Table of Contents
Advertisement
Advertisement
Table of Contents

Subscribe to Our Youtube Channel
Related Manuals for Zonestar Z9 Series


Summary of Contents for Zonestar Z9 Series
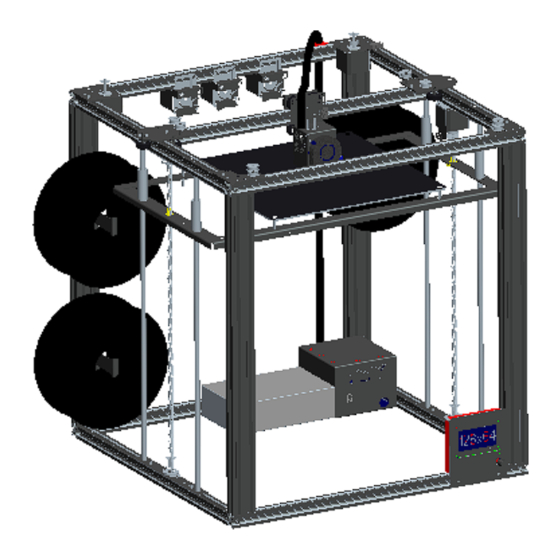
- Page 1 Model: Z9 Serial 4 Version User Manual...
- Page 2 !! ATTENTION !! Please strictly follow the standard operation when installation. Please put the printer away from the reach of kids. Must be guided by adults when children are installed or used. Take care when installation, to avoid electrical shock hazards. Caution: Hot! Hotend has high temperature even the printer stop working.
- Page 3 Parts Name Description Metal brackets 1. X-axis motor bracket 2. Y-axis motor bracket(with ENDSTOP) 3. Filament roll dock Screws Screws for assembled Other parts 1. Closed timing belt for Z-axis synchronize 2. Open timing belt for X and Y axis 3.
- Page 4 Parts Name Qty. Name Qty. Hot Bed 1 PC Z axis drive componen 1 Set Control box 1 Set Z-axis left slider 1 Set Control Panel 1 Set Z-axis right slider (with a hand screw) 1 Set Extrusion feeder 2/3/4(*) Stepper Motor for X and Y 2 PCS X Carrier...
- Page 5 Assemble hotend module Install X endstop Disassemble these two PM3x20 screws Hotend_back* Hotend module Proximity sensor* M3x6 *3 3. Tighten the screws 1. Install hotend module 2. Disassemble X 4. Install to install the X to the bracket ENDSTOP fixed screws proximity sensor ENDSTOP NOTE 1: Don’t install the proximity sensor in this step, about the detail, please refer the guide of “How to upgrade bed...
- Page 6 Assemble hot bed KM4x30 *4 Note: Connector M4 nut Hot bed (bottom)
- Page 7 Assemble X drive components PM3x6 *3 Jbckscrew should be fixed on the flat face of motor’s shaft M3 spring shim Jbckscrew Timing pulley Wire direction Metal bracket PN: Z9-11 NOTE: 1. Timing pulley’s inner diameter is 5mm. 2. The platform of the timing pulley is on the top.
- Page 8 Assemble Y drive components Metal bracket PN: Z9-11 PM3x6 *3 Jbckscrew should be fixed on the flat face of motor’s shaft Jbckscrew Timing pulley Connector M3 spring shim *3 NOTE: 1. Timing pulley’s inner diameter is 5mm. 2. The platform of the timing pulley is on the bottom.
- Page 9 Assemble Z axis drive mechanism- left PM4x8 (1) Part 11 Left Z slider-rod bracket Part 19 Slider rods Part 14 PM4x8 Z-axis left slider NOTE: Disassmbled the PM4x8 screws from end of the rods before installed it.
- Page 10 Assemble Z axis drive mechanism- right Part 13 Z axis drive componen PM4x8 Part 12 Right Z slider-rod bracket bottom Part19 Slider rod Part 15 right slider component PM4x8 NOTE: Disassmbled the PM4x8 screws from end of the rod first before installed it.
- Page 11 Assemble Z axis drive mechanism Z-axis drive mechanism- left Part 18 T8-510mm lead screw Insert a 8mm timing pulley, note its direction Put in the closed timing belt Part 18 T8-485mm lead screw Z-axis drive mechanism- right...
- Page 12 Assemble Z axis drive mechanism Jbckscrews*4 Spin in the lead Jbckscrews*2 screw and lock the jbckscrews move the timing pulley to the bottom and lock the jbckscrews Tighten the jbckscrew to lock Jbckscrews*2 the lead screw...
- Page 13 Aluminum profile preview Z9-A Z9-B Z9-X Z9-B Z9-A Z9-Z Z9-Z Z9-Z Z9-AP Z9-Z Z9-BP Z9-B Z9-A...
- Page 14 About aluminum profiles Z9-Z Z9-A Z9-AP Z9-B Z9-BP Z9-X 4PCS 3PCS 1PCS 3PCS 1PCS 1PCS...
- Page 15 Top aluminum profiles Z9-A Big hole on Big hole on the back the back BACK Big hole on Big hole on the bottom Big hole on the bottom the top 215mm TOP VIEW Big hole on 130mm Big hole on the bottom the top Big hole on...
- Page 16 Bottom aluminum profiles Z9-AP Big hole on Big hole on the back the back BACK Big hole on the right 215mm Big hole 130mm TOP VIEW on the Bottom 130mm Big hole on Big hole on Z9-A the front the front FRONT...
- Page 17 Top aluminum profiles frame assemble Z9-B HM5x20 *2 Z9-B Z9-A...
- Page 18 Install X Y carrier to top aluminum profile frame 7. Y Carrier – right For the RIGHT carrier There is a screw to touch the Y ENDSTOP 6. Y Carrier – left FRONT NOTE 1: Adjust the eccentric column with a wrench, let the carriers hold the rail well and move smoothly.
- Page 19 Assemble top aluminum profiles frame Back Z9-B HM5x20 *2 FRONT...
- Page 20 Install X Y bearing bracket Y Carrier – right Y bearing bracket Y Carrier – left X bearing bracket HM5x20 *2 Install from the bottom...
- Page 21 Install X and Y drive components Y ENDSTOPs Y-axis drive component X-axis drive component HM5x20 *2 Install from the bottom...
- Page 22 Assemble X-axis mechanism Bottom view HM5x20 Insert the hotend first PN: Z9-X HM5x20 M5 spring shim NOTE 1: Adjust the eccentric column with a wrench, let the printhead hold the rail well and move smoothly. NOTE 2: The printhead bracket shell maybe a little different with the picture.
- Page 23 Bottom aluminum profiles frame assemble Z9-AP Z9-BP HM5x20 *4 Z9-B Z9-A...
- Page 24 Install Rubber pads M5x10 *4 Shim Ø 5x10 *4 Rubber pad *4 M5 board nut...
- Page 25 Assemble the side aluminum profiles frame Pay attention to installation direction of Bottom Frame aluminum profiles, all of the big holes should be on the bottom HM5x20 *4...
- Page 26 Install Z drive mechanism to the frame LEFT Z motor toward up Z drive mechanism right HM5x20 *4 Z drive mechanism left timing pulley is on the bottom Bottom frame NOTE: There is a closed timing belts between the left and right drive components, which are omitted in this picture for easy viewing.
- Page 27 Install the top frame to Z-axis profiles – Step 1 HM5x30 Y-axis Carrier Y-axis Carrier...
- Page 28 Install the top frame to Z-axis profiles – Step 2 HM5x20 *4 Top frame...
- Page 29 About Corexy system 1. The Z9 XY drive system uses the Corexy structure. If you want to know more about the Corexy, please refer to the following links: https://reprap.org/wiki/CoreXY https://www.corexy.com/theory.html 2. As a Corexy drive system, the X motor and Y motor must work at the same time when the print head move in X or(and) Y axis.
- Page 30 About the belts for X & Y X motor(left) Y motor (right) X axes carrier X motor belt (Blue) is on the bottom layer. Y motor belt (Red) is on the top layer.
- Page 31 Install belts for X & Y Lock the belt on the bracked Hotend X motor(left) Y motor (right) Cable tie Bearing1 Bearing8 Bearing4 Bearing5 Y belt is on the top layer X belt is on the bottom layer Bearing3 Bearing7 Bearing2 Bearing6 In order to keep the X and Y axes perpendicular, please follow below steps:...
- Page 32 Install belts for X & Y Left (X) motor Right (Y) Motor Left Carrier Right Carrier Left idler Right idler...
- Page 33 Assemble hot bed Bracket PM3x6 *8 Hotbed bracket *2 PN: Z9-2...
- Page 34 Install hot bed Connector toward the right/back Ø10x22 spring *4 M4 Hand nut *4 hot bed...
- Page 35 Install LCD screen Tighten the screw to fix the LCD screen on the frame (right-bottom corner of the front) NOTE: If you want to add a cover for LCD screen, please find the “lcd12864_case.gcode” in SD card and print one, than install it to the back of the LCD screen.
- Page 36 Install filament roll bracket Lock these two srews install the bracket to be back Z axis profiles Filament roll bracket NOTE: Install 2 sets filament roll docks for Z9M2 and 3 sets for Z9M3.
- Page 37 Install extrusion feeder and PTFE tube Step 2. Install the fitting Step 3. Insert the PTFE tube (Filament guide ) Step 1. Lock the screw to install the extrusion feeder on the frame. TIPS: Presss the ring on the fitting and insert the PTFE tube.
- Page 38 Auto the Z-axis synchronous drive system For large-size 3D printers, since the printing platform is heavy, if the left and right sides are separated, there will be a problem of height inconsistency. Z9 solves this problem by using synchronization belt to force synchronization of the left and right Z axes. After the installation is complete, the Z-axis timing belt should be tightened by rotating the idler.
- Page 39 Photo of extrusion feeder and Z belt idler Z belt idler...
- Page 40 Level the Z aixs - step 1 Step 1: adjust the Z axis left and right slider components to the same height, steps as following: 1. loosen the set screws of the Z-axis timing pulley(fig 2. Manully Rotate the lead screws (fig 5 and 6) to move down the hotbed to the bottom, until both of the right and left copper nut touched the timing pulleys.
- Page 41 Level the Z aixs - step 2 Step 2: adjust the position of Z ENDSTOP, steps as following: 1. Adjust four hand nuts under the hot bed (fig 1), so that the distance is almost the same between the hot bed and the hot bed bracket (The end of the screws are flush with the hand nuts).
- Page 42 Wires layout TIPS: Insert the wires to the groove of profiles, and then and hide the wires by Plastic Cover Install hotend wire clip to hold the corrugated pipe Y Motor Cable Y ENDSTOP cable Z Motor Cable HOTEND cable fitting Z ENDSTOP cable X Motor Cable Extrusion feeder cables...
- Page 43 Install control box Step 1: Open the control box and wiring the hotend wires to control board. Step 2: If your city power is 110V, set the power select swicth to 110V. Step 3: Install the control box to the bottom/back/right corner of the frame. Micro SD card USB cable AC power voltage...
- Page 44 Wires layout Insert Y Motor and Y ENDSTOP wires to the Front_Right groove of Z profile and Cover them by Plastic Cover Insert Z Motor and Z ENDSTOP wires to the Right groove of Z profile and Cover them by Plastic Cover Insert...
- Page 45 !Attention! Take care when installation, to avoid electrical shock hazards! Once the connection is completed, please confirm again. WRONG WIRING MAY DAMAGED THE ELECTRONIC DEVICE! Some parts has lager operating current, please make sure the the wire and the terminal contact well. Please use cable tie to wrap the wires when wiring is completed..
- Page 46 Pin out of ZRIBV6...
- Page 47 Wiring Diagram...
- Page 48 About motor driver module WARNING!! Please pay attention to the direction of the motor driver module, incorrect direction will damage the control board!!!! You may need to adjust the drive current because a couple of reasons, for example, difference of the stepper motors, the hot bed weight, etc., you can rotate the potentiometer on the driver module to adjust the current.
- Page 49 LCD Menu and Operation Knob operation: <Clockwise rotation>: Next Item / Value +. <Counterclockwise rotation>: Previous Item / Value -. <Push>: Enter / Execute. This ICON only display in Z5M2 Hotbed setting temperature Mixrate of #1 extruder Mixrate of #2 extruder Hotbed current temperature FAN status Hotend setting temperature...
- Page 50 Prepare to print - level the hotbed Clean nozzle: make sure there aren't any filament at the end of nozzle, if not, remove it by a diagonal pliers. Choose “Prepare”>> “Auto Home”>>, wait the hotend go to the orig position. Watch the nozzle and make sure the nozzle is higher than the bed, otherwise tighten the hand nuts under the bed to pull down the hotbed or loosen these nuts to move up the bed.
- Page 51 Prepare to print - Load Filament Preheat nozzle: Choose “Prepare”>> “Preheat PLA”, then nozzle and hotbed will be heated. Waiting nozzle temperature reached to setting. If there is filament in the hotend, do this step, otherwise skip this step. Choose “Prepare”>> “Move axis”>>”Extruder”>>”Move 1mm”>>”extruder: ****mm”, then Clockwise rotate the knob slowly, until you can see the filament flow from the nozzle.
- Page 52 Print a test 3D object (Print from SD card) Insert the SD card to the SD card socket on the control box, and then power on the control box. NOTE: the touchpad of Micro SDcard pointing up Choose “Print from SD”>> Choose “Test_gcode\Single Color\xyz_cube.gcode”, push the knob to start printing.
- Page 53 Slicing, control and printing from PC HOST Before building a 3d object by using this 3D printer, you need to use a software to convert the 3D models (stl, obj, etc., depending on the type of slicing software) into a machine-recognizable file - gcode file. This process is called “slicing”. Copy to SD and load to slicing 3D object file...
- Page 54 How to apply the mixing color feature Manually extrude mixing color filament (extruding from both of extruders at the same time): Step 1: Refer to the “Prepare to print - Load Filament” to load filament to both of extruder engine, and make sure the filament has been insert to hotend already.
- Page 55 Upgrade more feature FROD: Filament run out detector is a sensor be used to detect the filament roll use up, Z5 control box can connect one FROD. About how to connect this sensor, please refer to the wiring diagam. Laser engraving: Only need to install a laser engine on the print head, you can turn this machine into a simple laser engraving machine.
- Page 56 Improve: Upgrade a laser engraving kit Click to Know More Scan to purchase!
- Page 57 Since began to develop and manufacture 3D printers in 2013, we have successively introduced several series of products such as P802, D805, Z5, Z6, Z8, Z9, and Z10, which are popular with customers all over the world. Now, ZONESTAR has Gradually grew to be a leader in the category of DIY 3D printers.
Need help?
Do you have a question about the Z9 Series and is the answer not in the manual?
Questions and answers