Table of Contents
Advertisement
Advertisement
Table of Contents

Summary of Contents for Mantis XP
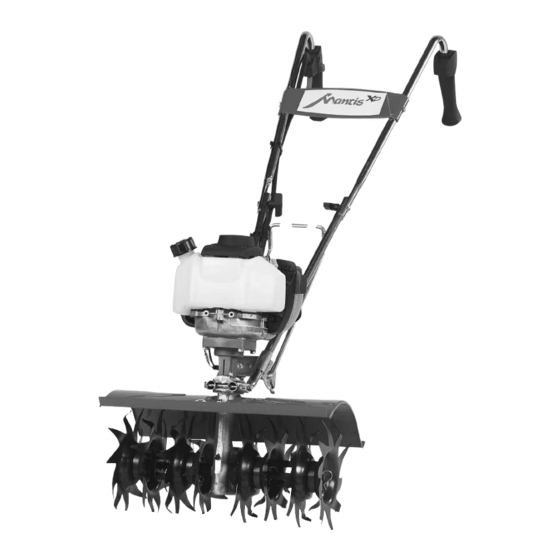
- Page 1 Tiller/Cultivator with 4 Stroke Engine OWNER’S MANUAL...
-
Page 2: Table Of Contents
Starting ....... .10 MANTIS XP Tiller Assembly Layout ..18 Additional Information . -
Page 3: Safety Rules & Warnings
Safety Rules & Warnings You will notice Safety Rules and Important Notes throughout this Owners Manual. Make sure you understand and obey these warnings for your own protection. I. Special Safety Information W RNING • D NGER TTENTION: THIS SYMBOL POINTS OUT OUR IMPORT NT S FETY INSTRUCTIONS. -
Page 4: Safety Decals
III. Safety Decal Information An important part of the safety system incorporated in this tiller are the warning and information decals found on various parts of the tiller. These decals must be replaced in time due to abrasion, etc. It is your responsibility to replace these decals when they become hard to read. -
Page 5: Engine & Fuel Warnings
Have repairs made by a qualified V. Warnings - Don'ts dealer or repairman. Don’t work on excessively steep Don’t use tiller with one hand. See that only original Mantis ® slopes. Keep both hands on handles with parts are used. -
Page 6: Assembly
20, 21, 39, bag containing the Owner’s Manual and 40, 55, Video. 66, 67 To assemble your MANTIS Tiller, Carrying Handle you’ll need two 7/16" and one 3/8" Handle Brace wrenches or sockets. We suggest that Bag of Hardware Containing: you install all nuts and bolts only Bolts (1”... - Page 7 Assembly (continued) HOW TO ASSEMBLE other handle clamp onto this other handle’s short leg. Add a nut (#48) LOWER HANDLES and tighten finger tight. (Picture 3) 6. Locate the worm gear housing. To identify part numbers, see It starts just above – and extends pages 6 and 18.
- Page 8 Handles and kickstand comes to a stop (Picture 3). Carrying Handle 4. Gently pull the lower ® NOTE: If your Mantis handles out to their original was supplied with a position. kickstand, please start at line 1. If not, please start 5.
- Page 9 Engine’s Oil Sump Tiller: IMPORTANT NOTE: Before using 1. Rock the tiller forward so that your new Mantis 4-Stroke Tiller for it rests on its fuel tank. the first time, it is important to 2. Remove the grey sump plug...
-
Page 10: Starting
15% MTBE, no methyl alcohol.) switch to “o” (Picture 6). This will stop the engine instantly. If it Mantis ® XP Tiller should ever fail to do so, just pull Starting Instructions the choke up to the closed (4 Stroke 35cc engine) position. -
Page 11: Additional Information
You can easily transport your to your garden the tines will stop. MANTIS ® XP Tiller to a friend’s NOTE: Once the throttle trigger A Tip for Extending or relative’s house. Just empty the is squeezed, you can release the fuel tank. - Page 12 Want to turn part of your lawn into a or area you want to till. Start it up. Then colorful flower border? Your MANTIS XP use an easy rocking motion. First, pull Tiller makes it easy! Just run your Tiller your Tiller backward.
-
Page 13: Tilling & Cultivating
Picture 1. When other side. running, the tines rotate to the Your Mantis XP tiller also has front of the tiller and the points the ability to till or cultivate at of the tines will contact the either a 9"... -
Page 14: Tine Positioning And Cleaning
Cultivating Position Narrow Rows! Tine teeth point in the same Tine teeth point in the Your Mantis XP Tiller is a direction as the rotation of the opposite direction as the rotation precision weeder that can easily fit of the tine. Tines point toward the tine;... -
Page 15: Maintenance
Inspect the grease level. If it is below the edge of the Inside the Worm Gear Housing gear housing, you will need to add grease. If it is When we built your Mantis ® XP tiller, we added already flush with this edge, you do not need to add grease to properly lubricate the transmission for the grease. - Page 16 Maintenance Check the ir Filter Often A wet or dirty air filter can affect the way your engine starts, performs, and wears. So, it’s a Picture 2 Picture 1 good idea to check your air filter once a month. (Picture 2) over the air cleaner and snap the two locking tabs.
-
Page 17: Storage
Picture 2 Do not store the tiller IMPORTANT It is important to store your 4 Stroke Mantis Tiller in an upright lying flat on its front, position. Laying the Tiller on its side will cause the oil to leak out back, or side. -
Page 18: Mantis Xp Tiller Assembly Layout
KICKSTAND LEG ASSY. WORM THRUST BEARING 1/4-20 X 3” BOLT 410113 HARDWARE FOR KICKSTAND WORM SHAFT M9452 BOLT 1/4 - 20 X 1/2" LG. 400635 LABEL, XP TINE WARNING WORM DISK * ALSO IN KEY #55 – 400302 # IF APPLICABLE... - Page 19 Spare Parts 1. Set of two inner tines 2. Set of two outer tines 400332 400331 3. Set of four tines (inner and outer) 400333 NOTES: _________________________________________________________________________ ________________________________________________________________________________ ________________________________________________________________________________ ________________________________________________________________________________ ________________________________________________________________________________ ________________________________________________________________________________ ________________________________________________________________________________ ________________________________________________________________________________ ________________________________________________________________________________ ________________________________________________________________________________ ________________________________________________________________________________ ________________________________________________________________________________ ________________________________________________________________________________ ________________________________________________________________________________...
-
Page 20: Limited Warranty Information
(2) years for commercial use from the date of purchase, to the first retail purchaser and each subsequent You must maintain your M NTIS XP TILLER by following the owner, during the warranty period. This warranty covers all maintenance procedures portions of the M NTIS XP TILLER.


Need help?
Do you have a question about the XP and is the answer not in the manual?
Questions and answers