Table of Contents
Advertisement
Advertisement
Table of Contents

Related Manuals for Mantis ElectricTiller


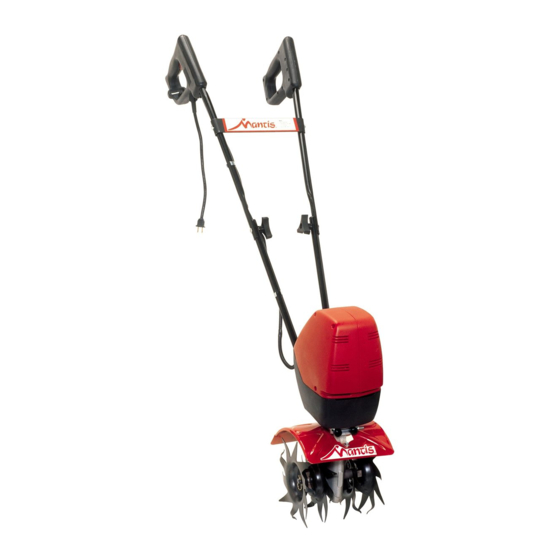
Summary of Contents for Mantis ElectricTiller
- Page 1 ® Electric Tiller O W N E R ’ S M A N U A L...
-
Page 2: Table Of Contents
The Mantis Promise ........ -
Page 3: Safety Rules And Warnings
FAILURE TO COMPLY MAY RESULT IN SERIOUS PERSONAL INJURY, AND/ OR EQUIPMENT AND PROPERTY DAMAGE. Safety and Warnings IMPROPER USE OR CARE OF THIS TILLER OR FAILURE TO WEAR PROPER PROTECTION CAN RESULT IN SERIOUS INJURY. READ AND UNDERSTAND THE RULES FOR SAFE OPERATION AND ALL... -
Page 4: Safety Decal Information
An important part of the safety system incorporated in this tiller are the warning and information decals found on various parts of the tiller. These decals must be replaced in time due to abrasion, etc. It is your responsibility to replace these decals when they become hard to read. The location and part numbers (P/N) of these decals are illustrated on Page 16 and 17. -
Page 5: Warnings - Don'ts
BE AWARE!! The tines may coast after the triggers are released. Make sure tines have come to a complete stop before letting go of the tiller. 2. Always maintain a firm footing and good balance. Do not overreach while operating the tiller. Before... -
Page 6: Assembly
The bag of hardware is in the plastic bag containing the Owner’s Manual and Video. To assemble your MANTIS Electric Tiller, you’ll need two 7/16" wrenches. We suggest that you install all nuts and bolts only “finger tight” — that is, one- half to one full turn —... - Page 7 Slide them into the two recessed channels.(Picture 5.) Make sure you insert them from the rear of the tiller - so that the bolt fits along the back of the housing. 8. Slide the second 3-inch bolt through the second set of holes in the short legs and clamps.
-
Page 8: Upper Handle Assembly
(#13) and a Lock Nut (#17) on either side (Picture 5) 5. Use a wrench to tighten Bolt (#13) and Lock Nuts (#17). 6. Now use wrench to tighten all nuts and bolts firmly and securely. Picture 1 Picture 4 Picture 2 Picture 5 Picture 3 Electric Tiller... -
Page 9: Before You Begin Tilling
IMPORTANT NOTE: Before you use your MANTIS Tiller, read the Safety Rules & Warnings on pages 2-4. B e f o re Yo u B e g i n T i l l i n g A. Starting Starting your MANTIS Electric Tiller is easy. - Page 10 Take It for a Ride. You can easily transport your MANTIS Electric Tiller to a friend’s or relative’s house. Simply fold down the handles, then store your tiller in the trunk of your car or truck.
-
Page 11: Tilling
THE OPERATOR OF THIS TILLER IS RESPONSIBLE FOR ACCIDENTS OR HAZARDS OCCURRING TO HIMSELF, OTHER PEOPLE A. Now You’re Ready to Use Your MANTIS Electric Tiller If you’ve seen other tillers, your MANTIS Electric Tiller may surprise you. It tills best when you pull it... -
Page 12: Tilling/ Cultivating
Your MANTIS Electric Tiller Makes Weeding a Pleasure! As a tiller, your MANTIS Tiller works the soil down to 10" (25.4 cm) deep. But, as a cultivator, it gently cultivates the surface, only 2" to 3" (5.09 cm to 7.62 cm) deep. - Page 13 The optional tine Detangler (Item #1322) will clear tines in a jiffy. Contact your local authorized MANTIS dealer. Your MANTIS Electric Tiller Will Weed Between Narrow Rows! Your MANTIS Electric Tiller is a precision weeder that easily fits in tight places. So don’t be afraid to weed anywhere: between plants and shrubs;...
-
Page 14: Using The Border Edger Attachment
U s i n g t h e B o rd e r E d ge r A t t a c h m e n t Your MANTIS Electric Tiller has been designed and built to accept a wide range of MANTIS Electric Tiller Attachments to increase its usefulness in your lawn and garden. -
Page 15: Troubleshooting
Picture 2 Picture 3 IMPORTANT NOTE: To keep your MANTIS Electric Tiller running as efficiently as possible, always make sure the tines are clear of rocks and debris. If you continue to experience problems, contact your local authorized MANTIS dealer. -
Page 16: Maintenance
M a i n t e n a n c e A. How to Check the Grease Level Inside the Worm Gear Housing When we built your MANTIS Electric Tiller, we lubricated the worm gear housing thoroughly. It is imperative that you inspect the grease level once a year. -
Page 17: Parts Explosion
Pa r t s E x p l o s i o n Electric Tiller P/N 438LA DIRECTION Raised Hub Teeth point in a Clockwise Direction When you look at a Tine with the raised hub facing you and the teeth are pointing in a CLOCKWISE rotation, you have a LEFT HAND TINE. -
Page 18: Parts List
Rd. Hd. Self Tapping Screw 418-1 Tine Retaining Hair Pin 438LA Tine Assembly (L.H.) 438RA Tine Assembly (R.H.) Fender Guard Bolt 1/4-20 x 3/8" Lg. 420600 Warning Fender Label 4058 Mantis Label 110637 Serial/UPC Label 400011 Electric Tiller Trans w/ drive shaft Electric Tiller... - Page 20 YOU. THIS WARRANTY GIVES YOU SPECIFIC LEGAL RIGHTS, AND YOU MAY ALSO HAVE OTHER RIGHTS WHICH VARY FROM STATE TO STATE. MANTIS 1028 Street Road Southampton , PA 18966 (215) 355-9700 ©2002 Mantis. Schiller-Pfeiffer, Inc. All Rights Reserved. Printed in USA P/N 420701 4/03...
Need help?
Do you have a question about the ElectricTiller and is the answer not in the manual?
Questions and answers