Table of Contents
Advertisement
Quick Links
Ethernet-enabled HDBaseT
Scaler with HDMI and
Analog Audio Outputs
AT-HDVS-200-RX Installation Guide
Please check http://www.atlona.com/product/AT-HDVS-200-
RX for the most recent firmware update or manual.
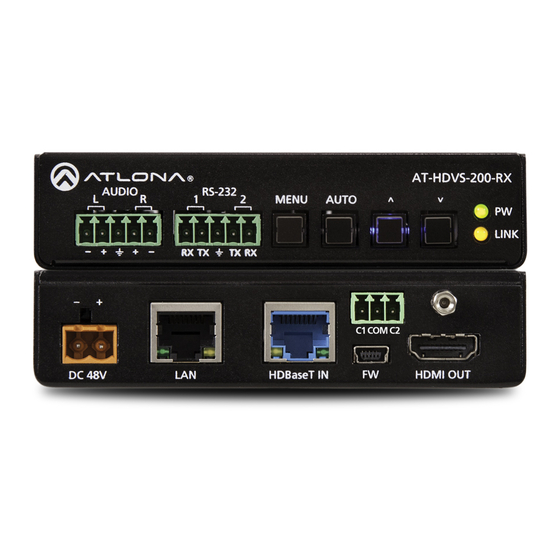
The AT-HDVS-200-RX is an HDBaseT scaler with HDMI and analog audio outputs. It features an
HDMI output with balanced analog audio de-embedding and display control using CEC, IP, or RS-
232. The AT-HDVS-200-RX combines the benefits of an extended-distance HDBaseT receiver with
built-in scaling and the capabilities of a control processor for simplified A/V system installation and
operation. When used with the AT-HDVS-200-TX switcher, it receives HDMI signals with embedded
audio and control signals at distances up to 328 feet (100 meters). The switcher/scaler pair enables
automatic display control, automatic input selection, volume adjustment, or optional third-party
control. The AT-HDVS-200-RX supplies power to the AT-HDVS-200-TX switcher via Power over
Ethernet and together they create a standalone A/V switching and control system with scaling for
classrooms and huddle rooms.
Package Contents
• 1 x AT-HDVS-200-RX
• 4 x Captive screw female connector (5 pin: audio, 5 pin: RS-232, 3 pin: relay, 2 pin: power)
• 1 x 48V DC captive screw power adapter
• 1 x pair of mounting brackets
• 1 x Installation Guide
Toll free: 1-877-536-3976
atlona.com
Local: 1-408-962-0515
Advertisement
Table of Contents

Summary of Contents for Atlona AT-HDVS-200-RX
- Page 1 Please check http://www.atlona.com/product/AT-HDVS-200- RX for the most recent firmware update or manual. The AT-HDVS-200-RX is an HDBaseT scaler with HDMI and analog audio outputs. It features an HDMI output with balanced analog audio de-embedding and display control using CEC, IP, or RS- 232.
-
Page 2: Panel Description
(e.g. AT-UHD-CLSO-601) 5. FW port: Firmware update port, connect a mini USB to USB A cable to a computer Note: Firmware is downloadable through http://www.atlona.com/products/AT-HDVS-200-RX/ 6. HDMI OUT port: Connect to a display Note: To ensure compatibility, please be certain both transmitter and receiver have blue HDBaseT ports. -
Page 3: Captive Screw
Use the screws at the upper contact plate and hold contact bar to release the top of the connector to compress the wires in place. wires. the wire against the contact plate. Toll free: 1-877-536-3976 atlona.com Local: 1-408-962-0515... - Page 4 A dual low-voltage signal relay is built into the HDVS-200-RX for control of devices such as electric screens and display lifts. AT-HDVS-200-RX There are 3 connections for the relay: C1, COM, and C2 (Circuit 1, Common, and Circuit 2 - pictured...
- Page 5 1. Use the IPCFG command to display the IP address. Launch a web browser and enter the IP address of the switcher. A login screen will appear (this is the same log in for admin and general users). The login for the webGUI will be username “root” and password “Atlona”. Toll free: 1-877-536-3976 atlona.com...
-
Page 6: Connection Diagram
HDMI IN 1 AUDIO IN VGA IN RS-232 AT-HDVS-200-TX HDMI IN 2 HDBaseT OUT Audio Video Media Player AT-PA100-G2 Drop down projector screen (contact closure controlled) AT-HDVS-200-RX AUDIO RS-232 MENU AUTO LINK RELAY AT-HDVS-200-RX DC 48V HDBaseT IN HDMI OUT Ethernet Projector... - Page 7 VOLUME Router AT-UHD-SW-52ED AUDIO RS-232 S/PDIF OUT Video Audio HDMI IN HDMI OUT HDBaseT OUT DC 48V AT-PA100-G2 AT-HDVS-200-RX AUDIO RS-232 MENU AUTO Drop down projector screen LINK Media Player Dry CC (contact closure controlled) RELAY AT-HDVS-200-RX DC 48V HDBaseT IN...
-
Page 8: Troubleshooting
For the AT-HDVS-200-TX, DHCP can be turned on/off by pressing the INPUT button for 15 seconds. For the AT-HDVS-200-RX, DHCP can be turned on/off by pressing the AUTO button for 15 seconds. You can also toggle between DHCP and Static IP modes using the IPDHCP command via TCP/IP or RS-232, or by using the webGUI or AMS.


Need help?
Do you have a question about the AT-HDVS-200-RX and is the answer not in the manual?
Questions and answers