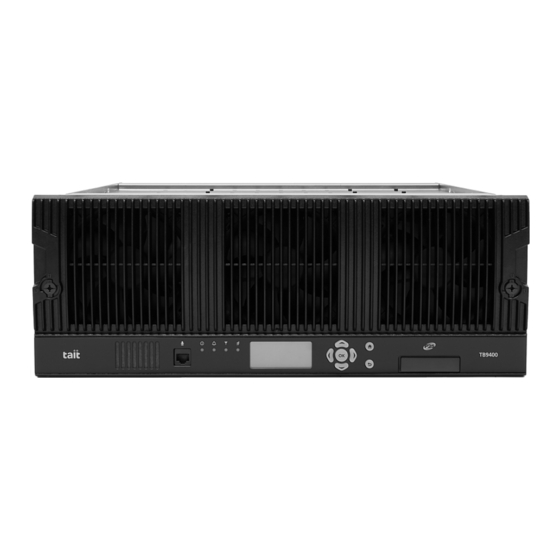
Tait TB9400 Installation And Operation Manual
Base station/repeater
Hide thumbs
Also See for TB9400:
- Installation and operation manual (150 pages) ,
- Specification manual (49 pages) ,
- Installation and operation manual (155 pages)

Related Manuals for Tait TB9400


Summary of Contents for Tait TB9400
- Page 1 TB9400 Base Station/Repeater Installation and Operation Manual MBC-00001-23 · Issue 23· November 2019...
- Page 2 Directive in the European Union. Tait International Limited. In China, we comply with the Measures for The word TAIT and the TAIT logo are trademarks of Administration of the Pollution Control of Electronic Tait International Limited. Information Products. We will comply with...
-
Page 3: Table Of Contents
2.3.3 Dust and Dirt ..........39 TB9400 Installation and Operation Manual... - Page 4 5.2.1 Logging In ..........89 TB9400 Installation and Operation Manual...
- Page 5 PMU Auxiliary DC Output ..........129 TB9400 Installation and Operation Manual...
- Page 6 Tait General Software License Agreement ........
-
Page 7: Preface
Document Conventions The TB9400 base station has a web interface with an accordion menu on the left side of the screen. “Configure > Base Station > Channels” means click Configure in the top-level menu, then in the expanded Configure menu, click Base Station, and finally click on the Channels tab on that page. -
Page 8: Associated Documentation
The characters xx represent the issue number of the documentation. Technical notes are published from time to time to describe applications for Tait products, to provide technical details not included in manuals, and to offer solutions for any problems that arise. Technical notes are available in PDF format from the Tait support website. -
Page 9: Publication Records
Added information on cancelling a firmware package to Subaudible Signaling on page 109. Added notice regarding the base station resetting to Setting the IP Address on page Added new HH band information throughout. TB9400 Installation and Operation Manual Preface © Tait International Limited November 2019... -
Page 10: Description
The ability of the base station to link stations using standard Internet Protocol communications, and to add features through firmware options, ensures that DMR and P25 systems designed with the TB9400 are scalable in both size and functionality. Its Ethernet interface provides built-in network connectivity which allows the base station to join with other base stations to form a channel group. -
Page 11: Firmware Applications
Firmware Applications The TB9400 is interoperable with both TB7300 and TB9300 base stations, and therefore operates in both P25/AS-IP and DMR/MPT networks. 1.1.1 Base Station Features The following is a list of base station features for both P25/AS-IP and DMR/MPT firmware applications: Fully compliant with the P25 Common Air Interface. - Page 12 – 30° C to + 60° C (– 22° F to + 140° F). Description TB9400 Installation and Operation Manual © Tait International Limited November 2019...
-
Page 13: Firmware Application Details
Firmware Application Details 1.2.1 P25/AS-IP The TB9400 is designed for operation as a transceiver in P25 trunked and trunked simulcast (Phase 1 or Phase 2), P25 conventional networks and analog conventional networks. It operates as a stand-alone base station, or as part of a channel group, providing receiver voting and simulcast transmission. -
Page 14: Dmr/Mpt
CTCSS or DCS subaudible signaling. With the DMR/MPT operation, channel groups can comprise a mixture of base station types. TB9400, TB7300 and TB9300 base stations are fully compatible and have identical timing in simulcast operation. For more information, refer to the DMR System Manual (MNB-00010- xx). -
Page 15: Modules
The position of a module in the subrack is defined by the socket on the subrack interconnect board to which the module is connected by the system control bus. TB9400 Installation and Operation Manual Description © Tait International Limited November 2019... - Page 16 The reciter provides the Ethernet interface and system inputs and outputs. Receiver modules (receive-only reciters) are not fitted with the transmit circuitry or front panel SMA connectors, and are physically unable to transmit. reciter receiver Description TB9400 Installation and Operation Manual © Tait International Limited November 2019...
- Page 17 DC, depending on the model. The PMU also has an auxiliary DC output of 13.65VDC, 27.3VDC, or 54.6VDC, depending on the model. AC and DC PMU shown TB9400 Installation and Operation Manual Description © Tait International Limited November 2019...
-
Page 18: Mechanical Assembly
1 subrack module retaining clamp subrack interconnect board PA 2 plastic guide rail reciter 2 subrack interconnect board retaining clamp cable retaining clip front panel fastener PA 1 Description TB9400 Installation and Operation Manual © Tait International Limited November 2019... - Page 19 PA in slot 2. The PA is mounted vertically with its heatsink facing the reciter. The PMU and the reciter/PA pair have their own cooling fans. Figure 1.2 Mechanical assembly - single 50W base station reciter 50W PA subrack TB9400 Installation and Operation Manual Description © Tait International Limited November 2019...
- Page 20 Figure 1.3 Mechanical assembly - single 100W base station reciter subrack airflow duct cable retaining clip Description TB9400 Installation and Operation Manual © Tait International Limited November 2019...
-
Page 21: Frequency Bands And Sub-Bands
Transmit: 762MHz to 776MHz, and 850MHz to 870MHz Receive: 794MHz to 824MHz For information on what air interfaces are applicable to what bands, please consult the TB9400 Specifications Manual (MBC-00002-xx) In Brazil, for K band, the TB9400 is considered to be configured as a base station with retransmission of received signals. -
Page 22: Licences
P25 Trunking Operation for operating as a trunking transceiver with a Tait trunking controller The base stations in a Tait DMR Tier 3 Network are controlled by a node (DMR trunking controller). Tait sells three types of node: Full, Express20, and Express6. Each type of node has different capabilities. -
Page 23: Feature Licences
P25 Phase 2 Simulcast P25 Phase 2 simulcast channel. Also requires the P25 Phase 2 Trunking (TBAS069) (TBAS066) and Simulcast (TBAS062) licences. Tait also recommends adding the Linear Simulcast Modulation (TBAS065) licence as it provides improved RF performance. Allows trunked channels that become isolated from a site controller to... - Page 24 Analog Air Interface analog conventional repeater. (TBAS301 - Default Licence) A base station with this licence can operate in a Tait DMR Tier 2 conventional network. It can also operate as a stand-alone repeater, or as DMR Conventional a member of a multi-site system (under the supervision of a DMR channel (TBAS304) controller).
-
Page 25: Theory Of Operation
RF Feedback Ethernet Interface to Network System Control Bus Front A receive-only base station has a receiver instead of a reciter, Panel and does not have a PA. TB9400 Installation and Operation Manual Description © Tait International Limited November 2019... - Page 26 P25 operation, gives the base station an identity as a network element, and provides the physical connections for the Ethernet and system interfaces. Description TB9400 Installation and Operation Manual © Tait International Limited November 2019...
-
Page 27: Signal Paths
Offline mode via its web interface. In Online mode, the base station is in service and performs its normal Online Mode functions of transmitting and receiving radio signals. TB9400 Installation and Operation Manual Description © Tait International Limited November 2019... -
Page 28: Intermodule Communications
RS-485 Fan 3: Fan 1: Reciter 1/ PA 1 User Controls Fan 2: Reciter 2/ PA 2 Front Panel Subrack Interconnect Board RS-485 RS-485 Reciter 2 PA 2 Description TB9400 Installation and Operation Manual © Tait International Limited November 2019... -
Page 29: Power Management And Distribution
The outputs from both the AC and DC high power converters are added together and fed to the modules via the high-current outputs. The auxiliary output is also tapped off this summed output. TB9400 Installation and Operation Manual Description © Tait International Limited November 2019... - Page 30 Aux. DC Subrack Board Front PA 1 PA 2 Reciter 1 Reciter 2 Panel Receive-only Aux. DC Subrack Board Front Receiver 1 Receiver 2 Receiver 3 Receiver 4 Panel Description TB9400 Installation and Operation Manual © Tait International Limited November 2019...
-
Page 31: Pmu Operation On Dc Input
These limits will not be reached under normal operation conditions, but are provided as “fail-safe” measures to protect the battery from deep discharge. They also remove the need for low-voltage disconnect modules. TB9400 Installation and Operation Manual Description © Tait International Limited November 2019... - Page 32 The information in this table is extracted from the Specifications Manual. Refer to the latest issue of this manual for the most up-to-date and complete PMU specifications. b. Using the base station’s web interface. Description TB9400 Installation and Operation Manual © Tait International Limited November 2019...
- Page 33 Figure 1.9 PMU alarm thresholds and voltage limits when operating on DC TB9400 Installation and Operation Manual Description © Tait International Limited November 2019...
-
Page 34: Front Panel Fans
Notice If a fan is not operational, the fan alarm will only be raised when the fan is turned on, not at system start-up. To avoid discovering a fan fault after leaving the site, Tait recommends running a diagnostics fan test. -
Page 35: General Safety And Regulatory Information
The PMU should be serviced only by qualified technicians. There are no user-replaceable parts inside. If the PMU is damaged and does not function properly, stop the module safely and contact your regional Tait office immediately. All servicing should be carried out only when the PMU is powered through a mains isolating transformer of sufficient rating. -
Page 36: Ac Power Connection
PMU and PA can reach temperatures of up to +176°F (+80°C). 2.1.6 LED Safety (EN60825-1) This equipment contains Class 1 LED Products. General Safety and Regulatory Information TB9400 Installation and Operation Manual © Tait International Limited November 2019... -
Page 37: Proximity To Rf Transmissions / A Proximité Des Émissions Rf
OET numéro 65 (47CFR 1.1310) IEEE C95.1 2005: Norme pour les niveaux de sécurité compatibles avec l'exposition des personnes aux champs électromagnétiques de radiofréquence 3kHz à 300GHz TB9400 Installation and Operation Manual General Safety and Regulatory Information © Tait International Limited November 2019... -
Page 38: Equipment Safety
ESD S20.20-1999 or BS EN 100015-4 1994. Figure 2.1 Typical antistatic bench set-up common point ground (building ground or mains ground) dissipative rubber bench mat conductive wrist strap General Safety and Regulatory Information TB9400 Installation and Operation Manual © Tait International Limited November 2019... -
Page 39: Anti-Tampering Devices
The humidity should not exceed 95% relative humidity through the specified operating temperature range. 2.3.3 Dust and Dirt For uncontrolled environments, the level of airborne particulates must not exceed 100µg/m TB9400 Installation and Operation Manual General Safety and Regulatory Information © Tait International Limited November 2019... -
Page 40: Regulatory Information
2.4.4 Unauthorized Modifications Any modifications you make to this equipment which are not authorized by Tait may invalidate your compliance authority’s approval to operate the equipment. The manufacturer is not responsible for any radio or TV interference caused by unauthorized modifications to this equipment. Such modifications could void the user’s authority to operate the equipment. -
Page 41: Operation
It will continue to flash until the alarm is canceled or the fault is fixed. Note that only those alarms which are enabled using the web interface will cause this LED to flash. TB9400 Installation and Operation Manual Operation © Tait International Limited November 2019... - Page 42 If required, the keypad can be disabled in the web interface to prevent access to the base station via the front panel menus (see “Subaudible Signaling” on page 109). Operation TB9400 Installation and Operation Manual © Tait International Limited November 2019...
- Page 43 When the contrast is set to the required level, press OK to save the changes and exit the menu. TB9400 Installation and Operation Manual Operation © Tait International Limited November 2019...
- Page 44 Reciter 1 View Reciter 1 Address 172.025.198.043 Front Panel Edit Reciter 1 Address MASK: 255.255.000.000 172.025.002.251 Edit Reciter 1 Address 172.025.198.043 MASK: 255.255.000.000 172.025.002.251 Front Panel Contrast Contrast Operation TB9400 Installation and Operation Manual © Tait International Limited November 2019...
-
Page 45: Module Indicator Leds And Switches
- the reciter or receiver is powered up ■ flashing red - one or more alarms have been generated; you can use the ■ web interface to find out more details about the alarms. TB9400 Installation and Operation Manual Operation © Tait International Limited November 2019... - Page 46 The amber ethernet connector LED will flash if the connection is running 100Base-T Ethernet Connector LED at 100 Mbits/s. It will be steady amber if the Ethernet interface is (amber) connected. Operation TB9400 Installation and Operation Manual © Tait International Limited November 2019...
- Page 47 The alarm LED will flash whenever an alarm is generated, whether or not this alarm has been disabled via the web interface. TB9400 Installation and Operation Manual Operation © Tait International Limited November 2019...
-
Page 48: Pmu
DC input is still connected to its power circuitry. The switch is recessed to prevent the DC module being accidentally switched off. These LEDs provide the following information about the state of the PMU: Indicator LEDs Operation TB9400 Installation and Operation Manual © Tait International Limited November 2019... - Page 49 The alarm LED will flash whenever an alarm is generated, whether or not this alarm has been disabled via the web interface. TB9400 Installation and Operation Manual Operation © Tait International Limited November 2019...
-
Page 50: Installation
Installation This chapter provides information on the site requirements for your TB9400 equipment and also describes how to install the base station in a standard 19 inch rack or cabinet. If this is your first time installing a TB9400 base station, we recommend that you read the entire chapter before beginning the actual installation. -
Page 51: Before You Begin
(e.g. for servicing purposes). 4.1.4 Ambient Temperature Sensor The ambient temperature reading for the base station is provided by the temperature sensor located on the front panel circuit board. TB9400 Installation and Operation Manual Installation © Tait International Limited November 2019... -
Page 52: Cabinet And Rack Ventilation
The maximum ambient temperature at the base station front panels must ■ not exceed +140°F (+60°C). Installation TB9400 Installation and Operation Manual © Tait International Limited November 2019... - Page 53 Figure 4.1 Typical cabinet ventilation requirements top view (20cm) side view front view ≥7in (≥17.5cm) ventilation slots airflow entry blanking panels airflow exit path TB9400 Installation and Operation Manual Installation © Tait International Limited November 2019...
-
Page 54: Unpacking And Moving The Subrack
Cut the tape securing the flaps at the top of the carton and fold them flat against the sides Rotate the carton carefully onto its side and then onto its top ensuring that none of the flaps is trapped underneath. Installation TB9400 Installation and Operation Manual © Tait International Limited November 2019... - Page 55 The foam cushions are CFC- and HCFC-free and may be burnt in a suitable waste-to-energy combustion facility, or compacted in landfill. TB9400 Installation and Operation Manual Installation © Tait International Limited November 2019...
-
Page 56: Identifying The Equipment
Identifying the Equipment You can identify the model and hardware configuration of the TB9400 modules by referring to the product code printed on labels at the rear of each module. The meaning of each character in the product code is explained in the tables below. - Page 57 The actual frequency coverage in this band when used with a K-band TB9400 reciter is 762MHz to 776MHz and 850MHZ to 870MHz. PMU Product Product Code Description Codes TBAXXXX-XXXX 3 = PMU TBA3XXX-XXXX 0 = default TBA3XXX-XXXX 0 = AC module not fitted...
-
Page 58: Initial Setting Up
One or more fans may operate, depending on the temperature of the modules. Installation TB9400 Installation and Operation Manual © Tait International Limited November 2019... - Page 59 PMU mains failure requires a DC backup supply Diagnose > Subsystems > PMU Control Tests fan operation checks the operation of each fan Diagnose > Subsystems > Fan Tests individually TB9400 Installation and Operation Manual Installation © Tait International Limited November 2019...
-
Page 60: Working With Configurations
To download a configuration file, click on the name of the saved configuration in the list of saved configurations. Create a human readable configuration report: Download and save ■ Installation TB9400 Installation and Operation Manual © Tait International Limited November 2019... -
Page 61: Customizing The Configuration
You can use it to capture, view, review, and compare configurations. Tait recommends creating a back-up of the current configuration before Advice on working with configurations making significant configuration changes. A backed up configuration is added to the list of stored configurations on the base station. -
Page 62: Recommended Configuration Settings
Base stations from the factory all have the same default configuration file. As a result, some settings will not be correct for your network. Frequency plan and alarm settings are examples. For more information, please contact your local Tait dealer. 4.4.4 Recommended Configuration Settings In a dual base station, only base station 1 communicates directly with the PMU and front panel. -
Page 63: Restricted Port Numbers
Knowledge of the password could be used to render the equipment inoperable, for example by deleting files. If you are concerned about the security risk that this poses, change the password. If Tait provides support services, they may need to know the password. - Page 64 Tait networks are deployed with default weak passwords. For the sake of security, Tait strongly recommends changing the default password where applicable. Installation TB9400 Installation and Operation Manual © Tait International Limited November 2019...
-
Page 65: Tuning The Reciter And Receiver
Figure 4.3 below) which is electronically switched in or out of circuit depending on the frequency programmed into the reciter. The bandwidth of these helical filters is approximately ±1.5MHz. TB9400 Installation and Operation Manual Installation © Tait International Limited November 2019... - Page 66 Figure 4.3 Identifying the B-band receiver front end helical filters B2: 146 to 156MHz B3: 159 to 174MHz B2: 136 to 146 MHz B3: 148 to 159 MHz Installation TB9400 Installation and Operation Manual © Tait International Limited November 2019...
- Page 67 –80dBm into the reciter’s RF input. Check that the RSSI reading on the RF Interface page is –80dBm ±1dB. Notice If you remove the reciter from the TB9400 subrack, the RSSI reading, without having a PA connected, will be zero. To fix this, go to Configure >...
- Page 68 RSSI level of the new frequency is more than 1dB lower than the RSSI level of the previously set frequency. Tait can provide extender cables (TBC Reciter Power Cables) to enable tuning with a subrack or from a bench power supply. To order these, the part number is T01-01150-0001.
- Page 69 The K-band reciter does not require tuning. K-Band 1. Included in the TBA0ST2 tool kit. Also available separately as part num- ber 937-00013-00. TB9400 Installation and Operation Manual Installation © Tait International Limited November 2019...
-
Page 70: Installing The Base Station On Site
The requirements for P25 Phase 1 systems are described in more detail below. Also see “Connecting an External Frequency Reference” on page 82 “Connecting a 1PPS Source” on page Installation TB9400 Installation and Operation Manual © Tait International Limited November 2019... -
Page 71: Equipment Required
8mm AF spanner for the SMA connectors, and the subrack ground ■ connector. You can also obtain the TBA0ST2 tool kit from your regional Tait office. It contains the basic tools needed to install, tune, and service the base station. -
Page 72: Mounting The Subrack
, as shown in Figure 4.5. If you need extra mounting security, additional mounting holes provided at the rear of the subrack for auxiliary support brackets. Installation TB9400 Installation and Operation Manual © Tait International Limited November 2019... - Page 73 14.37 in (365 mm) 18.3 in (465.1 mm) 4 in 5.25 in 6.96 in 0.42 in (101.6 mm) (133.4 mm) (176.8 mm) (10.6 mm) 0.26 in (6.6 mm) TB9400 Installation and Operation Manual Installation © Tait International Limited November 2019...
- Page 74 TBAA03-13 bracket fitted in a typical Tait cabinet . If you are not using the Tait cabinet, you may have to make your own brackets to suit your installation. Figure 4.7 Auxiliary support bracket Notice You must fit the auxiliary support brackets if you intend to transport a cabinet fitted with a fully built-up base station.
- Page 75 We recommend that you fit the supplied covers to the DC terminals to protect against accidental shorts. Figure 4.8 DC power cabling secure the cables to the cabinet to support their weight TB9400 Installation and Operation Manual Installation © Tait International Limited November 2019...
-
Page 76: Connecting Up The Base Station
DC output external reference frequency input AC mains input RF input Ethernet interface connector RF output subrack ground connector –VDC input system interface connector a. Factory use only. Installation TB9400 Installation and Operation Manual © Tait International Limited November 2019... - Page 77 DC output external reference frequency input AC mains input RF input Ethernet interface connector RF output subrack ground connector –VDC input system interface connector a. Factory use only. TB9400 Installation and Operation Manual Installation © Tait International Limited November 2019...
-
Page 78: Connecting Ac Power
IEC connector on the PMU to the local AC supply. The pins of the IEC ground connector on the PMU are identified at right. neutral rear view Installation TB9400 Installation and Operation Manual © Tait International Limited November 2019... -
Page 79: Connecting Dc Power
PMU is removed before the leads are disconnected. Protective covers for the DC terminals are supplied with each PMU. We recommend a screw torque of 18–20lbf·in (2–2.25N·m). TB9400 Installation and Operation Manual Installation © Tait International Limited November 2019... -
Page 80: Connecting The Auxiliary Dc Power Output
You can use this to connect the PMU’s auxiliary DC power output to another device (refer to “PMU Auxiliary DC Output” on page 129 for the pin allocations). Figure 4.11 Auxiliary DC power connector Phoenix MVSTBR2.5HC/2-ST/5.08 female Installation TB9400 Installation and Operation Manual © Tait International Limited November 2019... -
Page 81: Connecting Rf
PA and the mismatch is <1dB. ■ The effect of such conditions is variable: some devices will not be destroyed, and some may fail after repeated load interruptions. TB9400 Installation and Operation Manual Installation © Tait International Limited November 2019... -
Page 82: Connecting An External Frequency Reference
Figure 4.12 Daisy-chaining an external frequency reference input maximum overall cable length is 30m maximum of eight base station loads on one frequency reference output 50Ω termination (also needed for single base stations) Installation TB9400 Installation and Operation Manual © Tait International Limited November 2019... -
Page 83: Connecting A 1Pps Source
1PPS output 50Ω termination (also needed for single base stations) TB9400 Installation and Operation Manual Installation © Tait International Limited November 2019... -
Page 84: Ethernet Connection
The RJ-45 socket on the reciter’s rear panel provides the 10-BASE-T or 100-BASE-T Ethernet connection to the other devices in the network. Use a Cat-5 cable to connect this socket to the Tait Network via a router or switch. The Web UI allows you to set the Ethernet port speed auto-negotiation to 10/100 Mbit/s or to negotiate a maximum 10 Mbit/s. -
Page 85: Connecting General Purpose Inputs And Outputs
The existing Tx key and Rx gate signals are sufficient for balanced audio interconnection with connecting equipment compatible with 5V TTL level signaling. Tait also offers an isolation adapter that provides E&M isolated signaling (order number TBC101A). TB9400 Installation and Operation Manual Installation ©... -
Page 86: Setting Up Simplex Operation
(Tx delay for non-simulcast operation, and marshal- ling duration for simulcast operation). Tait offers an Antenna Relay Kit which comes complete with installation instructions (402-00119-01). Configuration Configure >... -
Page 87: Working With Base Stations From Your Pc
Working with Base Stations from Your The web browser on your PC provides a window into the TB9400 base station. Use it to connect to the base station so that you can monitor, configure, diagnose, and calibrate it (if required). -
Page 88: Pc Recommendations
Connections to the base station can be authenticated by a remote (i.e. centralized) service. Refer to “Setting Up Authentication” on page 93 and the base station Help for more information. Working with Base Stations from Your PC TB9400 Installation and Operation Manual © Tait International Limited November 2019... -
Page 89: Logging In
Web Interface” on page 94). Make sure that you store your passwords and usernames securely and do not lose them. They may be needed by Tait support personnel if assistance is required. Tait cannot retrieve forgotten passwords. TB9400 Installation and Operation Manual Working with Base Stations from Your PC ©... -
Page 90: Setting The Ip Address
(Identity > Identity > Network Identity). Notice If the base station is online when changing the IP address, it is possible that the base station will restart. Tait recommends that all configuration changes are made after taking the base station offline. -
Page 91: Security Certificates
A physical connection is needed as well as an alternate or temporary IP address and subnet mask. TB9400 Installation and Operation Manual Working with Base Stations from Your PC © Tait International Limited November 2019... -
Page 92: Troubleshooting Connection Problems
Finding a Lost or Forgotten IP Address Use the following procedure if an IP address has been lost or forgotten. Mount the reciter in a TB9400 subrack and fit the front panel. Power up the subrack. On the front panel display select Modules > Reciter 1 (or 2) > View Reciter 1 (or 2) Address. -
Page 93: Setting Up Authentication
(e.g. when the connection to the server is lost). The password for this emergency login should be kept secret. TB9400 Installation and Operation Manual Working with Base Stations from Your PC © Tait International Limited November 2019... -
Page 94: Working With The Web Interface
– icon ( ) to collapse it again. Using a browser window size smaller than 1024 x 768 may cause some pages to display incorrectly. Working with Base Stations from Your PC TB9400 Installation and Operation Manual © Tait International Limited November 2019... -
Page 95: Monitoring Operation
P25/AS-IP conditions (Monitor > Interfaces > Trunked RF). An equivalent screen appears under DMR/MPT conditions (Monitor > Interfaces > DMR Network Connections/MPT Network Connec- tions) TB9400 Installation and Operation Manual Working with Base Stations from Your PC © Tait International Limited November 2019... -
Page 96: Troubleshooting Alarms
Alarms menu automatically expands to dis- play the alarm(s). Click Help and navigate to the description of that alarm Working with Base Stations from Your PC TB9400 Installation and Operation Manual © Tait International Limited November 2019... -
Page 97: Viewing Configuration Settings
To see the channel number and profiles the base station is using, go to: P25/AS-IP: Monitor > Interfaces > Conventional RF. ■ DMR/MPT: Monitor > Interfaces > Analog RF or DMR RF. ■ TB9400 Installation and Operation Manual Working with Base Stations from Your PC © Tait International Limited November 2019... - Page 98 Channels can be edited from Configure > Base Station > Channels. To bring up the edit screen below, select a channel in the table and then click the Edit button. Working with Base Stations from Your PC TB9400 Installation and Operation Manual © Tait International Limited November 2019...
- Page 99 Configure > RF Interface > Channel Profiles and select the profile you wish to review or edit. Proceed in a similar way to view signaling profile and channel group settings. TB9400 Installation and Operation Manual Working with Base Stations from Your PC © Tait International Limited November 2019...
-
Page 100: Viewing The Base Station And Network Identity
(100 Mbits/s) within a small timing window to overflow internal buffers and therefore suffer packet loss. To minimize this cause of packet loss a setting of 10 Mbits/s is recommended. Working with Base Stations from Your PC TB9400 Installation and Operation Manual © Tait International Limited November 2019... - Page 101 Enter here the four lines of information you want to appear on the home screen on the front panel display. TB9400 Installation and Operation Manual Working with Base Stations from Your PC © Tait International Limited November 2019...
-
Page 102: Basic Tasks
Alarms menu automatically expands to display the alarm(s). Click Help and navigate to the description of that alarm. Working with Base Stations from Your PC TB9400 Installation and Operation Manual © Tait International Limited November 2019... -
Page 103: Disabling The Front Panel Keypad
■ file length is no more than 64 KB ■ To ensure you can quickly identify a tone, Tait recommends naming audio files according to their characteristics. Generic names can cause confusion. At least 100ms of silence should precede the tone if the call initiator wishes to hear it when releasing PTT. -
Page 104: Uploading New Firmware
On Linux, the firmware archive *.zip file has the following directory structure Firmware Location P25/AS-IP BaseStations\feeds\p25-bin-3.nn.nn.nnnn.tbc DMR/MPT BaseStations\feeds\dmr-bin-3.nn.nn.nnnn.tbc Select the file corresponding to the application and version you wish to install. Working with Base Stations from Your PC TB9400 Installation and Operation Manual © Tait International Limited November 2019... -
Page 105: Downloading Firmware From A Package Server
Mongoose, that is set up to allow base stations to directly download firmware files from your computer. Notice The version of Mongoose that Tait ships has a known security issue (CVE-2017-11567) that makes Mongoose unsuitable for use on the public Internet. For more information, please see the base station help. -
Page 106: Switching Application Packages
If you attempt to go online with a channel that is invalid for the firmware application you are currently using, an alarm will activate (Monitor > Working with Base Stations from Your PC TB9400 Installation and Operation Manual © Tait International Limited November 2019... - Page 107 Alarms). The alarm will warn you that the channel you are attempting to use will not function. TB9400 Installation and Operation Manual Working with Base Stations from Your PC © Tait International Limited November 2019...
- Page 108 Base stations are shipped with a set of factory default configurations featuring examples of channel setups for analog FM, P25, DMR and MPT. These configurations provide a safe set of values. Working with Base Stations from Your PC TB9400 Installation and Operation Manual © Tait International Limited November 2019...
-
Page 109: Setting Up Custom Alarms
Tait recommends that you download these configurations and store them on your PC as a backup before altering and saving any of your own configuration settings. You can also generate a report containing all the base station’s configuration settings relevant to the current application firmware (Tools >... -
Page 110: Checking For Interference On A Receive Channel
Transmitters in a simulcast channel must all begin transmitting simultaneously, therefore the configured value of the marshaling duration must allow for the worst case network delay, including delay variation (jitter). Working with Base Stations from Your PC TB9400 Installation and Operation Manual © Tait International Limited November 2019... -
Page 111: Uploading Firmware To The Base Station
Uploading Firmware to the Base Station To upload firmware directly from the base station, go to Tools > Firm- ware > Upload/Download. TB9400 Installation and Operation Manual Working with Base Stations from Your PC © Tait International Limited November 2019... -
Page 112: Snmp Network Management
Tait base stations provide Management Information Bases (MIBs), to allow network management using SNMP. The Windows MSI installer includes Tait defined MIBs (look for a folder labeled MIBs under Tait Applications in the Windows Start menu), and they are also published on the Tait Technical support website: http:// support.taitradio.com/home... -
Page 113: Configuring Single Base Stations
Also, some polled SNMP parameters, such as Tx NAC, will return the correct transmitter configuration data, but none of these parameters is used by the receiver. TB9400 Installation and Operation Manual Working with Base Stations from Your PC © Tait International Limited November 2019... -
Page 114: Configuring Base Stations In A Channel Group
IP packets. For more information on designing and configuring simulcast channel groups, refer to P25 Conventional Networks with TB9400 Base Stations System ■ Manual (MND-00002-xx) TaitNet Analog Conventional Networks with TB9400 Base Stations ■... -
Page 115: Maintenance
18–20lbf·in (2–2.25N·m). They may work loose with thermal cycling. Also, if you are using battery back-up, you should check the batteries regularly in accordance with the manufacturer’s recommendations. TB9400 Installation and Operation Manual Maintenance © Tait International Limited November 2019... - Page 116 You can use the web interface to configure the base station to generate an alarm if any of the front panel cooling fans fails. Refer to the Help for more details. Maintenance TB9400 Installation and Operation Manual © Tait International Limited November 2019...
-
Page 117: Troubleshooting
Troubleshooting Check that all front and rear connectors and cables are in place, and that power switches are on. If problems persist, contact your regional Tait office. Symptom Possible Cause Action Alarm LED red and steady The base station is in... -
Page 118: Replacing Modules
If one or more of the modules is faulty, you may be unable to save the configuration. In this case, you will have to restore the configuration from a back-up file. Refer to the Help for more information. Replacing Modules TB9400 Installation and Operation Manual © Tait International Limited November 2019... -
Page 119: Preliminary Disassembly
PMU. Also at the rear of the PMU disconnect the mains and battery supply leads, and the auxiliary DC supply lead (if fitted). TB9400 Installation and Operation Manual Replacing Modules © Tait International Limited November 2019... - Page 120 If you need to remove any front panel cables, simply pull the front of the cable retaining clip down and then slide it out from the subrack until it reaches the end of its travel. Replacing Modules TB9400 Installation and Operation Manual © Tait International Limited November 2019...
-
Page 121: Replacing A Reciter
Ensure the front panel cables are positioned correctly, and retained where required by the cable retaining clips in the top of the subrack (refer to “Appendix B – Inter-Module Connections” on page 130). TB9400 Installation and Operation Manual Replacing Modules © Tait International Limited November 2019... - Page 122 Tighten the nut on the SMA connector to a torque of 5lbf·in (0.6N·m). Carry out the instructions in “Final Reassembly” on page 128. Replacing Modules TB9400 Installation and Operation Manual © Tait International Limited November 2019...
-
Page 123: Replacing A Power Amplifier
Reconnect all the other front and rear panel cables previously disconnected. Ensure the front panel cables are positioned correctly, and retained where required by the cable retaining clips in the top of TB9400 Installation and Operation Manual Replacing Modules © Tait International Limited November 2019... - Page 124 “Appendix B – Inter-Module Connections” on page 130). Tighten the nut on the SMA connector to a torque of 5lbf·in (0.6N·m). Carry out the instructions in “Final Reassembly” on page 128. Replacing Modules TB9400 Installation and Operation Manual © Tait International Limited November 2019...
-
Page 125: Replacing A Power Management Unit
(refer to “Appendix B – Inter-Module Connections” on page 130). Carry out the instructions in “Final Reassembly” on page 128. TB9400 Installation and Operation Manual Replacing Modules © Tait International Limited November 2019... -
Page 126: Replacing The Module Guide Rails
Push the guide rail towards the front of the subrack until you hear the locking tab “click” into place. Replacing Modules TB9400 Installation and Operation Manual © Tait International Limited November 2019... -
Page 127: Replacing The Subrack Interconnect Board
Reconnect the system control bus cables and reciter DC cables as shown in “Appendix B – Inter-Module Connections” on page 130). Figure 8.1 Replacing the subrack interconnect board TB9400 Installation and Operation Manual Replacing Modules © Tait International Limited November 2019... -
Page 128: Final Reassembly
Replacing Modules TB9400 Installation and Operation Manual © Tait International Limited November 2019... -
Page 129: Appendix A - Interface Pin Allocations
The pin allocations for the auxiliary DC output on the PMU are given in the following table. Description +V output –V output 2-pin connector - external view TB9400 Installation and Operation Manual Appendix A – Interface Pin Allocations © Tait International Limited November 2019... -
Page 130: Appendix B - Inter-Module Connections
PMU via the subrack interconnect board. The DC supply to the reciters is via the system control bus ribbon cable. Appendix B – Inter-Module Connections TB9400 Installation and Operation Manual © Tait International Limited November 2019... -
Page 131: Single 50W Base Station
The PA is powered by a direct connection from the PMU. The reciter is DC Supply powered from the PMU via the subrack interconnect board and system control bus ribbon cable. TB9400 Installation and Operation Manual Appendix B – Inter-Module Connections © Tait International Limited November 2019... -
Page 132: 100W Base Station
The PA is powered by a direct connection from the PMU. The reciter is DC Supply powered from the PMU via the subrack interconnect board and system control bus ribbon cable. Appendix B – Inter-Module Connections TB9400 Installation and Operation Manual © Tait International Limited November 2019... -
Page 133: Appendix C - Identifying Front Panels
302-05302-xx duct: 302-05264-xx duct: 302-05265-xx fan 1 fan 2 fan 3 Receive-only base station receiver 1 and 2 receiver 3 and 4 T01-01110-DAAA duct: 302-05302-xx duct: 302-05303-xx duct: 302-05265-xx TB9400 Installation and Operation Manual © Tait International Limited November 2019... -
Page 134: Appendix D - Tb9400 Cable Kits
Cable Kits T01-01150-0003 - TB9400 Kit Cable Single 50W Channel Upgrade This kit is for adding a second reciter and 50W PA to a TB9400 subrack. It contains the following cables: 2 X 150mm SMA RF Cable reciter to PA ■... - Page 135 TB9400 Installation and Operation Manual © Tait International Limited November 2019...
-
Page 136: Appendix B- Installing The Firmware Package
If you click ‘Cancel’ while downloading a firmware package, it takes approximately 20 seconds for the cancellation to take effect and for the base station to respond. 1. The TB9400 is designed to use the same firmware and download system as the TB9300. TB9400 Installation and Operation Manual... -
Page 137: Setting Up A Temporary Package Server
IP address and port in each base station. Run Mongoose on the temporary package server (Start > Programs > Tait Applications > Tait Base Stations > Mongoose-3.0.exe). Windows Firewall may raise a Security Alert about allowing Mongoose to access your network or the internet. -
Page 138: Glossary
Glossary This glossary contains an alphabetical list of terms and abbreviations, from within this manual, related to the Tait network and the TB9400 base station. A radio receiver and transmitter that is located in a specific place (at a site) - Page 139 The range of frequencies that the equipment is capable of operating on. frequency band The cover over the front of the base station containing the indicator LEDs, front panel four-line LCD display, user controls and cooling fans. TB9400 Installation and Operation Manual © Tait International Limited November 2019...
- Page 140 Some operational functions of the base station are controlled by licences. licence Purchasing a licence from Tait allows you to enable the feature set which includes the required functionality. One of the two timeslots provided in each TB9400 radio frequency. Each...
- Page 141 (or going to) the single public IP address of the NAT device instead of the actual source or destination. Any device that is network-connected. A Tait digital network consists of a network element number of network elements. The TB9400 base station is a network element designed and manufactured by Tait.
- Page 142 SNMP the trunking site controller to monitor the status of the channel group and its members. Provides the following physical paths in a TB9400 base station: system control bus C and RS-485 communications between the modules in the subrack ■...
- Page 143 Brand name for a PMR network designed and manufactured by Tait TaitNet International Limited. Transmission Control Protocol. A complex protocol on top of IP for sending reliable streams of data with flow control. Time Division Multiple Access. TDMA divides a single RF channel into...
-
Page 144: Tait General Software License Agreement
“Designated Products” means products pro- releases of the software provided by Tait; (iii) vided by Tait to Licensee with which or for which means any upgrades, enhancements or other the Software and Documentation is licensed for functions or features to the Software provided by use. - Page 145 Tait during the course of the inspec- for use by third parties on a "time sharing," tion will be kept in strict confidence by Tait and "application service provider," "service bureau" used solely for the purpose of verifying...
- Page 146 Tait demonstrating compli- investigation of the perceived defect reveals that ance with all the foregoing. no such defect in fact exists, Tait may recover its Section 8 TERM AND TERMINATION costs in respect of such investigation from 8.1.
- Page 147 Agreement will result in irrepara- of Tait and Licensee. No third party has the right ble harm to Tait for which monetary damages to make any claim or assert any right under this would be inadequate. If Licensee breaches this...
-
Page 148: Simplified Eu Declaration Of Conformity
Internet: siguiente: www.taitradio.com/eudoc www.taitradio.com/eudoc Tímto Tait International Limited prohlašuje, že Ar šo Tait International Limited deklarē, ka typ rádiového zařízení TBCB1A, TBCB1B, TBCB1X, radioiekārta TBCB1A, TBCB1B, TBCB1X, TBCH1A, TBCH1B, TBCH2A, TBCH2B, TBCH3A TBCH1A, TBCH1B, TBCH2A, TBCH2B, TBCH3A &... - Page 149 TBCH3A & TBCH3B je v súlade so smernicou 2014/ 53/EÚ. Úplné EÚ vyhlásenie o zhode je k dispozícii na tejto internetovej adrese: Tait International Limited potrjuje, da je tip radijske opreme TBCB1A, TBCB1B, TBCB1X, TBCH1A, TBCH1B, TBCH2A, TBCH2B, TBCH3A & TBCH3B skladen z Direktivo 2014/53/EU.
Need help?
Do you have a question about the TB9400 and is the answer not in the manual?
Questions and answers