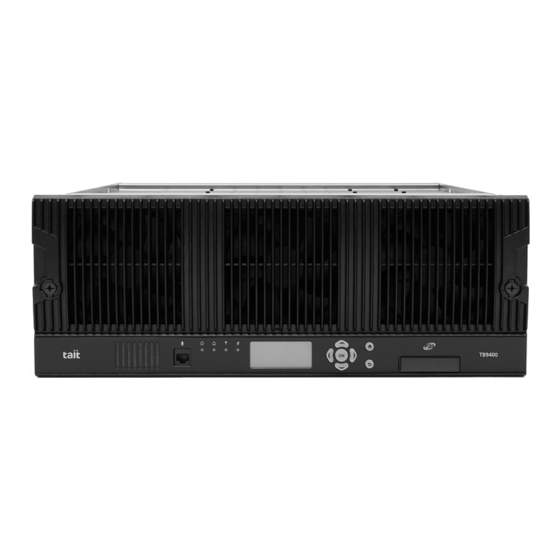
Tait TB9400 Installation And Operation Manual
Hide thumbs
Also See for TB9400:
- Installation and operation manual (150 pages) ,
- Specification manual (49 pages) ,
- Installation and operation manual (155 pages)

Related Manuals for Tait TB9400


Summary of Contents for Tait TB9400
- Page 1 DRAFT 4 TB9400 base station Installation and Operation Manual Draft in Progress MBC-00001-01 Issue 1 September 2011...
- Page 2 Technology is explicitly prohibited from attempting to Limited. decompile, reverse engineer, or disassemble the Object The word TAIT and the TAIT logo are trademarks of Code, or in any other way convert the Object Code Tait Electronics Limited. into a human-readable form. Protected by U.S. Patents...
-
Page 3: Table Of Contents
2.4.3 Unauthorized Modifications....... . 33 TB9400 Installation and Operation Manual... - Page 4 5.4.4 Tuning the Reciter ........74 TB9400 Installation and Operation Manual...
- Page 5 TaitNet P25 Glossary ......... . .115 Tait Software License Agreement ........129 TB9400 Installation and Operation Manual ©...
-
Page 6: Preface
DRAFT 4 Preface Scope of Manual This manual provides information on installing and operating the TB9400 base station. It is intended for use by experienced technicians familiar with installing and operating base station equipment. It also includes configuration, maintenance and troubleshooting information. -
Page 7: Associated Documentation
Associated Documentation The current set of TB9400 product documentation is provided in PDF format on the product DVD. Updates are made available on the Tait support website. Printed copies of the documentation are available on request. TB9400 Specifications Manual (MBC-00002-xx). - Page 8 DRAFT 4 Preface TB9400 Installation and Operation Manual © Tait Electronics Limited September 2011...
-
Page 9: Description
Internet Protocol communications, and to add features through software options ensures that P25 systems designed with the TB9400 are scalable in both size and functionality. base station combines industry-leading digital voice quality with rugged design specifications and intuitive user interfaces. -
Page 10: Features
Rugged construction with generous heatsinks and fan-forced cooling for ■ continuous operation from – 30° C to + 60° C (– 22° F to + 140° F). Description TB9400 Installation and Operation Manual © Tait Electronics Limited September 2011... -
Page 11: Modules
The following provides a brief description of the available modules. The reciter module comprises the Reciter receiver, exciter and digital control circuitry. The reciter provides the Ethernet interface and system inputs and outputs. TB9400 Installation and Operation Manual Description © Tait Electronics Limited September 2011... - Page 12 The PMU also has an auxiliary DC output of 13.65 VDC, 27.3 VDC, or 54.6 VDC, depending on the model. AC and DC PMU shown Description TB9400 Installation and Operation Manual © Tait Electronics Limited September 2011...
- Page 13 The position of a module in the subrack is defined by the socket on the subrack interconnect board to which the module is connected by the system control bus. TB9400 Installation and Operation Manual Description © Tait Electronics Limited September 2011...
-
Page 14: Mechanical Assembly
1 subrack module retaining clamp subrack interconnect board PA 2 plastic guide rail reciter 2 subrack interconnect board retaining clamp cable retaining clip front panel fastener PA 1 Description TB9400 Installation and Operation Manual © Tait Electronics Limited September 2011... - Page 15 The PMU and the reciter/PA pair have their own cooling fans. Figure 1.2 Mechanical assembly - single 50 W base station reciter 50 W PA subrack TB9400 Installation and Operation Manual Description © Tait Electronics Limited September 2011...
- Page 16 It is also fitted with an airflow duct to channel the airflow from the cooling fan through the heatsink fins. Figure 1.3 Mechanical assembly - single 100 W base station reciter subrack airflow duct cable retaining clip Description TB9400 Installation and Operation Manual © Tait Electronics Limited September 2011...
-
Page 17: Frequency Bands And Sub-Bands
Receive: 792 MHz to 824 MHz Applications The TB9400 is designed for operation in a TaitNet P25 trunked radio network. It can operate as a single base station or as part of a channel group or simulcast channel group, and as a traffic channel or control channel. -
Page 18: Licenses
This feature will allow the base station to operate in trunking mode using Phase 2 Operation (not yet available) two-slot TDMA as defined by the P25 Phase 2 standard. Description TB9400 Installation and Operation Manual © Tait Electronics Limited September 2011... -
Page 19: Theory Of Operation
AC Input RF + PA Key System Input and Output 28VDC Reciter DC Input RF Feedback Ethernet Interface to Network System Control Bus Front Panel *optional for non-simulcast systems TB9400 Installation and Operation Manual Description © Tait Electronics Limited September 2011... - Page 20 It performs the air interface signal processing for digital P25 mode, gives the base station identity as a network element, and provides the physical connections for the Ethernet and system interfaces. Description TB9400 Installation and Operation Manual © Tait Electronics Limited September 2011...
-
Page 21: Signal Paths
Offline mode. This takes the base station out of service. However, the front panel is still operational and can be used in the normal way. TB9400 Installation and Operation Manual Description © Tait Electronics Limited September 2011... -
Page 22: Intermodule Communications
I C Current Source RS-485 Reciter 1/ PA 1 Fan User Controls Reciter 2/ PA 2 Fan Front Panel Subrack Interconnect Board RS-485 RS-485 μP μP Reciter 2 PA 2 Description TB9400 Installation and Operation Manual © Tait Electronics Limited September 2011... -
Page 23: Power Management And Distribution
The outputs from both the AC and DC high power converters are added together and fed to the modules via the high-current outputs. The auxiliary output is also tapped off this summed output. TB9400 Installation and Operation Manual Description © Tait Electronics Limited September 2011... - Page 24 Subrack power distribution for single and dual base stations Single Aux. DC Subrack Board Front Reciter Panel Dual Aux. DC Subrack Board Front PA 1 PA 2 Reciter 1 Reciter 2 Panel Description TB9400 Installation and Operation Manual © Tait Electronics Limited September 2011...
-
Page 25: Pmu Operation On Dc Input
These limits will not be reached under normal operation conditions, but are provided as “fail-safe” measures to protect the battery from deep discharge. They also remove the need for low-voltage disconnect modules. TB9400 Installation and Operation Manual Description © Tait Electronics Limited September 2011... - Page 26 PMU specifications. b. Using the base station’s web interface. c. These limits are subject to the tolerances of the battery protection circuitry. Description TB9400 Installation and Operation Manual © Tait Electronics Limited September 2011...
- Page 27 DRAFT 4 Figure 1.9 PMU alarm thresholds and voltage limits when operating on DC TB9400 Installation and Operation Manual Description © Tait Electronics Limited September 2011...
-
Page 28: Front Panel Fans
<149 °F (65 °C) Increases as the load on the PMU increases 149-167 °F (65-75 °C) On for two minutes, off for one minute >167 °F (75 °C) Always on Description TB9400 Installation and Operation Manual © Tait Electronics Limited September 2011... -
Page 29: General Safety And Regulatory Information
The PMU should be serviced only by qualified technicians. There are no user-replaceable parts inside. If the PMU is damaged and does not function TB9400 Installation and Operation Manual General Safety and Regulatory Information © Tait Electronics Limited September 2011... -
Page 30: Ac Power Connection
+ 176° F (+ 80° C). 2.1.7 LED Safety (EN 60825-1) This equipment contains Class 1 LED Products. General Safety and Regulatory Information TB9400 Installation and Operation Manual © Tait Electronics Limited September 2011... -
Page 31: Equipment Safety
S20.20-1999 or BS EN 100015-4 1994. Figure 2.1 Typical antistatic bench set-up common point ground (building ground or mains ground) dissipative rubber bench mat conductive wrist strap TB9400 Installation and Operation Manual General Safety and Regulatory Information © Tait Electronics Limited September 2011... -
Page 32: Anti-Tampering Devices
The humidity should not exceed 95% relative humidity through the specified operating temperature range. 2.3.3 Dust and Dirt For uncontrolled environments, the level of airborne particulates must not exceed 100 µg/m General Safety and Regulatory Information TB9400 Installation and Operation Manual © Tait Electronics Limited September 2011... -
Page 33: Regulatory Information
2.4.3 Unauthorized Modifications Any modifications you make to this equipment which are not authorized by Tait Electronics Limited may invalidate your compliance authority’s approval to operate the equipment. TB9400 Installation and Operation Manual General Safety and Regulatory Information... -
Page 34: Health, Safety And Electromagnetic Compatibility In Europe
You can download the formal Declaration of Conformity from Declaration of Conformity http://eudocs.taitradio.com/. You can also obtain a signed and dated paper copy of the Declaration of Conformity from Tait Electronics Limited. General Safety and Regulatory Information TB9400 Installation and Operation Manual © Tait Electronics Limited September 2011... -
Page 35: Operation
DRAFT 4 Operation This section describes the user controls and indicator LEDs on the front panel and on the base station modules. TB9400 Installation and Operation Manual Operation © Tait Electronics Limited September 2011... -
Page 36: Front Panel
Offline mode (regardless of the presence of any fault). Flashing base station is in Online mode, and one or more faults are present. base station is in Online mode, and no faults are present. Operation TB9400 Installation and Operation Manual © Tait Electronics Limited September 2011... - Page 37 Moves the cursor up one line in the IP address screen. When the top line is ■ reached, pressing again returns to the previous menu. Note Unlike a computer keyboard, the keys do not auto-repeat. Each action requires a separate key-press. TB9400 Installation and Operation Manual Operation © Tait Electronics Limited September 2011...
- Page 38 When the contrast is set to the required level, press OK to save the changes and exit the menu. Operation TB9400 Installation and Operation Manual © Tait Electronics Limited September 2011...
- Page 39 View Reciter 1 Address 172.025.198.043 Reciter 2 Edit Reciter 1 Address MASK: 255.255.000.000 Front Panel GW: 172.025.002.251 Edit Reciter 1 Address 172.025.198.043 MASK: 255.255.000.000 GW: 172.025.002.251 Front Panel Contrast Contrast TB9400 Installation and Operation Manual Operation © Tait Electronics Limited September 2011...
-
Page 40: Module Indicator Leds And Switches
- the reciter is powered up ■ flashing red - one or more alarms have been generated; you can use the ■ web interface to find out more details about the alarms. Operation TB9400 Installation and Operation Manual © Tait Electronics Limited September 2011... - Page 41 These LEDs provide the following information about the state of the reciter: steady amber - the Ethernet interface is connected ■ flashing green - data is being transmitted across the Ethernet interface. ■ TB9400 Installation and Operation Manual Operation © Tait Electronics Limited September 2011...
- Page 42 Note The alarm LED will flash whenever an alarm is generated, whether or not this alarm has been disabled via the web interface. Operation TB9400 Installation and Operation Manual © Tait Electronics Limited September 2011...
-
Page 43: Pmu
On switches fitted to PMUs up to November 2008, the red button is “in” when on, and “out” when off. On switches fitted from November 2008 onwards, the red button remains “out” whether on or off. TB9400 Installation and Operation Manual Operation © Tait Electronics Limited September 2011... - Page 44 Note The alarm LED will flash whenever an alarm is generated, whether or not this alarm has been disabled via the web interface. Operation TB9400 Installation and Operation Manual © Tait Electronics Limited September 2011...
-
Page 45: Working With Base Stations From Your Pc
DRAFT 4 Working with Base Stations from Your The normal web browser on your PC provides a window into the TB9400 base station. Use it to connect to the base station so that you can monitor, configure, diagnose, and calibrate it (if required). -
Page 46: Pc Recommendations
(Tools > Tools > User Administration). Refer to the Help for more information on setting user access levels. Working with Base Stations from Your PC TB9400 Installation and Operation Manual © Tait Electronics Limited September 2011... -
Page 47: Logging In
Enter your user name and password. When connecting for the first time, enter the user name “admin” and password “tbc_admin”. Click Login. TB9400 Installation and Operation Manual Working with Base Stations from Your PC © Tait Electronics Limited September 2011... -
Page 48: Setting The Ip Address
IP address you are trying to enter is not already in ■ use by another device on the same subnet. Working with Base Stations from Your PC TB9400 Installation and Operation Manual © Tait Electronics Limited September 2011... -
Page 49: Responding To Security Warnings
4.2.3 Responding to Security Warnings When your browser connects to a TB9400 for the first time, it raises a security warning. Normally, secure websites have a security certificate issued by a trusted Certification Authority. This is to foil attempts by rogue websites to pretend to be something they are not. -
Page 50: Connecting A Networked Pc To A Base Station
Select the User configured option, and then enter a number that is on the same subnet as the base station. For example, if the TB9400 has IP 192.168.1.2, enter 192.168.1.1 for the PC. Enter a suitable subnet mask, for example 255.255.255.0. -
Page 51: Troubleshooting Connection Problems
Select the User configured option, and then enter a number that is on the same subnet as the base station. For example, if the TB9400 has IP 192.168.1.2, enter 192.168.1.1 for the PC. Enter a suitable subnet mask, for example 255.255.255.0. -
Page 52: Finding A Lost Or Forgotten Ip Address
Use the following procedure if an IP address has been lost or forgotten. What do you do if access to this front panel menu Mount the reciter in a TB9400 subrack and fit the front panel. Power has been blocked via the web interface? up the subrack. -
Page 53: Working With The Web Interface
Press F11 for a full-screen display of the browser which does not show toolbars and other information. Press F11 again to return to the standard view. TB9400 Installation and Operation Manual Working with Base Stations from Your PC © Tait Electronics Limited September 2011... -
Page 54: Monitoring Operation
Using the monitoring pages, you can see how the base station is currently operating. For example, you can see the status of its trunking interface (Monitor > Interfaces > Trunking). Working with Base Stations from Your PC TB9400 Installation and Operation Manual © Tait Electronics Limited September 2011... -
Page 55: Viewing Configuration Settings
Select a channel and click Edit to view details of the channel. Clicking directly on any text in a line will also open the edit screen. TB9400 Installation and Operation Manual Working with Base Stations from Your PC © Tait Electronics Limited September 2011... - Page 56 Configure > RF Interface > Channel Profiles and then click the relevant profile number. Proceed in a similar way to view signaling profile and channel group settings. Working with Base Stations from Your PC TB9400 Installation and Operation Manual © Tait Electronics Limited September 2011...
-
Page 57: Viewing The Base Station And Network Identity
You can also enter here the four lines of information you want to appear on the front panel display (at start-up and when idle). Each line has a maximum of 20 characters. TB9400 Installation and Operation Manual Working with Base Stations from Your PC © Tait Electronics Limited September 2011... -
Page 58: Basic Tasks
Alarms menu automatically expands to display the alarm(s). Click Help and navigate to the description of that alarm. Working with Base Stations from Your PC TB9400 Installation and Operation Manual © Tait Electronics Limited September 2011... -
Page 59: Working With Configuration Files
A Trunking Interface single base station interfaces to the site controller in the same way as the TB9400 Installation and Operation Manual Working with Base Stations from Your PC © Tait Electronics Limited September 2011... -
Page 60: Configuring Base Stations In A Channel Group
Select Configure > Base Station > Miscellaneous and in the Front Panel area clear the Keypad enabled check box. Working with Base Stations from Your PC TB9400 Installation and Operation Manual © Tait Electronics Limited September 2011... -
Page 61: Preparing To Download Firmware
Under Package server, enter the IP address of the laptop. You can now instruct a base station to list and download firmware from the package server. TB9400 Installation and Operation Manual Working with Base Stations from Your PC © Tait Electronics Limited September 2011... - Page 62 DRAFT 4 Working with Base Stations from Your PC TB9400 Installation and Operation Manual © Tait Electronics Limited September 2011...
-
Page 63: Installation
DRAFT 4 Installation This chapter provides information on the site requirements for your TB9400 equipment and also describes how to install the base station in a standard 19 inch rack or cabinet. If this is your first time installing a TB9400... -
Page 64: Equipment Ventilation
(e.g. for servicing purposes). 5.1.4 Ambient Temperature Sensor The ambient temperature reading for the base station is provided by the temperature sensor located on the front panel circuit board. Installation TB9400 Installation and Operation Manual © Tait Electronics Limited September 2011... -
Page 65: Cabinet And Rack Ventilation
) per subrack. If you have any other configuration, the performance of your system will depend on how closely you comply with the base station airflow requirements described above. TB9400 Installation and Operation Manual Installation © Tait Electronics Limited September 2011... - Page 66 Figure 5.1 Typical cabinet ventilation requirements top view 8 in (20 cm) side view front view ≥ 7 in (≥17.5cm) ventilation slots airflow entry blanking panels airflow exit path Installation TB9400 Installation and Operation Manual © Tait Electronics Limited September 2011...
-
Page 67: Unpacking And Moving The Subrack
Cut the tape securing the flaps at the top of the carton and fold them flat against the sides Rotate the carton carefully onto its side and then onto its top ensuring that none of the flaps is trapped underneath. TB9400 Installation and Operation Manual Installation © Tait Electronics Limited September 2011... - Page 68 The foam cushions are CFC- and HCFC-free and may be burnt in a suitable waste-to-energy combustion facility, or compacted in landfill. Installation TB9400 Installation and Operation Manual © Tait Electronics Limited September 2011...
-
Page 69: Identifying The Equipment
T01-01121-XXXX A = default T01-01121-XXXX A = default a. The actual frequency coverage in this band when used with a K-band TB9400 reciter is 762MHz to 776MHz and 850MHZ to 870MHz. TB9400 Installation and Operation Manual Installation © Tait Electronics Limited September 2011... - Page 70 1 = 12VDC auxiliary power supply board fitted 2 = 24VDC auxiliary power supply board fitted 4 = 48VDC auxiliary power supply board fitted TBA3XXX-XXXX 0 = default TBA3XXX-XXXX 0 = default Installation TB9400 Installation and Operation Manual © Tait Electronics Limited September 2011...
-
Page 71: Initial Setting Up
One or more fans may operate, depending on the temperature of the modules. TB9400 Installation and Operation Manual Installation © Tait Electronics Limited September 2011... - Page 72 PMU mains failure requires a DC backup supply Diagnose > Subsystems > PMU Control Tests fan operation checks the operation of each fan Diagnose > Subsystems > Fan Tests individually Installation TB9400 Installation and Operation Manual © Tait Electronics Limited September 2011...
-
Page 73: Customizing The Configuration
PC or network. This provides a backup which can be restored to the base station if the configuration information becomes lost or corrupted. TB9400 Installation and Operation Manual Installation © Tait Electronics Limited September 2011... -
Page 74: Changing The Root Password
Knowledge of the password could be used to render the equipment inoperable, for example by deleting files. If you are concerned about the security risk that this poses, change the password. If Tait provides support services, it may need to know the password. -
Page 75: Installing The Base Station On Site
You can also obtain the TBA0ST2 tool kit from your regional Tait office. It contains the basic tools needed to install, tune, and service the base station. TB9400 Installation and Operation Manual Installation © Tait Electronics Limited September 2011... -
Page 76: Mounting The Subrack
Fit the subrack into the cabinet or rack and secure it firmly with an M6 (0.25 in) screw, flat and spring washer in each of the four main mounting holes , as shown in Figure 5.3. Installation TB9400 Installation and Operation Manual © Tait Electronics Limited September 2011... - Page 77 18.3 in (465.1 mm) 14.37 in (365 mm) 4 in 5.25 in 6.96 in 0.42 in (133.4 mm) (176.8 mm) (101.6 mm) (10.6 mm) 0.26 in (6.6 mm) TB9400 Installation and Operation Manual Installation © Tait Electronics Limited September 2011...
- Page 78 TBAA03-13 bracket fitted in a typical Tait cabinet . If you are not using the Tait cabinet, you may have to make your own brackets to suit your installation. Figure 5.5 Auxiliary support bracket Important You must fit the auxiliary support brackets if you intend to...
- Page 79 We recommend that you fit the supplied covers to the DC terminals to protect against accidental shorts. Figure 5.6 DC power cabling secure the cables to the cabinet to support their weight TB9400 Installation and Operation Manual Installation © Tait Electronics Limited September 2011...
-
Page 80: Connecting Up The Base Station
DC output external reference frequency input AC mains input RF input Ethernet interface connector RF output subrack ground connector – VDC input system interface connector a. Factory use only. Installation TB9400 Installation and Operation Manual © Tait Electronics Limited September 2011... -
Page 81: Connecting Ac Power
IEC connector on the PMU to the local AC supply. The pins of the IEC connector on ground the PMU are identified at right. neutral rear view TB9400 Installation and Operation Manual Installation © Tait Electronics Limited September 2011... -
Page 82: Connecting Dc Power
Figure 5.8 Recommended DC power connection Circuit Breaker or Fuse Battery We recommend a screw torque of 18 – 20 lbf · in (2 – 2.25 N · m). Installation TB9400 Installation and Operation Manual © Tait Electronics Limited September 2011... -
Page 83: Connecting The Auxiliary Dc Power Output
You can use this to connect the PMU’s auxiliary DC power output to another device. Contact your regional Tait office for details on the full range of wiring kits available. Figure 5.9 Auxiliary DC power connector Phoenix MVSTBR2.5HC/2-ST/5.08 female TB9400 Installation and Operation Manual Installation © Tait Electronics Limited September 2011... -
Page 84: Connecting Rf
PA and the mismatch is < 1 dB. ■ The effect of such conditions is variable: some devices will not be destroyed, and some may fail after repeated load interruptions. Installation TB9400 Installation and Operation Manual © Tait Electronics Limited September 2011... -
Page 85: Connecting An External Frequency Reference
Connecting an External Frequency Reference For K4 Band, the internal frequency reference accuracy is inadequate, and an external reference (for example, the Tait T801-4) must be used. An external reference is also required for simulcast. The external reference frequency can be 10 MHz or 12.8 MHz, with an input level of 300 mV . -
Page 86: Connecting A 1Pps Source
This and the external frequency reference can be provided, for example, by a Tait T801-4 Frequency Reference. For more information, see the T801-4 Installation and Operation Manual (MBA-00033-xx). Use a 50 Ω coaxial cable (RG58 or RG223) to connect the source to the base station’s... -
Page 87: Connecting General Purpose Inputs And Outputs
5 V TTL logic input active low digital in 8 digital in 9 external view digital in 10 digital in 11 digital in 11 not used ground ground TB9400 Installation and Operation Manual Installation © Tait Electronics Limited September 2011... - Page 88 DRAFT 4 Installation TB9400 Installation and Operation Manual © Tait Electronics Limited September 2011...
-
Page 89: Maintenance
You can use the web interface to configure the base station generate an alarm if any of the front panel cooling fans fails. Refer to the Help for more details. TB9400 Installation and Operation Manual Maintenance © Tait Electronics Limited September 2011... - Page 90 DRAFT 4 Maintenance TB9400 Installation and Operation Manual © Tait Electronics Limited September 2011...
-
Page 91: Troubleshooting
Test tones can’t be heard IMBE does not pass on Ensure test tones are less than 400 Hz tones higher than 400 Hz Lost or forgotten base Procedure TBD station IP address TB9400 Installation and Operation Manual Troubleshooting © Tait Electronics Limited September 2011... - Page 92 DRAFT 4 Troubleshooting TB9400 Installation and Operation Manual © Tait Electronics Limited September 2011...
-
Page 93: Replacing Modules
(e.g. for servicing purposes). Both the PMU and PA modules have built-in protection mech- anisms to prevent damage from overheating. TB9400 Installation and Operation Manual Replacing Modules © Tait Electronics Limited September 2011... -
Page 94: Saving The Base Station's Configuration
If one or more of the modules is faulty, you may be unable to save the configuration. In this case, you will have to restore the configuration from a back-up file. Refer to the Help for more information. Replacing Modules TB9400 Installation and Operation Manual © Tait Electronics Limited September 2011... -
Page 95: Preliminary Disassembly
PMU. Also at the rear of the PMU disconnect the mains and battery supply leads, and the auxiliary DC supply lead (if fitted). TB9400 Installation and Operation Manual Replacing Modules © Tait Electronics Limited September 2011... - Page 96 If you need to remove any front panel cables, simply pull the front of the cable retaining clip down and then slide it out from the subrack until it reaches the end of its travel. Replacing Modules TB9400 Installation and Operation Manual © Tait Electronics Limited September 2011...
-
Page 97: Replacing A Reciter
Loosen the screw securing the retaining clamp and rotate the clamp through 90° to clear the module. Slide the reciter out of the subrack, taking care not to damage any of the cables. TB9400 Installation and Operation Manual Replacing Modules © Tait Electronics Limited September 2011... - Page 98 111). Tighten the nut on the SMA connector to a torque of 8 lbf ·in (0.9 N·m). Carry out the instructions in “Final Reassembly” on page 107. Replacing Modules TB9400 Installation and Operation Manual © Tait Electronics Limited September 2011...
-
Page 99: Replacing A Power Amplifier
Reconnect all the other front and rear panel cables previously disconnected. Ensure the front panel cables are positioned correctly, and retained where required by the cable retaining clips in the top of TB9400 Installation and Operation Manual Replacing Modules © Tait Electronics Limited September 2011... - Page 100 111). Tighten the nut on the SMA connector to a torque of 8 lbf ·in (0.9 N·m). Carry out the instructions in “Final Reassembly” on page 107. Replacing Modules TB9400 Installation and Operation Manual © Tait Electronics Limited September 2011...
-
Page 101: Replacing A Power Management Unit
(refer to “Appendix B – Inter-Module Connections” on page 111). Carry out the instructions in “Final Reassembly” on page 107. TB9400 Installation and Operation Manual Replacing Modules © Tait Electronics Limited September 2011... -
Page 102: Replacing The Front Panel Fans
Remove the two screws labeled and remove the PMU fan duct assembly. d. Remove the fours screws holding the fan into the duct and remove the fan. Replacing Modules TB9400 Installation and Operation Manual © Tait Electronics Limited September 2011... - Page 103 8.1. If the fan con- nections are changed, the wrong fan will be activated when a module needs cooling. The module may then fold back or shut down. TB9400 Installation and Operation Manual Replacing Modules © Tait Electronics Limited September 2011...
- Page 104 50 W PA 1 50 W PA 2 (fan 3) (fan 1) (fan 2) 100 W base station reciter 100 W PA (fan 1) (fan 2) (fan 3) Replacing Modules TB9400 Installation and Operation Manual © Tait Electronics Limited September 2011...
-
Page 105: Replacing The Module Guide Rails
Push the guide rail towards the front of the subrack until you hear the locking tab “click” into place. TB9400 Installation and Operation Manual Replacing Modules © Tait Electronics Limited September 2011... -
Page 106: Replacing The Subrack Interconnect Board
Reconnect the system control bus cables and reciter DC cables as shown in “Appendix B – Inter-Module Connections” on page 111. Figure 8.2 Replacing the subrack interconnect board Replacing Modules TB9400 Installation and Operation Manual © Tait Electronics Limited September 2011... -
Page 107: Final Reassembly
TB9400 Installation and Operation Manual Replacing Modules © Tait Electronics Limited September 2011... - Page 108 DRAFT 4 Replacing Modules TB9400 Installation and Operation Manual © Tait Electronics Limited September 2011...
-
Page 109: Appendix A - Interface Pin Allocations
The pin allocations for the auxiliary DC output on the PMU are given in the following table. Description + V output ground 2-pin connector - external view TB9400 Installation and Operation Manual Appendix A – Interface Pin Allocations © Tait Electronics Limited September 2011... - Page 110 DRAFT 4 Appendix A – Interface Pin Allocations TB9400 Installation and Operation Manual © Tait Electronics Limited September 2011...
-
Page 111: Appendix B - Inter-Module Connections
PMU via the subrack interconnect board. The DC supply to the reciters is via the system control bus ribbon cable. TB9400 Installation and Operation Manual Appendix B – Inter-Module Connections © Tait Electronics Limited September 2011... -
Page 112: Single 50W Base Station
PMU via the subrack interconnect board. The DC supply to the reciter is via the system control bus ribbon cable. Appendix B – Inter-Module Connections TB9400 Installation and Operation Manual © Tait Electronics Limited September 2011... -
Page 113: Base Station
The PA is powered by a direct connection from the PMU. The reciter is DC Supply powered from the PMU via the subrack interconnect board and system control bus ribbon cable. TB9400 Installation and Operation Manual Appendix B – Inter-Module Connections © Tait Electronics Limited September 2011... - Page 114 DRAFT 4 Appendix B – Inter-Module Connections TB9400 Installation and Operation Manual © Tait Electronics Limited September 2011...
-
Page 115: Taitnet P25 Glossary
Glossary This glossary contains an alphabetical list of terms and abbreviations related to the TaitNet P25 network and the TB9400 base station. Analog-to-Digital Converter. A device for converting an analog signal to a digital signal that represents the same information. - Page 116 A device which combines analog-to-digital conversion (coding) and digital- CODEC to-analog conversion (decoding). TaitNet P25 Glossary TB9400 Installation and Operation Manual © Tait Electronics Limited September 2011...
- Page 117 Providing transmission and reception in both directions simultaneously. duplex Used in relation to the PA, it is the proportion of time (expressed as a duty cycle percentage) during which the PA is transmitting. TB9400 Installation and Operation Manual TaitNet P25 Glossary © Tait Electronics Limited September 2011...
- Page 118 SU transmissions that are too weak to be received by that base station. Electrically block-erasable and programmable read-only memory. FLASH Frequency Modulation. Often used as an adjective to denote analog radio transmission. TaitNet P25 Glossary TB9400 Installation and Operation Manual © Tait Electronics Limited September 2011...
- Page 119 An adequate hysteresis prevents the receiver gate from repeatedly muting and unmuting when the level varies around the trigger point. TB9400 Installation and Operation Manual TaitNet P25 Glossary © Tait Electronics Limited September 2011...
- Page 120 C is a multi-master bus, which means that multiple chips can be connected to the same bus, and each one can act as a master by initiating a data transfer. Used in the TB9400 for communications between reciter 1 and the PMU.
- Page 121 Any device that is network-connected. A TaitNet digital network consists network element of a number of network elements. The TB9400 base station is a network element designed and manufactured by Tait. TB9400 Installation and Operation Manual TaitNet P25 Glossary...
- Page 122 A set of access rights to the web interface functions. There are Guest, privileges Maintainer, and Administrator privileges. TaitNet P25 Glossary TB9400 Installation and Operation Manual © Tait Electronics Limited September 2011...
- Page 123 An updated version of the RS-232 protocol for serial communications RS-485 between multiple devices. Received Signal Strength Indicator is a level that indicates the strength of the RSSI received signal. TB9400 Installation and Operation Manual TaitNet P25 Glossary © Tait Electronics Limited September 2011...
- Page 124 20 ms later than the first voice stream from the same SU, it is said to have a skew of 20 ms. TaitNet P25 Glossary TB9400 Installation and Operation Manual © Tait Electronics Limited September 2011...
- Page 125 ■ Brand name for any PMR network designed and manufactured by Tait TaitNet Electronics Limited. A set of Tait base stations interconnected by an IP network that can carry TaitNet P25 network voice and data traffic. A P25-compliant base station...
- Page 126 IP backbone network. The systematic sampling of a group of channels for the channel with the voting greatest signal strength. Voting provides wide-area coverage and ensures that TaitNet P25 Glossary TB9400 Installation and Operation Manual © Tait Electronics Limited September 2011...
- Page 127 A circuit that checks that the system is still responding. If the system does watchdog not respond (because the firmware has locked up), the circuit generally resets the system. TB9400 Installation and Operation Manual TaitNet P25 Glossary © Tait Electronics Limited September 2011...
- Page 128 DRAFT 4 TaitNet P25 Glossary TB9400 Installation and Operation Manual © Tait Electronics Limited September 2011...
-
Page 129: Tait Software License Agreement
(iii) may contain one or more items of soft- “Designated Products” means products pro- ware owned by a third-party supplier. The term vided by Tait to Licensee with which or for which "Software" does not include any third-party soft- the Software and Documentation is licensed for ware provided under separate license or not use. - Page 130 Open Source grant to verify compliance with this Agreement. Software Licenses will take precedence. For infor- Tait, or a third party nominated by Tait, may mation about Open Source Components con- inspect Licensee’s premises, books and records,...
- Page 131 Section 8 TERM AND TERMINATION the perceived defect reveals that no such defect in 8.1. Licensee’s right to use the Software and Doc- fact exists, Tait may recover its costs in respect of umentation will commence when the Designated such investigation from Licensee.
- Page 132 11.5. THIRD-PARTY BENEFICIARIES. This Agreement is entered into solely for the benefit of Tait and Licensee. No third party has the right to make any claim or assert any right under this Agreement, and no third party is deemed a bene- ficiary of this Agreement.
Need help?
Do you have a question about the TB9400 and is the answer not in the manual?
Questions and answers