Table of Contents
Advertisement
Quick Links
USER MANUAL AND SPECIFICATIONS
NI cRIO-9111/9112/9113/9114/
9116/9118
CompactRIO Reconfigurable Embedded Chassis
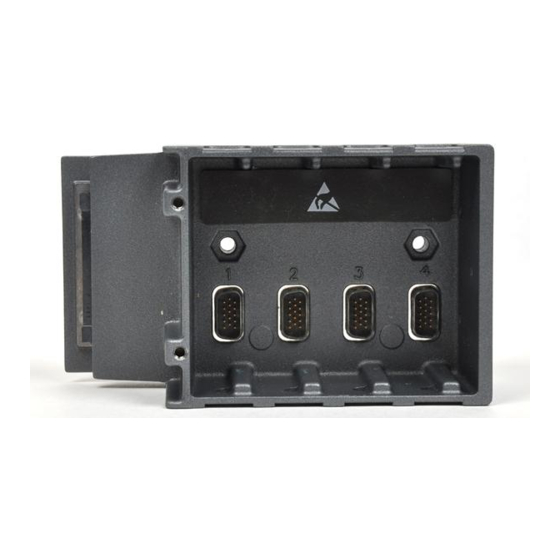
Figure 1. CompactRIO Eight-Slot and Four-Slot Reconfigurable Embedded Systems
2
1
1. Controller
2. Eight-Slot Reconfigurable Embedded Chassis
(cRIO-9112/9114/9116/9118)
This document describes how to install an NI cRIO-9111, cRIO-9112, cRIO-9113, cRIO-9114,
cRIO-9116, or cRIO-9118. In this document the NI cRIO-9111, cRIO-9112, cRIO-9113,
cRIO-9114, cRIO-9116, and cRIO-9118 are inclusively referred to as the cRIO-911x.
Safety Guidelines
Caution
Product misuse can result in a hazard. You can compromise the safety protection
built into the product if the product is damaged in any way. If the product is
damaged, return it to NI for repair.
3
Do not operate the chassis in a manner not specified in this document.
4
1
3. C Series I/O Module
4. Four-Slot Reconfigurable Embedded Chassis
(cRIO-9111/9113)
3
Advertisement
Table of Contents

Related Manuals for National Instruments NI cRIO-9111


Summary of Contents for National Instruments NI cRIO-9111
- Page 1 4. Four-Slot Reconfigurable Embedded Chassis (cRIO-9112/9114/9116/9118) (cRIO-9111/9113) This document describes how to install an NI cRIO-9111, cRIO-9112, cRIO-9113, cRIO-9114, cRIO-9116, or cRIO-9118. In this document the NI cRIO-9111, cRIO-9112, cRIO-9113, cRIO-9114, cRIO-9116, and cRIO-9118 are inclusively referred to as the cRIO-911x.
-
Page 2: Safety Guidelines For Hazardous Locations
This product was tested and complies with the regulatory requirements and limits for electromagnetic compatibility (EMC) stated in the product specifications. These requirements and limits provide reasonable protection against harmful interference when the product is operated in the intended operational electromagnetic environment. 2 | ni.com | NI cRIO-9111/9112/9113/9114/9116/9118... - Page 3 Documentation (available on ni.com/manuals) – cRIO controller documentation—learn how to connect the controller to a network and configure the controller. – C Series modules documentation—learn about module specifications and how to use the modules. NI cRIO-9111/9112/9113/9114/9116/9118 | © National Instruments | 3...
- Page 4 Installing the Controller on the Chassis Complete the following steps to install the controller on the chassis. Make sure that no power is connected to the controller or the chassis. Align the controller with the chassis. 4 | ni.com | NI cRIO-9111/9112/9113/9114/9116/9118...
- Page 5 Use an enclosure for harsh, dirty, or wet environments. Caution If the ambient temperature is 56 °C to 70 °C, you must mount the chassis on a thermally conductive material. For information about how mounting NI cRIO-9111/9112/9113/9114/9116/9118 | © National Instruments | 5...
- Page 6 93.1 mm 44.1 mm (3.66 in.) 23.7 mm (1.74 in.) (0.94 in.) 49.2 mm 25 mm (1.94 in.) (0.98 in.) 179.6 mm (7.07 in.) 63.1 mm (2.49 in.) 4.1 mm (0.16 in.) 1. M4 Thread 6 | ni.com | NI cRIO-9111/9112/9113/9114/9116/9118...
- Page 7 19.0 mm 25.4 mm (1.0 in.) (2.75 in.) (0.75 in.) 36.4 mm (1.43 in.) 88.1 mm (3.47 in.) 51.7 mm (2.04 in.) 4.1 mm Cooling Outline 25.4 mm (1.0 in.) (0.16 in.) NI cRIO-9111/9112/9113/9114/9116/9118 | © National Instruments | 7...
- Page 8 Bolt or screw the chassis to the panel using two M4 or number 10 panhead screws. NI does not provide the screws with the chassis. Figure 7. Mounting a Four-Slot Chassis on a Panel 8 | ni.com | NI cRIO-9111/9112/9113/9114/9116/9118...
-
Page 9: Mounting The Chassis On A Din Rail
Fasten the DIN rail clip to the chassis using a number 2 Phillips screwdriver and two M4 × 22 screws. The screws are included in the DIN rail mount kit. Figure 9. Fastening the DIN Rail Clip to a Four-Slot Chassis NI cRIO-9111/9112/9113/9114/9116/9118 | © National Instruments | 9... - Page 10 3. DIN Rail Spring Press down firmly on the chassis to compress the spring until the clip locks in place on the DIN rail. Caution Remove the I/O modules before removing the chassis from the DIN rail. 10 | ni.com | NI cRIO-9111/9112/9113/9114/9116/9118...
- Page 11 I/O modules. Align the I/O module with an I/O module slot in the chassis. The module slots are labeled 1 to 8, left to right. NI cRIO-9111/9112/9113/9114/9116/9118 | © National Instruments | 11...
- Page 12 Squeeze the latches on both sides of the module and pull the module out of the chassis. Connecting the Chassis to Earth Ground You must connect the panhead screw at the end of the chassis to ground using shielded cables. 12 | ni.com | NI cRIO-9111/9112/9113/9114/9116/9118...
-
Page 13: Where To Go From Here
These reset options determine how the chassis behaves when the controller is reset in various conditions. Use the RIO Device Setup utility to select reset options. Access the RIO Device Setup utility by selecting Start»All Programs» National Instruments»NI-RIO»RIO Device Setup. - Page 14 Timebases (40, 80, 120, 160, or 200 MHz) Accuracy ±100 ppm (max) Frequency-dependent jitter (peak-to-peak, max) 40 MHz 250 ps 80 MHz 422 ps 120 MHz 422 ps 160 MHz 402 ps 200 MHz 402 ps 14 | ni.com | NI cRIO-9111/9112/9113/9114/9116/9118...
-
Page 15: Power Requirements
I/O modules you are using. Keep in mind that the resulting total power consumption is a maximum value and that the CompactRIO system may require less power in your application. NI cRIO-9111/9112/9113/9114/9116/9118 | © National Instruments | 15... -
Page 16: Physical Characteristics
, 10 Hz to 500 Hz Sinusoidal (IEC 60068-2-6) 5 g, 10 Hz to 500 Hz Operating shock (IEC 60068-2-27) 30 g, 11 ms half sine; 50 g, 3 ms half sine; 18 shocks at 6 orientations 16 | ni.com | NI cRIO-9111/9112/9113/9114/9116/9118... -
Page 17: Safety And Hazardous Locations Standards
ICES-001: Class A emissions Note For the standards applied to assess the EMC of this product, refer to the Online Product Certification section. Note For EMC compliance, operate this product according to the documentation. NI cRIO-9111/9112/9113/9114/9116/9118 | © National Instruments | 17... -
Page 18: Environmental Management
The NI website is your complete resource for technical support. At ni.com/support, you have access to everything from troubleshooting and application development self-help resources to email and phone assistance from NI Application Engineers. Visit ni.com/services for NI Factory Installation Services, repairs, extended warranty, and other services. 18 | ni.com | NI cRIO-9111/9112/9113/9114/9116/9118... - Page 19 United States, visit the Worldwide Offices section of ni.com/ niglobal to access the branch office websites, which provide up-to-date contact information, support phone numbers, email addresses, and current events. NI cRIO-9111/9112/9113/9114/9116/9118 | © National Instruments | 19...
- Page 20 CONTAINED HEREIN AND SHALL NOT BE LIABLE FOR ANY ERRORS. U.S. Government Customers: The data contained in this manual was developed at private expense and is subject to the applicable limited rights and restricted data rights as set forth in FAR 52.227-14, DFAR 252.227-7014, and DFAR 252.227-7015. © 2009—2016 National Instruments. All rights reserved. 375079E-01 Apr16...
Need help?
Do you have a question about the NI cRIO-9111 and is the answer not in the manual?
Questions and answers