Advertisement
Quick Links
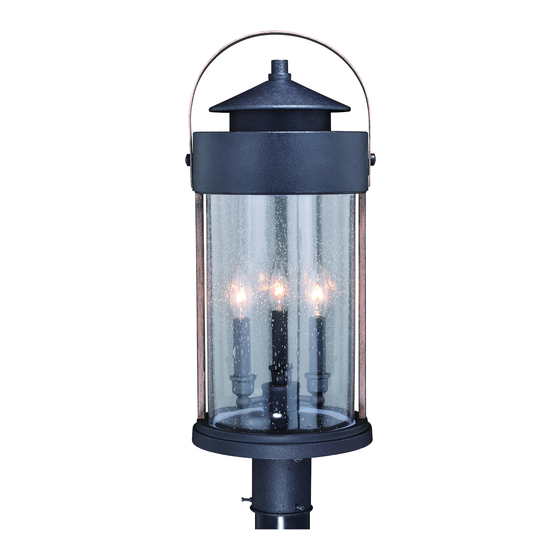
ASSEMBLY AND INSTALLATION
T0449
WARNING:
N
O
T
E
: S
. 1
B
e
o f
e r
n i
s
2. READ AND SAVE THESE INSTRUCTIONS.
Hardware Package (inculded):
IMPORTANT:
The sensor has an excellent photocell
function to enable the light to turn on
at dusk and off at dawn automatically.
Installation Steps
Turn off the power at fuse or circuit box.
1. Unscrew the roundhead screws and
flathead screws to remove the handle from
the cover assembly and to remove the
cover assembly from the fixture body.
2. Place the socket tubes onto the sockets
to cover the sockets completly.
3. Install bulbs (not included). See relamping
label at socket area or packaging for
maximum allowed wattage.
4. Restore the handle and cover assembly
to the fixture body by the roundhead screws
and flathead screws.
5. Unscrew the fitter screws (A) to remove the
fixture body away from the fitter.
6. Pull out the wires and grounding wire from the post.
Make wire connections using the wire connectors (B):
---The black wire from the fixture to the black
wire from the post.
---The white wire from the fixture to the white wire
from the post.
---The grounding wire from the fixture to the
grounding wire from the post.
Carefully put the wires back into the post.
Washer (G)
INSTRUCTIONS
TO AVOID RISK OF ELECTRICAL SHOCK, BE SURE TO SHUT OFF
POWER BEFORE INSTALLING OR SERVICING THIS FIXTURE.
a t
l l
n i
, g
c
o
n
s
u
t l
o l
c
l a
Bulb Type B MAX 60W
(not included)
Rubber Pad (H)
End Cap (I)
e
e l
c
r t
c i
l a
c
o
d
e
s
f
r o
w
Socket Tube
r i
n i
g
a
n
d
g
o r
u
n
d
n i
g
e r
Handle
Fitter Screw (A)
181017
q
i u
e r
m
e
t n
. s
Roundhead Screw
Flathead Screw
Cover Assembly
Fixture body
Wire Connector (B)
Grounding Wire
Post
Advertisement

Related Manuals for Vaxcel T0449


Summary of Contents for Vaxcel T0449
- Page 1 Washer (G) Rubber Pad (H) End Cap (I) ASSEMBLY AND INSTALLATION INSTRUCTIONS T0449 WARNING: TO AVOID RISK OF ELECTRICAL SHOCK, BE SURE TO SHUT OFF POWER BEFORE INSTALLING OR SERVICING THIS FIXTURE. 2. READ AND SAVE THESE INSTRUCTIONS. Hardware Package (inculded):...
- Page 2 7. Place the fitter on the top of the post, and then secure it with fitter screws (A). CAUTION: With silicone caulking compound, caulk completely around where the fitter meets with the post surface to prevent water from seeping into the post. Turn on the power at fuse or circuit box.