
Related Manuals for ITRON OpenWay Riva 500G ERT


Summary of Contents for ITRON OpenWay Riva 500G ERT
- Page 1 OpenWay® Riva 500G ERT® Module Installation Guide, Direct Mount TDC-1671-005 INSTALLATION GUIDE...
- Page 2 All other product names and logos in this documentation are used for identification purposes only and may be trademarks or registered trademarks of their respective companies. For more information about Itron or Itron products, go to www.itron.com. If you have questions or comments about a software or hardware product, contact Itron Technical Support Services. Contact Email: support@itron.com...
-
Page 3: Table Of Contents
Mobile High Power Mode Mobile and Handheld Mode (Optional) Hard to Read Mode Gas Day Take High Flow Event/Alarm Local Auditing Low Battery Event/Alarm OpenWay Riva 500G and Itron Security Manager Functional Specifications Operational Specifications Device Firmware Functionality 25 July 2019 TDC-1671-005... - Page 4 Field Deployment Manager (FDM) Mercury X-Blank options Check Endpoint functions Field Collection System (FCS) (Mobile Mode only) OpenWay Operation Center (OWOC) Itron Enterprise Edition (IEE) Meter Data Management Specific Meter Manufacturer Installation Elster American Installation Installation Overview Mechanical Installation Commercial Module Mechanical Installation...
- Page 5 500G ERT® Module Installation Guide, Direct Mount Table of Contents Residential Module Mechanical Installation Commercial Module Mechanical Installation Programming and Requirements notes Sensus Meter Installation Installation Overview Residential Meter Mechanical Installation Commercial Meter Mechanical Installation Programming and Requirements Notes 25 July 2019 TDC-1671-005...
-
Page 6: Important Safety And Compliance Information
I mportant Safety and Compliance Information This section provides important information for your safety and product compliance. U.S. and Canadian Patent Numbers U.S. Patent Numbers ■ 4,614,945 ■ 4,753,169 ■ 4,768,903 ■ 4,799,059 ■ 4,867,700 Canadian Patent Numbers ■ 1,254,949 ■... -
Page 7: Modifications And Repairs
To ensure system performance, this device and antenna shall not be changed or modified without the express approval of Itron. Per FCC rules, unapproved modifications or operation bey- ond or in conflict with these instructions for use could void the user's authority to operate the equipment. -
Page 8: Rf Exposure (Fcc/Ised)
Itron. Any unauthorized modification will void the user's authority to operate the equipment. In the event of malfunction, all repairs should be performed by Itron. It is the responsibility of users requiring service to report the need for service to Itron. -
Page 9: Equipment Repairs
Warning! Only authorized Itron personnel should attempt repairs on Itron equipment. Attempts to do so by others might void any maintenance contract with your company. Unauthorized service personnel might also be subject to shock hazard on some Itron equipment if removal of protective covers is attempted. -
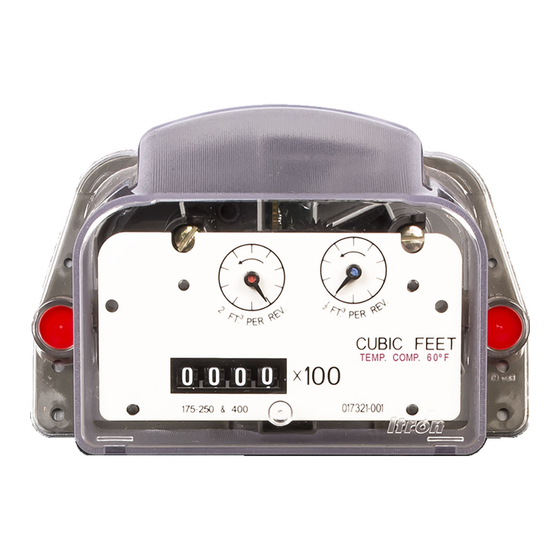
Page 10: About The Openway® Riva 500G Ert® Module
Itron direct mount 500G ERT modules are radio-frequency gas modules (RF) featuring IPv6 open standards. The 500G ERT modules are designed to be read under Itron’s multi-purpose OpenWay Riva Network Mode or by legacy ChoiceConnect handheld, mobile and fixed network readers. -
Page 11: (Optional) Hard To Read Mode
500G ERT® Module Installation Guide, Direct Mount Chapter 2 About the OpenWay Riva 500G ERT Module (Optional) Hard to Read Mode The 500G ERT module transmits a high-powered RF message every 30 seconds. Output power in this mode is 250 milliwatts or +24dBm. In Hard to Read Mode, the expected battery life decreases to 15 years in this mode. -
Page 12: Low Battery Event/Alarm
OpenWay Riva 500G and Itron Security Manager The OpenWay Riva 500G ERT module is a component of Itron's OpenWay Riva system. The OpenWay Riva system security, provided by Itron Security Manager (ISM), applies to the RF communications between the collection device and the ERT module. -
Page 13: Functional Specifications
500G ERT® Module Installation Guide, Direct Mount Chapter 2 About the OpenWay Riva 500G ERT Module Important! Modules ordered pre-programmed with security injected and specified as Zero Touch Deployment require that the installer rotates the wriggler five (5) times to activate the module to join the network, if the module is installed in a location with little or no gas flow. -
Page 14: Operational Specifications
500G ERT® Module Installation Guide, Direct Mount Chapter 2 About the OpenWay Riva 500G ERT Module Functional specifications Description Product identification Numeric and bar coded module type and serial number Construction materials Gray polycarbonate housing and back plate with encapsulated electronics... -
Page 15: Related Documents
500G ERT® Module Installation Guide, Direct Mount Chapter 2 About the OpenWay Riva 500G ERT Module Firmware Func- Firmware part Global soft- FDM Check Over-the-air tionality number ware release Endpoint firm- firmware part (GSR) version ware version number ■ Direct Mount: 2.2.6... -
Page 16: Installation Requirements
500G ERT® Module Installation Guide, Direct Mount Chapter 2 About the OpenWay Riva 500G ERT Module Document title Document part number OpenWay Riva 500G Gas ERT Module Specification Sheet 101510SP-0X Field Deployment Manager Tools Application Guide TDC-1713-XXX Field Deployment Manager Tools Configuration Guide... - Page 17 500G ERT® Module Installation Guide, Direct Mount Chapter 2 About the OpenWay Riva 500G ERT Module Replacement screws Meter To mount the Itron part To mount the Itron part 500G ERT number index on the number module on 500G ERT the meter:...
- Page 18 500G ERT® Module Installation Guide, Direct Mount Chapter 2 About the OpenWay Riva 500G ERT Module Commercial meter To mount the Itron part To mount the Itron part 500G commercial number index (and index number ERT on the assembly, if meter:...
-
Page 19: Programming
Standard Configuration The OpenWay Riva 500G ERT module is capable of configurations that reduce battery life. Standard battery life is based on the following configuration: ■... -
Page 20: Programming The Direct Mount Module
500G ERT® Module Installation Guide, Direct Mount Chapter 3 OpenWay Riva 500G ERT Module Programming ■ Five firmware downloads over the life of the ERT module ■ Network management and security overhead set to default timing ■ RF at capacity (2,000 maximum per cell) ■... - Page 21 500G ERT® Module Installation Guide, Direct Mount Chapter 3 OpenWay Riva 500G ERT Module Programming 25 July 2019 TDC-1671-005...
-
Page 22: Mercury X-Blank Options
500G ERT® Module Installation Guide, Direct Mount Chapter 3 OpenWay Riva 500G ERT Module Programming Programming example Endpoint programmed for 6 dial, 1000 cubic feet CCF. 1. Enter the initial index read. For this example, the initial read is 123456 where 6 = 600 cubic feet. -
Page 23: Check Endpoint Functions
FDM business unit. Note: Itron recommends that users only enable the configurations used by your business unit. Having only one meter configuration option enabled (with the endpoint variable being checked in the FDM business unit) eliminates the need to enter the number of dials. -
Page 24: Specific Meter Manufacturer Installation
500G ERT® Module Installation Guide, Direct Mount Chapter 4 Specific Meter Manufacturer Installation S pecific Meter Manufacturer Installation This chapter provides 500G ERT module installation instructions for the compatible meter types. See each section for a listing of those meters. Important! Modules ordered pre-programmed with security injected and specified as Zero Touch Deployment require that the installer rotate the wriggler five (5) times to activate the module to join the network if installing in a location with little or no gas flow. - Page 25 500G ERT® Module Installation Guide, Direct Mount Chapter 4 Specific Meter Manufacturer Installation Meter model Meter notes Itron part Gas module notes number ERG- 7000-001 W75AL Aluminum case AC-175 Aluminum case AL-175 Aluminum case ALC-175 Aluminum case AT-175 Aluminum case AT-210 Aluminum case...
- Page 26 500G ERT® Module Installation Guide, Direct Mount Chapter 4 Specific Meter Manufacturer Installation Meter model Meter notes Itron part Gas module notes number AR-250 Aluminum case ERG- 7000-001 AT-250 Aluminum case AL-310 Aluminum case AL-350 Aluminum case AL-425 Aluminum case AC-630 Aluminum case...
-
Page 27: Installation Overview
500G ERT® Module Installation Guide, Direct Mount Chapter 4 Specific Meter Manufacturer Installation Meter model Meter notes Itron part Gas module notes number Use Elster ERG- American kit 7000-001 numbers 93179K002, 003, 004, or 005 to attach a residential 500G ERT module. -
Page 28: Mechanical Installation
500G ERT® Module Installation Guide, Direct Mount Chapter 4 Specific Meter Manufacturer Installation Mechanical Installation 1. Remove the four index cover screws and the index cover from the Elster American residential meter. Alternate screw removal following the numbered pattern in the photo. 2. - Page 29 500G ERT® Module Installation Guide, Direct Mount Chapter 4 Specific Meter Manufacturer Installation 6. Separate the module housing from the cover by pulling the cover straight out from the housing. 7. Set the module clear cover aside where it will not be damaged or fill with rain, dirt, or snow. You will use the cover later in this installation procedure.
- Page 30 500G ERT® Module Installation Guide, Direct Mount Chapter 4 Specific Meter Manufacturer Installation 8. Using the original index mounting screw or a replacement screw, if necessary, place one 8 - 32 3/16-inch screw into one of the index's mounting screw holes. 9.
- Page 31 The pin on the 500G ERT module wrig- gler may be installed inside or outside the meter drive slot. For easy assembly, Itron recommends installing the pin on the module's wriggler outside the meter drive slot.
- Page 32 500G ERT® Module Installation Guide, Direct Mount Chapter 4 Specific Meter Manufacturer Installation 17. Carefully align the 500G ERT module's four screw holes with the holes on the meter. Attach the assembly using the original mounting screws if they are the correct size and are not corroded (1/4 - 20 x 5/8-inch screws.) If you discarded the original screws, use the correct replacement screws.
-
Page 33: Commercial Module Mechanical Installation
Commercial Module Mechanical Installation This section provides instructions to install the commercial 500G ERT Module Elster Amer- ican/Itron module on Elster American commercial meters. Warning: Handle the commercial 500G ERT module carefully so the metal passive radiator antenna is not damaged. - Page 34 500G ERT® Module Installation Guide, Direct Mount Chapter 4 Specific Meter Manufacturer Installation Note: It may not be necessary to dismantle your commercial index assembly (index and cover). These instructions do not include index/cover assembly for those applications. Some diaphragm commercial meters do not require an index assembly mounting plate. Indexes can be mounted directly to the module.
- Page 35 500G ERT® Module Installation Guide, Direct Mount Chapter 4 Specific Meter Manufacturer Installation 4. Remove the mounting plate screws and separate the mounting plate from the meter. Place the mount- ing plate where it will not be damaged. You may use it later in this installation.
- Page 36 500G ERT® Module Installation Guide, Direct Mount Chapter 4 Specific Meter Manufacturer Installation 8. Verify that the bottom of the 500G ERT module and the top of the meter meet. The 500G ERT mod- ule housing should rest on top of the meter without gaps. Warning: Do not press down on the 500G ERT module if a gap exists between the 500G ERT module and the meter.
-
Page 37: Programming And Requirements Notes
500G ERT® Module Installation Guide, Direct Mount Chapter 4 Specific Meter Manufacturer Installation 13. Place the index and cover assembly on the index mounting plate. (The index must face the direction it faced before removal.) Attach the index/cover assembly on the mounting plate using original 1/2-inch index screws. -
Page 38: Ge Oil And Gas (Dresser) Installation
500G ERT® Module Installation Guide, Direct Mount Chapter 4 Specific Meter Manufacturer Installation Commercial Module Programming Notes Take note of the index drive rate shown on the index. The 500G ERT module is programmed based on the drive rate. Elster American commercial meter index drive rates may be 5-, 10- or 100 cubic feet. - Page 39 500G ERT® Module Installation Guide, Direct Mount Chapter 4 Specific Meter Manufacturer Installation Meter model Meter notes Module type Itron part ERT mod- number ule notes To attach an 500G ERG- Elster Amer- 7000-001 ican residential module, install GE Dresser's Series B3...
- Page 40 500G ERT® Module Installation Guide, Direct Mount Chapter 4 Specific Meter Manufacturer Installation Meter model Meter notes Module type Itron part ERT mod- number ule notes Series A (LMMA) To attach an 1.5M-5M TC Elster American residential mod- (No pulser, no instrument drive)
-
Page 41: Installation Overview
500G ERT® Module Installation Guide, Direct Mount Chapter 4 Specific Meter Manufacturer Installation Installation Overview 500G ERT module configuration with the meter is dependent on your system application. See the GE Oil and Gas meter configuration information. Installing the 500G direct mount ERT module to a GE Oil and Gas product involves four tasks. 1. -
Page 42: Residential Module Installation
500G ERT® Module Installation Guide, Direct Mount Chapter 4 Specific Meter Manufacturer Installation GE Dresser LMMA TC GE Dresser 8C15 Connecting the commercial module to the meter may require the following materials: ■ One index mounting plate (if applicable) ■ Gasket and drive cover kit (if applicable) ■... -
Page 43: Commercial Module Mechanical Installation
500G ERT® Module Installation Guide, Direct Mount Chapter 4 Specific Meter Manufacturer Installation 1. The 500G ERT module must be mounted on the adapter plate in an upright position. Align the module wriggler with the opening between the tabs of the adapter's drive dog. ■... - Page 44 500G ERT® Module Installation Guide, Direct Mount Chapter 4 Specific Meter Manufacturer Installation Warning! Handle the commercial ERT module carefully so the metal passive radiator antenna is not damaged. 1. Locate the INSTRUMENT FACE stamp (1) and pos- ition the meter with the drive dog (2) centered (as shown).
-
Page 45: Programming And Requirements Notes
500G ERT® Module Installation Guide, Direct Mount Chapter 4 Specific Meter Manufacturer Installation 5. Install the four ERT module mounting screws (supplied with the commercial ERT). Tighten mounting screws in an alternating, diagonal pattern. Tighten each ERT module mounting screw evenly. ■... -
Page 46: Itron Meter Installation
Itron Meter Installation This section describes installing the 500G ERT module on Itron residential and commercial meters. Itron meters are also known as Actaris, Schlumberger, or Sprague meters. For these instructions, all meters will be referred to as Itron meters. - Page 47 500G ERT® Module Installation Guide, Direct Mount Chapter 4 Specific Meter Manufacturer Installation Residential Itron 500G ERT module Commercial Elster American/Itron 500G ERT module 25 July 2019 TDC-1671-005...
- Page 48 500G ERT® Module Installation Guide, Direct Mount Chapter 4 Specific Meter Manufacturer Installation Meter model Meter notes Module Itron ERT module notes type module part number 3-hole index cover 500G ERG- 2-hole index 7000- cover 175 combination 3-hole index cover integrated reg-...
- Page 49 500G ERT® Module Installation Guide, Direct Mount Chapter 4 Specific Meter Manufacturer Installation Meter model Meter notes Module Itron ERT module notes type module part number Slant-face I-250 250WC Integrated reg- ulator 305 combination Integrated reg- ulator Slant-face meter Slant-face meter...
- Page 50 Slant-face 500G ERG- A longer mounting 7000- screw is required when retrofitting to METRIS meters. Longer mounting screw is Itron p/n 010626-002. METRIS 250 Slant-face meter, back inlet and outlet METRIS RM METRIS MB Slant-face meter, back inlet and...
-
Page 51: Installation Overview
ERG- regulator on back 7000- of meter Installation Overview Installing the direct mount 500G ERT module on an Itron meter involves four tasks. 1. Removing the index cover and preparing the meter for installation. ■ Preparing the meter requires: ■... - Page 52 Replacement screws (for replacement screw information, see Installation Require- ments on page 16) Note: 500G ERT module installation on a flat-faced Sprague meter requires the Itron adapter plate kit (CFG-0015-001). The adapter plate kit includes: ■ the adapter shim plate (1) ■...
- Page 53 Chapter 4 Specific Meter Manufacturer Installation Optional commercial module installation materials Itron part number (available from Itron) Commercial index Various Itron adapter kit materials (part number 80005901- Itron part number (kit com- 001) ponent) Adapter plate 550418-001 500G ERT module mounting...
-
Page 54: Itron Residential Meter Mechanical Installation
500G ERT module configuration with the meter is dependent on your system application. Itron Residential Meter Mechanical Installation This section describes installation on Itron residential meters. 1. Remove the index cover screws and the index cover from the Itron meter. Examine the mounting screws. - Page 55 500G ERT® Module Installation Guide, Direct Mount Chapter 4 Specific Meter Manufacturer Installation 3. Remove the old gasket, gasket residue, and dirt from the meter (if applicable). The meter face must be free of gasket residue or dirt before you install the 500G ERT module.
- Page 56 Verify the cover is installed correctly. The 500G ERT module label should be clearly visible and easily read. 10. After you program the 500G ERT module, attach it to the Itron meter. For programming information, Programming the Direct Mount Module on page 20.
- Page 57 500G ERT® Module Installation Guide, Direct Mount Chapter 4 Specific Meter Manufacturer Installation Warning: Failure to correctly align the meter drive post and 500G ERT module wriggler can cause binding and lead to poor registration or meter failure. If there is a gap between the 500G ERT module gasket and the meter, it may be that the wriggler of the 500G ERT module is dead-headed against the meter drive dog as shown in the following illustration.
- Page 58 500G ERT® Module Installation Guide, Direct Mount Chapter 4 Specific Meter Manufacturer Installation 14. Slightly raise the left side of the 500G ERT mod- ule (the module will rotate on the right screw) until the left 500G ERT module mounting hole is approx- imately 1/4-inch above the left meter mounting hole.
- Page 59 500G Mechanical Installation Using the Itron Adapter Plate Kit 1. 500G ERT module installation on a flat-faced Sprague meter requires the Itron Adapter Plate Kit (CFG-0015-001). Warning: The adapter plate must fit flush against the meter face. Some older Sprague meters are not compatible with the adapter plate.
- Page 60 500G ERT® Module Installation Guide, Direct Mount Chapter 4 Specific Meter Manufacturer Installation 3. Attach the adapter plate to the meter with the gasket against the meter face. Secure the plate to the meter with the two adapter plate mounting screws. Tighten the screws in an alternating pattern. a.
- Page 61 500G ERT® Module Installation Guide, Direct Mount Chapter 4 Specific Meter Manufacturer Installation 3. Remove the old gasket, gasket residue, and dirt from the meter (if applicable). The meter face must be free of gasket residue and dirt before you install the 500G ERT module.
- Page 62 Tighten the index mounting screws. 8. Program the Itron 175RM meter before you install the assembly to the meter. 9. Slide the 500G ERT module cover over the index and housing. Verify that the cover is installed cor- rectly.
-
Page 63: Itron Commercial Meter Mechanical Installation
Itron Commercial Meter Mechanical Installation This section provides instructions for installing the commercial module on the Itron, Sprague, Actaris, or Schlumberger 675A, 800A, and 1000A commercial meter. The installation requires an Itron adapter kit available from Itron. - Page 64 Caution: If the RTV silicone gasket is damaged during removal or shows signs of degradation, you must replace it with a new index cover from Itron. 6. Set the index cover aside. The index will be reinstalled later in the installation.
- Page 65 500G ERT® Module Installation Guide, Direct Mount Chapter 4 Specific Meter Manufacturer Installation Completing the installation Install the dial index on the index bracket 1. If the original dial index mounting screws cannot be reused, remove them from the index mounting bracket and recycle or discard.
- Page 66 9. Tighten the index mounting screws in an alternating pattern. Torque the index mounting screws to 3 to 6 inch-pounds. Note: You must program the commercial module before installation on the Itron commercial meter. For programming information, see Programming the Direct Mount Module on page 20.
- Page 67 INLET lettering on the meter. 14. Slowly lower the module onto the Itron commercial meter. Carefully align the meter drive dog and commercial 500G ERT module wriggler. The module housing should rest on the top of the meter without gaps.
- Page 68 18. Place the Itron adapter plate on the commercial 500G ERT module with the two small screw holes in the adapter plate to the back of the meter. The front of the adapter plate must align with the front of the meter (1).
- Page 69 22. Insert tamper seals in the tamper seal cups on the index cover and press into place with an 11/32 nut driver or similar blunt tool. This completes installation of the commercial 500G ERT module on the Itron meter. 25 July 2019 TDC-1671-005...
-
Page 70: Programming And Requirements Notes
The ERT module is programmed based on the drive rate. Residential Meter Drive Rates Itron residential meter index drive rates are typically 2-cubic feet. Sprague 175-RM meter index drive rates are typically 2-cubic feet. Commercial Meter Drive Rates Take note of the index drive rate shown on the index. - Page 71 Chapter 4 Specific Meter Manufacturer Installation 1. Typically, brass meter tags have mounting (screw/rivet) holes on each end of the tag. Secure the brass meter tag using one of the three Itron-approved methods. Methods 1 and 2 2. Carefully remove the brass meter tag from the meter index cover. Try not to damage the meter tag mounting holes.
-
Page 72: National (Lancaster) Meter Installation
500G ERT® Module Installation Guide, Direct Mount Chapter 4 Specific Meter Manufacturer Installation 4. Attach the meter tag to the meter mounting hole. Note: If the brass meter tag will be secured to the meter using the meter index cover mounting hole, it must be attached during the installation procedure. -
Page 73: Installation Overview
500G ERT® Module Installation Guide, Direct Mount Chapter 4 Specific Meter Manufacturer Installation Meter model Meter Module Itron Gas module notes notes type module part number National 500G ERG- Actaris/Schlumberger/Sprague meter 7000- direct read (odometer) indexes indexes cannot be used. with... -
Page 74: Mechanical Installation
500G ERT® Module Installation Guide, Direct Mount Chapter 4 Specific Meter Manufacturer Installation ■ 11/32-inch nut driver or other blunt tool ■ Replacement screws (for replacement screw information, see Installation Require- ments on page 16. 500G module configuration with the meter is dependent on your system application. Mechanical Installation This section describes the mechanical installation of the National meter and the 500G ERT mod- ule. - Page 75 500G ERT® Module Installation Guide, Direct Mount Chapter 4 Specific Meter Manufacturer Installation 7. Separate the module housing from the cover by pulling the cover straight out from the housing. 8. Set the ERT cover aside where it will not be damaged or fill with rain, dirt, or snow. You will use the cover later in this installation procedure.
- Page 76 500G ERT® Module Installation Guide, Direct Mount Chapter 4 Specific Meter Manufacturer Installation Some National meter indexes have index legs to mount the index on the meter or ERT. Some indexes have both legs and index mounting holes and some have just mounting holes. Mounting methods are dependent on the index.
- Page 77 500G ERT® Module Installation Guide, Direct Mount Chapter 4 Specific Meter Manufacturer Installation 13. Carefully slide the index drive post into the ERT shaft slot. Verify positive engagement of the index wriggler to the ERT shaft. (The following illustrations show index to shaft placement with positive engage- ment.) Warning: Verify that the index drive slot engages with the ERT module shaft.
- Page 78 500G ERT® Module Installation Guide, Direct Mount Chapter 4 Specific Meter Manufacturer Installation 17. Align the black wriggler (1) so one of its four drive fins lines up with the meter's drive dog (2). 18. Carefully place the ERT module on the meter. Warning: Failure to correctly align the meter drive post and ERT module wriggler can cause binding and lead to poor registration or meter failure.
- Page 79 500G ERT® Module Installation Guide, Direct Mount Chapter 4 Specific Meter Manufacturer Installation 22. Rotate the ERT up to align the left mounting holes. Raising and lowering the ERT module on the meter drive post facilitates the proper positioning and engagement of ERT module wriggler with the meter drive post.
-
Page 80: Programming And Requirements Notes
500G ERT® Module Installation Guide, Direct Mount Chapter 4 Specific Meter Manufacturer Installation Programming and Requirements Notes Take note of the index drive rate shown on a top right dial on the index. The endpoint is pro- grammed based on the drive rate. National/Lancaster meter index drive rates are typically 2- cubic feet. -
Page 81: Installation Overview
500G ERT® Module Installation Guide, Direct Mount Chapter 4 Specific Meter Manufacturer Installation Meter model Meter notes Module type Itron part num- ERT module notes Must purchase 500G ERG-7000-001 adapter kit from Romet No pulse/no instru- ment drive RM Series 500G... -
Page 82: Residential Module Mechanical Installation
Socket head cap screws (2) #6-32 x 1/2 lg d. O-Ring e. Drive dog assembly f. Romet STD CTR g. Itron 100G residential ERT module h. Lock washers (4) i. Lock washers (6) j. Adapter plate k. Flat head screws (3) #4-40 x 5/16 3. -
Page 83: Commercial Module Mechanical Installation
Socket head cap screws (2) #6-32 x 1/2 lg d. O-Ring e. Drive dog assembly f. Romet STD CTR g. Itron 100G residential ERT module h. Lock washers (4) i. Lock washers (6) j. Adapter plate k. Flat head screws (3) #4-40 x 5/16... -
Page 84: Sensus Meter Installation
500G ERT® Module Installation Guide, Direct Mount Chapter 4 Specific Meter Manufacturer Installation 3. Mount the adapter plate (10) over the meter drive dog and to the Romet rotary meter using the lock washers (8, 9) and the socket head cap screws (2, 3). 4. - Page 85 500G ERT® Module Installation Guide, Direct Mount Chapter 4 Specific Meter Manufacturer Installation Sensus 11-tooth Sensus 16-tooth Sensus 18-tooth The listed Sensus meters are compatible with the Gas Modules. 25 July 2019 TDC-1671-005...
- Page 86 500G ERT® Module Installation Guide, Direct Mount Chapter 4 Specific Meter Manufacturer Installation Meter model Meter notes Itron part num- Gas module notes S-110 11-tooth ERG-7000-002 24 and 30-tooth gears are not compatible 25 July 2019 TDC-1671-005...
- Page 87 500G ERT® Module Installation Guide, Direct Mount Chapter 4 Specific Meter Manufacturer Installation Meter model Meter notes Itron part num- Gas module notes T-110 S-120 T-120 R-175 R-200 RT-200 S-200 RC-225 RT-225 RC-230 RT-230 Cubix250 MR-7 (Cubix250 Metric) R-275 RT-275 S-275...
- Page 88 500G ERT® Module Installation Guide, Direct Mount Chapter 4 Specific Meter Manufacturer Installation Meter model Meter notes Itron part num- Gas module notes RCM-230 16-tooth ERG-7000-003 24 and 30-tooth gears are not (RC-230 Metric) compatible MR-8 (R-275 Metric) MR-5 (S275 Metric)
-
Page 89: Installation Overview
500G ERT® Module Installation Guide, Direct Mount Chapter 4 Specific Meter Manufacturer Installation Meter model Meter notes Itron part num- Gas module notes Aluminum ERG-7000-008 Requires Itron mounting screws, box direct part number SCR-0062-001. reading Must purchase separately. (VDR) index 1000 1600... -
Page 90: Residential Meter Mechanical Installation
500G ERT® Module Installation Guide, Direct Mount Chapter 4 Specific Meter Manufacturer Installation 4. Connecting the ERT module to the meter. Connecting the module to the meter may require the following materials: ■ A compatible index ■ Small and medium flat-blade or Phillips screwdrivers ■... - Page 91 500G ERT® Module Installation Guide, Direct Mount Chapter 4 Specific Meter Manufacturer Installation 4. Set the index aside where it will not be damaged or fill with dirt, rain, or snow. You will mount the index on the 500G ERT module later in this procedure. 5.
- Page 92 500G ERT® Module Installation Guide, Direct Mount Chapter 4 Specific Meter Manufacturer Installation 9. After the index drive gear is aligned and inserted into the shaft gear cup, the mounting holes will line 10. Using the original index mounting screw or a replacement screw (if necessary), place one 6 - 32 x 5/8-inch screw into the index right mounting screw hole.
- Page 93 500G ERT® Module Installation Guide, Direct Mount Chapter 4 Specific Meter Manufacturer Installation 15. After the 500G ERT module programming is complete, attach the module assembly to the Sensus meter. For programming information, see Programming the Direct Mount Module on page 20. 16.
- Page 94 500G ERT® Module Installation Guide, Direct Mount Chapter 4 Specific Meter Manufacturer Installation 18. Install the remaining three mounting screws and tighten them as described here and shown in the illus- tration. ■ Insert lower left mounting screw (2) and tighten to snug position.
-
Page 95: Commercial Meter Mechanical Installation
500G ERT® Module Installation Guide, Direct Mount Chapter 4 Specific Meter Manufacturer Installation This completes installation of the 500G ERT module installation on the Sensus meter. Commercial Meter Mechanical Installation This section provides instructions to install the commercial 500G ERT module on a Sensus com- mercial meter. - Page 96 500G ERT® Module Installation Guide, Direct Mount Chapter 4 Specific Meter Manufacturer Installation 1. Remove any tamper seals (or wire seals) from the index cover and remove the index cover mounting screws. You will reinstall it later in these instruc- tions. 2.
- Page 97 Carefully lower the 500G ERT module on the meter so the wrig- gler's bars line up with the meter drive dog. Itron recommends installation with one bar inserted into the meter drive dog's u-shaped gear.
- Page 98 500G ERT® Module Installation Guide, Direct Mount Chapter 4 Specific Meter Manufacturer Installation 8. Install the 500G ERT module mounting screws (SCR-0062-003). Turn each screw 1/4 to 1/2 turn after it contacts the index assembly. 9. Install the index cover. ■ For index covers with flat-surface screw holes, use screws (SCR-0062-002), flat washers (WSH- 0020-005), and cork washers (WSH-0032-001).
- Page 99 Mechanical Installation on a Rockwell Meter with a VDR Index Installing the commercial Sensus on a Rockwell commercial meter with an aluminum box direct reading (VDR) index requires two Itron SCR-0062-001 mounting screws. The mounting screws must be purchased separately.
- Page 100 6. Align the 500G ERT module so the screw holes line up with the meter's top screw holes. Carefully lower the 500G ERT module on the meter so the wriggler's bars line up with the meter drive dog. Itron recommends installation with one bar inserted into the meter drive dog's u-shaped gear.
- Page 101 Attach the 500G ERT module to the meter using two SCR-0062-001 Itron mounting screws. 9. Attach the index cover with the original index cover screws. 10. Insert tamper seals in the tamper seal cups. Push tamper seals into place using an 11/32-inch nut driver or similar blunt tool.
-
Page 102: Programming And Requirements Notes
500G ERT® Module Installation Guide, Direct Mount Chapter 4 Specific Meter Manufacturer Installation Programming and Requirements Notes Caution: You must program the 500G ERT Module before use. For programming information, see Programming the Direct Mount Module on page 20. Sensus Residential 500G ERT module Programming The 500G ERT module is programmed based on the meter's drive rate.
Need help?
Do you have a question about the OpenWay Riva 500G ERT and is the answer not in the manual?
Questions and answers