Bodet Cristalys 14 Installation And Operating Instructions Manual
Hide thumbs
Also See for Cristalys 14:
- Installation and operating instructions manual (55 pages) ,
- Quick start manual (8 pages)
Table of Contents
Advertisement
Available languages
Available languages
Quick Links
INSTRUCTIONS DE MISE EN SERVICE ET D'UTILISATION
INSTALLATION AND OPERATING INSTRUCTIONS
s'assurer à réception que le produit n'a pas été endommagé durant le transport pour réserve au transporteur
Upon receipt, always check the product for damage during shipment. If any is found, you may file a damage
Cristalys 14
B.P. 1
49340 TRÉMENTINES
FRANCE
Tél. : 02 41 71 72 00
Fax : 02 41 71 72 01
www.bodet.fr
claim with the carrier.
Réf.: 605847 Q
1
Advertisement
Table of Contents

Related Manuals for Bodet Cristalys 14


Summary of Contents for Bodet Cristalys 14
- Page 1 Cristalys 14 INSTRUCTIONS DE MISE EN SERVICE ET D’UTILISATION INSTALLATION AND OPERATING INSTRUCTIONS B.P. 1 49340 TRÉMENTINES FRANCE Tél. : 02 41 71 72 00 Fax : 02 41 71 72 01 www.bodet.fr Réf.: 605847 Q s’assurer à réception que le produit n’a pas été endommagé durant le transport pour réserve au transporteur Upon receipt, always check the product for damage during shipment.
-
Page 2: Table Of Contents
Table des matières FRANÇAIS I - VÉRIFICATION INITIALE- Consignes de sécurité 1.1 Déballage de l’horloge 1.2 Sauvegarde des données II-PRÉSENTATION DE L’HORLOGE CRISTALYS III - MISE EN SERVICE - INSTALLATION 3.1 Horloge à piles 3.2 Horloge réceptrice avec alimentation externe 3.3 Connexion à... - Page 3 Table of contents ENGLISH I - INITIAL VERIFICATION 1.1 Unpacking the clock 1.2 Backup II - INTRODUCTION TO THE CRISTALYS CLOCK III - SETTING IN OPERATION - INSTALLATION 3.1 Clock with batteries 3.2 Receiver clock with external power supply 3.3 Link-up to a time distribution network 3.4 Installation IV - TIME SETTING MENU 4.1 Independent quartz clock...
-
Page 4: Français
I - VÉRIFICATION INITIALE- CONSIGNES DE SÉCURITÉ Nous vous remercions d’avoir choisi une horloge BODET. Ce produit a été conçu avec soin pour votre satisfaction d’après les bases qualité ISO9001. Nous vous recommandons, de lire attentivement ce manuel avant de commencer à manipuler l’horloge. -
Page 5: Sauvegarde Des Données
II-PRÉSENTATION DE L’HORLOGE CRISTALYS L’horloge Cristalys 14 est une horloge pour l’intérieur, à piles (type LR14). La durée de vie des piles est supérieure à 3 ans. En option, un support (référence 938907) alimentation basse tension (6 à 24 V AC ou DC) permet de remplacer les piles. -
Page 6: Mise En Service - Installation
III - MISE EN SERVICE - INSTALLATION 3.1 Horloge à piles Mise en place des piles Fig.: 2 Reset SELECT ∞ Vis de verrouillage antivol Fig.: 3 a. Retourner l’horloge sur une table. Pousser en face des 2 flèches le support mural pour declipser et retirer le support mural / cache pile placé... -
Page 7: Installation
Connecter l’horloge en fonction du type de distribution horaire. Le type de distribution devra être paramétré dans le menu technicien (voir page 16). Impulsions minute // ou Reset SELECT 1/2minute // de 12 à 48V, Points de AFNOR ou Irig-B ∞... -
Page 8: Horloge Réceptrice Afnor/Impulsion
Mise à l’heure de l’horloge : 1. a A la mise en place des piles, les 2 points clignotent. Appuyer sur [Sel] pendant 2 secondes : l’heure clignote. b Presser sur [+] jusqu’à l’heure désirée (L’affichage des heures prend en compte le mode 12/24 h, voir page 9). -
Page 9: Menu Configuration
V - MENU CONFIGURATION Ce menu permet le choix de différents modes : 12/24H, Eco, affichage, zone horaire été-hiver et décalage horaire. Pour programmer votre horloge, choisir l’option d’affichage ci-dessous puis aller dans le paragraphe “Fonctions avancées” page 9. Affichage standard de votre horloge. Affichage de l’heure en mode 12 H AM/PM. - Page 10 anglo-saxon des heures AM/PM de 1 h à 12 h.) ou le mode “24 h” (affichage de 0 h à 23 h). Appuyer sur [Sel] pour valider. 3. Menu ”Eco”. Presser sur [+] pour choisir le mode normal “nor” ou le mode économique “Eco”. Ce mode “Eco”...
- Page 11 - Affichage de l’année : Rappel : À n’importe quel moment en maintenant la touche [Sel] enfoncée puis en pressant la touche [+] de façon brève, il est possible de sortir du menu de configuration. 5.a Le menu Mode horaire apparaît. Il vous permet de préciser la zone géographique où est située l’horloge (pour gérer automatiquement le changement d’horaires été/hiver) ou d’indiquer (pour les modèles radio synchronisé...
- Page 12 Zone Central USA “mode_usac” (Chicago). Heure d’hiver vers l’été = second dimanche de mars à 2 h 00, heure locale(*). Heure d’été vers l’hiver = premier dimanche de novembre à 2 h 00, heure locale(*). Zone Montain USA “mode_usam” (Denver). Heure d’hiver vers l’été...
-
Page 13: Principe De Mise À L'heure Pour Les Réceptrices
2) Presser [Sel] : le “Rang” clignote. Le Rang désigne le numéro d’ordre de la semaine dans le mois (de 1 à 5 selon les mois) (le rang “5” indique toujours la dernière semaine). La valeur “F” indique le choix d’une date fixe. 3) Après avoir déterminé... -
Page 14: Horloge Radio Synchronisée Dhf
Si l’horloge est en mode LOC , l’heure affichée prend en comptes les décalages choisis dans le menu horaire (décalage horaire décalage saison). Attention : si une modification de l’heure est faite sur l’horloge mère après la synchronisation, la correction ne se fera que l’heure suivante. 2. -
Page 15: Modèle Récepteur Radio Synchronisé Dcf
série. 6.4 Modèle récepteur radio synchronisé DCF 1. A la première mise sous tension, l’heure est initialisée à 00h00mn00ss du 01/01/2000. La réception radio se fait lors de la mise en service de l’horloge et si l’utilisateur fait une mise à... -
Page 16: Vii- Menu Technicien
VII- MENU TECHNICIEN L’accès au menu technicien s’effectue par l’intermédiaire des deux boutons [SELECT] et [+]. La touche [SELECT] est au-dessus de la touche [+]. Procéder en deux étapes. 1. Appuyer sur le bouton [SELECT], et [+] pour accéder au menu Configuration. Relâcher puis : 2. - Page 17 l’horloge mère. Si l’horloge est en mode LOC, l’heure affichée prend en comptes les décalages choisis dans le menu horaire de l’horloge Cristalys (décalage horaire et décalage saison). DHF : activation de la carte de synchronisation radio HF. nor : mode normal, l’horloge est déjà associée à un émetteur DHF. Appuyer sur [SELECT], vous avez accès au menu synchro DHF dynamique.
-
Page 18: Viii-Caractéristiques Techniques
VIII-CARACTÉRISTIQUES TECHNIQUES L’horloge Cristalys 14 respecte la directive compatibilité électromagnétique 89/336/CEE. Elle est destinée à un environnement résidentiel ou commercial. Elle est conforme aux normes européennes en vigueur. Alimentation : 4 piles type LR14 pour une durée de 3 à 4 ans. -
Page 19: Que Faire Si
IX - QUE FAIRE SI...? ...VÉRIFIER. Que faire si...? … Vérifier. ■ L’horloge affiche . ■ L’horloge détecte le seuil “pile basse”, le pictogramme représentant une pile vide s’affiche jusqu’à l’extinction complète de l’affichage (fin des piles). Remplacer les piles. La remise à... - Page 20 Que faire si...? … Vérifier. ■ La réceptrice sur un réseau ■ Comme il est impossible à l’horloge réceptrice de distinguer ½ minute est décalée de 30s entre deux impulsions 1/2 minute laquelle est le top minute après l’installation. de l’horloge mère, il faut inverser les fils d’entrée pour pouvoir corriger l’heure ■...
-
Page 21: English
TABLE OF CONTENTS I - INITIAL VERIFICATION Thank you for choosing a BODET clock. This product has been carefully designed for your satisfaction based on ISO9001 quality requirements. We advise you to read this manual thoroughly before attempting to manipulate the clock. -
Page 22: Backup
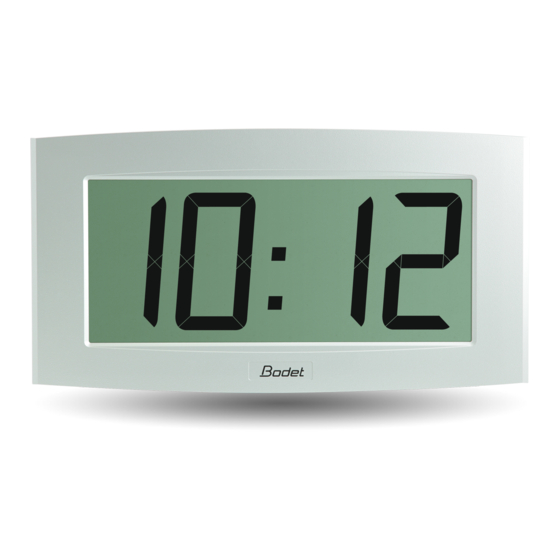
II - INTRODUCTION TO THE CRISTALYS CLOCK The Cristalys 14 clock is a calendar clock for indoor use, with batteries (type LR14). The service life of the batteries is over 3 years. As an option, a bracket (reference 938907) for low voltage power supply (6 to 24V AC or DC) permits to replace the batteries. -
Page 23: Setting In Operation - Installation
III - SETTING IN OPERATION - INSTALLATION 3.1 Clock with batteries Fitting the batteries Diag.: 2 Reset SELECT ∞ Anti-theft locking screw Fig.: 3 a. Turn the clock over onto a table. Unscrew the anti-theft locking screw. Push in front of the 2 arrows on the wall bracket to unclip it. -
Page 24: Installation
distribution network. Connect the time coded line to terminals 1 and 2 on the terminal strip. Time distribution type has to be configured in the technician menu (see page 33). Time synchronisation: Minute //, Reset SELECT ½ minute // from 12 to 48V or Fixing points IRIG-B/AFNOR impuls ∞... -
Page 25: Radio Synchronised Clock
b Press [+] until the required minute is displayed. To synchronise your clock to the nearest second, select the current minute +1 and as the minute pips, validate by pressing [SEL] ; The internal second counter is then reset to zero and starts up. 3. -
Page 26: Configuration Menu
V - CONFIGURATION MENU This menu enables you to select the different modes : 12 /24 hr, Eco, type of display, summer- winter time zone and time difference. To program your Cristalys clock, select the display option below, then go to the “advanced functions”... - Page 27 from 0,00 to 23.00 hrs). Press [SEL] to validate. 3. The Economy menu is displayed : “Eco” or “nor”. Press [+] to choose normal “nor” or economy “Eco” mode. The latter mode switches off the display between 11 pm and 6 am (period not parameterisable), to enable savings of up to 20% on the battery charge..
- Page 28 - the year : Press [SEL] to validate. Reminder : At any time, by holding down [SEL] then pressing [+] quickly, it is possible to go to normal display mode and exit the configuration menu. 5.a The Time mode menu appears. This enables you to specify the geographic zone in which the clock is located (to automatically manage the summer/winter time changeover) or to give (for radio synchronised or AFNOR/Irig-B receiver models) a “time difference”...
- Page 29 Winter to summer time = second Sunday of March at 2am local time. Summer to Winter time = first Sunday of November at 2am local time. Australia Zone “mode_aus” (Sydney). Winter to summer time = first Sunday of October at 2am local time. Summer to Winter time = first Sunday of April at 3am local time.
-
Page 30: Principle Of Time Setting
between 1 and the last day of the chosen month 4) Press [SEL] : the number of the month flashes. Give the start of the winter period. Press [+] to select the month. Then continue as described in points 2 and 3 to set the start of the summer period. 5) Menu only operational for radio and AFNOR/Irig-B in mode LOC models. -
Page 31: Dhf Clock
6.2 DHF clock On leaving the factory, the DHF clock is set in “Initialisation” mode. After inserting the batteries, the clock displays INIT for 5 seconds then 00:00. The synchronisation search is limited to 4 hours. Beyond, the clock stops searching and displays only 2 fixed dots. - Page 32 6.5 Annex for time difference Choose the reference country for the summer/winter time changes, as well as the time difference, according to the city in which you wish to display the local time. CITY Zone Reference zone Time difference/GMT LOS ANGELES USAP United States / Canada MEXICO...
-
Page 33: Vii- Technician Menu
VII- TECHNICIAN MENU Access to the technician menu is via the two push buttons [SELECT] and [+] located on the back of the clock. The [SELECT] button is above the [+] button. Proceed in two stages. 1. Press the [SELECT] button, and while holding it down, press [+] for more than 3 seconds to go initially to Configuration menu : 2. - Page 34 If the clock is in mode COD, the time displayed is the time received from master clock. If the clock is in mode LOC, the time displayed depends on the offset selected in the Time mode menu (Seasonal change and offset change).
-
Page 35: Viii- Technical Features
VIII- TECHNICAL FEATURES The Cristalys 14 clock complies with electromagnetic compatibility directive 89/336/EEC. It is intended for a residential or commercial environment. It complies with the European standards in force. Power supply : 2 x type LR14 batteries to last up to 3-4 years. -
Page 36: What To Do If
IX - WHAT TO DO IF...? ...CHECK. WHAT TO DO IF...? … CHECK. ”, ■ The clock displays ■ The clock detects the “low battery threshold, the pictogram representing an empty battery appears until the display disappears completely (batteries have run out). Replace the batteries.
Need help?
Do you have a question about the Cristalys 14 and is the answer not in the manual?
Questions and answers