Bodet Cristalys Ellipse Installation And Operating Instructions Manual
Ntp
Hide thumbs
Also See for Cristalys Ellipse:
- Installation and operating istructions (48 pages) ,
- Installation and operating instructions manual (55 pages) ,
- Quick start manual (8 pages)
Table of Contents
Advertisement
Available languages
Available languages
Quick Links
IN STRUC TIONS DE MISE EN SER VICE ET D'UTILISATION
IN STAL LA TION AND OP ER AT ING IN STRUC TIONS
Cristalys / Opalys
s'assurer à réception que le produit n'a pas été endommagé durant le transport pour réserve au transporteur.
When receiving goods please check nothing is broken otherwise make a claim near shipping company.
El lipse
NTP
B.P. 1
49340 TRÉMENTINES
FRANCE
Tél. : 02 41 71 72 00
Fax : 02 41 71 72 01
www.bodet.com
Réf.: 606872 B
Advertisement
Table of Contents

Subscribe to Our Youtube Channel
Related Manuals for Bodet Cristalys Ellipse


Summary of Contents for Bodet Cristalys Ellipse
- Page 1 FRANCE Tél. : 02 41 71 72 00 Fax : 02 41 71 72 01 www.bodet.com Réf.: 606872 B s’assurer à réception que le produit n’a pas été endommagé durant le transport pour réserve au transporteur. When receiving goods please check nothing is broken otherwise make a claim near shipping company.
-
Page 2: Table Of Contents
Table des ma tiè res FRANÇAIS ......4 I - VÉRIFICATION INITIALE ......4 1.1 Déballage de l’horloge . - Page 3 ENGLISH ....... 24 I - INITIAL VERIFICATION ......24 1.1 Unpacking the clock .
-
Page 4: Français
I - VÉRIFICATION INITIALE Nous vous remercions d’avoir choisi une horloge BODET. Ce produit a été conçu avec soin pour votre satisfaction d’après les bases qualité ISO9001. Nous vous recommandons, de lire attentivement ce manuel avant de commencer à manipuler l’horloge. -
Page 5: Présentation Des Horloges Cristalys Et Opalys
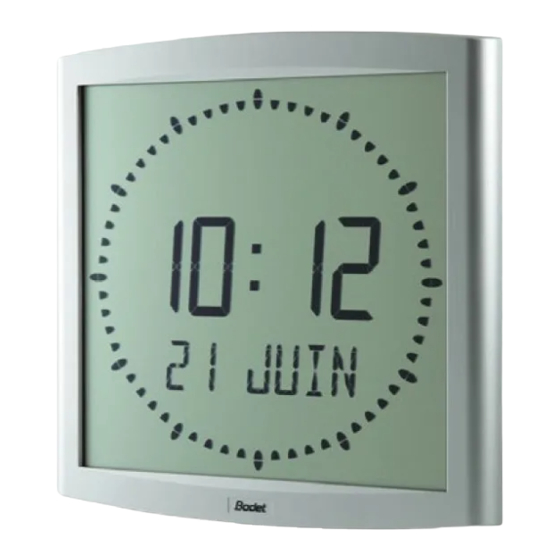
II - PRÉSENTATION DES HORLOGES CRISTALYS ET OPALYS Les horloges Cristalys ou Opalys Ellipse sont des horloges pour l’intérieur. Elles affichent les heures (en mode 12 h ou 24 h) les minutes, les secondes et la date. Elle gère automatiquement les changements d’horaires été-hiver. Une fonction ECO permet d’éteindre l’afficheur la nuit de 23 h à... -
Page 6: Mise En Service - Installation
III - MISE EN SERVICE - INSTALLATION 3.1 Connexion Retourner l’horloge sur une table. Desserrer la vis de verrouillage antivol. Pousser en face des 2 flèches le support mural pour le déclipser. Retirer le support mural placé au dos de l’horloge. - Page 7 Installer le support à son emplacement (les 2 points de fixation sont repérés (5)) à l’aide des chevilles et des vis fournies. Clipser l’horloge en place sur le support et la bloquer avec la vis de blocage antivol fournie (voir fig.2). Points de fixation (5) Ôter la feuille de protection de...
-
Page 8: Menu Mise À L'heure
IV - MENU MISE À L’HEURE 4.1 Horloge NTP Reset Les horloges réceptrices (NTP), se mettent à l’heure automatiquement. Les horloges NTP, après un reset ou un changement Sel. d’heure, attendent 3 messages horaires cohérents avant de se synchroniser. Remarque : voir le chapitre “Menu technicien” °... - Page 9 minute actuelle +1 et au top de la minute, valider en appuyant sur [Sel] ; Le compteur interne des secondes est alors initialisé à zéro et démarre. 3. a Après avoir validé les minutes : l’année clignote. Presser sur [+] jusqu’à l’apparition de l’année courante. 4.
-
Page 10: Menu Configuration
Attention : pour sortir du menu à n’importe quel moment, appuyer simultanément sur la touche [Sel] et sur la touche [+] de façon brève. Après une période de 10 minutes sans appui touche, l’horloge se replace automatiquement en mode normal d’affichage de l’heure. V - MENU CONFIGURATION Ce mode permet le choix des différents modes : 12/24H, sélection de la langue, Type d’affichage, zone horaire été-hiver et décalage horaire. - Page 11 point “5” (page 14). Affichage de l’heure seule. Aller dans le menu de configuration, jusqu’au point “4” (page 12). Affichage de la seconde ligne : Pour accéder à ces fonctions, aller dans le menu de configuration, jusqu’au point “4” (page 12). Secondes température C ou F...
-
Page 12: Menu De Configuration
Menu de configuration Pour passer en mode Configuration, appuyer sur le bouton [Sel] puis en le maintenant enfoncé, presser [+] pendant plus de 3 secondes. Le menu 12/24 est affiché. Presser sur [+] pour choisir entre le mode “12h” (affichage anglo-saxon des heures AM/PM de 1 h à 12 h.) ou le mode “24 h”... - Page 13 – 60, affichage des secondes. – °C, affichage de la température en ° Celsius. – °F, affichage de la température en ° Fahrenheit. – --, pas d’affichage “Première info”. Puis après validation, le choix d’un second affichage, en alternance avec celui sélectionné...
- Page 14 Choisir avec [+] parmi les différentes options et valider avec [Sel]. Le sous-menu Affichage apparaît. Il permet d’obtenir : un affichage fixe de l’heure, choix FIX avec [+] un affichage alterné : alternance entre l’heure et la température Celsius, choix °C avec [+].
- Page 15 Le menu Mode horaire apparaît. Il vous permet de préciser la zone géographique où est située l’horloge (pour gérer automatiquement le changement d’heures été/hiver) ou d’indiquer (pour les réceptrices NTP) un “décalage horaire”par rapport à l’heure UTC. Presser sur [+] et choisir votre zone parmi l’une de celles proposées (huit zones prédéfinies et une zone programmable).
- Page 16 Heure d’été vers l’hiver = premier dimanche de novembre à 2 h 00, heure locale. Zone Pacific USA “mode_usap” (Los Angeles). Heure d’hiver vers l’été = second dimanche de mars à 2 h 00, heure locale. Heure d’été vers l’hiver = premier dimanche de novembre à 2 h 00, heure locale Zone Australie “mode_aus”...
- Page 17 mois clignote. Presser sur [+] pour sélectionner le mois. 2) Presser [Sel] : le “Rang” clignote. Le Rang désigne le numéro d’ordre de la semaine dans le mois (de 1 à 5 selon les mois) (le rang 5 indique toujours la dernière semaine). La valeur “F”...
-
Page 18: Vi- Principe De Mise À Jour De L'heure
VI- PRINCIPE DE MISE À JOUR DE L’HEURE 6.1 Réceptrices NTP A la première mise sous tension, l’heure est initialisée à 00h00mn00ss du 01/01/2000. L’horloge cherche à la mise sous tension, après chaque modification manuelle de l’heure, après un reset ou une reconfiguration de l’horloge à se synchroniser, dès que 3 messages cohérents consécutifs ont étés reçus, elle fait un recalage de sa base de temps. -
Page 19: Menu Technicien
VII - MENU TECHNICIEN L’accès au menu technicien s’effectue par l’intermédiaire des deux boutons poussoirs [SELECT] et [+] placés au dos de l’horloge. La touche [SELECT] est au-dessus de la touche [+]. Procéder en deux étapes. Appuyer sur le bouton [SELECT], et en le maintenant enfoncé, presser [+] pendant plus de 3 secondes pour passer dans un premier temps en mode Configuration. -
Page 20: Vérifier
de l’offset. La lecture de la température se fait toutes les 10 secondes. Appuyer sur [SELECT] pour obtenir le menu Test afficheur. Ce menu permet la vérification du bon affichage de tous les segments de l’horloge. Sur l’horloge Opalys Ellipse la touche [+] permet de faire défiler la table des caractères. -
Page 21: Que Faire Si
VIII - QUE FAIRE SI...? ...VÉRIFIER. Que faire si...? … Vé ri fier. L’affichage de l’horloge ne dépasse L’horloge est programmée en mode 12 h au lieu pas 12 h. de 24 h (revoir la notice page 12, § 2). La synchronisation horaire de Vérifier dans le mode changement d’heure que l’horloge est correcte, mais le... -
Page 22: Caractéristiques Techniques
IX - CARACTÉRISTIQUES TECHNIQUES Les horloges Cristalys et Opalys respectent la directive compatibilité électromagnétique 2004/108/CE & DBT 2006/95/CE. C’est un produit de classe A. Dans un environnement domestique, ce produit peut causer des interférences radios auquel cas l’utilisateur doit prendre des mesures adéquates. Elles sont destinées à un environnement résidentiel, commercial ou industrie légère. -
Page 23: Annexes
X - ANNEXES 10.1 Règle sur la langue utilisée dans le menu de mise à l’heure : La langue utilisée pour faire la mise à l’heure dépend du menu configuration). Il existe des combinaisons de configuration avec la 1 et la 2 information qui ne permettent pas de désigner clairement la langue utilisée pour l’affichage du mois dans le menu mise à... -
Page 24: English
I - INITIAL VERIFICATION Thank you for choosing a BODET clock. This product has been carefully designed for your satisfaction based on ISO9001 quality requirements. We advise you to read this manual thoroughly before attempting to manipulate the clock. These indicate important comments. -
Page 25: Introduction To The Opalys Clock
II - INTRODUCTION TO THE OPALYS CLOCK The Cristalys or Opalys Ellipse clock are calendar clocks for indoor use. They displays the hours (in 12 hr or 24 hr mode), minutes and date. They automatically manages summer-winter time changeovers. An ECO function enables the display to be switched off at night between 11pm and 6am. They have three menus for making adjustments : the time setting menu ;... -
Page 26: Setting In Operation - Installation
III - SETTING IN OPERATION - INSTALLATION 3.1 Connection Turn the clock upside down on a table. Unscrew the anti-theft locking screw. Push the wall holder opposite the two arrows to unclip it. Remove the wall holder on the back of the clock. Connect the Ethernet network on the RJ45 connector. -
Page 27: Installation
3.2 Installation Fig. 2 Reset Sel. ° Anti-theft locking screw. Setting of the table bracket (if supplied) (in the 2 notches of the wall bracket). Fix the wall bracket using the plugs and screws supplied (fixing points (5)). Clip the clock in place on the bracket and secure with the anti-theft locking screw Reset provided (see fig.2). -
Page 28: Time Setting Menu
IV - TIME SETTING MENU 4.1 NTP clock Reset The receiver (NTP) clocks set themselves to the correct time automatically. After a reset or time change, the NTP clocks wait for Sel. three coherent time messages before synchronising. Remark : See the chapter “Technician Menu” page 38 to parameter to time distribution. - Page 29 Press [+] until the current year is displayed. 4. a Validate the year by pressing [SEL] : the month flashes. Press [+] until the required month is displayed. 5. a Press [SEL] to validate the month : the day flashes. Press [+] until the chosen day is displayed (Scrolling of the days takes account of the month and year selected (leap years)).
-
Page 30: Configuration Menu
V - CONFIGURATION MENU This mode enables you to select the different modes : 12 /24 hr, Eco, language selection, type of display, summer-winter time zone and time difference. With the different languages, there are no less than 4 million display possibilities offered by your calendar clock. We only give the simple functions below, but by combining them, you can find them all. - Page 31 (page 31). Seconds temperature °C or °F date numeric date day of the year and number of the week Configuration menu To go to Configuration mode, press the [SEL] button and while holding it down press [+] for more than 3 seconds. The 12/24 menu is displayed.
- Page 32 The date will be displayed, in an alphanumeric format, in the language selected or : – “DT”, display date in digital format (eg: 21-6-02). – 365, day of the year display and number of the week – 60, seconds display –...
- Page 33 a The sub-menu Language1 is displayed The display language flashes. Choose the language with [+] (table below) and validate with [SEL]. b The sub-menu Language2 appears. Choose with [+] from the different options : “--”, to validate the first language only, The sub-menu Display appears.
- Page 34 Choice of SEC 4 : Deletion of one notch moving forward every second. a Time mode menu appears. This enables you to specify the geographic zone in which the clock is located (to automatically manage the summer/winter time changeovers) or to give (for radio synchronised or AFNOR/Irig-B receiver models) a “time difference”...
- Page 35 Mountain USA Zone “mode_usam” (Denver). Winter to summer time = second Sunday of March at 2am local time. Summer to Winter time = first Sunday of November at 2am local time. Pacific USA Zone “mode_usap” (Los Angeles). Winter to summer time = second Sunday of March at 2am local time.
- Page 36 1) Go to mode_prg and press [SEL] : the number of the month flashes. Press [+] to select the month. 2) Press [SEL] : “Order” flashes. Order denotes the sequence number for the week of the month (from 1 to 5 according to the months) (order always denotes the last week).
-
Page 37: Vi- Principle Of Time Setting
VI- PRINCIPLE OF TIME SETTING 6.1 NTP receivers When they are first switched on, the time is initialized at 00:00:00 on 01/01/2000. The clock attempts to synchronise on switching on, after each manual time change, or after a reset or reconfiguration of the clock; as soon as three consecutive coherent messages have been received, it adjusts its time base. -
Page 38: Technician Menu
VII - TECHNICIAN MENU Access to the technician menu is via the two push buttons [SELECT] and [+] located on the back of the clock. The [SELECT] button is above the [+] button. Proceed in two stages. Press the [SELECT] button, and while holding it down, press [+] for more than 3 seconds to go initially to Configuration menu. - Page 39 Caution: the address configured in the clock must be the same as that entered in the Multicast NTP server. Press the [SELECT] button. Adjusting the temperature offset. Variation, using the [+] button between –9.5°C and +9.5°C by increments of 0.5 (on leaving the factory, an adjustment can be made).
-
Page 40: What To Do If
VIII - WHAT TO DO IF...? ...CHECK. WHAT TO DO IF...? … CHECK. The clock does not display the day of The clock is programmed in week number or day the week but a number. number display mode (reread the note on page 32, §... -
Page 41: Technical Features
IX - TECHNICAL FEATURES Cristalys and Opalys clocks comply with the electromagnetic compatibility directive 2004/108/CE & DBT 2006/95/CE. This is a Class A product. In a domestic environment this product may cause radio frequency interference, in which case the user may be required to take adequate measures. This product is suitable for installation in a residential, commercial or light industrial environment. -
Page 42: Appendix
X - APPENDIX 10.1 Rule concerning the language used in the time setting menu: The language used to set the time depends on the configuration menu. Some combinations of configurations with the 1st and the 2nd information do not permit to designate clearly the language used to display month in the time setting menu.
Need help?
Do you have a question about the Cristalys Ellipse and is the answer not in the manual?
Questions and answers