Table of Contents
Advertisement
Available languages
Available languages
Quick Links
Cristalys 7
Cristalys Date
Réceptrice NTP Supervisée
NTP Supervised receiver
Manuel d'installation et de mise en service
Installation and operating instructions
www.bodet-time.com
S'assurer à réception que le produit n'a pas été endommagé durant le transport pour réserve au transporteur
When receiving goods please check nothing is broken otherwise make a claim near shipping company.
HORLOGES LCD
LCD CLOCKS
BODET Time & Sport
1, rue du Général de Gaulle
49340 TREMENTINES I France
Tél. support France: 02.41.71.72.99
Tel. support (intl): +33 241 71 72 33
intérieures
indoor
Cristalys 14
Cristalys Ellipse
.
1
Advertisement
Table of Contents

Subscribe to Our Youtube Channel
Related Manuals for Bodet Cristalys Date


Summary of Contents for Bodet Cristalys Date
- Page 1 Cristalys Date Réceptrice NTP Supervisée NTP Supervised receiver Manuel d’installation et de mise en service Installation and operating instructions BODET Time & Sport 1, rue du Général de Gaulle 49340 TREMENTINES I France Tél. support France: 02.41.71.72.99 www.bodet-time.com Tel. support (intl): +33 241 71 72 33 S’assurer à...
-
Page 2: Table Of Contents
Table des matières I - Vérification initiale 1.1 Déballage de l’horloge......................4 1.2 Nettoyage..........................4 1.3 Pré-requis..........................4 II - Présentation des horloges CRISTALYS NTP SUPERVISEES III - Mise en service - Installation 3.1 Installation et connexion d’une horloge Simple Face (SF)........6 3.2 Connexion d’une horloge Double Face (DF)............8 IV - Mise à... - Page 3 Table of contents I - Initial Verification 1.1 Unpacking the clock.....................30 1.2 Cleaning........................30 1.3 Pre-requisit......................30 II - Introduction to the CRISTALYS NTP SUPERVISED III - Installation 3.1 Installation and connection of the Single Face clock (SF)......32 3.2 Connection Double Sided clock (DF)..............34 IV - Time setting V - Factory configuration VI - Configuration menu CRISTALYS 7 &...
-
Page 4: I - Vérification Initiale
I - Vérification initiale Nous vous remercions d’avoir choisi une horloge BODET. Ce produit a été conçu avec soin pour votre satisfaction d’après les bases qualité ISO9001. Nous vous recommandons, de lire attentivement ce manuel avant de commencer à manipuler l’horloge. -
Page 5: Présentation Des Horloges Cristalys Ntp Supervisees
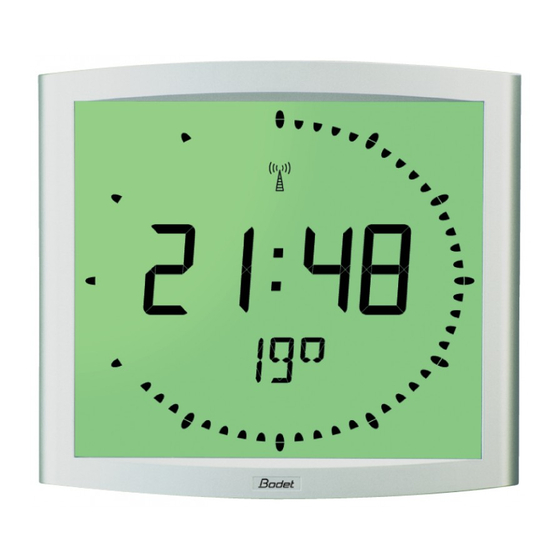
II - Présentation des horloges CRISTALYS NTP SUPERVISEES Les horloges Cristalys sont des horloges pour l’intérieur. Elles affichent les heures (en mode 12 h ou 24 h) les minutes et la date (suivant les modèles). Elles gèrent automatiquement les changements d’horaires été-hiver. Une fonction ECO permet d’éteindre l’afficheur la nuit de 23 h à... -
Page 6: Mise En Service - Installation
Le type de synchronisation devra être paramétré dans les pages webserver de l’horloge (voir page 17), notamment l’adresse multicast qui doit être identique à celle du serveur (par défaut 239.192.54.01). Relever l’adresse MAC qui sera utile lors de la détection de l’horloge sur le logiciel Bodet Detect pour la renommer. Reset Sel. - Page 7 c. Installation mécanique. ■ Fixer le support mural à l’aide des chevilles et des vis fournies. ■ Clipser l’horloge en place sur le support et la bloquer avec la vis de blocage antivol fournie. ■ Ôter la feuille de protection de la façade, et nettoyer l’horloge à l’aide du chiffon antistatique. Installation sur potence : ■...
-
Page 8: Connexion D'une Horloge Double Face (Df)
RJ 12 RJ 45 Note : Dans le cas d’une horloge double face, le fonctionnement du logiciel «BODET Detect» (voir notice 607548) ainsi que l’utilisation du serveur web restent inchangés. La prise en main s’effectue sur une seule horloge («maître»). Cette dernière transmet les informations à l’horloge «esclave»... -
Page 9: Mise À L'heure
5 secondes minimum. Ce bouton est situé dans un trou inaccessible à main nue, voir photo ci-dessous : Bouton «Reset» La configuration usine complète est la suivante : ■ Nom de l’horloge : «BODET-@MAC». ■ Configuration IP par DHCP. ■ Time zone : EUR. ■ Synchronisation : Multicast. -
Page 10: Menu Configuration Cristalys 7 & 14 Ntp Supervisees
VI - Menu configuration CRISTALYS 7 & 14 NTP SUPERVISEES Ce menu permet le choix des différents modes : 12/24H, Eco, Type d’affichage, zone horaire été-hiver et décalage horaire. Affichage standard de votre horloge. Affichage de l’heure en mode 12 H AM/PM. Aller dans le menu de configuration, jusqu’au point “2”... - Page 11 Le menu Affichage est visible. Le programme permet d’afficher deux informations en alternance. a Choisir la première information à afficher, avec [+] entre : - Affichage de l’heure : - Affichage de la date : Pour le mode d’affichage de la date, voir le § 4.c. - Affichage de la température interne : La température est mise à...
-
Page 12: Menu Configuration Cristalys Ellipse & Date Ntp Supervisees
VII - Menu configuration CRISTALYS ELLIPSE & DATE NTP SUPERVISEES Ce mode permet le choix des différents modes : 12/24H, Eco, Type d’affichage, zone horaire été-hiver et décalage horaire. Nous ne vous présenterons ci-dessous que les fonctions simples, mais en les combinant, vous pourrez toutes les retrouver. - Page 13 Affichage de la seconde ligne : pour accéder à ces fonctions : Aller dans le menu de configuration, jusqu’au point «4» (page 14). Seconde T° (°C ou °F) Date Date numérique Quantième de l’année et n° semaine...
- Page 14 Menu de configuration 1. Pour passer en mode Configuration, appuyer sur le bouton [Sel] puis en le maintenant enfoncé, presser [+] pendant plus de 3 secondes. 2. Le menu 12/24 est affiché. Presser sur [+] pour choisir entre le mode “12h” (affichage anglo-saxon des heures AM/PM de 1 h à...
- Page 15 - 60, affichage des secondes. - °C, affichage de la température en °Celsius. - °F, affichage de la température en °Fahrenheit. - -, pas d’affichage «Première info». - Puis après validation, le choix d’un second affichage, en alternance avec celui sélectionné...
- Page 16 Choisir avec [+] parmi les différentes options et valider avec [Sel]. 5. Le sous-menu Affichage apparaît. Il permet d’obtenir : un affichage fixe de l’heure, choix FIX avec [+] un affichage alterné : alternance entre l’heure et la température Celsius, choix °C avec [+].
- Page 17 Les deux modes suivants sont disponibles uniquement sur Cristalys Date : 7. Décomptage “Événement ” en jours Sélectionner la valeur “EV” à l’aide de la touche [+] et valider avec [Sel]. a) Sélectionner la date de l’événement à décompter : Commencer par l’année avec [+] de 00 (2000) à...
-
Page 18: Présentation Du Serveur Web
1/ Ouvrir une page de votre navigateur internet puis dans la barre de recherche, entrez l’adresse IP de votre horloge (Par exemple : 192.0.1.128). 2/ Utiliser le logiciel BODET Detect puis cliquez sur le bouton Web browser pour ouvrir le serveur web (se reporter à la notice du logiciel, 607548). -
Page 19: Page Configuration Réseau
- MAC Address : il s’agit de l’adresse MAC de l’horloge. Cette adresse est unique pour chaque produit. Ce numéro est indiqué sur une étiquette au dos des horloges Bodet. - Name : nom donné par l’utilisateur à l’horloge. Il est conseillé de mettre l’emplacement de l’horloge dans le nom du produit. -
Page 20: Page Configuration Heure Et Synchronisation
8.3 Page Configuration heure et synchronisation La page Time Configuration est divisée en deux parties. L’une permet de configurer le fuseau horaire et l’autre le mode de synchronisation. Ci-dessous le descriptif des informations affichées : - Time zone : à l’aide du menu déroulant, il est possible de choisir le fuseau horaire (la gestion de l’heure été/hiver est automatique en fonction de la zone horaire sélectionnée). - Page 21 été renseigné. L’adresse multicast des clients doit être identique à celle diffusé par le serveur. Par défaut les produits Bodet émettent et reçoivent sur l’adresse multicast :239.192.54.1 Les adresses multicast sont comprises entre 224.0.0.0 et 239.255.255.255.
-
Page 22: Page Configuration Des Alarmes
8.4 Page configuration des alarmes Cette page permet d’activer la supervision de l’horloge, de définir les informations qui seront transmises et le serveur de destination. Il est possible de sélectionner le ou les paramètres à définir comme alarmes et de les configurer. Ci-dessous le descriptif des informations affichées : - Case à... -
Page 23: Page Système
8.5 Page système Cette page est divisée en quatre parties qui sont les suivantes : 1ère partie : présentation de la version du programme (logiciel) ainsi que la durée de fonctionnement depuis la mise sous tension de l’horloge. 2ème partie : un message de prévention indique qu’une fois défini, il est obligatoire d’utiliser le bon mot de passe pour établir la connexion avec le serveur web. -
Page 24: Menu Technicien Cristalys 7 & 14 Ntp Supervisees
IX - Menu technicien CRISTALYS 7 & 14 NTP SUPERVISEES L’accès au menu technicien s’effectue par l’intermédiaire des deux boutons poussoirs [SELECT] et [+] placés au dos de l’horloge. La touche [SELECT] est au-dessus de la touche [+]. Procéder en deux étapes. 1. -
Page 25: Menu Technicien Cristalys Ellipse & Date Ntp Supervisees
X - Menu technicien CRISTALYS ELLIPSE & DATE NTP SUPERVISEES L’accès au menu technicien s’effectue par l’intermédiaire des deux boutons poussoirs [SELECT] et [+] placés au dos de l’horloge. La touche [SELECT] est au-dessus de la touche [+]. 1. Appuyer sur le bouton [SELECT], et en le maintenant enfoncé, presser [+] pendant plus de 3 secondes pour passer dans un premier temps en mode Configuration. -
Page 26: Que Faire Si
Pas de serveur DHCP sur le - DNS : 0.0.0.0 réseau 2) Utiliser soft PC «BODET Detect» avec le bouton «Network configuration» pour définir les paramètres réseau de l’horloge. 3) Si pas de serveur DHCP, les horloges sont visibles sur le logiciel Bodet Detect (après un démarrage, environ 3min). -
Page 27: Caractéristiques Techniques Cristalys 7 & 14 Ntp Supervisees
XII - Caractéristiques techniques CRISTALYS 7 & 14 NTP SUPERVISEES Les horloges Cristalys respectent la directive compatibilité électromagnétique 2004/108/CE & DBT 2006/95/CE. C’est un produit de classe A. Dans un environnement domestique, ce produit peut causer des interférences radios auquel cas l’utilisateur doit prendre des mesures adéquates. -
Page 28: Caractéristiques Techniques Cristalys Ellipse & Date Ntp Supervisees
XIII - Caractéristiques techniques CRISTALYS ELLIPSE & DATE NTP SUPERVISEES Les CRISTALYS respectent la directive compatibilité électromagnétique 2004/108/CE et la directive basse tension 2006/95/CE. Ce sont des produits de classe A. Dans un environnement domestique, ces produits peuvent causer des interférences radios auquel cas l’utilisateur doit prendre des mesures adéquates. -
Page 29: Annexes
XIV - ANNEXES (Cristalys Ellipse uniquement) 14.1 Règle sur la langue utilisée dans le menu de mise à l’heure (mode indépendante uniquement) La langue utilisée pour faire la mise à l’heure dépend du menu configuration. Il existe des combinaisons de configuration avec la 1e et la 2e information qui ne permettent pas de désigner clairement la langue utilisée pour l’affichage du mois dans le menu mise à... -
Page 30: I - Initial Verification
For the commisioning of the clocks you must install «BODET Detect». This software is available on BODET web site www.bodet-time.com as a free download. Note: the Ethernet network connection to which the Bodet clock is connected must be PoE, the power being supplied by a PoE switch or a PoE injector. -
Page 31: Introduction To The Cristalys Ntp Supervised
II - Introduction to the CRISTALYS NTP SUPERVISED The Cristalys clocks are calendar clocks for indoor use. They display the hours (in 12 hr or 24 hr mode), minutes and date. They automatically manage daylight saving time changeovers. An ECO function enables the display to be switched off at night between 11pm and 6am. Three menus are available to make adjustments : ■... -
Page 32: Installation
47), particularly the Multicast address which must be the same as that of the server (by default 239.192.54.01). Find the MAC address which will be useful during the detection of the clock on the software Bodet Detect to reappoint it. Reset Sel. - Page 33 c. Mechanical installation. ■ Mount the bracket on the wallusing the plugs and screws supplied. ■ Clip the clock on the bracket and secure it with the supplied anti-theft locking screw. ■ Remove the protective film from the front panel and use the anti-static cloth to clean the clock. Mounting on vertical bracket or ceiling bracket: ■...
-
Page 34: Connection Double Sided Clock (Df)
RJ 12 RJ 45 Note: The «Bodet detect» software (see instruction 607548) and the built-in web interface operate identically for a double-face clock. All settings are applied to a single (master) clock, which sends the data to the slave clock via the RJ 12 Ethernet cable. A firmware update takes effect for both clocks. -
Page 35: Time Setting
■ To reset the configuration to the factory setting press the Reset button (with a needle or any other sharp object, see picture below) for at least 5 seconds. «Reset» Button The full factory configuration is as follows: ■ Clock name: «BODET-@MAC» ■ IP configuration by DHCP ■ Time zone : EUR. ■ Multicast synchronisation ■... -
Page 36: Configuration Menu Cristalys 7 & 14 Ntp Supervised
VI - Configuration menu CRISTALYS 7 & 14 NTP SUPERVISED This menu enables you to select the different modes : 12 /24 hr, Eco, type of display, summer- winter time zone and time difference. Standard display on your clock. Time display in 12 hr AM/PM mode. Go into the configuration menu, point “2”... - Page 37 The display menu appears. This menu determines the information which will be displayed . a Select the first information to display between the different options with [+] : - Display of the hour : - Display of the date : for the display mode of the date, see the §...
-
Page 38: Configuration Menu Cristalys Ellipse & Date Ntp Supervised
VII - Configuration menu CRISTALYS ELLIPSE & DATE NTP SUPERVISED This mode enables you to select the different modes : 12 /24 hr, Eco, language selection, type of display, summer-winter time zone and time difference. We only give the simple functions below, but by combining them, you can find them all. To programm your clock, choose the option display below and go to “Configuration menu”... - Page 39 Display on the second line. To access to this functions, go to configuration menu , point “4” (page xx) Seconds T° (°C ou °F) Date Day of the year Numéric date and number of the week...
- Page 40 Configuration 1. To go to Configuration mode, press the [SEL] button and while holding it down press [+] for more than 3 seconds. 2. The 12/24 menu is displayed. Press [+] to choose between “12h” mode (display of AM/PM from 1 hr to 12 hrs) or “24h” mode (display from 0,00 to 23.00 hrs).
- Page 41 - 60, seconds display. - °C, temperature display in ° Celsius. - °F, temperature display in °Fahrenheit. - -, No display “First info”. - Then, after validation ; the choice between a second language for alternating display or : – “DT”, display date in digital format (eg.: 21-6-01). –...
- Page 42 Choisir avec [+] parmi les différentes options et valider avec [Sel]. 5. The sub-menu Display appears. It enables you to obtain: time display only, choose FIX with [+] an alternating display: alternating between the hour and the temperature Celsius, choose°C with [+]. alternating between the hour and the temperature Fahrenheit, choose°F with [+].
- Page 43 Cristalys Date: 7. Countdown “Event” in days Select the value “EV” using the [+] button and validate with [SEL]. a) Select the date of the event to be counted down to : Begin with the year with [+] from 00 (2000) to 99 (2099) and validate with [SEL].
-
Page 44: Web Interface
There are two ways to access the web interface: 1/ Open your web browser and enter the IP address of the clock in the address bar. 2/ Using the «BODET Detect», click on the Web browser button to open the web interface (refer to software instructions, 607548). -
Page 45: Network Configuration Page
- MAC Address: this is the clock’s MAC address. This address is unique to each device. This number is given on a label on the back of Bodet clocks. - Name : user-defined clock name. It is recommended to put the location of the clock in the name of the product. -
Page 46: Time And Synchronisation Configuration Page
8.3 Time and synchronisation configuration page The Time Configuration page is divided into two parts. One is used to set the time zone, the other to set the synchronisation mode. The information displayed is described below: - Time zone : the drop-down menu can be used to select the appropriate time zone (summer/winter time changes are automatically managed according to the selected time zone). - Page 47 The multicast address of the clients (reveivers) must be the same that the one on which the server broadcasts. By default, the Bodet products transmit or receive using the multicast address: 239.192.54.1 The multicast addresses are included between 224.0.0.0 and 239.255.255.255.
-
Page 48: Alarm Configuration Page
8.4 Alarm configuration page This page is used to enable monitoring of the clock, and to set which information will be sent as well as the destination server. You can choose which parameter or parameters to define as alarms, and configure them. -
Page 49: System Page
8.5 System page This page is divided into four parts as follows: 1st part: information panel displaying software version and time since the clock was powered on. 2nd part: a warning message reminds you that once a password is set, a connection can only be established with the clock’s web interface by entering the correct password. -
Page 50: Technician Menu Cristalys 7 & 14 Ntp Supervised
IX - Technician menu CRISTALYS 7 & 14 NTP SUPERVISED Access to the technician menu is via the two push buttons [SELECT] and [+] located on the back of the clock. The [SELECT] button is above the [+] button. Proceed in two stages. 1. -
Page 51: Technician Menu Cristalys Ellipse & Date Ntp Supervised
X - Technician menu CRISTALYS ELLIPSE & DATE NTP SUPERVISED Access to the technician menu is via the two push buttons [SELECT] and [+] located on the back of the clock. The [SELECT] button is above the [+] button. 1. Press the [SELECT] button, and while holding it down, press [+] for more than 3 seconds to go initially to Configuration menu. -
Page 52: What To Do If
2) Use soft BODET Detect PC with the button ‘Network configuration’ to define the network parameters of the clock. 3) If no server DHCP, clocks are visible on the software Bodet Detect (after a starting up, approximately 3 minutes). You can then configure the address compatible IP / mask with your network. -
Page 53: Technical Features Cristalys 7 & 14 Ntp Supervised
XII - Technical features CRISTALYS 7 & 14 NTP SUPERVISED Cristalys clocks comply with the electromagnetic compatibility directive 2004/108/CE & DBT 2006/95/CE. This is a Class A product. In a domestic environment this product may cause radio frequency interference, in which case the user may be required to take adequate measures. It is intended for a residential or commercial environment. -
Page 54: Technical Features
XIII - Technical features Cristalys clocks comply with the electromagnetic compatibility directive 2004/108/CE & DBT 2006/95/CE. This is a Class A product. In a domestic environment this product may cause radio frequency interference, in which case the user may be required to take adequate measures. It is intended for a residential or commercial environment. -
Page 55: Appendix
XIV - Appendix (Cristalys Ellipse only) 14.1 Rule concerning the language used in the time setting menu: The language used to set the time depends on the configuration menu. Some combinations of configurations with the 1st and the 2nd information do not permit to designate clearly the language used to display month in the time setting menu.
Need help?
Do you have a question about the Cristalys Date and is the answer not in the manual?
Questions and answers