Bodet Profil 930 Installation And Operation Manual
Ntp receiver
Hide thumbs
Also See for Profil 930:
- Installation and operation manual (27 pages) ,
- Installation and operating instructions manual (16 pages) ,
- Installation and operating instructions manual (12 pages)
Table of Contents
Advertisement
Available languages
Available languages
Horloge Profil 930-940 intérieure
Réceptrice NTP
NTP Receiver
Manuel d'installation et de mise en service
Installation and operation manual
www.bodet-time.com
S'assurer à réception que le produit n'a pas été endommagé durant le transport pour réserve au transporteur.
When receiving goods please check nothing is broken otherwise make a claim near shipping company.
HORLOGES ANALOGIQUES intérieures
ANALOGUE CLOCKS indoor
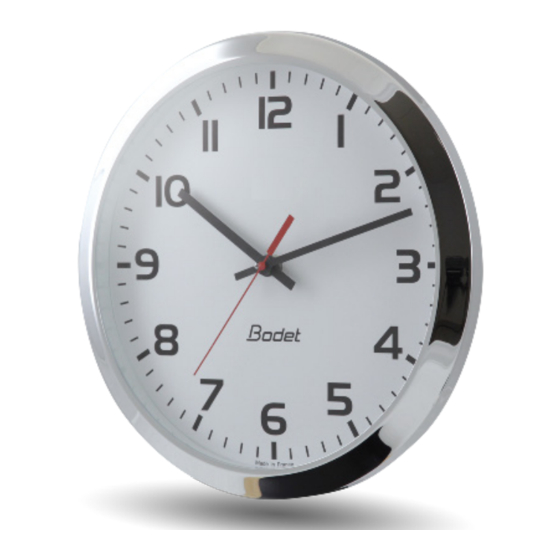
Profil 930-940 Clock indoor
BODET SA
BP1
49340 TREMENTINES I FRANCE
Tel: +33 241.71.72.98
Fax: +33 241.71.72.01
Usine de Trémentines
Système de
Management certifié
1
Advertisement
Table of Contents

Related Manuals for Bodet Profil 930


Summary of Contents for Bodet Profil 930
- Page 1 HORLOGES ANALOGIQUES intérieures ANALOGUE CLOCKS indoor Horloge Profil 930-940 intérieure Profil 930-940 Clock indoor Réceptrice NTP NTP Receiver Manuel d’installation et de mise en service Installation and operation manual BODET SA 49340 TREMENTINES I FRANCE Tel: +33 241.71.72.98 Fax: +33 241.71.72.01 www.bodet-time.com...
-
Page 2: Table Of Contents
Table des matières I - Vérification initiale 1.1 Déballage de l’horloge............................4 1.2 Nettoyage................................4 1.3 Pré-requis................................4 II - Installation 2.1 Horloge Simple Face (SF)............................5 2.2 Horloge Double Face (DF)............................5 III - Mise en service et mise à l’heure IV - Caractéristiques techniques V - Présentation du serveur web 5.1 Page d’accueil.................................8 5.2 Page Configuration réseau............................9... -
Page 3: I - Vérification Initiale
La présente notice concerne les modèles «NTP». Pour les autres modèles, se reporter à la notice correspondante. Deux mouvements différents sont utilisés pour ces horloges: ■ Mouvement standard HM/HMS : toutes les horloges Profil 930 NTP et Profil 940 NTP et HMS hors cas ci-dessous). Les versions HMS avec ce mouvement disposent d’un balayage de la trotteuse par seconde sautante. -
Page 4: Installation
II - Installation Choisir l’emplacement où sera installée l’horloge en privilégiant un endroit exempt de parasites électriques (transformateur, ...). Le réseau informatique doit être PoE (802.3af, classe 3). 2.1 Horloge Simple Face (SF) Ces horloges s’accrochent simplement sur une tête de vis (dimensions en page 7). 1) Installer une vis (Ø... - Page 5 Photo 1 : horloge maître Photo 2 : horloge esclave Note : Le fonctionnement du logiciel «BODET Detect» (voir notice 607548) ainsi que l’utilisation du serveur web restent inchangés dans le cas d’une horloge double face. La prise en main s’effectue sur une seule horloge (maître) et celle-ci transmet les informations à...
-
Page 6: Mise En Service Et Mise À L'heure
Après 3 minutes les aiguilles se mettent à l’heure NTP. Mouvement standard HM/HMS (ex: Profil 940) Broches pour shunt Mouvement seconde silencieuse (ex: Profil 930) Broches pour shunt ■ Configuration par défaut (un rappel de cette configuration est fournie au dos du produit) - Configuration IP par DHCP. -
Page 7: Caractéristiques Techniques
Classe de protection : III. Indice de protection : IP40. Lisibilité : Profil 930 = 20m, Profil 940 = 35m. Poids : Profil 930 = 1kg, Profil 940 = 1,9kg. Conformité aux Normes : EN 60950, EN 55022 et EN 55024. -
Page 8: Présentation Du Serveur Web
1/ Ouvrir une page de votre navigateur internet puis dans la barre de recherche, entrez l’adresse IP de votre horloge. 2/ Utiliser le logiciel «BODET Detect» puis cliquez sur le bouton Web browser pour ouvrir le serveur web (se reporter à la notice du logiciel, 607548). -
Page 9: Page Configuration Réseau
Ci-dessous le descriptif des informations affichées : - MAC Address : il s’agit de l’adresse MAC de l’horloge. Cette adresse est unique pour chaque produit. Ce numéro est indiqué sur une étiquette au dos des horloges Bodet. - Name : nom donné par l’utilisateur à l’horloge. -
Page 10: Page Configuration Heure Et Synchronisation
5.3 Page Configuration heure et synchronisation La page Time Configuration est divisée en deux parties. L’une permet de configurer le fuseau horaire et l’autre le mode de synchronisation. Ci-dessous le descriptif des informations affichées : - Time zone : à l’aide du menu déroulant, il est possible de choisir le fuseau horaire (la gestion de l’heure été/hiver est automatique en fonction de la zone horaire sélectionnée). - Page 11 été renseigné. L’adresse multicast des clients doit être identique à celle diffusé par le serveur. Par défaut les produits Bodet émettent et reçoivent sur l’adresse multicast :239.192.54.1 Les adresses multicast sont comprises entre 224.0.0.0 et 239.255.255.255.
-
Page 12: Page Configuration Des Alarmes
5.4 Page configuration des alarmes Cette page permet d’activer la supervision de l’horloge, de définir les informations qui seront transmises et le serveur de destination. Il est possible de sélectionner le ou les paramètres à définir comme alarmes et de les configurer. Ci-dessous le descriptif des informations affichées : - Case à... - Page 13 Information : les informations remontées sont mineures et ne nécessitent pas expressément la visite d’un technicien de maintenance pour corriger le défaut. Warning : les erreurs ou défauts remontés sont importants et nécessitent la visite d’un technicien de maintenance pour corriger le défaut. Critic : les erreurs ou défauts remontés sont graves et nécessitent rapidement la visite d’un technicien de maintenance pour corriger le défaut.
-
Page 14: Page Système
5.5 Page système Cette page est divisée en quatre parties qui sont les suivantes : 1ère partie : présentation de la version du programme (logiciel), la durée depuis la mise sous tension de l’horloge et la date de fabrication du produit (année/semaine). 2ème partie : un message de prévention indique qu’une fois défini, il est obligatoire d’utiliser le bon mot de passe pour établir la connexion avec le serveur web. -
Page 15: Que Faire Si
VI - Que faire si...? ...Vérifier. Que faire si...? ...Vérifier que 1) Le type de signal émis par l’horloge mère est de même type que celui de l’horloge (NTP). Pas de synchronisation après l’installation 2) Le serveur NTP est sur le même réseau que la récep- trice (adresses IP, masque de sous réseau et Passerelles). -
Page 16: I - Initial Checks
Table of contents I - Initial checks 1.1 Unpacking the clock..............................16 1.2 Cleaning................................16 1.3 Pre-requisit................................16 II - Installation 2.1 Single sided (SF) clock............................17 2.2 Double sided (DF) clock............................17 III - Initial startup and time setting IV - Technical characteristics V - Web interface 5.1 Homepage................................20 5.2 Network configuration page..........................21 5.3 Time and synchronisation configuration page......................22... -
Page 17: Unpacking The Clock
HMS except movement below). The second hand of these HMS models moves by steps. ■ Sweep second movement: Profil 930 NTP and Profil 940 NTP silent only. The second hand of these HMS models moves continuously (smooth and silent motion) 1.1 Unpacking the clock... -
Page 18: Installation
II - Installation Choose a location where to install the clock, preferably away from sources of electrical interference, such as transformers. The data network must be PoE (802.3af, class 3). 2.1 Single sided (SF) clock Clocks for indoor use are simply mounted by hanging on a screw head (see dimensions page 7). 1) Position a screw (Ø... - Page 19 Connection of the Ethernet cable: - If a Cat5 Ethernet cable is use to carry the NTP signal then it is possible to connect it directly to the clock using the wall bracket ref: 981006. - If a Cat6 Ethernet cable is use to carry the NTP signal then we recommend that you connect that cable to an intermediate female RJ45 connector (in red in the illustration) and connect the clock with a flexible Male RJ45 to Male RJ45 cable (not supplied).
-
Page 20: Initial Startup And Time Setting
After 3 minutes the hands set themselves to the NTP time. HM/HMS Standard movement (ex: Profil 940) Pins to be short-circuited Sweep second movement (ex: Profil 930) Pins to be short-circuited ■ The default configuration is as follows (this configuration is listed on the back of the device) -
Page 21: Technical Characteristics
Operating temperature: 0°C to +50°C. Protection class: III. Protection index: IP40. Viewing distance: Profil 930 = 20m, Profil 940 = 35m. Weight: Profil 930 = 1kg, Profil 940 = 1.9kg. Standards compliance: EN 60950, EN 55022 and EN 55024. The electronics in these clocks are protected by a resettable fuse. -
Page 22: Web Interface
There are two ways to access the web interface: 1/ Open your web browser and enter the IP address of the clock in the address bar. 2/ Using the «BODET Detect», click on the Web browser button to open the web interface (refer to software instructions, 607548). -
Page 23: Network Configuration Page
The information displayed is described below: - MAC Address: this is the clock's MAC address. This address is unique to each device. This number is given on a label on the back of Bodet clocks. - Name: user-defined clock name. -
Page 24: Time And Synchronisation Configuration Page
5.3 Time and synchronisation configuration page The Time Configuration page is divided into two parts. One is used to set the time zone, the other to set the synchronisation mode. The information displayed is described below: - Time zone : the drop-down menu can be used to select the appropriate time zone (summer/winter time changes are automatically managed according to the selected time zone). - Page 25 The multicast address of the clients (reveivers) must be the same that the one on which the server broadcasts. By default, the Bodet products transmit or receive using the multicast address: 239.192.54.1 The multicast addresses are included between 224.0.0.0 and 239.255.255.255.
-
Page 26: Alarm Configuration Page
5.4 Alarm configuration page This page is used to enable monitoring of the clock, and to set which information will be sent as well as the destination server. You can choose which parameter or parameters to define as alarms, and configure them. - Page 27 Information: the errors or faults reported are minor and do not in themselves require a visit by a maintenance technician to correct the fault. Warning: the errors or faults reported are serious and require a visit by a maintenance technician to correct the fault. Critical: the errors or faults reported are serious and require a prompt visit by a maintenance technician to correct the fault.
-
Page 28: System Page
5.5 System page This page is divided into four parts as follows: 1st part: information panel displaying software version, time since the clock was powered on and the date of manufacture of the product (year/week). 2nd part: a warning message reminds you that once a password is set, a connection can only be established with the clock's web interface by entering the correct password. -
Page 29: What To Do If
VI - What to do if...? ... Check. What to do if…? ... Check 1) Check that the signal type sent by the master clock is the same as the clock's signal type (NTP). - No synchronisation after installation 2) The NTP server is on the same network as the receiver (IP address, subnet mask and gateways).
Need help?
Do you have a question about the Profil 930 and is the answer not in the manual?
Questions and answers