Advertisement
Quick Links
Advertisement

Related Manuals for MinimumRC Butterfly V1


Summary of Contents for MinimumRC Butterfly V1
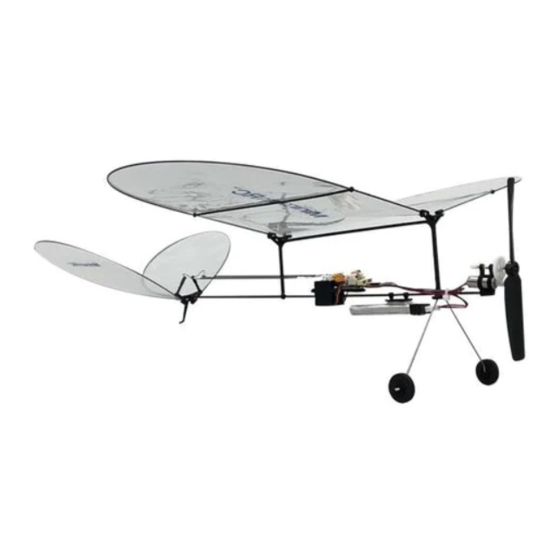
- Page 1 The Ultimate Possibility of Airplane Kits! Butterfly V1 Assembly Instructions...
- Page 2 1. Cut off the connections (shown blue in the picture) and remove the parts. 2. Use utility knife to cut carbon rods. 3. Divide φ0.8mm carbon rod into: 2x 425mm; 2x 300mm; 1x 117mm; 1x 38mm;1x 31mm.
- Page 3 4. Use 502 glue to attach the φ0.8mm carbon rod to the fuselage frame. 6. Insert a φ1.5mm x 250mm carbon rod into the fuselage and glue it with 502 glue.
- Page 4 7. Install part I. Note: Place the fuselage on a level surface to ensure part I level. The slots are facing the tail. 8. Assemble the landing gear. Use heat-shrinkable tube to hold the wheels. 9. Combined motor unit. Note: Only the non-skid end of the shaft can be put into the copper bushing, otherwise it will be stuck.
- Page 5 10. Use glue to bond copper bushing. 11. Install landing gear and battery seat (E), servo seat (L). In case of resistance, slightly polish the clamp. Temporarily not bonded. 12. Take two φ0.8x300mm carbon rods, combine with part C, and fix with 502 glue.
- Page 6 13. Bend the carbon into tail frame; The end of the carbon rod is extended by 10 mm. Note: The direction of carbon rod bending is confusing. Please observe the picture. 14. The carbon rod end stopper (part G) has a gap of 4-5 mm between the stopper and the bracket.
- Page 7 16. Use the screws to secure part H to form a full-motion V-tail. 17. Two φ0.8x425mm carbon rods were taken and combined with Part B to form a wing. Both ends of the carbon rod are 80 mm apart from part B. 18.
- Page 8 21. Use part D to secure the wing.
- Page 9 23. Six propeller adapters (K) have different diameters. Please choose the optimum size according to the propeller aperture. 24. The propeller adapter is wedge-shaped and is installed with the smaller end facing forward.
- Page 10 25.Install the propeller. 26.Install the servos. Use Velcro to attach the battery and receiver. Adjust the center of gravity to 40mm back from the leading edge of wing, glue the mounting base. 27. Use heat-shrinkable tube to connect the φ1mm carbon rod to the clips. Note: The length of the push rods needs to be cut according to the actual demand.
- Page 11 29. Connect the push rods to the tail. It is recommended to use the connection hole at the top of the rudder arm. 30. Connect the pushrods to the servos.
- Page 12 31. 【Film coating method A】Spread the film on a flat surface. 32. Note that the center width of the wing (inside the carbon rod) must be greater than 119 mm. Coat the wing & tail frame is with 7140 glue and paste them. (Optional 3M 77 spray) 33.
- Page 13 34. 【Film coating method B】Twist the film and straighten it to a flat surface. 33. Paste the wing & tail frame. Assembly completed!
- Page 14 First test flight Set the transmitter to V-tail mixing mode: ·Push/pull the elevator control stick, and the tails on both sides tilt up/down at the same time. ·Push/pull the rudder control stick, and the tails on both sides tilt left/right at the same time.
Need help?
Do you have a question about the Butterfly V1 and is the answer not in the manual?
Questions and answers