
Related Manuals for CYP PUV-44XPL-4K22-KIT


Summary of Contents for CYP PUV-44XPL-4K22-KIT
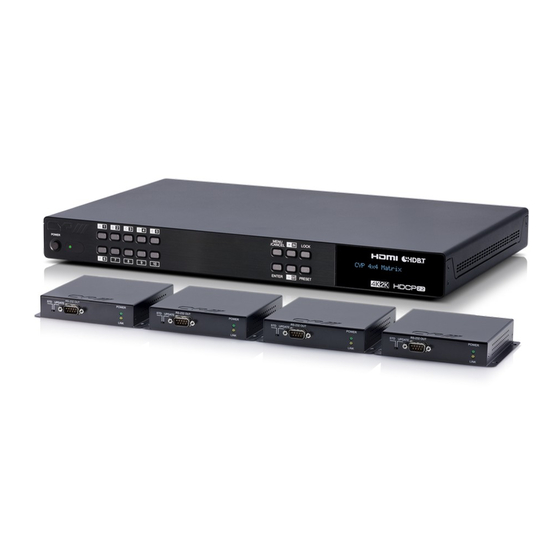
- Page 1 PUV-44XPL-4K22-KIT 4 x 4 HDMI HDBaseT™ LITE Matrix with 2x Independent HDMI outputs & Audio De-embedding (4K, HDCP2.2, PoH, 60m) inc. 4x PUV-1210PL-RX Receivers OPERATION MANUAL...
- Page 3 SAFETY PRECAUTIONS Please read all instructions before attempting to unpack, install or operate this equipment and before connecting the power supply. Please keep the following in mind as you unpack and install this equipment: • Always follow basic safety precautions to reduce the risk of fire, electrical shock and injury to persons.
-
Page 4: Table Of Contents
CONTENTS 1. Introduction ................... 1 2. Applications .................. 1 3. Package Contents ............... 2 4. System Requirements ..............2 5. Features ..................3 6. Operation Controls and Functions ..........4 6.1 Front Panel ................4 6.2 Rear Panel ................5 6.4 Remote Control ............... -
Page 5: Introduction
Control is via manual selection buttons, IR, RS-232, Telnet or WebGUI. CYP provide control drivers for all the major control systems. The PUV-44XPL-4K22 is designed to be used with PUV- 1210PL-RX receivers that can utilize the PoH capabilities of the matrix. -
Page 6: Package Contents
3. PACKAGE CONTENTS • 1× 4x 6 Matrix system • 1×24V DC Power Adaptor • 4×IR Blaster • 4×IR Extender • 2×Racked Ear • 1×Remote Control (CR-163) • 1×UK Power Cord • 1×Europe Power Cord • 1×Operation Manual 4. SYSTEM REQUIREMENTS •... -
Page 7: Features
5. FEATURES • HDMI 2.0, HDCP1.4 and HDCP2.2 compliant • Routes four HDMI sources to four displays using four HDBaseT outputs and two independent or mirrored HDMI outputs • Supported HDBaseT resolutions: VGA~WUXGA, 480i~1080p, 4K UHD@24/25/30Hz (R:G:B 4:4: & Y:U:V 4:4:4 & Y:U:V 4:2:2), 4K UHD@ 60Hz (YUV 4:2:0), dependent upon the output display’s EDID settings •... -
Page 8: Operation Controls And Functions
6. OPERATION CONTROLS AND FUNCTIONS 6.1 Front Panel MENU LOCK /CANCEL POWER ENTER PRESET 8 10 POWER: Press this button to power on/ off device. POWER LED: The LED will illuminate in green when the power is on, and shown in red when power off this device. The network function will remain active once press this power off button. -
Page 9: Rear Panel
MINUS (-)/OUT: Press Minus “-” button to navigate down button selection. Press “OUT” button for output port sources selection. LOCK: Press this button for three second to lock all buttons on panel. The right top side will display “L” once front panel locked. Press for few seconds to unlock. - Page 10 IR IN (ALL): Connect an IR extender for IR signal reception. Ensure that remote being used is within the direct line-of-sight of the IR extender. IR signals received will transmitted by all IR blasters connected to the matrix or Receivers. IR OUT (ALL): Connect an IR Blaster for IR signal transmission to the source/input location.
-
Page 11: Remote Control
6.4 Remote Control Power: Press this button to power the matrix MUTE LOCK POWER unit. LOCK: Press this button to lock front panel of matrix unit. MUTE: Mutes Zone Audio outputs. HDBaseT audio can only be muted when an independent non HDMI audio has been routed to these outputs. -
Page 12: Oled Menu
6.5 OLED Menu LEVEL LEVEL LEVEL EDID EDID Mode All/Independent EDID Select All/1~6/7~12/13~16 (1~6=Default EDID settings, 7~12=Sink’s EDID settings, 13~16=User’s EDID settings) Network Link Status (Idle) IP Address Subnet Mask Gateway Address MAC Address DHCP mode On/Off HDMI Mirroring Output E/F Factory Default Yes/No Firmware... -
Page 13: Ir Cable Pin Assignment
6.6 IR Cable Pin Assignment IR Blaster Power IR Signal IR Extender IR Signal Power Grounding 6.7 RS-232 Protocol MATRIX MATRIX Assignment Assignment ► ◄ Baud Rate: 115200bps Data bit: 8 bits Parity: None Flow Control: None Stop Bit: 1... -
Page 14: Rs-232 And Telnet Commands
6.8 RS-232 and Telnet Commands Command DESCRIPTION Video source of HDMI Tx out E~F. HDMI_Out M M=E~F(Support multiple selection). VideoSrc=XXX Available XXX: HDMI_In n, n=1~4 Reset Video source of HDMI Tx out to HDMI_Out M factory default. VideoSrc=Default M=E~F(Support multiple selection). Audio/Video following source of HDMI Tx out E~F. - Page 15 Command DESCRIPTION HDBT_Out M Setup HDBT A~D verbose name. Name=”NameString” M=A~D(Only support single selection). Display HDMI In 1~4 status. HDMI_In M Status M=1~4(Support multiple selection). HDMI_In M Setup HDMI In 1~4 verbose name. Name=”NameString” M=1~4(Only support single selection). SETIP <IP> <SubNet> Setting IP.SubNet.GateWay(Static IP) <GW>...
- Page 16 Command DESCRIPTION Display all available commands Display all available commands(Except Help hidden commands) Show firmware version Setup HDBT_Out zone side audio/video pairing storage slot N video source. ZoneAvPair HDBT_Out M=A~D(Only support single selection). M Slot N VideoSrc=XXX N=1~4 (Support multiple selection). Available XXX: HDMI_In n, n=1~4 Load slot N of HDBT_Out zone side audio/...
- Page 17 Command DESCRIPTION Setup IR source of HDBT Rx end IR out jack. M0=Output port index. M0=A~D (Support multiple selection) M1=Route operation. Available M1: IR_Route HDBT_Out M0 Add: Add M2 input source to HDBT_Out. M1 M2 Del: Delete M2 input source from HDBT_ Out.
-
Page 18: Telnet Control
6.9 Telnet Control Before attempting to use the Telnet control, please ensure that both the Matrix (via the ‘LAN /CONTROL’ port) and the PC/Laptop are connected to the same active networks. To access the Telnet control in Windows 7, click on the ‘Start’ menu and type “cmd”... - Page 19 Once in the command line interface (CLI) type “telnet”, then the IP address of the unit and “23”, then hit enter. This will bring us into the unit which we wish to control. Type “help” to list the available commands. Note: 1.
-
Page 20: Webgui Control
6.10 WebGUI Control • Install the IP Discovery Tool: (1) Connect the Matrix to a PC with a Ethernet connection (via the ‘LAN/CONTROL’ port). Please ensure your PC is on the same active network as the Matrix before running the application. (2) Please download the ZIP file from our website and save it in a directory where you can easily find it again. - Page 21 • Login the WebGUI: (1) Please enter “admin” at both of Username and Password column to log in the WebGUI tool. (2) Following functions tab will show at left side on first pages.
-
Page 22: Video Switch
6.10.1 Video Switch The page offers video routing setting. • Output and Input Routing: Please click the tab for the HDBaseT output port for example “HDB_ Out A” and click HDMI input port “HDMI_In 1” for basic routing setting. When clicking the output ports and input ports, the icons will show in orange. - Page 23 • Output and Input Naming: All inputs and outputs can be named to correspond to the actual devices or rooms as required. Please click the icon to edit the input and output ports name. Please click “save” icon to confirm the change.
- Page 24 • HDMI Output Setting: Two HDMI outputs (port I & port J) allows a maximum timing of 6G (4096x2160p@50/60Hz), these can be used as general routing (named as independent on the WebGUI) and mirrored routing (named as Mirror on the WebGUI) for real time zone mirroring e.g.
- Page 25 • Preset Setting: Eight video and audio routing presets are available to “store”. Click the icon as shown to invoke the Preset page, click the tab to “recall” a previous preset. The end user can utilize presets to recall different routing selections as required.
- Page 26 Recall: Click icon to recall preset setting back.
-
Page 27: Zone A/V Pairing
6.10.2 Zone A/V Pairing The easiest way to use the PUV-44XPL-4K22 for simple HDMI switching whilst still allowing for individually tailored zone audio is to use the Zone AV Pairing settings configured on this section of the webGUI. As the IR remote supplied with the PUV-44XPL-4K22 sends AV pairing com- mands, if you wish to use this remote it is necessary to configure this page when any non-HDMI audio is required to be routed along with the corre- sponding video. -
Page 28: Edid Settings
Video and Audio Setting: Please click the icon to edit the zone video routing setting, please save the setting once complete selection. 6.10.3 EDID Settings • Customer EDID Settings: Click the “Upload” tab to import a custom saved EDID file. - Page 29 • Sink EDID Download: Ten sets of sink EDID’s and four sets of customer EDID are available for EDID management. Four sets of customer EDID files allow the customer to edit the names and customized the EDID data. • Set EDID Input Content: The EDID management can be set in two ways.
-
Page 30: Hdbaset & H/W Info
Note: The matrix unit comes with 6 sets of default EDID setting. The settings are as following. 1. FHD / 2CH:1080p/60Hz(148M),2.0LPCM, 8-bit color. 2. FHD / MCH:1080p/60Hz(148M),7.1LPCM and bit-stream, 8-bit color. 3. 4K UHD / 2CH : 3840*2160p/30Hz (297M), 2.0LPCM, Deep color (8/10/12-bit) 4. -
Page 31: User Config
6.10.11 User Config The Web and Telnet login user name and password allows to setting on this page. Two levels management are available, one is “administrator” and the other one is “general user” 6.10.12 System Settings The system configuration includes power on/off, network setting, down- load &... -
Page 32: Edid Setting
6.10.13 EDID Setting Click the “Download” tab to download current system configuration. The current system configuration will be stored as XML file. The system configu- ration is able to be restore once selected the XML file and restore. 6.10.13 Logout Click the logout tab at left side, it will automatic to logout the WebGUI and return to login page. -
Page 33: Connection Diagram
7. CONNECTION DIAGRAM HDMI Source Devices • HDMI Input • IR Output 1.5m 1.5m 60° 60° 1.5m 1.5m 60° 60° Audio Zones • Analog Audio Output RS-232 Equipped RS-232 PC or Control System Power Supply HDMI Output HDMI Output Internet 60°... -
Page 34: Specifications
8. SPECIFICATIONS 8.1 Technical Specifications Video Bandwidth HDMI: 600 MHz/18 Gbps HDBaseT: 340 MHz/10.2 Gbps Input Ports 4×HDMI, 4×Stereo Audio (2×RCA) Output Ports 2×HDMI, 4×CAT5e/6 Control Ports 4×IR Extender, 4×IR Blaster, 1×RS-232 (9- pin D-sub), 1×Control Service Port 1×USB 2.0 HDMI Resolutions 480i~4K2K@50/60 Hz EDID Management... -
Page 35: Supported Timing Table & Maximum Hdmi Cable Length
8.2 Supported Timing Table & Maximum HDMI Cable Length Supported timing table HDMI Input Output 480i@60 480p@60 576i@60 576p@60 640 x 480@60 800 x 600@60 720p@50/60 1080i@50/60 1080p@24/50/60 1024 x 768@60 1280 x 1024@60 1360 x 768@60 1600 x 1200@60 1920 x 1200@60 2560 x 1440@60 3840 x 2160@24/25/30/50/59.94/60... -
Page 36: Supported Audio Formats
Maximum HDMI Cable Length Timing Input Output 8 bit 1080p 12 bit 1080p 3840 x 2160p YUV420 3840 x 2160p YUV444 (Certified HDMI2.0 premium cable) Note: The 6G YUV444 of HDMI inputs converts to 3G YUV420 for four output ports of HDBaseT. Some TV not support YUV420 will cause error of color space changed. -
Page 37: Hdbaset Features
Dolby Digital Dolby Digital 5.1CH DTS 5.1CH Dolby Digital Plus DTS-HD High Resolution Audio Dolby TrueHD DTS-HD Master Audio Dolby Atmos Note: 1.The optical & coaxial supports PCM2ch,Dolby 5.1,DTS 5.1. 2.When input not LPCM 2ch, the extended auido of L/R out will be mute. -
Page 38: Cat5E/6/7 Cable Specifications
8.5 CAT5e/6/7 Cable Specifications Cable Type Range Pixel Clock Video Supported Video Rate Data Rate Formats CAT5e/6/7 ≤225 MHz ≤5.3 Gbps Up to 1080p@60 Hz, CAT5e/6 36-bit, 3D (data Video) rates lower than CAT6/7 5.3 Gbps or below 225 MHz TMDS clock). -
Page 39: Acronym
9. ACRONYM ACRONYM COMPLETE TERM CAT5e Category 5 Cable CAT6 Category 6 Cable CAT7 Category 7 Cable Consumer Electronics Control Command Line Interface COAX Coaxial Digital Theater System Digital Visual Interface EDID Extended Display Identification Data Graphical User Interface HDCP High-bandwidth Digital Content Protection HDMI High-Definition Multimedia Interface... - Page 40 CYP (UK) Ltd., Unit 7, Shepperton Business Park, Govett Avenue, Shepperton, Middlesex, TW17 8BA Tel: +44 (0) 20 3137 9180 | Fax: +44 (0) 20 3137 6279 Email: sales@cypeurope.com www.cypeurope.com RDV1...
Need help?
Do you have a question about the PUV-44XPL-4K22-KIT and is the answer not in the manual?
Questions and answers