
Related Manuals for Argon 18 KRYPTON PRO 302A


Summary of Contents for Argon 18 KRYPTON PRO 302A
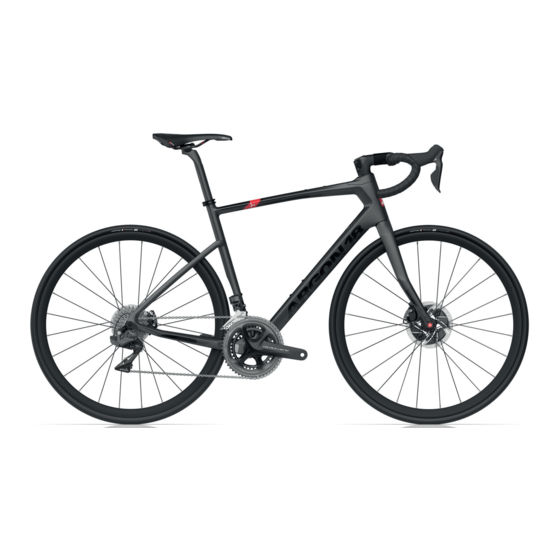
- Page 1 KRYPTON PRO 302A ASSEMBLY GUIDE Valid for MY2020 Krypton Pro 302A Revision 1.0 - 08.30.2019...
-
Page 2: Table Of Contents
Annex B. Tips for Traveling with a Bike Box ....36 For the warranty to be valid, the bicycle must be fully assembled by an authorized Argon 18 dealer. High-end components, particularly carbon parts, need extra care when assembled. -
Page 3: Tools Needed And First Aid Kit
KRYPTON PRO 302A 1. Tools Needed & First Aid Kit Tools needed for assembly 1. Bearing Cup Press (Park Tool HHP-2) 2. Allen Key Set 3. Grease 4. Utility Pick Set (Park Tool Item #UP-SET) 5. Clean Rags 6. Derailleur Hanger Alignment Gauge (Park Tool Item #DAG-2) 7. -
Page 4: Frameset Inspection
KRYPTON PRO 302A 2. Frameset Inspection BEFORE ASSEMBLING YOUR NEW KRYPTON PRO, MAKE SURE THAT YOU HAVE ALL THE FOLLOWING: 1. Frameset parts checklist (see Frameset Parts’ SKU and Description p.31-34) 2. All the necessary bolts (refer to Frameset Parts’ SKU and Description, p.31-34) WHEN ASSEMBLING YOUR NEW KRYPTON PRO, MAKE SURE YOU FOLLOW THIS PROCEDURE: 3. -
Page 5: Troubleshooting / Tips / Specification
KRYPTON PRO 302A 3. Troubleshooting / Tips / Specifi cation Brakes Use only fl at mount hydraulic disc brakes. The frame and fork are compatible with either 140mm or 160mm disc rotors. Adapters might be required, consult brake manufacturer. • Rear mount thickness: 25mm Tire Clearance The biggest tires that can be installed must be no wider than 34mm (32c) for the rear and front wheel. -
Page 6: Bike Fitting
4. Bike Fitting Here are the basic bike-fitting steps to follow before proceeding with the complete assembly. Consult your authorized Argon 18 Dealer to assure a proper fit that takes into account your personal specifications. STEP 1: Frame Size • Using the Sizing Chart (p.6), determine the required frame size based on your saddle height measurement. Where two frame sizes are suggested, you can choose depending on your prefered stack, reach and stand-over clearance. -
Page 7: Sizing Chart
KRYPTON PRO 302A 4.1 Sizing Chart Saddle Height Sizing Chart: Krypton Pro Sizing Chart: Krypton Pro With 0 mm Headset With 15 mm Headset With 30 mm Headset Saddle Suggested Seat Tube Top Tube Stack Reach Minimum Maximum Saddle Suggested... -
Page 8: Min/Max Seat Post Insertion
KRYPTON PRO 302A 4.2. Min/Max Seat Post Insertion NOTE: THE ABOVE IMAGE IS FOR VISUAL REFERENCE OF SEATPOST INSERTION ONLY Saddle Height Limits Krypton Pro Refer to the supplied table for details on Saddle Height and SeatPost insertion limits. The correct frame size must be determined according to the saddle height limits. -
Page 9: Stack Height Adjustment
KRYPTON PRO 302A 4.3. Stack Height Adjustment Note: Validate the required Stack Height before proceeding with the cable routing. • A total of 60mm of stack adjustment is possible. • Using the Sizing Chart’s Stack and Reach columns (p.6), determine the required 3D system headset size (0mm, 15mm or 30mm) based on your recommended handlebar position. -
Page 10: Stem Compression Cap And Over-Stack Spacer
KRYPTON PRO 302A 4.4. Stem Compression Cap and Over-Stack Spacer The Krypton Pro comes with two diff erent Stem Caps: 1. Integrated version for a slick integration: • Profi led Top Compression Cap (7.5) • Flat Head Screw M5x25mm (7.6) 2. Flat version for over-stack spacers to keep an extra length of fork steerer tube until your fi t is confi rmed. -
Page 11: Cutting The Fork's Steerer Tube
KRYPTON PRO 302A 4.5. Cutting the Fork’s Steerer Tube To assemble the Krypton Pro Stem with the Integrated Top Compression Cap (7.5), the fork’s steerer tube must be cut-to-size. 1. Confi rm your desired stack height and stem height position. Measure twice, cut once! 2. Mark the top-back-end of the stem’s carbon body (7.1). -
Page 12: Headset Installation
KRYPTON PRO 302A 4.6. Headset Installation Steps of assembly 1. Insert the headset plastic sleeve into the top on the headtube. (apply grease) 2. Insert the required headset column, 0, 15 or 30mm, in the headset plastic sleeve. (apply grease) *** After Step 2., complete the frame cable routing before continuing with Step 3. -
Page 13: Rear Derailleur Hanger Adjustment
KRYPTON PRO 302A 5. Rear Derailleur Hanger Adjustment 1. Select the correct rear derailleur hanger depending on the type of derailleur that you have. a. Direct mount b. Regular mount 2. Make sure to align the rear derailleur hanger. 3. Use Derailleur Hanger Alignment Gauge like Park Tool Item #DAG-2. -
Page 14: Cable And Housing Routing - Electronic Shifting
KRYPTON PRO 302A 6. Cable and Housing Routing - Electronic Shifting Rear derailleur cable and rear brake housing must be routed above the BB carbon sleeve. Red line: brake cable/housing / Yellow line: derailleur cable/housing... - Page 15 KRYPTON PRO 302A 6. Cable and Housing Routing - Electronic Shifting Depending of the type of assembly, you will have to select the correct parts. Tip: No matter the type of assembly you will choose, always pass the brake housing fi rst starting from the back of the bike to the front.
- Page 16 KRYPTON PRO 302A 6. Cable and Housing Routing - Electronic Shifting EW = Electronic Wire Use the square hole to connect all the wires to the junction box. Insert the junction box in the hole. Insert the BB cover in the square hole until it clicks.
- Page 17 KRYPTON PRO 302A 6. Cable and Housing Routing - Electronic Shifting BR = Brake Hose Exit the hydraulic brake hose through EW = Electronic Wire the hole on the chain stay.
-
Page 18: Cable And Housing Routing - Mechanical Shifting
KRYPTON PRO 302A 7. Cable and Housing Routing - Mechanical Shifting Rear derailleur cable and rear brake housing must be routed on the right side in the inside of the downtube. Red line: brake cable/housing / Blue line: derailleur cable/housing Rear brake housing need to routed above the bb carbon sleeve. - Page 19 KRYPTON PRO 302A 7. Cable and Housing Routing - Mechanical Shifting The Krypton Pro is optimized for electronic shifting groupsets. The frame is also compatible with mechanical groupsets through our modular console. Rear derailleur housing Front derailleur housing Rear derailleur...
- Page 20 KRYPTON PRO 302A 7. Cable and Housing Routing - Mechanical Shifting DC = Derailleur Cable (mech.) Exit derailleur cables through bottom bracket (BB) hole. Insert in the appropriate slots in the BB guide. Making sure the pipe is aligned with the top hole,...
- Page 21 KRYPTON PRO 302A 7. Cable and Housing Routing - Mechanical Shifting DC+DH BR = Brake Hose Exit the hydraulic brake hose through DC = Derailleur Cable (mech.) the hole on the chain stay. DH = Derailleur Housing (mech.)
-
Page 22: Stem Assembly
KRYPTON PRO 302A 8. Stem Assembly The Krypton Pro has a fully integrated cockpit system (IST) 7.11 that consist of the following parts: • Fork with proprietary steerer (2) • 3D+ system Headset w/ specific expander (4.4) • HT Top cap, in 3 sizes: 0mm (4.1), 15mm (4.2), 30mm (4.3) •... - Page 23 KRYPTON PRO 302A 8. Stem Assembly Stem Assembly - Step #1 After completion of the frame’s internal cable routing (refer to section 6. or 7.), you will have two cable / hose coming out of the HT: • Rear brake hydraulic housing (BR) •...
- Page 24 KRYPTON PRO 302A 8. Stem Assembly Stem Assembly - Step #2 1. Prepare the fork by routing the front brake hose thru the inside of the left blade, out of the left-side hole in the steerer (use the right-side hole if you are assembling the front brake on the right-side lever).
- Page 25 KRYPTON PRO 302A 8. Stem Assembly Stem Assembly - Step #3 1. Install spacers, if required (refer the Stack Height Adjustment instructions, p.8). 2. Thread the cable / hoses into the 1st Spacer and slide the 1st Spacer onto the steerer tube.
- Page 26 KRYPTON PRO 302A 8. Stem Assembly Stem Assembly - Step #4 1. Thread the cable / hoses into the Cables/ hoses Hood (7.2). The Molecule must be placed at the top-front position. 2. Slide the Hood over the Stem’s Carbon Body, enough to clear the handlebar and the bar clamp.
- Page 27 KRYPTON PRO 302A 8. Stem Assembly Stem Assembly - Step #5 1. Install the Bar Clamp (7.4) using the 4 M5x14mm Screws (7.11). Apply grease on the screw threads and only engage all screw threads. CARBON FIBER 2. First, tighten the top screws. Torque at 5Nm.
- Page 28 KRYPTON PRO 302A 8. Stem Assembly Stem Assembly - Step #6 Complete the cable / hoses routing into the handlebar and shifters according to the manufacturer’s recommendations.
-
Page 29: Seat Post Collar Assembly
KRYPTON PRO 302A 9. Seat Post Collar Assembly CARBON FIBER ASSEMBLY PASTE 4 Nm Assemble the seat post collar over the frame’s seat tube. Apply carbon fiber assembly paste on the seat post where it inserts inside the frame. Grease the screw and tighten at 4 Nm. -
Page 30: Seat Post Assembly
KRYPTON PRO 302A 10. Seat Post Assembly The seat post is supplied fully assembled. It’s equipped with a spring-loaded head for easy installation of the saddle. GREASE • Unscrew both bolts slightly until the top clamp (b) and the cradle (c) are separated enough to insert the saddle rail. -
Page 31: Chain Catcher
KRYPTON PRO 302A 11. Chain Catcher 1. Select the corresponding chain catcher. The selection of the correct chain catcher is made in function of the size of the small chaining. Small Chain Chain Ring Size Catcher 34-36 Small 38-42 Large 2. -
Page 32: Fender Bracket
KRYPTON PRO 302A 12. Fender bracket Maximum insertion of the screw: 10mm The maximum length insertion for the fender is the same on both seat stay. i. According to the model of fender using place the backet at the correct hight on the seatstay. -
Page 33: Frameset Parts' Sku And Description
KRYPTON PRO 302A 13. Frameset Parts’ SKU and Description 81056 81057 81058 80807 80803 80801 SP.KRYPRO.302A 81060 81061 81062 80802 81063 81070 81071 80800 FK.KRYPRO.XXS-XS.302A FK.KRYPRO.S-XL.302A 80808 80832 80551 80804 80805 80264 80806 80813 80812 70-80mm: 81073 38446 80811 70-80mm: 81077... - Page 34 KRYPTON PRO 302A 13. Frameset Parts’ SKU and Description* Name A18 SKU# KRYPTON PRO FRAME NOT AVAILABLE AS SPARE PART REAR DERAILLER HANGER (INCL. DROPOUT AND SCREW) 80802 REAR DERAILLER HANGER DIRECT MOUNT 80832 FLAT HEAD CAP SCREW M4 x 0.7 x 12 LG - For Console cover & HS caps 81087 REMOVABLE CABLE STOPPER (INCL.
- Page 35 KRYPTON PRO 302A 13. Frameset Parts’ SKU and Description Name A18 SKU# Stem 70mm Krypton Pro (carbon body only) 81088 Stem 80mm Krypton Pro (carbon body only) 81089 Stem 90mm Krypton Pro (carbon body only) 81090 Stem 100mm Krypton Pro (carbon body only)
-
Page 36: Annex A. Stem Swap Kits
KRYPTON PRO 302A ANNEX A. Stem Swap Kits No. Name Part list A18 SKU# Image Ref. (1x) Stem 70mm Krypton Pro (carbon body only) 1. SWAP KIT FOR STEM LENGTH 70MM (1x) Cables/hoses Hood for Stem 70-80mm 81064 1 kit... -
Page 37: Annex B. Tips For Traveling With A Bike Box
KRYPTON PRO 302A ANNEX B. Tips for Traveling with a Bike Box Integrated cables can sometimes present a challenge when packing a bike for travel, but this is not the case with the Krypton Pro. The entire cockpit can be removed as one piece and attached to the frame within a box or bike bag, in the same way as a regular cockpit and cables.
Need help?
Do you have a question about the KRYPTON PRO 302A and is the answer not in the manual?
Questions and answers