Table of Contents
Advertisement
Quick Links
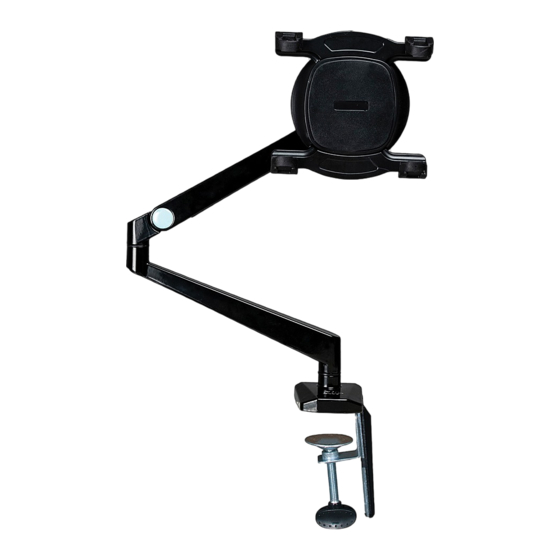
Item No.: PAD-TAM
Installation guide
1kg
7"-12"
S T E P 1
Twist ring counter-clockwise to loosen.
2
S T E P 3 - A
M5X8MM
M5X6MM
3X3MM
A(3PCS)
B 2PCS
(
)
C 1PCS
(
)
Main body
1
PCS
1
1
2
Fixed plate
1PCS
2
Screw
3
1PCS
Bottom support 1
1PCS
4
8
Anti-slip rubber 1
5
2PCS
3
Washer
6
1PCS
Knob nut
1PCS
7
9
Anti-slip rubber 2
8
4PCS
Bottom support 2
9
1PCS
Anti-slip rubber 3
1PCS
4
10
10
11
Knob
1PCS
Cable cover
1PCS
12
12
11
S T E P 2
Slip ring over ball end of arm then snap ball into female
end of holder. Twist ring clockwise to tighten.
2
8
A
C
9
6
B
11
12
C
S T E P 3 - B
1
2
4
5
3
3
6
7
A
4
C
S T E P 4
Adjusting the Tablet Stand
1
S T E P 5
Installing Your Tablet
10
8
5
6
C
After putting in the tablet, if the
Stand can not be hovering, use
3mm Allen Key(C) to adjust.
1.Press the button to adjust
gears that fit different tablets.
2.Put the tablet in.
7
Press
Advertisement
Table of Contents

Subscribe to Our Youtube Channel
Related Manuals for CTA PAD-TAM


Summary of Contents for CTA PAD-TAM
- Page 1 S T E P 3 - B M5X8MM M5X6MM 3X3MM Item No.: PAD-TAM A(3PCS) B 2PCS C 1PCS Main body Installation guide Fixed plate 1PCS Screw 1PCS Bottom support 1 1PCS Anti-slip rubber 1 2PCS Washer 1PCS Knob nut 1PCS...
- Page 2 S T E P 6 Using cable management CAUTION CAUTION This product contains small items that could be a choking hazard if swallowed.Keep these items away from young children. ● Please read the intruction manual carefully before installation and follow the procedure step by step. ●...
Need help?
Do you have a question about the PAD-TAM and is the answer not in the manual?
Questions and answers