
Subscribe to Our Youtube Channel
Related Manuals for ekwb EK Series


Summary of Contents for ekwb EK Series
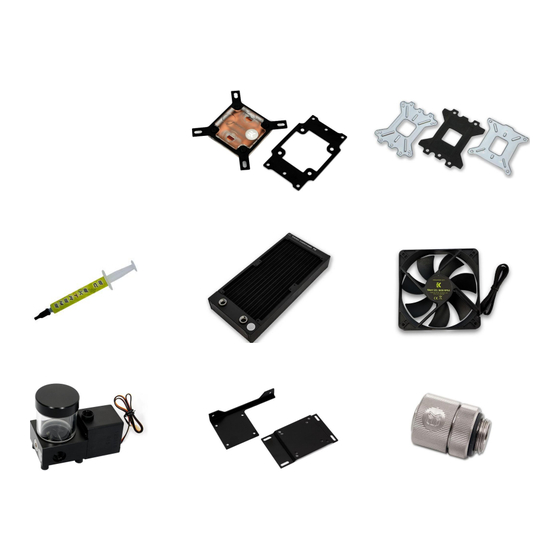
- Page 4 CPU Water Block with AMD plate CPU Backplate mechanism CPU Wasserkühler mit AMD Verpackung CPU Backplate Montagehalterung Thermal compound - grease Radiator Wärmeleitpaste Radiator Lüfter Pump/reservoir combo Pump/reservoir holders Compression fittings AGB-Pumpenaufsatz Pumpe/Tank Behälter Klemmverschraubung CPU mounting mechanism Coolant Tube CPU-Kühler Montagematerial Kühlmittel Schlauch...
- Page 6 The following instructions are subject to change without notice. Please visit our web site at www.ekwb.com updates. Before installation of this product please read important notice, disclosure and warranty conditions printed on the back of the box.
-
Page 7: Step 5: Installing The Water Block
STEP 5: INSTALLING THE WATER BLOCK: STEP 5a: Intel LGA-775/1366 and AMD socket motherboard: STEP 5b: Intel LGA-115x socket motherboard: 1) Place motherboard on an even surface with front facing down. 1) Place motherboard on an even surface with front facing down. 2) Install backplate rubber gasket - depending on your CPU platform 2) Install backplate rubber gasket depending on your CPU platform see STEP... - Page 8 Open PC chassis and remove stock fans. Secure the motherboard by screwing in motherboard Install the necassery spacers and install the motherboard. mounting screws (provided with your PC chassis) Befestigen sie das Mainboard in dem sie die dafür Gehäuse öffnen und Original-Lüfter entfernen vorgesehenen Befestigungsschrauben anbringen (warden mit Ihrem Gehäuse mitgeliefert) Take the fans and put it on the radiator.
- Page 9 Screw in all four UNC 6-32 x 4 screws per fan into the threaded holes on the Install the fans and the radiator on the spot where normally air cooling radiator casing. Use enclosed 2mm allen key to tighten the screws in clockwise fans take place.
- Page 10 Use enclosed UNC 6-32 x 30 with 2mm allen key screws to install DCP 2.2 X- You must remove the two bottom UNC 6-32 x 30 screws that hold fan RES fan holder onto the fan chassis. Make sure that the screws are holding against the radiator.
- Page 11 Attach Classic mounting plate to the chassis using four M4x6 screws as Make sure that the screws are holding tight, but do not exaggerate with the shown on the drawing above. Use 2.5mm allen key to tighten the screws. force applied. Verschrauben Sie die klassische Installations-Platte mit dem Gehäuse und verwenden Sie zu diesem Zweck M4x6-Schrauben.
- Page 12 Take the cable with adaptors from the Connect pumps female 3-PIN connector to male Connect 4-pin Molex female connector to male pump delivery. connector of the motherboard. Molex connector of the power supply. Den 3-Pin Anschluss der Pumpe mit dem Schliessen Sie den weiblichen 4-Pin-Molex- Kabeladapter aus dem Lieferumfang entsprechenden Anschluss des Adapters...
- Page 13 Fill up the liquid while the pump is running and Alternately turn off and on (cycle) power supply Turn on the power supply stop when the water level reaches 2 cm under in few second intervals to speed up air bleeding the edge process.
- Page 14 Cover all exposed hardware with a towel or Unscrew one of the G1/4 fitting rings on the Gently pull the tube off the fitting and direct it into paper towels. Unmount the pump/reservoir inlet port of the pump/reservoir combo. the container. combo and hold it above the container.
Need help?
Do you have a question about the EK Series and is the answer not in the manual?
Questions and answers