
Related Manuals for ekwb EK-XLC PREDATOR 240


Summary of Contents for ekwb EK-XLC PREDATOR 240
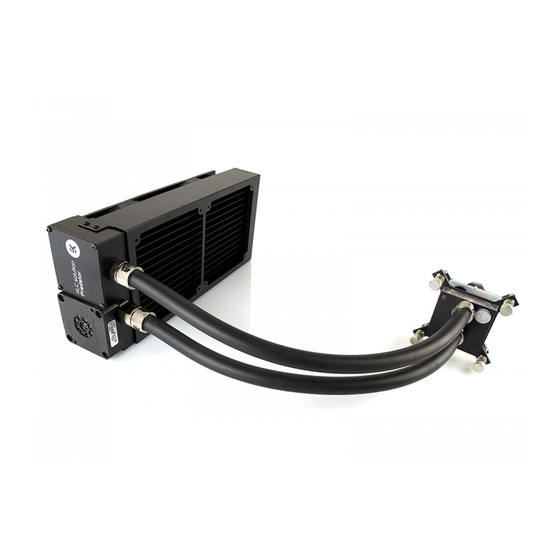
- Page 1 For EK-XLC Predator (r1.1) series units | 3rd revision, Dec 1st 2015 Pre-fi lled CPU Xpandable Liquid Cooling EK-XLC PREDATOR 240 360 USEr gUIDE...
-
Page 3: Safety Precautions
If there is any problem, contact the shop where you have purchased the problem to get a replacement or refund. 3. EKWB d.o.o. is not responsible for any damages due to external causes, including but not limited to, improper use, problems with electrical power, accident, neglect, alteration, repair, improper installation and improper testing. -
Page 4: Table Of Contents
In CASE OF CPU OVErHEATIng QUICK INSTALLATION GUIDE THE COOLEr IS TOO LOUD RADIATOR SPACE CONSTRAINT REQUIREMENTS GENERAL LIQUID COOLING PARTS CLEANING GUIDE EK-XLC PrEDATOr 240 PrEVEnTIVE STEPS EK-XLC PrEDATOr 360 (InCL. QDC) PART SPECIFICATION LIST UNIT ORIENTATION LIMITATIONS PUmP XyLEm DDC – 3.1... -
Page 5: Scope Of Delivery
SCOPE OF DELIVEry All-in-one expandable liquid cooling unit EK-XLC Predator 360 (incl. QDC) EK-XLC Predator 240 CPU Backplate mechanism Thermal grease CPU mounting mechanism Installation manual rEQUIrED TOOLS VIDEO InSTALLATIOn gUIDES Our offi cial youTube channel features Phillips-head screwdriver video installation guides, that can help you with Predator installation. -
Page 6: Radiator Space Constraint Requirements
SPACE COnSTrAInT rEQUIrEmEnTS EK-XLC PREDATOR 240 133 mm (5,24 in) Pump Water block radiator 68 mm (2,68 in) / 4 /... -
Page 7: Ek-Xlc Predator 360 (Incl. Qdc)
EK-XLC PREDATOR 360 (INCL. QDC) 415 mm (16,34 in) 15 mm (0,59 in) 120 mm (4,72 in) Pump radiator Water block / 5 /... -
Page 8: Unit Orientation Limitations
UnIT OrIEnTATIOn LImITATIOnS CAUTION: The orientation of the unit is very important as wrong installation may lead to insuf- fi cient cooling performance and premature failure of the unit. The orientation limitations stand for both (240 and 360) versions of the unit. Pump Pump / 6 /... -
Page 9: Electrical Connections
ELECTrICAL COnnECTIOnS CONNECTING THE HUB TO THE POWER SUPPLY STEP 1.: Take the enclosed power cable and plug the two-pin PCI-express minifit power connector to the fan splitter hub. STEP 2.: Use the SATA POWEr connector at the other end and plug it to the female STEP 1 STEP 2 connector found on the main power supply. -
Page 10: Installing The Pump/Fan/Radiator Unit
InSTALLIng THE PUmP/FAn/rADIATOr UnIT STEP 1 mounting of the pump/fan/radiator unit requires special attention. Please take the unit and fi nd the enclosed standard fan mounting screws. you will need 8 screws for 240mm version or 12 screws for 360mm version. you will need a philips-head screwdriver which is not enclosed in the package. -
Page 11: General Information On Waterblock Compatibility
gEnErAL InFOrmATIOn On WATErBLOCK COmPATIBILITy This CPU liquid cooling unit is pre-assembled for use with modern Intel desktop socket type motherboards. By default (out of the box) this water block supports the following CPU sockets: - Intel® Socket LGA-775 - Intel® Socket LGA-115x - Intel®... -
Page 12: Installing The Water Block
InSTALLIng THE WATEr BLOCK LGA-2011(-3) SOCKET MOTHERBOARDS STEP 1 LgA-2011 m4 Prepare the foil bag with mounting mechanism, which is enclosed with the EK- LgA-2011 m4 Thumb Screw XLC Predator block delivery. Thumb Screw Install four (4) specific LgA-2011 m4 thumb screws into four m4 threaded stubs on the LgA-2011 socket integrated latch mechanism (ILm). -
Page 13: Lga-115X Socket Motherboards
STEP 3.: Align the water block over the mounting screws on the LgA-2011(-3) motherboard with pre-installed CPU. Before proceeding with the installation It is mandatory to remove the protective foil from the backside of the water block. Place an enclosed compression spring and thumb nut over each m4 thumb screw. - Page 14 STEP 3 Install backplate rubber gasket and place metal backplate for Intel LgA-115x socket to the back of your motherboard rIBBED SIDE UP! (facing away from the motherboard) Align the holes on the metal m4 Thumb motherboard with holes on rubber gasket and backplate. Backplate Screw make sure to orientate the rubber gasket to fi t past the...
- Page 15 STEP 6 Align the water block over the mounting screws on the LgA-115x moth- erboard with pre-installed CPU. Place an enclosed coiled spring and thumb nut over each m4 thumb screw. Start fastening two thumb nuts at a time, preferably in cross pat- Thumb nut tern and do not tighten them fully until all of them are partially screwed Coiled spring...
-
Page 16: Possibilities Of Expanding The System
POSSIBILITIES OF EXPAnDIng THE SySTEm EK-XLC PREDATOR 240 The EK-XLC Predator 240 is capable to cope with expansion of the system with one additional waterblock, radiator and reservoir (optional). yOU mAy nEED TO rEmOVE COmPLETE UnIT FrOm yOUr COmPUTEr CHASSIS! -
Page 17: Adding Components To The Loop
Take the additional liquid cooling component (water block of any type, radiator...) and mount it according to its installation manual. To connect it to the EK-XLC Pred- ator 240 unit please follow the steps below: STEP 3.: Connect the loose tube from Predator unit to the 10/16 fi tting on the additional water block. STEP 4.: make sure that the tube sits fi rmly on the fi tting barb and then tighten the compression ring using your hands only. - Page 18 STEP 9.: reinstall the plug, removed in STEP 7 using 6mm Allen key. Afterwards place the unit on the fi rm surface with fans facing upwards as pictured in STEP 9 and 10 STEP 10.: Unscrew the integrated reservoir plug in counter-clockwise direction using 6mm Allen key.
-
Page 19: Adding An External Reservoir (Optional) 1
STEP 14.: It is always a good practice to conduct a 24-hour leak test to ensure the system is leak free and safe to use. Upon completing the leak test please reinstall the liquid cooling unit back into your computer chassis. Before you add the power to your computer please check if everything is installed according to the installation manual. -
Page 20: Ek-Xlc Predator 360 (Incl. Qdc)
POSSIBILITIES OF EXPAnDIng THE SySTEm EK-XLC PREDATOR 360 (INCL. QDC) The EK-XLC Predator 360 (incl. QDC) is capable to cope with expansion of the system with additional 2 (two) waterblocks and 1 (one) radiator. There is no need to unmount the unit from the chassis unless you have some tube-routing constraints. -
Page 21: Connecting The Pre-Filled Water Block/Radiator Unit
STEP 5.: Connect the QDC couplings according to the sketch on the right. you will feel the locking click sound when assembled correctly. The installation is now complete. OPTIONAL STEP 6.: Plug in the ATX bridging plug. make sure nothing except the fan splitter hub is plugged to the power supply. -
Page 22: Adding An External Reservoir (Optional)
OPTIONAL Adding an external reservoir: In order to make the refi lling process of the unit after the expansion easier it is recommended to install an additional reservoir. To achieve the best fl ow balance in the loop it is mandatory to install the reservoir on the last stage in before the water enters the pump/radiator/fans unit –... -
Page 23: Maintenance
mAInTEnAnCE In order to obtain the best performance through they should. The pump and fans must run silently without any rattling noises and must react to PWm duty cycle changes.. All imperfections may lead to whole lifespan of the product it is crucial to follow overheating and breakdown. - Page 24 A: The Predator units typically operate at about 135L/h (EK-XLC Preda- tor 360 (incl. QDC)) and 170L/h (EK-XLC Predator 240) respectively. Is it possible to ‘daisy-chain’ the integrated PWM splitter? Installing a typical gPU water block with Quick-Disconnect Couplings (QDC) typically drop fl ow rates from 135L/h to about 105L/h.
-
Page 25: Troubleshooting
Upon exhausting all options please consult EK knowledge base at when obstructed by other computer chassis elements such as closing side http://support.ekwb.com . raise a question through EK Support panel doors. Check the tubing for any signs of kink which restrict the flow. -
Page 26: The Cooler Is Too Loud
THE COOLER IS TOO LOUD: General Gigabyte Z170/X99 motherboard guide: The Predator unit is equipped with fast-spinning EK-Vardar high-static pres- sure PWm controlled fans, which run at very high speed if the UEFI/BIOS is 1. Enter UEFI and go to m.I. T . - > PC Health Status not set to control fan speed. -
Page 27: Preventive Steps
with distilled water. After rinsing we recommend soaking the water blocks in Algae- or dirt deposits may be rubbed out using soft cloth in com- paper towels until completely dry. It is nearly impossible to avoid the naturally bination with warm, soapy water. rinse with distilled water after occurring copper tarnishing (oxidation) as the oxidation will reoccur the mo- cleaning. -
Page 28: Part Specification List
PArT SPECIFICATIOn LIST PUMP XYLEM DDC – 3.1 p Xylem DDC - 3.1 1,80 Pump Type ..........DC centrifugal Pump 1,60 Bearing Type ..........Ceramic Bearing Ball 1,40 rated Voltage ........12VDC Operating voltage ....... 8*-13,2VDC *9v starting 1,20 Pump rPm ..........3000rPm 1,00 Dimensions (LxWxH) ..... -
Page 29: Fan Splitter Hub
FAN SPLITTER HUB To the Power supply unit Fan splitter hub All the elements that need electricity to run are connected to the fan splitter hub, located on the bac k of the unit. Fan 3 This fan splitter hub contains three 4-pin PWm Fan Pump Fan 2 Fan 1... -
Page 30: Fans
FANS EK-Vardar F4-120 Fan type ..............PWm rated Voltage ..........12 VDC Power Draw ............2,16W max Air Flow ..........77 CFm = 131 m³/h Static Pressure ..........3.16mm H2O = 31 Pa noise Level .............33.5 dBA - m3/h max speed ............2200 rpm (+/- 10%) Life Expectancy ..........50.000 hrs @ 40°C (mTBF) Dimensions .............120 x 120 x 25 mm THERMAL GREASE... -
Page 32: Support And Service
SUPPOrT AnD SErVICE For assistance please contact: http://support.ekwb.com/ EKWB d.o.o. Pod lipami 18 1218 Komenda Slovenia - EU SOCIAL mEDIA EKWaterBlocks @EKWaterBlocks ekwaterblocks EKWBofficial ekwaterblocks...
Need help?
Do you have a question about the EK-XLC PREDATOR 240 and is the answer not in the manual?
Questions and answers