
Subscribe to Our Youtube Channel
Related Manuals for Southern Enterprises Kedzie Multilevel Desk HO730400TX


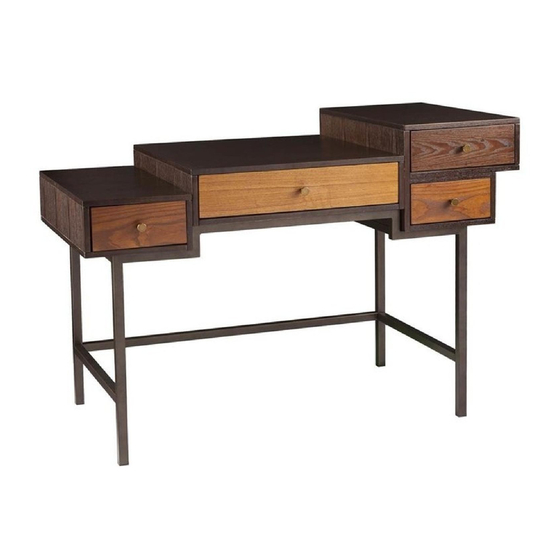
Summary of Contents for Southern Enterprises Kedzie Multilevel Desk HO730400TX
- Page 1 HO730400TX Kedzie Multilevel Desk For assistance with assembly, contact: Southern Enterprises, Inc. Customer Service: 1-800-633-5096 Assembly Instructions service@seidal.com www.seidal.com PO#:13864 Page | 1...
- Page 2 Kedzie Multilevel Desk Parts List Please check packaging for all parts and hardware before discarding. Unpack and lay parts on clean, padded surface like carpet or blanket. Check that you have all parts indicated. Call customer service if hardware is missing.
- Page 3 Quantity Quantity Quantity of 2 of 1 of 3 Small Drawer Front Panel Big Drawer Front Panel Drawer Left Side Panel Quantity Quantity Quantity of 3 of 2 of 1 Drawer Right Side Panel Small Drawer Back Panel Big Drawer Back Panel Quantity Quantity Quantity...
- Page 4 Quantity Quantity Quantity of 1 of 1 of 1 Right Back Panel-2 Metal Front Frame Metal Back Frame Quantity Quantity of 4 of 2 Top Stretcher Bottom Stretcher Quantity Quantity Quantity of 30 of 30 of 36 Cam Bolts Cam Locks Wood Dowels Dia.
- Page 5 Quantity Quantity Quantity of 4 of 28 of 4 Bolts Screw Dia. 5/32”x 1”L Metal Nut Dia. 5/32” x 1L Quantity Bolt Dia. 1/4x1-1/2” L Care and Cleaning Instructions: Before using, wipe with a clean, dry cloth. For replacement parts or questions, please call Periodically apply furniture wax to renew the Customer Service at 1-800-633-5096.
- Page 6 Kedzie Multilevel Desk Assembly Instructions Start with finger to help align Cam Bolts. Insert Cam Locks (B) into corresponding holes on Centre Bottom Panel (10). Screw Cam Bolts (A) into threaded holes on Left / Right Middle Panel (7/8). Attach Left / Right Middle Panel (7/8) to Bottom Panel (10) by inserting Cam Bolts (A) and Wood Dowel (C) into corresponding holes until all panels meet.
- Page 7 Start with finger to help align Cam Bolts. Insert Cam Locks (B) into corresponding holes on Left Side Panel (4). Screw Cam Bolts (A) into threaded holes on Left Bottom Panel (9). Attach Left Bottom Panel (9) to Left Side Panel (4) by inserting Cam Bolts (A) and Wood Dowel (C) into corresponding holes until all panels meet.
- Page 8 Start with finger to help align Cam Bolts. Insert Cam Locks (B) into corresponding holes on pre-assembled unit from figure 4. Screw Cam Bolts (A) into threaded holes on Right Bottom Panel (11). Attach Right Bottom Panel (11) to pre-assembled unit from figure 4 by inserting Cam Bolts (A) and Wood Dowel (C) into corresponding holes until all panels meet.
- Page 9 Start with finger to help align Cam Bolts. Insert Cam Locks (B) into corresponding holes on pre-assembled unit from figure 3. Screw Cam Bolts (A) into threaded holes on pre-assembled unit from figure 6. Attach pre-assembled unit from figure 3 to pre-assembled unit from figure 6 by inserting Cam Bolts (A) and Wood Dowel (C) into corresponding holes until all...
- Page 10 Attach Back Panels (25/26/27/28) to back of the unit with Screws (H). Tighten Screws (H) with Phillips screwdriver Figure 9 Attach Drawer Side Panels (15/16) to Drawer Back Panel (18) using Screws (K). Insert Drawer Bottom Panel (20) into grooves of Panels (15/16/18). Attach Drawer Front Panel (14) to assembled unit using Screws (K).
- Page 11 Connect Drawer Back Panel (24) to Drawer Bottom (21) using Wood Dowels (C). Attach using Screws (K). Connect Drawer Side Panels (22/23) to drawer using Wood Dowels (C). Use Bolts (M), Metal Nuts (L) and Screws (K) to attach Drawer Side Panels (22/23). Tighten bolts and screws with Allen Wrench (G) and Phillips screwdriver.
- Page 12 Attach the Metal Front Frames (29) to Top Stretchers (31) and Bottom Stretchers (32) with Bolts (D), Spring Washers (E) and Flat Washers (F). Tighten bolt with Allen Wrench (G). Figure 13 Attach pre-assembled unit from figure 13 to pre-assembled unit from figure 10 with screw H Tighten Screws (H) with Phillips screwdriver.
- Page 13 Insert drawer into assembled unit. Make sure slides glide smoothly in and out. Note: There is a lever located on male slide for bottom drawer slide. Push lever to either side in order to detach male slide from female slide. Figure 15 Figure 16 Page | 13...
- Page 14 Figure 17 Now your Kedzie Multilevel Desk is ready to us! is ready to us! Figure 18 Page | 14...
-
Page 15: Parts Replacement Form
90 days of your receipt, we are under no obligation to provide parts or replacement merchandise. For product issues, please contact Southern Enterprises at 800-633-5096 (toll-free) / 972-869-0111 (Dallas), Mon-Fri 9am – 4pm CST, or email us at service@seidal.com. Please ask for customer service representative for issues involving damages or replacement parts.
Need help?
Do you have a question about the Kedzie Multilevel Desk HO730400TX and is the answer not in the manual?
Questions and answers