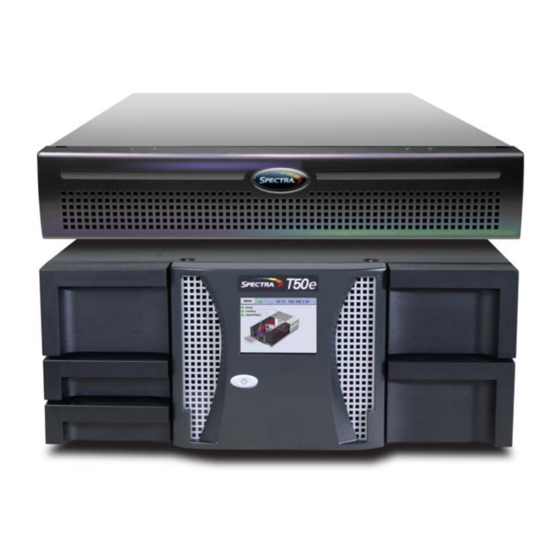
Spectra BlackPearl T50e Installation Manual
Archive solution
Hide thumbs
Also See for BlackPearl T50e:
- User manual (539 pages) ,
- Replacement instructions manual (24 pages) ,
- Installation or replacement instructions (8 pages)
Table of Contents
Advertisement
Quick Links
Advertisement
Table of Contents

Related Manuals for Spectra BlackPearl T50e


Summary of Contents for Spectra BlackPearl T50e
- Page 1 Spectra BlackPearl - T50e Archive Solution Installation SpectraLogic.com...
- Page 2 Notes Installation 90990122...
- Page 3 Trademarks BlackPearl, BlueScale, CC, Spectra, SpectraGuard, Spectra Logic, TeraPack, TFinity, TranScale, and Verde are registered trademarks of Spectra Logic Corporation. ArchiveGrade, ArcticBlue, Verde DP, and Verde DPE are trademarks of Spectra Logic Corporation. All rights reserved worldwide. All other trademarks and registered trademarks are the property of their respective owners. Part Number 90990122 Revision C Revision History Revision Date Description March 2016 Initial release. April 2016 Added additional configuration steps. February 2017 Updated for process changes. Note: To make sure you have the most current version of this guide check the Spectra Logic Technical Support portal at support.spectralogic.com/documentation/user‐guides/. To make sure you have the release notes for the most current version of the BlackPearl Release Notes, check the Spectra Logic Technical Support portal at support.spectralogic.com/documentation/release‐notes/. You must sign into the portal before viewing Release Notes. The release notes contain updates to the User Guide since the last time it was revised. February 2017 Spectra BlackPearl - T50e Archive Solution...
- Page 4 End User 1. READ CAREFULLY License YOU SHOULD READ THE FOLLOWING TERMS AND CONDITIONS BEFORE Agreement ACCEPTING THIS END‐USER LICENSE AGREEMENT (ʺEULAʺ). THIS EULA IS A LEGAL AGREEMENT BETWEEN YOUR ORGANIZATION, THE END USER, AND SPECTRA LOGIC CORPORATION (ʺSPECTRAʺ) FOR THE SPECTRA SOFTWARE PRODUCT WHICH INCLUDES COMPUTER SOFTWARE AND MAY INCLUDE ASSOCIATED MEDIA, PRINTED MEDIA, AND ʺONLINEʺ OR ELECTRONIC DOCUMENTATION (COLLECTIVELY, ʺSOFTWARE PRODUCTʺ). BY INSTALLING, COPYING, OR OTHERWISE USING THE SOFTWARE PRODUCT, YOU AGREE TO BE BOUND BY THE TERMS OF THIS EULA. IF YOU DO NOT AGREE TO THE TERMS OF THIS EULA, YOU MAY NOT INSTALL, COPY, DOWNLOAD OR USE THE SOFTWARE PRODUCT. YOU AGREE THAT YOUR USE OF THE SOFTWARE ACKNOWLEDGES THAT YOU HAVE READ THIS AGREEMENT, UNDERSTAND IT, AND AGREE TO BE BOUND BY ITS TERMS AND CONDITIONS. 2. OWNERSHIP It is understood and agreed that Spectra Logic Corporation, a Delaware corporation with offices at 6285 Lookout Road, Boulder, CO 80301 (ʺLicensorʺ) is the owner of all right, title and interest to the Software Product, regardless of the media or form of the original download, whether by the World Wide Web, disk or otherwise. You, as licensee (ʺLicenseeʺ) through your downloading, installing, copying or use of this product do not acquire any ownership rights to the Software Product. 3. GENERAL The Software Product is licensed, not sold, to you by Spectra for use only under the terms of this EULA. The Software Product is protected by copyright laws and international copyright treaties, as well as other intellectual property laws and treaties. The rights granted herein are limited to Spectraʹs and its licensorsʹ intellectual property rights in the Software Product and do not include any other patents or intellectual property rights. The terms of this EULA will govern any software upgrades provided by Spectra that replace and/or supplement the original Software Product, unless such upgrade is accompanied by a separate ...
- Page 5 A. Spectra will provide you with support services related to the Software Product (ʺSupportʺ). Such Support will be provided in accordance with the Spectra Master Support Agreement, available for download and viewing on the Spectra Corporate Web site. Use of Support is governed by this EULA and Spectraʹs Master Support Agreement, B. Any supplemental software, code, content, or media provided to you in the course of Support shall be considered part of the Software Product and subject to the terms and conditions of this EULA. C. Spectra retains all right, title, and interest in and to the Software Product, and any rights not granted to you herein are reserved by Spectra. You hereby expressly agree not to extract information, reverse engineer, disassemble, decompile, or translate the Software Product, or otherwise attempt to derive the source code of the Software, except to the extent allowed under any applicable law. In the event that such activities are permitted by applicable law, any information you, or your authorized agent, discover shall be promptly disclosed to Spectra and shall be deemed the confidential information of Spectra. D. You shall not modify, sublicense, assign, or transfer the Software Product or any rights under this EULA, except as expressly provided in this EULA. Any attempt to other sublicense, assign, or transfer any of the rights, duties, or obligations will be void. E. You may permanently transfer all of your rights under this EULA, provided you retain no copies. The other party must agree to accept the terms and conditions of the EULA. 7. ALL RESERVED All rights not expressly granted herein are reserved by Spectra. February 2017 Spectra BlackPearl - T50e Archive Solution...
- Page 6 8. TERM A. This License is effective until terminated. Licensee may terminate it at any time by destroying the Software Product with all copies, full or partial, and removing all of its component parties. B. Your rights under this EULA will terminate automatically without notice from Spectra if you fail to comply with any term(s) or condition(s) of this EULA. In such event, no notice shall be required by Spectra to effect such termination. C. Upon termination of this EULA, you shall cease all use of the Software Product and destroy all copies, full or partial, together with all backup copies, modifications, printed or written materials, and merged portions in any form and remove all component parts of the Software Product. 9. INTELLECTUAL PROPERTY RIGHTS A. Spectra shall retain all right, title, and interest in the Software Product and to any modifications or improvements made thereto, and any upgrades, updates or Documentation provided to End User. End User will not obtain any rights in the Software Product, its updates, upgrades, and Documentation, as a result of its responsibilities hereunder. B. B. End User acknowledges Spectraʹs exclusive rights in the Software Product and that the Software Product is unique and original to Spectra and that Spectra is owner thereof. Unless otherwise permitted by law, End User shall not, at any time during or after the effective Term of the Agreement, dispute or contest, directly or indirectly, Spectraʹs exclusive right and title to the Software Product or the validity thereof. 10. U.S. GOVERNMENT END USERS The Software Product and related documentation are ʺCommercial Items,ʺ as that term is defined at 48 C.F.R. §2.101, consisting of ʺCommercial Computer Softwareʺ and ʺCommercial Computer Software Documentation,ʺ as such terms are used in 48 C.F.R. §12.212 or 48 C.F.R. §§227.7202‐1 through 227.7202‐4, as applicable. The Commercial Computer Software and Commercial Computer Software Documentation are being licensed to U.S. Government end users (a) only as Commercial Items and (b) with only those rights as are granted to all other ...
- Page 7 JURISDICTIONS DO NOT ALLOW THE EXCLUSION OF IMPLIED WARRANTIES OR LIMITATION ON APPLICABLE STATUTORY RIGHTS OF A CONSUMER, SO THE ABOVE EXCLUSION AND LIMITATIONS MAY NOT APPLY TO YOU. 13. LIMITATION OF LIABILITY TO THE MAXIMUM EXTENT PERMITTED BY APPLICABLE LAW, IN NO EVENT SHALL SPECTRA, ITS AFFILIATES OR LICENSEES, BE LIABLE FOR ANY SPECIAL, INCIDENTAL, INDIRECT, OR CONSEQUENTIAL DAMAGES WHATSOEVER (INCLUDING, WITHOUT LIMITATION, DAMAGES FOR LOSS OF BUSINESS PROFITS, BUSINESS INTERRUPTION, LOSS OF BUSINESS INFORMATION, OR ANY OTHER PECUNIARY LOSS) ARISING OUT OF THE USE OF OR INABILITY TO USE THE SOFTWARE PRODUCT OR THE PROVISION OF OR FAILURE TO PROVIDE SUPPORT SERVICES, EVEN IF SPECTRA HAS BEEN ADVISED OF THE POSSIBILITY OF SUCH DAMAGES. IN ANY CASE, SPECTRAʹS ENTIRE LIABILITY UNDER ANY PROVISION OF THIS EULA SHALL BE LIMITED TO THE AMOUNT ACTUALLY PAID BY YOU FOR THE SOFTWARE PRODUCT; PROVIDED HOWEVER, IF YOU HAVE ENTERED INTO A MASTER SUPPORT AGREEMENT, SPECTRAʹS ENTIRE LIABILITY REGARDING SUPPORT SERVICES SHALL BE GOVERNED BY THE TERMS OF THAT AGREEMENT. BECAUSE SOME STATES AND JURISDICTIONS DO NOT ALLOW THE EXCLUSION OR LIMITATION OF LIABILITY, THE ABOVE LIMITATION MAY NOT APPLY TO YOU. 14. CONTROLLING LAW AND SEVERABILITY This EULA will be governed by and construed in accordance with the laws of the State of Colorado, as applied to agreements entered into and to be performed entirely within Colorado between Colorado residents. This EULA shall not be governed by the United Nations Convention on Contracts for the International Sale of Goods, the application of which is expressly excluded. If for any reason a court of competent jurisdiction finds any provision, or portion thereof, to be unenforceable, the remainder of this EULA shall continue in full force and effect. February 2017 Spectra BlackPearl - T50e Archive Solution...
- Page 8 Boulder, CO 80301 Bracknell Berks, RG12 8PE United Kingdom Phone: 1.800.833.1132 or 1.303.449.6400 International: 1.303.449.6400 Phone: 44 (0) 870.112.2150 Fax: 1.303.939.8844 Fax: 44 (0) 870.112.2175 Spectra Logic Technical Support Technical Support Portal: support.spectralogic.com United States and Canada Europe, Middle East, Africa Phone: Phone: 44 (0) 870.112.2185 Toll free US and Canada: 1.800.227.4637 Deutsch Sprechende Kunden ...
-
Page 9: Table Of Contents
. . . . . . . . . . . . . . . . . . . . . . . . . 12 REPARE LACE C . . . . . . . . . . . . . . . . . . . . . . . . . . . . . . 13 NSTALLATION HECKLIST Chapter 2 – Install and Configure the Spectra T50e Library I . . . . . . . . . . . . . . . . . . . . . . . . . . . . . . . . 16 IBRARY NSTALLATION Install the Library in a Rack . . . . . . . . . . . . . . . . . . . . . . . . . . . . . . . . . . 16 Remove the Shipping Lock . . . . . . . . . . . . . . . . . . . . . . . . . . . . . . . . . . 19 Install the Tape Drives . . . . . . . . . . . . . . . . . . . . . . . . . . . . . . . . . . . . . . 20 Connect the Cables . . . . . . . . . . . . . . . . . . . . . . . . . . . . . . . . . . . . . . . . . 21 ... - Page 10 Contents B G . . . . . . . . . . . . . . . . . 54 ONFIGURE LACK EARL ATEWAY Power on the Gateway . . . . . . . . . . . . . . . . . . . . . . . . . . . . . . . . . . . . . . 54 Configure the BlackPearl Management Port . . . . . . . . . . . . . . . . . . . 54 Import the Option Activation Keys . . . . . . . . . . . . . . . . . . . . . . . . . . . 56 Log In to the BlackPearl User Interface . . . . . . . . . . . . . . . . . . . . . . . . 56 BlackPearl User Interface . . . . . . . . . . . . . . . . . . . . . . . . . . . . . . . . . . . . 58 Configure Network Settings . . . . . . . . . . . . . . . . . . . . . . . . . . . . . . . . . 60 Configure SMTP Settings . . . . . . . . . . . . . . . . . . . . . . . . . . . . . . . . . . . . 61 Activate Hardware Systems . . . . . . . . . . . . . . . . . . . . . . . . . . . . . . . . . 62 Select a Data Policy . . . . . . . . . . . . . . . . . . . . . . . . . . . . . . . . . . . . . . . . . 64 Set the Default Data Policy for the Administrator . . . . . . . . . . . . . . . 66 Create Users . . . . . . . . . . . . . . . . . . . . . . . . . . . . . . . . . . . . . . . . . . . . . . . 67 View S3 Credentials . . . . . . . . . . . . . . . . . . . . . . . . . . . . . . . . . . . . . . . . ...
-
Page 11: Chapter 1 - Prepare For Installation
® ® the Spectra T50e library and BlackPearl gateway. Topic Related Information page 11 Create a Support Portal Account page 11 Prepare and Place the Rack page 12 Installation Checklist page 13 ELATED NFORMATION For more detailed information about the components of the solution, see the following resources: For additional information about the Spectra BlackPearl Deep Storage gateway, see the Spectra BlackPearl Deep Storage Gateway User Guide at: http://support.spectralogic.com/python/documents/ Spectra%20BlackPearl%20User%20Guide.pdf. For additional information about the Spectra Logic T50e Library, see the Spectra T50e Library User Guide at: http://support.spectralogic.com/ python/documents/T50e%20User%20Guide.pdf. REATE A UPPORT ORTAL CCOUNT The Spectra Logic Technical Support portal provides access to the Knowledge Base, the current version of Spectra library and BlackPearl software, and additional service and support tools. You can also use the support portal to open or update a support incident and upload log files. If you do not yet have a portal account, access the Technical Support portal login page at support.spectralogic.com. On the home page, click Sign up for one now!. Enter the requested information to create your account and click ... -
Page 12: Prepare And Place The Rack
Includes the chassis, the LCM (library control module), four half-height tape drives, two power supplies, and 47 cartridges. c. Includes the chassis, and ten SAS HDDs (hard-disk drives). Keep the following in mind when selecting a rack: Check the rack specifications to make sure it will accommodate the weight and depth of the T50e and BlackPearl chassis. The use of a two‐post rack is not supported. Notes: An enclosed 19‐inch (48.3‐cm), four‐post rack is available for purchase from Spectra Logic. The rack has two doors and removable side panels. Contact Spectra Logic Sales for more information (see Contacting Spectra Logic on page 8). In earthquake prone areas, provide restraints as necessary. The SAS cables between the BlackPearl gateway and the T50e library are 9.8 ft (3 m) long. It is best if the library and the gateway are installed in the same rack. Using a 4‐post rack that is at least 36 inches (91 cm) deep is recommended. -
Page 13: Installation Checklist
2 in. (5 cm), minimum Front mounting post Door frame Door Figure 1 Ensure clearance between the rack’s front door and the front posts. See the Spectra BlackPearl Site Preparation Guide if you have questions on preparing your site. NSTALLATION HECKLIST Use the checklist on the next page to track the completion of the installation steps. You must complete the steps in this checklist in the order listed. Prepare For Installation Date Completed Create a Support Portal Account on page 11 Prepare and Place the Rack on page 12 ... - Page 14 Installation Checklist Install and Configure the Spectra T50e Library Install the Library in a Rack on page 16 Remove the Shipping Lock on page 19 Install the Tape Drives on page 20 Connect the Cables on page 21 AutoInstall the Option Activation Keys and Update the BlueScale Software on page 21 Log In to the BlueScale User Interface on page 22 Create a Partition on page 26 Load Data and Cleaning Tape Cartridges on page 27 Configure Network Settings on page 28 Configure Date and Time on page 31 Create Additional Users on page 32 Configure SMTP and Mail Users on page 34 Back Up the Library Configuration on page 36 Install and Configure the Spectra BlackPearl Gateway Install HBAs in the Gateway on page 43 Install the Gateway in a Rack on page 46 Install Drives on page 52 Connect the Cables on page 53 Power on the Gateway on page 54 Configure the BlackPearl Management Port on page 54 Import the Option Activation Keys on page 56 Log In to the BlackPearl User Interface on page 56 Configure Network Settings on page 60 Configure SMTP Settings on page 61 Activate Hardware Systems on page 62...
-
Page 15: Spectra T50E Library
HAPTER Install and Configure the Spectra T50e Library This chapter describes the steps for installing and configuring the Spectra T50e library for use with a BlackPearl gateway. For additional information about the Spectra Logic T50e Library, see the Spectra T50e Library User Guide. Spectra Logic Professional Services installs larger tape libraries and creates partitions. If the tape library is already installed and configured with at least one storage partition, then skip to Chapter 3 – Install and Configure the Spectra BlackPearl Gateway on page 41. Topic Library Installation page 16 Install the Library in a Rack page 16 Remove the Shipping Lock page 19 Install the Tape Drives page 20 Connect the Cables page 21 Configure the Library page 21 AutoInstall the Option Activation Keys and page 21 Update the BlueScale Software Log In to the BlueScale User Interface page 22 Create a Partition page 26 Load Data and Cleaning Tape Cartridges page 27 Configure Library Settings page 28 Configure Network Settings... -
Page 16: Library Installation
For ease of use, install the library near the center of the rack so you can easily access the front panel, the access port, and the magazines. Install the Library in a Rack The T50e library is shipped with a rack‐mount kit. If your rack is too small for the standard rails, contact Spectra Logic Sales for a substitute rail kit. The rails provided with the library are designed for a standard 4-post 19-inch Warning (48 cm) rack. A 2-post rack will not support the weight of the library. WARNUNG Die mit der Bibliothek vorgesehen Schienen sind für ein Standard- 4-... - Page 17 Install the Library in a Rack The T50e rack‐mount kit contains the following components: Component Rail assemblies Support the chassis in the rack. Each rail is Back Qty = 2 pre‐assembled and consists of the Adjustable following components: slider Adjustable slider Rails (2) Rail Front M6 screws Attach the rail assemblies to the rack. Size Qty = 16 used depends on rack type. M6 x 8 mm (small shoulder) (8 of each style) M6 x 8 mm (large shoulder) Shoulder Use the screws with the larger shoulder for racks with square holes. M5 x 12 screws Secure the library mounting brackets to Qty = 2 the rack. To perform the installation, you need the following tools: #2 Phillips screwdriver, magnetic if available ...
- Page 18 Library Installation 4. Using a #2 Phillips screwdriver, install four M6 screws — t wo in the front and two in the rear — t o secure the rail to the rack. Make sure that the front and back of the rail are attached to the rack at the same height on the front and back posts. Using a level simplifies the leveling procedure. Tighten the screws securely. Two sets of M6 screws are provided. The type you use Notes: depends on the type of rack you have. Use the screws with the larger shoulder for racks with square holes. To simplify the installation, have a second person support the rail while you install the screws. Leave the middle hole in each rail empty. You will use them when attaching the library mounting brackets to the rack. Back of Rack Adjust to fit depth of rack Position rail Simplified behind front Front Rear rack rail...
-
Page 19: Remove The Shipping Lock
Remove the Shipping Lock Mount the Library in the Rack The library is heavy (see product specifications for details). Use extreme caution and Warning proper equipment when moving the library. Do not install components in the library until it is secured in the rack. WARNUNG Die Bibliothek ist schwer (siehe Produkt-Spezifikationen für Details). -
Page 20: Install The Tape Drives
Library Installation 4. Store the lock in the tab at the back of the library. 1. Remove the label. 2. Remove the lock. Replace the label. 4. Store the lock. Figure 4 The shipping lock must be removed before powering on the library. Install the Tape Drives Install the tape drives in the back of the library, from bottom to top. -
Page 21: Connect The Cables
Connect the Cables Connect the Cables Use Figure 6 to help you connect the cables. Power Connect the power cord to the library and to an outlet. If the library shipped with the optional redundant power supply, connect a second power cord to the redundant supply and to an outlet. Note: Do not power on the library at this time. Ethernet Connect an Ethernet cable into the Ethernet connector on the back of the library and connect the other end to the management network. SAS cables are installed after installing the BlackPearl gateway in Note: the rack, and before powering on the gateway. Do not power on the BlackPearl gateway before completing the library setup. Power Ethernet Figure 6 Install power and network cables. ONFIGURE THE IBRARY AutoInstall the Option Activation Keys and Update the BlueScale Software The USB device that came in your document kit contains the activation ... -
Page 22: Log In To The Bluescale User Interface
Configure the Library 2. Press the front panel power button for two to three seconds. device 1. Insert USB device 2. Press power button Figure 7 Insert the USB device and press the power button. 3. Wait while the library performs its initial power‐on sequence, which takes approximately eight minutes. 4. Wait while the AutoInstall process automatically updates the library BlueScale software and installs the option activation keys. This takes approximately ten minutes. Note: The library reboots during the AutoInstall process. No action is required until the Login screen displays. 5. When the Login screen displays, remove the USB device from the library. Do not remove the USB device until after the Login screen displays. Do not leave the Important USB device connected to the library after the AutoInstall process is complete. - Page 23 Log In to the BlueScale User Interface For a full description of the BlueScale interface, see “Introducing the BlueScale User Interface” in the Spectra T50e Library User Guide. 1. Using the stylus located in the document kit, touch the keyboard icon to expand the soft keyboard. When not in use, store the stylus in the stylus holder to the right Note: of the screen. 2. Touch (to select) the User box and type su (the default superuser). 3. Leave the password field blank and click Login. Note: If you are prompted to calibrate the touch screen, follow the instructions on the screen. You must use the stylus for the calibration procedure to complete successfully. 2. Type “su” Click Login Wait for General Status screen 1. Touch to open keyboard Figure 8 Log into the BlueScale interface.
- Page 24 Configure the Library The General Status Screen When you first log into the library, the General Status screen displays. Icons on this screen indicate the current status for the major library components. Moving the cursor over the name of the component highlights the component in the system graphic. From the General Status screen, click the MENU to display the General menu screen. Menus The options in the BlueScale user interface are divided into four menus. When you click the icon for one of the menus, its associated options display below it. When you are viewing a screen for one of the BlueScale options, clicking MENU displays the last menu screen you viewed. From there you can navigate to other menus to select additional options. Security Configuration menu menu General Maintenance menu menu Options on the General menu screen Figure 10 Options on the General menu screen. The following menu screens are available: ...
- Page 25 Motion Trace Born On Date Web Server Port Motion Geometry Exported Media Enable SSL Motion Pools Last Write Time Online Access to Spectra Logic Motion Inventory Last Read Time Email Auto-Configuration Save Motion Options MLM Details Option Keys Save MLM Report...
-
Page 26: Create A Partition
Configure the Library Create a Partition A tape partition is a data storage target cabled to the BlackPearl gateway. Follow these steps to let the partition wizard create a single partition using all available slots and drives. To use the BlackPearl gateway’s Eject function, the library can only have one partition. To manually create a partition to not use all available slots or drives, or to use encryption or other advanced features, see “Configuring and Managing Partitions” in the Spectra T50e Library User Guide for instructions. Note: The BlackPearl gateway uses a cleaning tape stored in a data partition to automatically clean the tape drives in the library. Do not create a cleaning partition. 1. If you want to save the library configuration to a USB device after you create the partition (recommended), connect the device to a USB port on the LCM (library control module) and allow time for the device to mount before continuing (see Figure 7 on page 22). The option to save the file to USB is only available if you connect a USB device to Important the library before you click New. -
Page 27: Load Data And Cleaning Tape Cartridges
Load Data and Cleaning Tape Cartridges Load Data and Cleaning Tape Cartridges Use the Bulk Load option to load the tape cartridges including at least one cleaning tape. Only load the number of cartridges matching your capacity Notes: license. The BlackPearl gateway automatically handles periodic tape drive cleaning, but can only complete the task if cleaning tapes are present in the library. 1. If necessary, click MENU to display the Menu screen. 2. Select General > Import/Export, and then click Bulk Load. Both left‐side magazines release. 3. Load cartridges in the left‐side magazines. a. Remove the bottom left magazine and set it on a stable surface. b. In the bottom left‐side magazine, load the cartridges sequentially, with the barcode label facing out, starting at slot 1 and skipping the access port. Important! Load cartridges sequentially starting at slot 1. -
Page 28: Configure Library Settings
Reinsert the bottom right‐side magazine, and then, if necessary, repeat for the top right‐side magazine. 5. After you have loaded cartridges to fill all licensed slots, gently push each magazine into the library until it is fully seated and click Stop Importing. The library inventories the cartridges. ONFIGURE IBRARY ETTINGS It is vital to configure the following library settings before using it with the BlackPearl gateway. See “Configure Global Settings” in the Spectra T50e Library User Guide for information on configuring other, optional, library settings. Configure Network Settings Spectra Logic highly recommends that you connect the library to an Ethernet network and configure it for network access as described in this section. Network access lets you perform the following operations: Access the BlueScale web interface for remote management of the library using a standard web browser. Open support incidents or send ASLs (AutoSupport Logs) to Spectra Logic Technical Support for troubleshooting directly from the library. Automatically email system messages or reports to configured mail users. Automatically send a notification to a specified mail recipient when certain critical events occur. Download the latest BlueScale update package from the Spectra Logic Support portal directly to the library. These functions are not available if you do not connect the library to an Ethernet network. Installation 90990122... - Page 29 Configure Network Settings The IP address of the library displays in the upper right corner of the touch screen operator panel. If the library does not have an IP address configured or is not connected to an Ethernet network, 0.0.0.0 displays in this location. Note: If you are accessing the library remotely through the BlueScale web interface, the library name, if configured, displays instead of the IP address. If the library name is not configured, the upper right corner of the screen is blank. Using DHCP Addressing By default, the IP address for the Ethernet port on the LCM (Library Control Module) is set automatically using the Dynamic Host Configuration Protocol (DHCP). If you select DHCP addressing, the LCM must be connected Notes: to an Ethernet network that has a DHCP server to obtain an IP address. Do not select DHCP addressing if your network does not have a DHCP server. Using Static IP Addressing If your network does not use DHCP, or if you want the library to have a fixed IP address, you can configure a static (fixed) IP address as described in this section. Using a static IP address ensures that you always know the IP address for the library and is highly recommended, especially if you plan to manage the library remotely using the BlueScale web interface. Prepare the Library Before configuring the network settings, make sure that you address the following requirements: The library is connected to an active link on the Ethernet network. ...
- Page 30 Configure Library Settings Set the IP Addressing Use the following steps to configure the library for Ethernet network access. 1. If necessary, click MENU to display the Menu screen. 2. Click Configuration to display the Configuration menu. 3. On the Configuration menu, click More Options (down arrow) to display additional configuration options. 4. Click Network. The Network screen displays. This screen changes depending on whether the library is configured to use DHCP or Static IP addressing. Figure 14 Use the Network screen to configure the IP addressing for the library. 5. Decide which type of addressing you want the library to use. DHCP (default setting) — T he library is issued an IP address by the DHCP server.
-
Page 31: Configure Date And Time
Configure Date and Time Configure Date and Time Use the following steps to configure the library system clock. 1. If necessary, click MENU to display the Menu screen. 2. Click Configuration to display the Configuration menu. 3. On the Configuration menu, click More Options (down arrow) to display additional configuration options. 4. Click Date & Time. The Date & Time screen displays showing the method currently selected for setting the date and time. The values in the Date & Time counters do not wrap. For Note: example, to change the month from December to January, click and hold the – button to decrement the month. Figure 15 Set the date and time for the library. 5. Use the + and – buttons to set the month, day, year, hour, and minute to display. Note: Instead of clicking the + or – button multiple times, you can click ... -
Page 32: Create Additional Users
Configure Library Settings Create Additional Users There are three default users set up on the library: su (superuser), administrator, and operator. By default, passwords are not set for the three default users. Use the following steps to add a new library user and assign that user to a user group. 1. If necessary, click MENU to display the Menu screen. 2. Click Security > Edit Users. The Edit Users screen displays. Figure 16 Click New on the Edit Users screen to add a new user. 3. Click New to display the New User screen. Figure 17 Enter the information for the new user. Installation 90990122... - Page 33 Create Additional Users 4. Complete the information on the New User screen. User names and passwords can contain any combination of the Note: numbers 0‐9, lower and upper case alphabetic characters (a‐z and A‐Z), and the at symbol (@), dash (‐), underscore (_), period (.), forward slash (/), and space characters. There is no limit to the length but that we recommend lengths of less than 2048 characters. For this field... Enter... User The name for the user. Password A password for the user; retype the password to confirm. Retype Password Notes: For security, the text in the Password and Retype Password fields displays as asterisks (*). Though highly recommended, passwords are not required for any of the three user types. User Type Select the group to which the user belongs. Superuser ‐ Controls all aspects of the library’s configuration and operation, including defining other library users and assigning them to a user‐privilege group. Notes: The library requires a minimum of one superuser. You cannot delete the last member of the Superuser group. ...
-
Page 34: Configure Smtp And Mail Users
(see “Configuring and Using AutoSupport” in the in the Spectra T50e Library User Guide). This mail user is also used to send the ASL and HHM (Hardware Health Monitor) files that the library generates to Spectra Logic Technical Support when troubleshooting a problem. Installation 90990122... - Page 35 Configure SMTP and Mail Users 5. Enter or update the information for the mail user. Figure 19 Enter or modify the information for the mail user. For this field... Do the following... Enter the email address of the recipient. Be sure to use the full email address using the standard email format, including the @ symbol. Important: The email address cannot contain spaces or other non- alphanumeric characters (for example, an ampersand, &). To include multiple addresses, leave a space between each address.
-
Page 36: Back Up The Library Configuration
Configure Library Settings 6. Click Save. The Mail Users screen redisplays (see Figure 18 on page 34). 7. Repeat Step 4 on page 34 through Step 6 to configure or modify additional email users. 8. Optionally, click Test for each new user to send a test email. Back Up the Library Configuration After completing the library configuration steps, Spectra Logic recommends that you manually back up the library configuration as described in this section. Generate the Configuration Backup File 1. If you want to save the configuration to a USB device (recommended), connect the device to a USB port on the LCM and allow time for the device to mount before continuing (see Figure 7 on page 22). The option to save the file to USB is only available if you connect a USB device to Important the library’s USB port before you access the utilities. - Page 37 Figure 22 Read about the Save Library Configuration utility. 6. Select whether to save the configuration backup file to USB or to email it to a previously configured mail user and then click Next. Note: Do not use the autosupport@spectralogic.com address unless specifically instructed to do so by Spectra Logic Technical Support. Figure 23 Select the destination for the configuration backup file. Select... To... Save the library configuration file to the USB device connected to a USB port on the LCM. The backup file is stored in a folder called ...
- Page 38 Note: The Destinations screen specifies where to send the utility results system message. It does not affect where the actual configuration backup file is sent. Note: Do not use the autosupport@spectralogic.com address unless specifically instructed to do so by Spectra Logic Technical Support. Figure 24 Select additional destinations for the utility results file. After a brief delay, the Utility Results screen redisplays, showing that the configuration file was sent to the selected destination. Confirm that the backup was successful, as described in Verify the Configuration Backup. Verify the Configuration Backup After creating a backup of your library configuration, use one of the ...
-
Page 39: Next Steps
When Sent as an Email Attachment 1. Open the email and confirm that it contains a zip file attachment named <date-time>cfg.zip, where <date-time> is the time stamp for when the zip file was created. 2. Open the zip file and confirm that it contains several configuration files named using the format cnnnnnn.cfg, where n is a number between 0 and 9. Make sure that all of the files are more than 0 bytes in size. If the configuration files are present and are more than 0 bytes in size, the backup was successful. Save the email attachment to a safe location from which you can copy it to a USB device, if needed. If the email attachment does not contain the configuration files or if one or more of the files are 0 bytes in size, repeat the backup process (Back Up the Library Configuration on page 36) to send the email again. TEPS You are now ready to install the BlackPearl gateway (see Install and Configure the Spectra BlackPearl Gateway on page 41) or further configure the T50e library using one of the topics below. Configure MLM Media Lifecycle Management (MLM) is an exclusive feature of Spectra Logic libraries that allows users to track the health of the media in the library. When coupled with Spectra‐certified media, it gives users a powerful monitoring tool to avoid downtime or data loss caused by media reaching its end of life. See ʺConfiguring and Using Media Lifecycle Managementʺ in the Spectra T50e Library User Guide. February 2017 BlackPearl-T50e Archive Solution... - Page 40 WWNs, drive health, and error codes displayed on the drivesʹ single‐ character display. See ʺUsing Drive Lifecycle Managementʺ in the Spectra T50e Library User Guide. Import/Export Media Using the import/export screen, users have physical access to the media within the library. This screen allows users to import and export media to and from an active partition, or to and from the configured entry/exit port. See “Using Cartridges in the Library” in the Spectra T50e Library User Guide. Collect Logs & Use AutoSupport AutoSupport is an important feature in monitoring the health of the library. AutoSupport Logs (ASL) can be gathered and sent automatically to a designated mail user or directly to Spectra Logic Technical Support. See ‘Configuring and Using AutoSupport” in the Spectra T50e Library User Guide. Use the Support Portal Spectra Logic Technical Support maintains a portal for all support related services, as well as a database of Knowledge Base articles at https://support.spectralogic.com. For more information on creating an account and using the Support Portal see “Technical Support” in the Spectra T50e Library User Guide. Backup the Library Configuration For recommendations and instructions for backing up and restoring the library configuration, see “Backing up the Library Configuration” in the Spectra T50e Library User Guide. Installation 90990122...
-
Page 41: Spectra Blackpearl Gateway
HAPTER Install and Configure the Spectra BlackPearl Gateway This chapter describes the steps for installing and configuring the Spectra BlackPearl Deep Storage Gateway for use with the T50e library. For additional information about the Spectra Logic BlackPearl gateway, see the Spectra BlackPearl User Guide. Topic Gateway Installation page 42 Install HBAs in the Gateway page 43 Install the Gateway in a Rack page 46 Install Drives page 52 Connect the Cables page 52 Configure the BlackPearl Gateway page 54 Power on the Gateway page 54 Configure the BlackPearl Management Port page 54 Import the Option Activation Keys page 56 Log Into the BlackPearl User Interface page 56 BlackPearl User Interface page 58 Configure Network Settings page 60 Configure SMTP Settings page 61 Activate Hardware Systems page 62... -
Page 42: Gateway Installation
ATEWAY NSTALLATION Use these instructions to install the BlackPearl gateway. The Spectra BlackPearl 2U gateway weighs 55.9 lb (25.4 kg). Spectra Logic requires Warning using two people, or using a lift to support the weight of the gateway while installing it into, or removing it from a rack. -
Page 43: Install Hbas In The Gateway
Install HBAs in the Gateway Component # Required Secure the chassis to the rack (2). Chassis screws Attach to the ends of the outer rack rails, allowing installation of the rack kit in a rack (optional) with circular mounting cutouts. If you are installing the rack kit in a circular cutout rack, see the Spectra BlackPearl Rack Mounting Instructions. Circular cutout rack adaptors To perform the installation, you need the following tools: Grounded anti‐static wristband #1 Phillips screwdriver #2 Phillips screwdriver, magnetic if available Level (recommended) Install HBAs in the Gateway Use the following instructions to install Host Bus Adaptor (HBA) cards in the BlackPearl gateway. Any damage to a BlackPearl gateway caused by failure to protect it from Caution electrostatic discharge (ESD) voids the gateway’s warranty. - Page 44 Gateway Installation Install the HBAs Use the instructions in this section to install an HBA in the chassis. 1. Press down on the two release latches and slide the cover toward the rear of the chassis to remove it. Front of chassis Figure 25 Release latches on the 2U chassis. 2. Locate the slot where you want to install an HBA in the unit. Because the 2U chassis has a single CPU, only three of the six Notes: PCI slots are active. Make sure you install the HBA into one of the indicated slots, which are labeled on the motherboard as slots 1, 2, and 3. Some HBAs may already be installed. PCI blanking plates HBA locations Front of chassis Figure 26 HBA locations in the BlackPearl 2U chassis. Installation 90990122...
- Page 45 Install HBAs in the Gateway 3. Using a #1 Phillips screwdriver, remove the single screw that secures the PCI blanking plate to the chassis. Figure 27 Remove the PCI blanking plate screw. 4. Remove the HBA from its packaging. 5. Orient the HBA so that the card bracket faces the rear of the chassis and the edge connector is oriented down. Bracket Edge connector Figure 28 The 10 GigE HBA. February 2017 BlackPearl-T50e Archive Solution...
-
Page 46: Install The Gateway In A Rack
Gateway Installation 6. Guide the connectors on the HBA through the slot in the rear of the chassis. Be careful not to damage the connectors on the HBA as you guide them through Caution the slot in the rear of the chassis. 7. Press down on the HBA to secure it in the socket on the motherboard. The card fits firmly in the socket. 8. Using a #1 Phillips screwdriver, install the bracket screw to secure the HBA to the chassis. 9. Repeat Step 2 on page 44 through Step 8 for any additional HBA(s) that need to be installed. 10. Install the chassis cover. a. - Page 47 Install the Gateway in a Rack 2. Flip the rail assembly over so the outer rail is on top and the self‐ locking latch is facing you. Press the self‐locking latch toward the closest edge of the inner rail and then fully extract the inner rail from the outer rail. Figure 30 Press the latch toward the closest outer edge. Install the Inner Rails 1. Place the gateway on a sturdy, flat surface. 2. Orient the inner rail with the self locking latch facing you and the black plastic tab on the end of the rail oriented toward the front of the chassis. 3. Position the inner rack rail over the hooks extending out from the side of the chassis. The rail is keyed to only fit one way. Hooks (12) Front Rear of chassis of chassis Plastic tab Self-locking latch...
- Page 48 Gateway Installation 5. Using a #2 Phillips screwdriver, secure the rail to the chassis using two screws. 6. Repeat Step 2 on page 47 through Step 5 for the other side. Install the Outer Rail If you are installing the rack kit in a circular cutout rack, see the Spectra BlackPearl Rack Mounting Instructions. 1. Determine the position of the rack mount kit in the rack. Figure 32 shows the relationship of the rack kit position in the rack and the resulting position of the chassis. Note: The T50e library and BlackPearl gateway should be installed in the same rack, preferably adjacent to one another. The combined space required for the library and gateway is 6U (10.5 inches). BlackPearl 2U Rack gateway Figure 32 Relationship between the rack kit position and the BlackPearl 2U chassis. 2. Position the outer rack rail at the desired height in the rack with the ...
- Page 49 Install the Gateway in a Rack 3. Insert the mounting hooks on the open end of the rail into the cut‐outs in the front of the rack. This action also depresses the black tabs used to lock the rail in the rack. (depressed) Hooks Figure 33 Insert the mounting hooks through the cut-outs in the rack. 4. Press the outer rail down to lock the mounting hooks to the rack. The black tabs will pop through the holes in the front of the rack and lock in place with an audible click. (locked) Hook Screw holes Figure 34 Press the rail down to lock it into place. 5.
- Page 50 9. Make sure the installed rails are level in relation to each other. Using a level is recommended. Slide the Chassis into the Rack The Spectra BlackPearl 2U gateway weighs 55.9 lb (25.4 kg). Spectra Logic requires Warning using two people, or using a lift to support the weight of the gateway while installing it into, or removing it from a rack.
- Page 51 Install the Gateway in a Rack 3. Slide the chassis into the rack until the self‐locking latches engage. 4. While supporting the front of the chassis with one hand or a lift, press the self‐locking latches on both inner rails downward. Push the chassis the rest of the way into the rack until the mounting brackets on the front of the chassis are flush with the front posts of the rack. Locking latch Figure 36 Press the self-locking latch downward. 5. Using a #2 Phillips screwdriver, install one chassis screw into the hole in the mounting bracket on each side of the chassis to secure the chassis to the rack. Do not over‐tighten the screw. Mounting bracket Screw Figure 37 Secure the chassis to the rack. February 2017 BlackPearl-T50e Archive Solution...
-
Page 52: Install Drives
Gateway Installation Install Drives The drives used in the BlackPearl gateway are mounted on drive sleds that ensure proper data and electrical connection with the backplane inside the gateway. Only install drives that you purchase from Spectra Logic. Any damage to a BlackPearl gateway caused by failure to protect it from Caution electrostatic discharge (ESD) voids the gateway’s warranty. To protect the drives from damage: Wear an anti-static wristband, properly grounded, throughout the procedure. If a wristband is not available, touch a known grounded surface, such as the unpainted metal chassis. -
Page 53: Connect The Cables
Connect the Cables 2. Open the drive sled handle on a sled with a drive and insert it into the empty slot. Close the handle by rotating it inward to the right. An audible click indicates the drive is locked in place. Figure 39 Install the drive into the gateway. Connect the Cables Using Figure 40 as a reference, connect the following cables. Power Connect two power cables to the gateway and to outlets. Ethernet Connect the included Ethernet cable from an active network over which a computer can access the gateway, to the BlackPearl management port on the BlackPearl gateway. This port cannot be used for data transfer. Connect additional Ethernet cables from your network switch to one or all of the 10GBase‐T ports or the 10 GigE ports. Only one data connection is supported, but ports of the same type can be configured with link aggregation. SAS Connect the single end of the fanout SAS cable to the BlackPearl SAS HBA. Insert one of the other ends of the cable into each tape drive (see Figure 6 on page 21). 1/10GBase-T 10 GigE Monitor Power Ethernet connector ports (4) ports (2) -
Page 54: Configure The Black Pearl Gateway
You must connect Ethernet cables as described in Connect the Cables on page 53 Important before either proceeding with the steps below or skipping this section and accepting the default IP address for the management port. Note: Using the BlackPearl console is the recommended way to change the management port IP address. If you cannot use the console, see “Resolving a BlackPearl Management Port IP Address Conflict” in the Spectra BlackPearl User Guide for information on alternate methods. Installation 90990122... - Page 55 Configure the BlackPearl Management Port Use the following instructions to configure the management port. 1. Connect a monitor and USB keyboard to the rear of the BlackPearl gateway. See Figure 40 on page 53 to locate the monitor and USB connectors. The Console screen displays. Figure 42 The Console screen. 2. Press CTRL-N. The Configure Management Network Interface screen displays. Figure 43 The Configure Management Network Interface screen. 3. Select either DHCP or Static as the addressing method. If you select static addressing, enter the following information: IP Address — E nter a valid IPv4 address. Netmask — E nter the subnet mask.
-
Page 56: Import The Option Activation Keys
Configure the BlackPearl Gateway Import the Option Activation Keys The USB device in the BlackPearl documentation kit contains the activation keys for the options that you purchased. Follow these steps to import the keys. If your BlackPearl documentation kit does not contain a USB Note: device, see “Enter Activation Keys” in the Spectra BlackPearl User Guide for instructions for manually entering the activation keys. 1. Insert the USB device into a USB port on the back of the gateway. See Figure 40 on page 53. When the BlackPearl gateway detects the USB device it automatically imports the activation keys and power cycles the gateway. 2. Wait while the BlackPearl gateway performs its power‐on sequence and then log into the BlackPearl user interface. Do not remove the USB device until after the gateway power cycles and the Important BlackPearl user interface displays a message that it is safe to remove the USB device. - Page 57 Log Into the BlackPearl User Interface 3. Enter the primary administrator username and password. The default username and password are both spectra, using all lowercase letters. Spectra Logic recommends that you change the password for Notes: the spectra account. See “Edit a User” in the Spectra BlackPearl User Guide for instructions. A monitor account is also available to view gateway status and eject tapes only. The default username and password are both monitor using all lowercase letters. Spectra Logic recommends that you change the default password for the monitor account. See “Edit a User” in the Spectra BlackPearl User Guide for instructions. Figure 44 The BlackPearl Login screen. 4. Click > to log in. Note: The first time that you log in after importing activation keys, an informational message displays indicating that you can now safely remove the USB device. Use the following steps to close the message: a. Remove the USB device. b. On the menu bar, select Status > Messages. The messages ...
-
Page 58: Blackpearl User Interface
Configure the BlackPearl Gateway BlackPearl User Interface The BlackPearl user interface lets you set configuration options and monitor the status of the system components. Menu bar Status bar Power Alerts Figure 45 The BlackPearl 3.0 dashboard. Dashboard The Dashboard screen displays the general status of the gateway, tape cache, and network connections. Clicking any of the panes on the Dashboard takes you to a details screen for that selection. The Dashboard screen also displays performance metrics for the gateway. Menus A menu bar appears along the top edge of each screen. Drop‐down menus in the menu bar let you navigate through the available menus to select options. The Dashboard navigation link returns you to the Dashboard screen from any other screen in the interface. The Configuration menu provides access to controls for configuring all aspects of the gateway’s operation. The Status menu provides access to the tools for monitoring the BlackPearl gateway in your environment. The Support menu provides access for maintenance and troubleshooting options for the BlackPearl gateway. ... - Page 59 BlackPearl User Interface Status Bar The Status Bar at the bottom of all screens provides information on hardware status, the severity, date, and time of the most severe un‐read system message, and tools for rebooting or powering off the gateway. Status Icons Status icons indicate the status of a component and the highest severity level for any system messages, as described in the following table. Icon Meaning Component OK The component is functioning correctly. Information An informational message about a system component is available. Check messages to determine the component. Warning A system component requires attention. Check messages to determine the component. Error A system component experienced an error condition. Check messages to determine the component and its error condition. Unknown The status of a system component cannot be determined. Check messages to determine the component and its status. February 2017 BlackPearl-T50e Archive Solution...
-
Page 60: Configure Network Settings
Configure the BlackPearl Gateway Configure Network Settings Use the following steps to configure network settings for the gateway. See the Network Setup Tips document, shipped with the gateway, for information on configuring your network connection for the best performance with the gateway. 1. Select Configuration > Network. The Network screen displays. Figure 46 The Network screen. 2. Double‐click the Data row in the Network Interfaces pane, or select the Data row and select Action > Edit from the menu bar. The Edit Data Ports dialog box displays. Note: Depending on your hardware configuration, the Edit Data Ports dialog box may look different than what is shown below Figure 47 The Edit Data Ports dialog box. Installation 90990122... -
Page 61: Configure Smtp Settings
Configure SMTP Settings 3. Click the option button that matches how you cabled the data path in Connect the Cables on page 53. The data path can be a single connection or an aggregate of the two 10 GigE ports. Link aggregation uses multiple Ethernet ports, configured with a single IP address, to improve data transfer speed. 4. Select DHCP; or select Static and enter the IP address, netmask, and gateway for the data connection. If desired, you can enter Aliases, multiple IP and Netmask Note: addresses assigned to the data port. Use the + button at the bottom of the Edit Data Ports dialog box to increase the number of IP and Netmask addresses. A maximum of 16 additional IP and Netmask addresses can be configured. See the Network Setup Tips document for more information about aliases. 5. (Optional) Change the MTU (Maximum Transmission Unit) value. The default setting is 1500 bytes. Higher settings allow for faster data transfer, but all hardware in the data path must support the higher MTU settings. The maximum MTU value for the BlackPearl gateway is 9000 bytes. Configure SMTP Settings Use the Email settings to associate the BlackPearl gateway with a mail server. The gateway uses this SMTP server to send emails whenever ASLs or certain types of messages are generated. Use the following instructions to enter SMTP information on the gateway. 1. From the menu bar, select Configuration > Network, or select the Network pane from the Dashboard screen. The Network screen displays. -
Page 62: Activate Hardware Systems
Configure the BlackPearl Gateway 2. Double‐click the entry row below SMTP Server, or select the row and then click Action > Edit. The Email dialog box displays. Figure 49 The Email dialog box. 3. Enter a valid IPv4 address for the SMTP Server. 4. If necessary, edit the SMTP Port. The default is 25. 5. If your SMTP server uses TLS (Transport Layer Security) authentication, select the Enable TLS Authentication check box and enter the required username and password information. 6. Enter an email address in the From Address field. This is the email address that displays as the sender whenever the gateway generates an email. This email address should uniquely identify the BlackPearl gateway to assist in troubleshooting and be recognized by the SMTP server as a valid domain address. 7. Click Save. Activate Hardware Systems 1. Use the following steps to activate the data path. a. - Page 63 Activate Hardware Systems 2. Use the following steps to activate the tape partition. a. From the menu bar, select Configuration > Advanced Bucket Management to display the Advanced Bucket Management screen. Figure 51 The Advanced Bucket Management screen. b. Select the tape partition in the Tape Partitions pane, and select Action > Activate Tape Partition. The Activate Tape Partition confirmation window displays. Note: If the tape partition is not displayed in the Tape Partitions pane, the gateway has not yet auto‐detected the tape library. Wait up to 5 minutes and refresh the screen. Figure 52 The Activate Tape Partition confirmation window. c. Click Activate. The tape partition is activated and is usable by the BlackPearl gateway. The BlackPearl gateway begins the process of ...
-
Page 64: Select A Data Policy
It is difficult and time consuming to change the data policy once data is written to a Important bucket using it. Two default data policies are automatically available. Single Copy on Tape ‐ Creates one copy of data that always remains in the library – not exported or delivered to an external source. Dual Copy on Tape ‐ Creates two copies of data, one copy of data that always remains in the library and one copy able to be exported or delivered to an external source. For more information about the default data policies, or if these data policies do not meet your needs, see “Understanding Spectra Advanced Bucket Management Concepts” in the Spectra BlackPearl User Guide and create a custom data policy before continuing. Two common reasons to customize data policies are to easily be able to eject tapes for archive or use in another BlackPearl gateway, or to eject tapes to be read in a non‐ BlackPearl system using LTFS. Ejecting Tapes If you plan to eject tapes, Spectra Logic recommends the following storage domain and data policy settings: Set the Write Optimization setting to Capacity when configuring a ... - Page 65 UUID string, which is not human readable. Object names must comply with LTFS file naming rules: The colon character (:) is not allowed in LTFS file names and therefore not allowed in BlackPearl object names. The slash character (/) is also technically not allowed in LTFS file names; however, the BlackPearl software can accommodate a slash in the object name and translates it as a directory in the LTFS file system (for example, directory1/directory2/video1.mov). Directory names have a limit of 255 characters. File names have a variable character limit. If you are using English ASCII characters, the limit is 1024 characters. If you are using a graphical language, such as Japanese, the limit is 512 characters. Spectra Logic does not recommend the following characters in LTFS file names or BlackPearl object names for reasons of cross‐platform compatibility: control characters such as carriage return (CR) and line feed (LF), double quotation mark (“), asterisk (*), question mark (?), less than sign (<), greater than sign (>), backslash (\), forward slash (/) vertical line (|). Blobbing Enabled should be cleared when configuring a data policy. Blobbing allows an object larger than 1 TB to be broken into multiple blobs and then stored on multiple tapes. Tapes created with blobbing disabled are always readable by a non‐BlackPearl system; tapes created with blobbing enabled may not be readable by a non‐BlackPearl system. With blobbing disabled, all files must have a size of 1 TB or less. The Keep Latest setting cannot be used for a data policy which uses a storage domain configured with the LTFS File Name option set to Object Name.
-
Page 66: Set The Default Data Policy For The Administrator
Configure the BlackPearl Gateway Set the Default Data Policy for the Administrator Use the following steps to set a data policy for the Primary Administrator. 1. From the menu bar, select Configuration > Users. The Users screen displays. Figure 53 The Users screen. 2. Double‐click the Spectra account in the Primary Administrators pane, or select the Spectra account, and then select Action > Edit. The Edit User dialog box appears. Figure 54 The Edit User dialog box. Installation 90990122... -
Page 67: Create Users
Create Users 3. From the drop‐down list, select a Default Data Policy for the user. The gateway uses the selected data policy for all buckets created by the user, unless a different policy is specified during bucket creation. Note: Make sure the three Password entry fields are blank. If they are populated, delete any data in these fields. 4. Leave the remaining fields as‐is, and click Save. Create Users Use the instructions in this section to create users. Each user has a unique S3 Access ID and Secret Key. Note: Users are not able to log into the BlackPearl user interface. Only the primary administrator account can log into the interface. You cannot create additional administrator accounts. 1. From the menu bar, select Configuration > Users. The Users screen displays. 2. Select Action > New from the menu bar. The New User dialog box displays. Figure 55 The New User dialog box. 3. -
Page 68: View S3 Credentials
Configure the BlackPearl Gateway 7. From the drop‐down list, select a Default Data Policy for the user. The gateway uses the selected data policy for all buckets created by the user, unless a different policy is specified during bucket creation. 8. If desired, make changes to the Global Bucket Access Control List selections. Note: Spectra Logic highly recommends that you do not make changes to the Global Bucket Access Control List selections. Before you consider making any changes to the Global Bucket Access Control List, be sure that you review all of the related information in the Spectra BlackPearl User Guide. 9. If desired, under Global Data Policy Access Control List, select the check box to allow the user access to any data policy created on the gateway. Before you consider making any changes to the Global Data Policy Access Control List, be sure that you review all of the related ... -
Page 69: Create A Bucket
Create a Bucket Create a Bucket Buckets are data transfer targets for read and write operations. The gateway stages data written to it on the cache and optimizes how it writes the data based on the storage domains included in the data policy assigned to the bucket. Use the instructions in this section to configure a bucket. 1. From the menu bar, select Configuration > Buckets. The Buckets screen displays. 2. Select Action > New from the menu bar. The New Bucket dialog box displays. Figure 57 The New Bucket dialog box. 3. Enter a name for the bucket in the Bucket Name field. The bucket name cannot use the colon (:) or forward slash (/) Notes: characters. The bucket name cannot exceed 255 characters. 4. Using the drop‐down menu, select an Owner for the bucket from the list of users already created on the gateway. -
Page 70: Configure Mail Recipients
Configure the BlackPearl Gateway Configure Mail Recipients You can configure the gateway to email system messages and AutoSupport log sets, as they are generated, to selected recipients. It is critical that personnel responsible for the operation of the archive solution be set up to receive email notifications from the BlackPearl gateway so that messages about operational issues are delivered in a timely manner. Users of the archive solution can also be set up to receive emails, but without access to the administrator login, they will not be able to correct problems with the archive system. All log sets and messages are sent to a previously configured mail recipient. You cannot send log sets or messages directly to an email address. Use the Mail Recipient screen to add, edit, or delete mail recipient accounts. Figure 58 The Mail Recipients screen. Add a New Recipient 1. From the menu bar, select Configuration > Mail Recipients. The Mail Recipients screen displays. 2. Select Action > New. The New Mail Recipient dialog box displays. Figure 59 The New Mail Recipient dialog box. - Page 71 Configure Mail Recipients 3. Enter the following information for the mail recipient: Field Description Name The name of the recipient. Email Address The email address of the recipient. Be sure to use the full address using the standard email format, including the @ symbol. Important: The address cannot contain spaces or other non-alphanumeric characters (for example, an ampersand, &). Select Scheduled Log Sets, Error Log Sets, both options, or neither option for the Select AutoSupport gateway mail recipient. Scheduled log sets are sent from the BlackPearl on the log sets to send to first of each month. Error log sets are sent anytime an error occurs that causes ...
-
Page 72: Check If Tapes Are Ready For Use
Configure the BlackPearl Gateway 2. From the list of mail recipients, select the name of the recipient you want to receive a test email, and then select Action > Send test email. Figure 60 The Mail Recipients screen. The BlackPearl gateway immediately sends a test email to the selected account. 3. Verify the user received the email from the BlackPearl gateway. If the email is not received, verify that you entered the SMTP server settings correctly (see Configure SMTP Settings on page 61). Check if Tapes are Ready for Use Use the instructions in this section to determine if the tapes in the T50e library are ready for use by the BlackPearl gateway. From the menu bar, select Status > Tape Management. The Tape Management screen displays. Figure 61 The Tape Management screen. ... -
Page 73: Backup The Configuration
Figure 62 The Inspect Tape dialog box. 2. Click Inspect to begin inspecting the tape. 3. Repeat Step 1 and Step 2 to inspect any additional tapes. Backup the Configuration The management path configuration, including the network configuration, SMTP settings, and email notification settings, is automatically backed up as you make changes to the gateway configuration. Information about data stored by the gateway, including configured data policies, storage domains, buckets, and S3 object data, is backed up during a database backup. After completing the gateway configuration steps, Spectra Logic recommends that you manually create a database backup. By default the BlackPearl gateway is scheduled to generate a database backup once per day, and retain a maximum of two backups, so it is not necessary for you to manually backup the database after creating this initial backup. If you want to change this schedule, see “Database Backup & Restore” in the Spectra BlackPearl User Guide. Manually Generate a Database Backup 1. From the menu bar, select Configuration > Database Backup. The Database Backup screen displays. Figure 63 The Database Backup screen. -
Page 74: Next Steps
Figure 64 The Start Immediate Backup confirmation window. 3. Click Backup. TEPS You are now ready to install and configure your host client or further configure the BlackPearl gateway. If you purchased a solution including a client or plugin from Spectra Logic, go to the Spectra Logic support portal at: support.spectralogic.com and log in to your portal account. If you do not yet have a portal account, click sign up for one now! and follow the instruction to request an account. Once you are logged into the support portal, select Support by Product > BlackPearl to access the client or plugin download files and documentation. To learn more about the BlackPearl gateway, see the Spectra BlackPearl User Guide, particularly the following topics: See “Understanding Spectra Advanced Bucket Management Concepts” in the Spectra BlackPearl User Guide for information about Spectra S3 and Advanced Bucket Management concepts you need to understand to customize the storage architecture of the BlackPearl gateway. See “Operating the BlackPearl Gateway” in the Spectra BlackPearl User Guide for information about day‐to‐day monitoring and operation of the gateway. See “Additional Configuration Options” in the Spectra BlackPearl User Guide for information about the additional options that can be configured on the BlackPearl gateway. Installation 90990122... -
Page 75: Appendix 4 - Recommended Settings
PPENDIX Recommended Settings Use the tables below to see the typical settings for many options on both the BlackPearl gateway and associated tape library. Note: While specific settings, like IP addresses, are unique to each installation, using some typical settings and naming conventions make maintenance and troubleshooting simpler and allow for future data merges without the danger of data corruption through duplicate names. Tape Library Typical Settings Item Where to Find Recommended Setting Notes Tape In the BlueScale user None Option Enablement keys Library interface, select are installed automatically Configuration > System. Option as part of the T50e Enablement installation process. See Keys AutoInstall the Option Activation Keys and Update the BlueScale Software on page 21 for ... -
Page 76: Blackpearl Gateway Typical Settings
Item Where to Find Recommended Setting Notes Partitions In the BlueScale user Consider naming with Automatically create a interface, select format: Function_Library_ partition. See Create a Configuration > Partitions Location (for example: Partition on page 26 for > New. Archive1_T50e1_DC3) more information. Media In the BlueScale user Enabled Enabled by default. See Lifecycle interface, select “Configuring and Using Manage- Configuration > Media Media Lifecycle Lifecycle Management. ment (MLM) Management” in the T50e User Guide for more ... - Page 77 Item Where to Find Recommended Setting Notes In the BlackPearl user Configure to use your local SMTP Unique interface, select SMTP server, which must Configuration > Network. be capable of sending outgoing mail. Recommended that you send a test email to confirm configuration. See Configure SMTP Settings on page 61 for more information. In the BlackPearl user If your system contains a Online Unique Storage interface, select BlackPearl expansion Configuration > Advanced node, configure the drives Pool Bucket Management. Then as a storage target. See select Action > New Online “Create Online Disk Pool” ...
- Page 78 Item Where to Find Recommended Setting Notes At a minimum, there Storage In the BlackPearl user See “Create a Storage Domains interface, select should be one storage Domain” in the BlackPearl Configuration > Advanced domain for each User Guide for more Bucket Management. partition, plus another if information. you want a second copy on tape, or an eject copy. First tape copy should use Performance mode unless you need bucket isolation to keep tape(s) exclusive to a bucket. If used for tape ejection, the second copy should be configured in Capacity mode. Disk storage pools should be configured in ...
- Page 79 Item Where to Find Recommended Setting Notes User designates access to In the BlackPearl user Users None interface, select buckets, not the Configuration > Users. BlackPearl user interface. A default data policy must be configured for each User. This can be overridden when a bucket is created, but is used as the default data policy when a bucket is created outside of the BlackPearl user interface. After creating a User, select Action > Show S3 Credentials to display the S3 credentials of the user. These credentials are needed in the setup of an external client or ...
- Page 80 Notes Installation 90990122...
Need help?
Do you have a question about the BlackPearl T50e and is the answer not in the manual?
Questions and answers