Table of Contents
Advertisement
Advertisement
Table of Contents

Related Manuals for Uniden DCT5260


Summary of Contents for Uniden DCT5260
- Page 3 w w w. u n i d e n . c o m...
-
Page 4: Table Of Contents
DISPLAY AND ICONS ABOUT SOFT KEY FUNCTION/TERMINOLOGY GETTING STARTED Read this First Checking the Package Contents Setting up the Phone DCT5260 Flow Chart About the Menu Setting up the Menu BASICS Making and Receiving Calls Placing a Call on Hold... -
Page 5: Welcome/Features
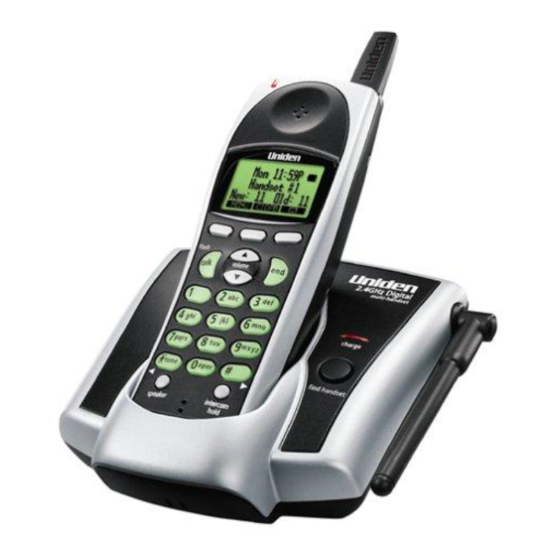
Welcome Congratulations on your purchase of the Uniden DCT5260 series Multi Handset Cordless System telephone. This unit is different from conventional cordless telephones. When the base unit is connected to AC power and a telephone line, it can support up to 8 handsets. - Page 6 The DCT5260 series features include AutoTalk™ and AutoStandby™. AutoTalk allows you to answer a call by just removing the handset from the cradle so you don’t have to waste time pushing buttons. AutoStandby allows you to hang up by simply returning the handset to the cradle.
-
Page 7: Quick Reference Guide
Step 1 Charging the Batteries INSTALL THE AA BATTERIES Remove the cover. Install the batteries, observing the correct + - polarity. Replace the cover. PLUG INTO AC POWER Plug the AC adapter cord into the base unit and then to a 120V AC outlet. Place the handset in the base. -
Page 8: Controls And Functions
Controls and Functions [ 6 ] C O N T R O L S A N D F U N C T I O N S 1. Handset Antenna 2. Headset Jack Cover 3. Beltclip Hole 4. Hands Free Speaker 5. - Page 9 25. DC Power Input 26. Charging Contacts (DCT5260-2 only) 27. Charge LED (DCT5260-2 only) 28. DC Power Input (DCT5260-2 only) C O N T R O L S A N D F U N C T I O N S [ 7 ]...
-
Page 10: Display And Icons
Display and Icons Example of the standby mode display ICON STATUS Standby/Talk Standby Standby Talk Talk [ 8 ] D I S P L AY A N D I C O N S Ringer off icon (when the ringer is Off) / day of the week and time (hh:mm/A/P) / battery icon Handset ID and Banner Number of new Caller ID calls received... -
Page 11: About Soft Key Function/Terminology
About Soft Key Function In the standby mode Soft key 1 Soft key 2 Soft key 3 Soft key functions consists of soft key icons and soft keys (No. 1, 2, and 3). Each soft key corresponds to the icon displayed above, and each icon will be changed depending on the operation. Press the corresponding soft key to enter a menu, or select an item. -
Page 12: Getting Started
Read this First This cordless telephone must be set up before use. Follow these steps: Step 1 (page 11) Unpack the telephone and accessories. Step 2 (page 12) Next, choose the best location to set up the base unit. Step 3 (page 13 to 15) Then, insert the batteries into the handset. -
Page 13: Checking The Package Contents
Checking the Package Contents Make sure you have received the following items in the package. If any of these items are missing or damaged, contact the Uniden Parts Department. • Base unit (1) • Handset [DCT5260 (1) / DCT5260-2 (2)*] •... -
Page 14: Setting Up The Phone
Setting up the Phone Do the following steps: A. Choose the best location B. Install the AA batteries into the handset If your home has specially wired alarm A. Choose the best location equipment connected to Before choosing a location for your new phone, read “Installation Considerations” on the telephone line, be sure that installing the page 58. - Page 15 4) Place the handset in the charging cradle with the keypad facing up. The DCT5260 series will only work with “AA” Ni-MH rechargeable batteries. If you use any other type of batteries, the display will show “...
-
Page 16: Low Battery Alert
Low battery alert When the batteries are very low and need to be charged, the phone is programmed to eliminate functions in order to save power. The batteries need to be charged when: - The battery icon - “ If the phone is in the standby mode, none of keys will operate. If you are on a call, complete your conversation as quickly as possible, and return the handset to the cradle. - Page 17 3) Make sure the charge LED illuminates. If the LED does not illuminate, check to see that the AC adapter is plugged in and that the handset makes good contact with the base charging contacts. • Use only the supplied AD-800 AC adapter. Do not use any other AC adapter.
-
Page 18: Dct5260 Flow Chart
DCT5260 Flow Chart • From the standby mode Select a menu, then press the Access the voice mail OK soft key. dial (see page 32). Setup the menu: • See page 41 for Caller ID. • See page 28 for Redial. - Page 19 OK soft key OK soft key Setup the menu (see page 24). • From the Talk mode OK soft key • Press the MUTE soft key to mute a call • Press the MENU soft key, then select: OK soft key Setup the menu (see page 25).
-
Page 20: About The Menu
About the Menu Most of the handset settings are set from the menu. The menu has 4 main menus (DirectLink Mode, Handset Setup, Global Setup, and System Reset) and submenus respectively. Summary of the Main Menu and Submenu DirectLink Mode Select this menu to enter the handset into Directlink mode. -
Page 21: Global Setup
Submenu name AutoTalk Allows you to answer the phone without pressing When the AutoTalk is set to On, simply remove the handset from the cradle and the phone automatically answers the call (see page 22). Anykey Answer Allows you to answer the phone without pressing When the Anykey Answer is On, you can answer a call by pressing any number key, /tone/... -
Page 22: Setting Up The Menu
(see page 25). Clear the base ID. Use this menu, for example, if you replace the base with a different base of the DCT series model (DCT5260/DCT5280/DCT5285 series) (see page 25). to move the pointer to a desired to select a desired submenu, is used to select an item. -
Page 23: Directlink Mode
DirectLink Mode Using the DirectLink Mode 1) Enter the “ ” menu (see “Entering the Menu” on page 20). 2) Press the ENTER soft key to enter the . You will hear a confirmation tone, and “ 3) To return back to the normal mode, exit the DirectLink mode. - Page 24 Selecting a Ringer Tone 1) Enter the “ “Entering the Menu” on page 20). You can choose from 8 ringers or 8 melodies: - Ringers [Flicker, Clatter, Soft Alert, Wake Up, Light Bug, If you set the ringer Beep Boop, Tone Board, Chip Chop] to Off, the ringer - Melodies [Beethoven’s Symphony #9 (Beethoven9), For tone will not sound.
- Page 25 Setting the Anykey Answer 1) Enter the “ ” menu, then the “ ” submenu (see “Entering the Menu” on page 20). 2) Press volume/ to change the selection, “ ” or “ ”. 3) Press the OK soft key and you will hear a confirmation tone. Setting the Banner 1) Enter the “...
- Page 26 Global Setup Setting Day and Time 1) Enter the “ 2) Press volume/ • When a Global then press the NEXT soft key. setting is changed from one handset, 3) Press the number keypad (0-9) to set the time, then press the NEXT soft key. this affects all 4) Press volume/ registered handsets.
-
Page 27: System Reset
System Reset De-register the Handset 1) Enter the “ ” menu, then the “ “Entering the Menu” on page 20). 2) Press volume/ to select the handset ID to be de-registered from the list, then press the OK soft key. 3) Press the OK soft key. -
Page 28: Basics
Making and Receiving Calls On the handset, you may also use the speakerphone while talking to an outside call. Using the handset speakerphone is called “hands-free conversation”. This feature allows you to easily communicate while performing other tasks, such as cooking. •... -
Page 29: Placing A Call On Hold
Placing a Call on Hold 1) During a call, press intercom/hold. The call will be put on hold. If you have more than one handset, once 10 seconds has passed or when you press the put on hold. 2) To talk to the caller, press talk/flash or speaker on a handset. -
Page 30: Redialing A Call
Redialing a Call The last three phone numbers dialed can be quickly redialed. Redialing from Standby Mode • If the number exceeds 32 digits, 1) Press the CID RDL PB soft key in the standby mode. only the first 32 digits are retained 2) Press volume/ in redial memory. -
Page 31: Ringer Mute (Temporarily)
Ringer Mute (temporarily) You can temporarily mute the ringer tone. When the handset is off the cradle and the phone is ringing, press the MUTE soft key. The ringer tone will return to the previous setting starting with the next incoming call. Adjusting the Earpiece and Handset Speaker Volume You can select different volume levels for the handset... -
Page 32: Tone Dialing Switch-Over
Tone Dialing Switch-over Some telephone companies use equipment that requires pulse dialing (sometimes referred to as rotary dialing). If you need to enter tone dialing digits, you can switch-over to tone dialing • The tone feature only during the call. For example, entering your bank account applies when the dial mode is set to pulse. -
Page 33: Find Handset
Find Handset To locate the handset, press find handset on the base when the base is in the standby mode. All registered handset(s) beeps for 60 seconds, and “ on the handset display. Paging is canceled when pressing any key on the handset or find handset on the base. -
Page 34: Using One Touch Voice Mail Access
Using One Touch Voice Mail Access If you subscribe to voice mail service, you can use your phone to access your voice mailbox. The voice mail LED flashes whenever you have messages waiting in your voice mailbox. Just program the handset with your access number and you can get You must subscribe your messages at the touch of a button. -
Page 35: Phonebook
Phonebook Phonebook allows you to dial a number using just a few key presses. Your phone stores names/numbers in the phonebook memory location, and you can search names in alphabetical order. You have a total of 100 locations that can be used for the phonebook (including the Speed dials) and Caller ID messages. - Page 36 3) Press the STORE soft key, “ 4) Enter the name (up to 16 characters) by using the number keypad (see the “Steps for Entering Names and Special Characters” on page 35). • When the memory is full, you will hear a If a name is not required, go to step 5.
-
Page 37: Steps For Entering Names And Special Characters
Steps for Entering Names and Special Characters Refer to the letters on the number keys to select the desired characters. With each press of a number key (0-9), the displayed character appears in the following order: Upper case letters first, lower case letters next and finally the number corresponding to the key. - Page 38 If you make a mistake while entering a name Press the DELETE soft key to erase the wrong character, then enter the correct character. To delete all characters, press and hold the DELETE soft key. If the next character uses the same number For example, to enter Movies: key, you must press 1) When the phone is in the standby mode, recall the “Phonebook”...
-
Page 39: Viewing The Phonebook
Viewing the Phonebook Your phone stores names/numbers in the phonebook memory locations, and you can search names in alphabetical order. You can view the phonebook even while the phone is in use. 1) Press the CID RDL PB soft key (or the MENU soft key during a call). 2) Press volume/ to move the pointer to “... -
Page 40: Making Calls Using The Phonebook
Making Calls Using the Phonebook From Standby Mode 1) When the phone is in the standby mode, view the phonebook location to dial (see “Viewing the Phonebook” on page 37). 2) Press talk/flash or speaker. The displayed number is dialed. 3) To hang up press the end key. -
Page 41: Editing Or Erasing A Stored Name, Phone Number, Distinctive Ring, And Speed Dial
Editing or Erasing a Stored Name, Phone Number, Distinctive Ring, and Speed Dial 1) When the phone is in the standby mode, press the CID RDL PB soft key. 2) Press volume/ to move the pointer to “ ”, then press the OK soft key. 3) Press volume/ , or the number keypad to view the phonebook locations (see “Viewing the Phonebook”... -
Page 42: Chain Dialing
Chain Dialing The memory locations in the handset are not limited to phone numbers. You can also store a group of numbers (up to 20 digits), that you need to enter once your call connects. This is referred to as Chain Dialing. An example of this is a bank account number. -
Page 43: Caller Id
Caller ID You must subscribe to Caller ID service to use this feature. When the telephone rings, the Caller ID feature allows you to view the caller’s name and phone number in the display before you answer the phone. Additionally, you can dial the displayed number and store the information for memory dialing. -
Page 44: Viewing The Caller Id List
You may receive any one of the following messages: When invalid data is received When a private name is received When a private number is received When a unknown name is received When a unknown number is received 2) When you receive the call, the display changes to “ Viewing the Caller ID List The Caller ID list stores information for incoming calls –... -
Page 45: Deleting Information From The Caller Id List
Deleting Information from the Caller ID List Deleting a Caller ID message 1) When the phone is in the standby mode, view the Caller ID information to be deleted (see “Viewing the Caller ID List” on page 42). 2) Press the DELETE soft key. “... -
Page 46: Using The Caller Id Message List
Using the Caller ID Message List Calling a party from the Caller ID list From Standby mode • You cannot make a call 1) When the phone is in the standby mode, view the Caller from the Caller ID list ID message (see “Viewing the Caller ID List”... -
Page 47: Call Waiting Deluxe Features
Call Waiting Deluxe Features Your phone gives you new options for call waiting. At the touch of a button, you can place the caller on hold, send them to your voice mail service, or conference them into your current call. You may be required to subscribe to Call Waiting and Call Waiting Deluxe to use these features. -
Page 48: Expanding Your Phone
IMPORTANT: is received. • If you purchase a DCX520 extra handset, please register the handset to the DCT5260 series base before use. The DCX520 will not operate until it is registered. • If you change a setting of the Globe Setup menu in one of the handsets, you change settings for all the handsets. -
Page 49: Register The Handset
Only one handset can be registered at a time. The handset ID for the supplied handset(s) was assigned at the factory, which has #1 (#1 and #2 for DCT5260-2) in the display. When you register additional handset to the base, the handset ID will be assigned. -
Page 50: Using The Directlink Mode
Using the DirectLink Mode To use this feature, you must enter the two handsets into the DirectLink mode first. To enter the DirectLink mode • During DirectLink mode, batteries use time when fully charged is as follows: • Placing the handset in the cradle causes the handset to exit the DirectLink mode. DirectLink call 1) When the phone is in the DirectLink standby mode, press the DirectLink soft key (example of DirectLink... -
Page 51: 3-Way Conferencing
3-Way Conferencing The phone permits 3-way conversations between 2 handsets, and an outside line. 1) During a call, press talk/flash on another handset to initiate the 3-way conversation. 2) To remove either caller from your conversation, press the end key on either handset. The other handset will still be connected to the call. -
Page 52: Replacing The Base
Replacing the Base When you replace the base with a different base of the DCT series model (DCT5260, DCT5280, or DCT5285 series), you need to clear the handset(s) and base ID. To do this, perform the “System Reset”... -
Page 53: Additional Information
Pull both sides of the beltclip to release the tabs from the holes. Headset Installation Your phone may be used with an optional headset, the Uniden HS910. To use this feature, insert the headset plug into the headset jack. Your phone is ready for hands-free conversations. -
Page 54: Note On Power Sources
Please use only “AA” rechargeable Ni-MH batteries. Warning To avoid the risk of personal injury or property damage from fire or electrical shock, only use the Uniden adapter model specifically designated for this product, and “AA” rechargeable Ni-MH batteries. Power Failure During the period that the power is off, you will not be able to make or receive calls with the telephone. -
Page 55: General Information
A replacement Uniden adapter may be purchase at your local Uniden dealer or by contacting the Uniden Parts Department (800) 554-3988. Hours are from 8:00 a.m. to 5:00 p.m. CST, Monday through Friday. We can also be reached on the web at www.uniden.com. -
Page 56: Troubleshooting
• Make sure the handset is properly seated in the cradle. • Make sure the charging contacts on the handset and the base (or the charger (for DCT5260-2 only)) are clean. • Move the handset and/or base to a different location away from metal objects or appliances and try again. - Page 57 Symptom Severe noise interference. • Keep the handset away from microwave ovens, computers, • Move to another location or turn off the source of interference. The Caller ID does not display. • The handset was picked up before the second ring. •...
-
Page 58: Liquid Damage
DO NOT use a microwave oven to speed up the drying process. This will cause permanent damage to the handset, base and the microwave oven. After following these steps, if your cordless telephone does not work, please send to: Uniden America Corporation Parts and Service Division 4700 Amon Carter Blvd. -
Page 59: Precautions & Warranty
(servicing) instructions in the literature accompanying the appliance. Uniden works to reduce lead content in our PVC coated cords in our products and accessories. WARNING: The cords on this product and/or accessories contain lead, a chemical known to the State of California to cause birth defects or other reproductive harm. -
Page 60: Installation Considerations
Uniden service center for a defect or malfunction covered by this warranty, (E) used in any conjunction with equipment or parts or as part of any system not manufactured by Uniden, or (F) installed or programmed by anyone other than as detailed by the owner’s manual for this product. -
Page 61: I.c. Notice
I.C. Notice TERMINAL EQUIPMENT NOTICE: This equipment meets the applicable Industry Canada Terminal Equipment Technical Specifications. This is confirmed by the registration number. The abbreviation, IC, before the registration number signifies that registration was performed based on a Declaration of Conformity indicating that Industry Canada technical specifications were met. -
Page 62: Index
Index 0 - 9 3-way conferencing ...49 16 ring options ...22 Anykey answer...23 Area code ...24 AutoTalk ...22 Banner ...23 Battery Preparing and charging ...13 Replacement and handling ...52 Beltclip ...51 Booster ...30 Caller ID Caller ID service ...41 Calling ...44 Call Waiting ...24, 45 Deleting ...43 Setting...24... - Page 63 If you need any assistance with this product, please call our Customer Hotline at PLEASE DO NOT RETURN THIS PRODUCT TO THE PLACE OF PURCHASE. Our Uniden representatives will be happy to help you with any matters regarding the operation of this unit, available accessories, or any other related matters.