Subscribe to Our Youtube Channel
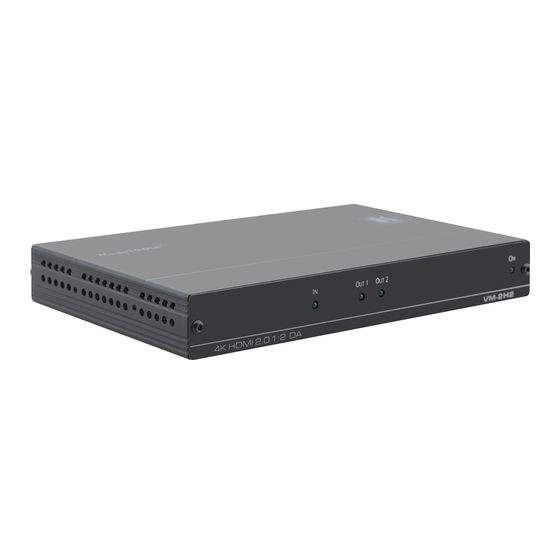
Summary of Contents for Kramer VM-2H2
- Page 1 USER MANUAL MODEL: VM-2H2 4K HDMI 2.0 1:2 DA P/N: 2900-300602 Rev 3 www.kramerAV.com...
-
Page 2: Table Of Contents
Kramer Electronics Ltd. Contents Introduction Getting Started Overview Typical Applications Defining the VM-2H2 4K HDMI 2.0 1:2 DA Setting the DIP-Switches LED Indications Mounting VM-2H2 Connecting the VM-2H2 EDID Acquisition Policy Upgrading the Firmware Supported Input Resolutions Default EDID Technical Specifications... -
Page 3: Introduction
Kramer Electronics Ltd. Introduction Welcome to Kramer Electronics! Since 1981, Kramer Electronics has been providing a world of unique, creative, and affordable solutions to the vast range of problems that confront video, audio, presentation, and broadcasting professionals on a daily basis. In recent years, we have... - Page 4 European Advanced Recycling Network (EARN) and will cover any costs of treatment, recycling and recovery of waste Kramer Electronics branded equipment on arrival at the EARN facility. For details of Kramer’s recycling arrangements in your particular country go to our recycling pages at www.kramerav.com/support/recycling.
-
Page 5: Overview
• A default EDID for fast and efficient connection of the unit. The default EDID feature lets you connect the VM-2H2 without having to connect a display to the output. • Operating modes selectable by DIP-switch: force RGB, lock EDID, HDCP enable, programming mode. -
Page 6: Defining The Vm-2H2 4K Hdmi 2.0 1:2 Da
• Lock default EDID – locked, not locked. Any time the DIP-switch settings are changed, the device must be powered off and on for the new settings to take effect. VM-2H2 – Defining the VM-2H2 4K HDMI 2.0 1:2 DA... -
Page 7: Led Indications
Flashes slowly, repeatedly Input signal detected. Output device has invalid EDID Flashes twice quickly then twice slowly, HDCP signal on input. repeatedly Output device does not support HDCP and has invalid EDID VM-2H2 – Defining the VM-2H2 4K HDMI 2.0 1:2 DA... -
Page 8: Mounting Vm-2H2
Kramer Electronics Ltd. Mounting VM-2H2 This section provides instructions for mounting VM-2H2. Before installing, verify that the environment is within the recommended range: • Operation temperature – 0 to 40C (32 to 104F). • Storage temperature – -40 to +70C (-40 to +158F). -
Page 9: Connecting The Vm-2H2
Kramer Electronics Ltd. Connecting the VM-2H2 Always switch off the power to each device before connecting it to your VM-2H2. After connecting your VM-2H2, connect its power and then switch on the power to each device. You do not have to connect all the inputs and outputs, connect only those that are required. -
Page 10: Edid Acquisition Policy
When set to OFF (up): • If no outputs are connected when powering on the VM-2H2, the default EDID is set on the input. The EDID of the first output that is connected after powering the device is set to the input. This EDID is replaced by the default EDID only when all outputs are disconnected. -
Page 11: Upgrading The Firmware
2. Download and install the EPConsole application from the Koryo (Taiwan) Web site. 3. Download and extract the latest version of the firmware from the Kramer Web site to a disk location on your PC. The firmware includes three files with names ending in .h00, .h01, .h02. -
Page 12: Supported Input Resolutions
1920x1080p 24Hz 1920x1080p 30Hz 1920x1080p 50Hz 1920x1080p 60Hz 3840x2160p 24Hz 16:9 3840x2160p 30Hz 16:9 3840x2160p 60Hz 16:9 4096x2160p 24Hz 256:135 4096x2160p 30Hz 256:135 4096x2160p 60Hz 256:135 (Default) 3840x2160p 24Hz 64:27 3840x2160p 30Hz 64:27 3840x2160p 60Hz 64:27 VM-2H2 – Supported Input Resolutions... -
Page 13: Default Edid
Detailed timing #3..1366x768p at 50Hz (16:9) Modeline...."1366x768" 84.650 1366 1894 1938 2086 768 772 777 813 +hsync +vsync Detailed timing #4..1366x768p at 60Hz (16:9) Modeline...."1366x768" 101.610 1366 1894 1938 2086 768 772 777 813 +hsync +vsync VM-2H2 – Default EDID... - Page 14 IEEE registration number. 0x000C03 CEC physical address..1.0.0.0 Maximum TMDS clock..165MHz Report information Date generated... 4/17/2016 Software revision..2.90.0.1002 Data source....File Operating system..6.1.7601.2.Service Pack 1 Raw data 00,FF,FF,FF,FF,FF,FF,00,2D,B2,00,12,00,00,00,00,0E,1A,01,03,80,34,20,78,EA,B3,25,AC,51,30,B4,26, 10,50,54,2D,CF,00,A9,C0,81,00,A9,40,61,59,45,59,31,59,71,4F,81,40,02,3A,80,18,71,38,2D,40,58,2C, 45,00,0F,24,21,00,00,1E,00,00,00,FD,00,38,4C,1E,53,11,00,0A,20,20,20,20,20,20,00,00,00,FC,00,56, 4D,2D,34,48,32,0A,20,20,20,20,20,20,00,00,00,F7,00,00,08,42,A2,20,00,00,00,00,00,00,00,00,01,B4, 02,03,23,F0,50,90,05,02,14,1F,20,22,5D,5F,61,62,64,66,67,69,6B,23,09,07,07,83,01,00,00,65,03,0C, 00,10,00,51,03,D0,18,21,F0,2D,00,58,2C,45,00,0F,1A,21,00,00,9E,51,13,54,D0,32,E0,2D,10,10,2C,45, 80,BA,88,21,00,00,1E,11,21,56,D0,52,00,2D,30,10,2C,45,80,BA,88,21,00,00,1E,B1,27,56,D0,52,00,2D, 30,10,2C,45,80,BA,88,21,00,00,1E,B1,0A,D0,A0,20,40,2D,20,08,60,22,01,80,E0,21,00,00,00,00,F1,B5 VM-2H2 – Default EDID...
-
Page 15: Technical Specifications
35.1cm x 21.2cm x 7.2cm (13.8" x 8.4" x 2.8") W, D, H SHIPPING WEIGHT: 0.67kg (0.67lb) INCLUDED ACCESSORIES: Power supply Specifications are subject to change without notice For the most updated resolution list, go to our Web site at http://www.kramerav.com VM-2H2 – Technical Specifications... - Page 16 Electronics products, this product must be insured during shipment, with the insurance and shipping charges prepaid by you. If this product is returned uninsured, you assume all risks of loss or damage during shipment. Kramer Electronics will not be responsible for any costs related to the removal or re- installation of this product from or into any installation.
- Page 17 SAFETY WARNING Disconnect the unit from the power supply before opening and servicing For the latest information on our products and a list of Kramer distributors, visit our website where updates to this user manual may be found. We welcome your questions, comments, and feedback.


Need help?
Do you have a question about the VM-2H2 and is the answer not in the manual?
Questions and answers