Sam4s ER-900 Series Technical Manual
Hide thumbs
Also See for ER-900 Series:
- Operator's and programming manual (255 pages) ,
- Operation and program manual (244 pages) ,
- Operation & programming manual (185 pages)
Table of Contents
Advertisement
Advertisement
Table of Contents

Related Manuals for Sam4s ER-900 Series


Summary of Contents for Sam4s ER-900 Series
- Page 3 Precaution Statements Follow these safety, servicing and ESD precautions to prevent damage and to protect against potential hazards such as electrical shock. 1-1 Safety Precautions 1. Be sure that all built-in protective devices are between components and the printed circuit replaced.
- Page 4 1-2 Servicing Precautions WARNING: First read the Safety Precautions section of this manual. If some unforeseen circumstance creates a conflict between the servicing and safety precautions, always follow the safety precautions. WARNING: An electrolytic capacitor installed with the wrong polarity might explode. 1.
-
Page 6: Table Of Contents
Clear PLU File......................... 28 Clear PLU File of Zero Priced items ..................29 Flash ROM Information......................31 Function Key Assignment......................32 ER-900 Series Function Key Codes ................33 RS232 Communication Option Programs................34 SD Card Utilities........................36 Load/Save Receipt Images....................... 39 Key Tasks Keyboard Alpha Overlays...................... -
Page 7: Getting Started Chapter
Getting Started Chapter... -
Page 8: About The Er-900 Series
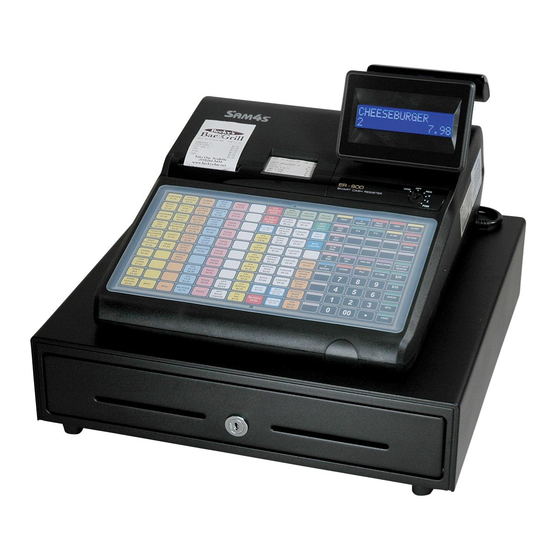
About the ER-900 Series The ER-900 Series is offered in four different configurations. There are two flat keyboard models that work well for restaurants, food service shops, or convenience stores and two raised keyboard models for retail shops. This manual includes instructions for all models. The keyboard and printer configuration defines the model. -
Page 9: Basic Features And Functions
Basic Features and Functions SAM4s ER-900 series electronic cash registers are designed to fit into many different retail and restaurant environments. Standard features include: Easy drop-and-print paper loading. A two-line 16-character backlit LCD display and a 9-character rotating rear display. -
Page 10: Keyboards
Keyboards ER-920/ER-940 Flat Keyboard Versions The ER-920/ER-940 keyboards include 150 key positions with the default legends and key assignments as shown below. The keyboard sheet can be replaced by lifting the protective rubber cover. *Shaded key locations are fixed and cannot be changed. FEED QUICK FEED... -
Page 11: Messages And Errors
Messages and Errors Displayed Messages SEQUENCE ERR PLU NO DATA ERR CLERK ERROR AMOUNT CNT ERR LANTRAN ERR COMM ERROR TIME ERROR OVER LIMIT ERR INACTIVE ERR X MODE ONLY NON ADD ERROR ADD CHECK ERR CONDIMENT ERROR REQ. EATIN FUNC. STOCK ERROR DRAWER ERROR REQ. -
Page 12: Initial Clear For Error Status
An initial clear may be necessary as part of servicing, or troubleshooting Perform this procedure only as necessary. Contact your SAM4S dealer first if you have questions about operating or programming your SAM4S ER-900. To Perform an Initial Clear 1. -
Page 13: Quick Feature Setup Chapter
Quick Feature Setup Chapter... -
Page 14: Clerk Interrupt
The ability to interrupt a sale in progress and commence another sale for a different employee referred to as clerk interrupt The ER-900 Series series will operate either guest management and / or clerk interrupt. The clerk interrupt feature can be used via the clerk buttons, or via the Clerk # sign on button... -
Page 15: Guest Check Management
Guest Check Management The ER-900 series allows for either clerk interrupt and / or guest check management providing full functionality for table tracking The bill can be produced using the registers receipt printer with either an inbuilt graphics logo or user ... -
Page 16: Remote Guest Check Printing
Remote Guest Check Printing The bill can be produced using the ECR receipt printer with either an inbuilt graphics logo or user definable graphics logo and text. Alternatively the bill can be printed on an external printer with a 6-line receipt header and footer. -
Page 17: Remote Kitchen Order Printing
Remote Kitchen Order Printing It is possible to utilise both serial ports for kitchen printing direct from one machine, alternatively the kitchen ticket can be issued from the register’s receipt printer. The groups are allocated with the printer port number, making it possible to designate different printers for ... -
Page 18: Bitmap Printing
6 line header and footer logo text. The register will allow two graphic images, which can be either the inbuilt or alternatively custom designed and downloaded from the PC utility. Sam4s M Series Your Receipt PLU 1 £1.00 PLU 2 £2.00... -
Page 19: Pc Communications
PC Communications The ER-900 PC Utility provides the option to upload and download program files. The graphics logo can be designed on a PC and transmitted to the register using the utility It is also possible to upload the register X1, Z1, and X2, Z2 reports to the PC. ... -
Page 20: Pole Display Setup
Pole Display Setup The ER-900 range all have a built in customer display, but if you require an additional display, a pole display can be connected via one of the serial ports. This will require external power. The ER-900 also supports multi-line display, which means it will show you detailed information about ... -
Page 21: Scanner Setup
Sets the port for a Scanner QTY/Time SBTL CASH 80 = Serial Port 1 82 = RJ Port 3 81 = Serial Port 2 83 = RJ Port 4 / USB Port Ensure the Scanner has successfully scanned the supplied Sam4s Setup sheet... -
Page 22: Scanner Setup
Scanner Setup METROLOGIC VOYAGER MS9520 CONFIGURATION TO SAM4S Scan the following barcodes in sequence to setup the scanner. If an error occurs, turn the scanner off then on ENTER PROGRAM MODE RECALL DEFAULTS ENABLE RS-232 2400 BAUD RATE ODD PARITY... - Page 23 METROLOGIC MS7120 (ORBIT) CONFIGURATION FOR SAM4S Scan the following barcodes in sequence to setup the scanner. If an error occurs, turn the scanner off and on. ENTER CONFIG MODE ENABLE UPC PREFIX RECALL DEFAULTS 8 DATA BITS DISABLE LF SUFFIX...
- Page 24 METROLOGIC VOYAGER MS9590GS CONFIGURATION TO SAM4S Scan the following barcodes in sequence to setup the scanner. If an error occurs, turn the scanner off then on. ENTER PROGRAM MODE RECALL DEFAULTS ENABLE RS-232 9600 BAUD RATE ODD PARITY 8 DATA BITS...
- Page 25 METROLOGIC ECLIPSE CONFIGURATION TO SAM4S Scan the following barcodes in sequence to setup the scanner. If an error occurs, turn the scanner off then on. ENTER PROGRAM MODE RECALL DEFAULTS ENABLE RS-232 2400 BAUD RATE ODD PARITY 8 DATA BITS...
-
Page 27: Service Mode Chapter
Service Mode Chapter... -
Page 28: Overview
Overview The following procedures are done from the Service Mode menu: Clear all totals Clear grand total Clear PLU file Engineer Counter Change EPROM Information Memory Allocation Assignment of functions to keyboard locations ... -
Page 29: Ram Clear & Memory Allocation
Ram Clear & Memory Allocation Memory All Clear This reset procedure has been carried out at the factory and need only be carried out if the machines requires resetting back to factory defaults. Further information can be found in the Service Mode chapter ** Warning this operation will erase all data from the Cash Register. - Page 30 Memory Table ITEM ER-900 Sizes 8000 (Max.10000) CLERK (Max. 99) GROUP (Max. 99) CHECK# (Max. 500) CHECK LINE (Max. 100) CHECK TYPE : (Soft) with Items, (Default) Hard(1), Soft(0) - (Hard) no items PRICE LEVEL (Max. 2) MIX AND MATCH (Max.
-
Page 31: Clear Totals
Clear Totals ** Warning this procedure will reset all sales totals. 1.Turn the control lock to the S position. 2.To Reset Totals, enter 20, press the SBTL key. SBTL 3. Press the QTY/TIME key to confirm. QTY/TIME 1. Press CASH key to finalise CASH Clear Grand Totals ** Warning this procedure will rest all Grand Totals... -
Page 32: Clear Plu File
Clear PLU File ** Warning this operation will erase all PLU data from the Cash Register. 1.Turn the control lock to the S position. 2.To Reset PLU file, enter 40, then press the SBTL key. SBTL Press the QTY/TIME key to confirm QTY/TIME Press the CASH key to finalise CASH... -
Page 33: Clear Plu File Of Zero Priced Items
Clear PLU File of Zero Priced items ** Warning this operation will erase all PLU items where the status is Preset and both prices 1 and 2 are zero. Ensure all sales reset reports have been carried out before this operation is commenced. 1.Turn the control lock to the S position. - Page 34 Engineer Edit Counters In order to adjust the grand total, receipt & Z counters it is first necessary to reset (Z) the financial sales report 1.Turn the control lock to the S position. 2.To Reset Totals, enter 90, press the SBTL key. S BTL 3.
-
Page 35: Flash Rom Information
Flash ROM Information 1.Turn the control lock to the S position. 2.To print Eprom Information, enter 50, press the SBTL key. SBTL Memory Allocation Information 1.Turn the control lock to the S position. 2.To print the memory allocation, enter 60, press the SBTL key. SBTL Load Default Keyboard 1.Turn the control lock to the S position. -
Page 36: Function Key Assignment
Function Key Assignment Function keys may be relocated, inactivated or changed with this program. For example, you may wish to place functions, such as PREVIOUS BALANCE and SERVICE that are not placed on the default keyboard. Or perhaps, you may wish to remove a function, such as CANCEL, for security reasons. -
Page 37: Er-900 Series Function Key Codes
ER-900 Series Function Key Codes Function Function Function Function Code Code Code Code NLU 1 ENDORSE MODIFIER 4 CLERK 1 NLU 117 CHEQUE TEND MODIFIER 5 CLERK 2 Numeric 1 CHECK # P/BAL CLERK 3 Numeric 2 CLEAR (ESC) PAID OUT 1... -
Page 38: Rs232 Communication Option Programs
RS232 Communication Option Programs The following procedure is used to define the settings for peripheral devices connected to the unit. 1. Turn the control lock to the S position 2. Then carry out the appropriate port settings using the values table following. Show in grid See table SBTL... - Page 39 End Feeding Line KP 0 - 20 Initial Feeding Line Slip 0 - 20 Print Line On Guest Check 0 - 50 NONE Printer Type SAM4s ELLIX10 SAM4s ELLIX20 SRP-270/270, SNBC M280 SRP-350, SNBC R580/2002NP/880NP CITIZEN 3550 CITIZEN 810 CITIZEN 230...
-
Page 40: Sd Card Utilities
SD Card Utilities You can use an SD flash memory card to backup and restore program and save reports for both utility and csv view. Note The data is saved in a separate folder named with the store name in System Option #30. - Page 41 Note : The store name is default to backup, and can be changed using the system options. Note: The saved files can be read using the Sam4s PC utility. The files would be placed in the \ER-900PC\*storename. Then the store name would be added as a Store within the utility to allow viewing of the files.
- Page 42 Saving Reports(CSV) to SD Card Reports saved are the current X1 readings. 1. Turn the control lock to the X position. 2. To backup Reports to SD, enter 1 0 1, press the SUBTOTAL key. TOTAL Note: The above files can be viewed on a PC using a Windows program such as Notepad or Excel.
-
Page 43: Load/Save Receipt Images
Note: After loading images, you must set Print Options #28 and #29 for image printing. Preparing a Graphic Logo Bitmap for an ER-900 Series The image must be black/white, 384 x 192 pixels, and 10 Kbytes or less in size. - Page 44 Use the PC Utility to Convert the Image 1. Install the ER-900 PC Utility on your PC. 2. At your PC, start the ER-900 PC Utility. (Select Start, Programs, SHC PC UTILITY, ER-900 PC UTILITY.) The Store Setting dialog box displays. 3.
- Page 45 Load the Images by SD Card 1. Insert the SD card into the register’s SD slot. Note: The SD slot is located in the printer compartment of the ER-900. Remove the security screw to access the slot. 2. Turn the control lock to the S position. 3.
-
Page 47: Key Tasks
Key Tasks... -
Page 48: Keyboard Alpha Overlays
Keyboard Alpha Overlays ER-920/940 Alpha Keyboard Overlay & ‘ < BOLD SPACE SPACE SPACE SPACE SPACE BACK > CLEAR X/TIME ½ ¼ SBTL € £ CASH ¥ ER-925/945 Alpha Keyboard Overlay “ SPACE SPACE CLEAR X/TIME BOLD & < BACK SUBTOTAL >... -
Page 49: Descriptor Code Method
Descriptor Code Method Descriptiors can be entered using the keyboard layouts or character codes as shown If you customise your keyboard by covering key locations or by installing double or quad size keys you will need to program descriptors using the descriptor codes. Descriptor Code Chart Ç... -
Page 50: Ecr Program Codes
ECR Program Codes The following Program Codes are explained in the following chapter 50 SUB Tax Rate *Status table shown following 100 SUB PLU Status *Status table shown following 150 SUB PLU Group assignment 200 SUB PLU Price/HALO 250 SUB PLU Stock amount 280 SUB PLU Minimum stock amount... - Page 51 The following status tables, can be used in conjunction with the ECR program codes shown previously Tax Rate Programming Flowchart SBTL TAX RATE X/TIME SBTL CASH Tax Rate You must enter decimal type Info Tax Type VALUE If the tax is a percentage added to the sale (normal add on tax), If the tax is a percentage value added tax (Inclusive in sale total), VALUE GST (tax 4) is taxable by rate 1?
- Page 52 PLU Status Chart Value Address Program Option Yes = 0 PLU is preset? No = 1 Yes = 0 PLU is override preset ? No = 2 Yes = 4 PLU is taxable by rate 1? No = 0 Yes = 1 PLU is taxable by rate 2? No = 0 Yes = 2...
-
Page 53: System Option Programming
System Option Programming Refer to the “System Option Table” to review the system options. Read each option carefully to determine if you wish to make any changes. NOTE: You do not need to program this section unless you wish to change the default status. Programming a System Option: 1. -
Page 54: System Option Table
System Option Table Address SYSTEM OPTION VALUE Beeper is active? Yes = 0 No = 1 Clerk sign on method direct entry Code entry Clerks are: pop-up stay down Drawer Needs to be shut to operate Yes = 0 No = 2 Activate Open Drawer Alarm Yes = 4 No = 0... - Page 55 Split price round Up at 0.50 0(default) calculations will: always round up = always round down = Eat In / Take out / Drive Thru Analysis compulsory Yes = 1 before tendering is allowed? No = 0 Hash is Normal Non-add Reset the Financial report Z counter after a Z1 Yes = 1...
- Page 56 Use Overlay Descriptor method to program Yes = 1 descriptor. No = 0 % will not affect net sales? Yes = 2 No = 0 Disable Cash Declaration? Yes = 4 No = 0 Clerk Interrupt Allowed? Yes = 1 No = 0 Do not count totals in void mode? Yes = 2...
- Page 57 Use Autocutter? Yes = 1 No = 0 Use Journal Spool? Yes = 2 No = 0 Use MCR? Yes = 4 No = 0 Track 1 & 2 MSR Track Use: Track 2 & 3 (default) Use Dallas? Yes = 1 No = 0 Prompt for Price if Price 1 = 0.00 Yes = 2...
-
Page 58: Print Option Programming
Print Option Programming Refer to the “Print Option Table” to review the print options. Read each option carefully to determine if you wish to make any changes. NOTE : You do not need to program this section unless you wish to change the default status. Programming a Print Option: 1. -
Page 59: Print Option Table
Print Option Table Address PRINT OPTION VALUE Yes = 1 Print media total on clerk report? No = 0 Yes = 0 Print tax symbol? No = 2 Yes = 0 Void Mode / Return totals on the Financial report? No = 1 Yes = 2 Audaction total will print on the Financial report? - Page 60 Yes = 0 Print Gross total on the X Financial report? No = 1 Yes = 0 Print Gross total on the Z Financial report? No = 2 Yes = 1 Print Subtotal without Add tax on the receipt? No = 0 Tax amount to print combine on receipt is:...
- Page 61 Print average sales per customer on the Yes = 0 Financial report? No = 2 Buffered Receipt when receipt / issue a second Yes = 1 receipt for the same transaction? No = 0 Priority print by group on the kitchen printer? Yes = 2 No = 0 Print PLU number and name on the receipt?
- Page 62 Print in high density? Yes = 1 No = 0 Print journal In Training mode Yes = 2 No = 0 Suppress bitmap in PGM and X/Z Mode Yes = 1 No = 0 Suppress printing of last report date Yes = 2 No = 0 Print Group Details on Kitchen Printer at...
-
Page 63: Program Scans
Program Scans ER-900 Since much time and energy has been invested in the planning and programming of your , it is advisable to print a hard copy of the final program for future reference. OTHER PROGRAM SCANS 1. Turn the control lock to the PGM position. 2. - Page 64 OTHER PROGRAM SCAN QTY/TIME Program Program Group Drawer Limit Cheque Change Limit System option Time & Date Print option Machine Number Function keys Mix & Match Clerk Not Used Preamble message Euro Rounding Postamble message All Function Keyboard Scan Endorsement message Alpha Text Financial Report message System Text...
-
Page 65: Report Table
Report Table Mode Report Report Report Type Key Sequence Number Mode lock 1 – SBTL 1 – SBTL Financial 201 – SBTL 201 – SBTL 2 – SBTL 2 – SBTL Time 202 – SBTL 202 – SBTL 3 – SBTL 3 –... - Page 66 Mode Report Report Report Type Key Sequence Number Mode Lock Individual Clerk 9–SBTL -#-CLERK-#-CLERK Report 209–SBTL -#-CLERK-#-CLERK 10 – SBTL 10 – SBTL 210 – SBTL MIX AND MATCH 210 – SBTL 11 – SBTL Open Table 11 – SBTL 12 –...
-
Page 67: Reports To Sd Card
Reports to SD Card Saving Reports to an SD Card The following procedure saves all available reports to the card, to the folder name set within system options Formatting an SD card SD cards must be formatted as FAT 32. Caution: Formatting the SD card will clear all data on the SD card and prepare it for use. -
Page 68: Cash Declaration
Cash Declaration If compulsory cash declaration is required you must declare the count of the cash drawer prior to taking X or Z Financial and clerk reports. You can enter the cash drawer total in one step or to facilitate the counting of the cash drawer, you can enter each type of bill/coin and cheques separately and let the register act as an adding machine. -
Page 69: Technical
Technical... -
Page 70: Wiring Diagrams
Wiring Diagrams TO SAMSUNG POLE TO METROLOGIC SCANNER DISPLAY SCAN POLE GREEN BROWN BLUE ORANGE WHITE Sam4s to PC Cable TO PRINTER Cable ECR 9M 25M PRINTER ECR 9M 9M PC... -
Page 71: Flash Rom Updates
FLASH ROM Updates The ER-900 register software is loaded in an Flash ROM (erasable programmable read only This program may occasionally be updated by the manufacturer. Your SAM4s memory). dealer can update the software if necessary. The Flash ROM can be loaded through a PC Utility or by SD card. - Page 72 NEWNET_DOWN.exe (The update utility program) NEWNET.bin PC Connection Cable YOU MUST USE Port #1. Use the following cable: The cable should be as per Sam4s to PC shown previously STD Part # 522120 (Register DB-9MF COM 1 to PC DB-9F)
- Page 73 Update Boot Area The relevant update instructions supplied with the .bin file will tell whether both Boot Area and/or Application Area updates are required, mostly it will be application. 1. Connect the Serial Cable From ECR to PC. 2. At the register, turn the control lock to the S position. 3.
- Page 74 Update Program Area 1. Connect the Serial Cable From ECR to PC. 2. At the register, turn the control lock to the S position. 3. Turn the power switch to the OFF position. 4. Press and hold the CASH and CLERK keys. Note Use the keys in their default locations, the upper-right and lower- right keys on the keyboard.
Need help?
Do you have a question about the ER-900 Series and is the answer not in the manual?
Questions and answers