Table of Contents
Advertisement
Advertisement
Table of Contents

Subscribe to Our Youtube Channel
Related Manuals for Renogy ADVENTURER


Summary of Contents for Renogy ADVENTURER
- Page 1 ADVENTURER 30A PWM Flush Mount Charge Controller w/ LCD Display Version 2.0...
- Page 2 Important Safety Instructions Please save these instructions. This manual contains important safety, installation, and operating instructions for the charge controller. The following symbols are used throughout the manual: Indicates a potentially dangerous condition. Use extreme WARNING caution when performing this task. Indicates a critical procedure for safe and proper operation of CAUTION the controller.
- Page 3 Battery Safety Do NOT let the positive (+) and negative (-) terminals of the battery touch each other. Explosive battery gases may be present while charging. Be certain there is enough ventilation to release the gases. Be careful when working with large lead acid batteries. Wear eye protection and have fresh water available in case there is contact with the battery acid.
-
Page 4: Table Of Contents
Table of Contents General Information Product Overview Identification of Parts Dimensions Included Components Optional Components Installation Flush Mounting Surface Mount Attachment Wiring Operation System Status Icons Change the Parameters Power Generation Interface -> Reset Battery Interface -> Set Battery Type Battery Temperature Interface ->... -
Page 5: General Information
General Information The Adventurer is an advanced charge controller for off-grid solar applications. Integrating highly efficient PWM charging, this controller increases battery life and improved system performance. It can be used for 12V or 24V battery or battery bank. The controller is embedded with self-diagnostics and electronic protection functions that prevent damages from installation mistakes or system faults. -
Page 6: Product Overview
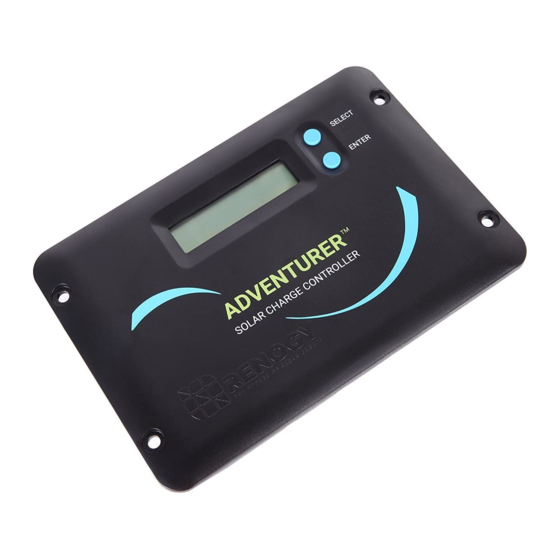
Product Overview Identification of Parts BATT+ BATT- RS232 Temp. Sensor Batt. Remote Label Description USB Port 5V, Up to 2.4A USB port for charging USB devices. Select Button Cycle through the interface Enter Button Parameter Setting button LCD Display Blue Backlit LCD displays system status information Mounting Holes diameter holes for mounting the controller PV Terminals... -
Page 7: Dimensions
Dimensions 22.1mm φ4.8mm 92.1mm φ0.2in 114.2mm 0.2in 25mm 1.0in 47.8mm 1.9in 143.9mm 5.7in Adventurer Controller 170.6mm 24.1mm 6.7in 0.9in 94.1mm 3.7in 118.2mm 4.7in 45mm 1.8in Adventurer Accessory... -
Page 8: Included Components
Battery Voltage Sensor (BVS): The battery voltage sensor is polarity sensitive and should be used if the adventurer will be installed with longer line runs. In longer runs, due to connection and cable resistance, there can be discrepancies in the voltages at the battery terminals. -
Page 9: Installation
The front of the Adventurer will serve as a heat sink, therefore it is important to ensure that the mounting location is not near any heat generating sources and ensure that there is proper airflow across the faceplate of the Adventurer to remove the heat dissipated from the surface. -
Page 10: Flush Mounting
Flush Mounting:... -
Page 11: Surface Mount Attachment
Surface Mount Attachment: The charge controller can also be mounted on a flat surface using the Adventurer Surface Mount Attachment. In order to properly mount the charge controller, there is no need to cut a section of the wall considering the charge controller can now be mounted on a flat surface using the attachment. - Page 12 2.Unscrew PV terminals by rotating counterclockwise to open the hatch. Then connect the positive and negative battery connections in their appropriate labeled terminal. 3. Insert temperature sensor block terminal and connect wire. It is not polarity sensitive. (Optional, requires a separate purchase).
-
Page 13: Operation
4. Insert the battery voltage sensor terminal block in the Batt Remote port. This is polarity sensitive. (Optional, requires a separate purchase). WARNING If unscrewing the Battery Voltage Sensor terminal block, make sure to not mix the wires. It is polarity sensitive and may cause damage to the controller if connected incorrectly. Operation After connecting the battery to the charge controller, the controller will turn on automatically. -
Page 14: System Status Icons
The Adventurer is an easy to use controller requiring minimal maintenance. The user is able to adjust some parameters based on the display screen. The user can manually cycle through the display screens by using the “SELECT” and “ENTER” buttons Cycles forwards through the different display screens. -
Page 15: Battery Temperatureinterface Change From C° To F
BATT. 4. Set Battery Type to Lithium Set Lithium Battery Parameters When using the Adventurer to charge lithium battery, the user is able to set Battery Parameters. In the Battery Interface, select Lithium as Battery Type. Short press “ENTER” to enter Battery Voltage selection interface. -
Page 16: Pwm Technology
PWM Technology The Adventurer utilizes Pulse Width Modulation (PWM) technology for battery charging. Battery charging is a current based process so controlling the current will control the battery voltage. For the most accurate return of capacity, and for the prevention of excessive gassing pressure, the battery is required to be controlled by specified voltage regulation set points for Absorption, Float, and Equalization charging stages. -
Page 17: System Status Troubleshooting
Equalization: Is carried out every 28 days of the month. It is intentional overcharging of the battery for a controlled period of time. Certain types of batteries benefit from periodic equalizing charge, which can stir the electrolyte, balance battery voltage and complete chemical reaction. -
Page 18: Maintenance
130A 170A Fuse from Controller to Battery Controller to Battery Fuse = Current Rating of Charge Controller Ex. Adventurer = 30A fuse from Controller to Battery Fuse from Solar Panel(s) to Controller Ex. 200W; 2 X 100 W panels Parallel Total Amperage = Isc1 + Isc2 = (5.75A + 5.75A) * 1.25... -
Page 19: Technical Specifications
Technical Specifications Description Parameter Nominal Voltage 12V/24V Auto Recognition Rated Charge Current Max. PV Input Voltage 50 VDC USB Output 5V, 2.4A max Self-consumption ≤13mA Temperature Compensation Coefficient -3mV/℃/2V -25℃ to +55℃ | -13 F to 131 Operating Temperature Storage Temperature -35℃... - Page 20 RENOGY.COM Renogy reserves the right to change the contents of this manual without notice. 2775 E Philadelphia St, Ontario, CA 91761, USA 909-287-7111 www.renogy.com customerservice@renogy.com 苏州高新区科技城培源路1号5号楼-4 400-6636-695 https://www.renogy.cn sales@renogy.cn https://www.renogy.jp onlinestorejp@renogy.com https://ca.renogy.com onlinestoreca@renogy.com https://au.renogy.com onlinestoreau@renogy.com https://uk.renogy.com onlinestoreuk@renogy.com https://de.renogy.com onlinestorede@renogy.com https://fr.renogy.com...
Need help?
Do you have a question about the ADVENTURER and is the answer not in the manual?
Questions and answers
I'm unable to remove Adventurer surface mount base from flush face plate of the controller