
Related Manuals for Renogy Commander Series


Summary of Contents for Renogy Commander Series
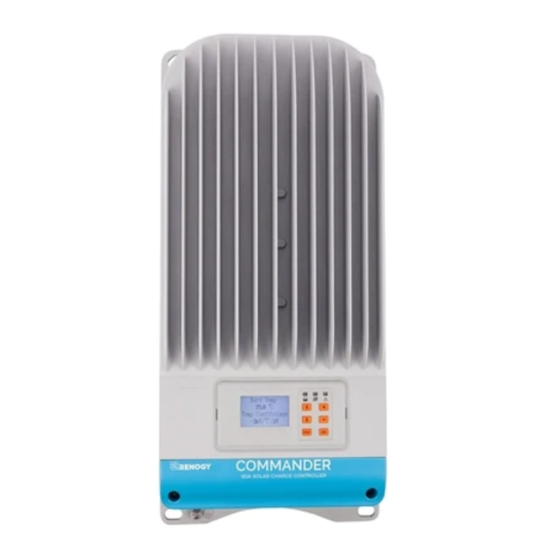
- Page 1 Commander Series RENOGY 60A Maximum Power Point Tracking Solar Charge Controller 2775 E. Philadelphia St., Ontario, CA 91761 Version 3.0 1-800-330-8678...
- Page 2 Important Safety Instructions Please save these instructions. This manual contains important safety, installation, and operating instructions for the charge controller. The following symbols are used throughout the manual to indicate potentially dangerous conditions or important safety information. WARNING: Indicates a potentially dangerous condition. Use extreme caution when performing this task.
- Page 3 Battery Safety • Use only sealed lead-acid, flooded, or gel batteries which must be deep cycle. • Explosive battery gases may be present while charging. Be certain there is enough ventilation to release the gases. • Be careful when working with large lead acid batteries. Wear eye protection and have fresh water available in case there is contact with the battery acid.
-
Page 4: Table Of Contents
Table of Contents General Information ............................ 4 Additional Components ..........................8 Optional Components ..........................8 Identification of Parts ..........................9 PV Array Requirements ..........................10 PV Strings .............................. 10 PV Max Power ............................10 Installation ..............................11 Operation ..............................16 1. -
Page 5: General Information
General Information The RENOGY Commander MPPT controller is suitable for off-grid solar applications. It protects the battery from being over-charged by the solar modules and over-discharged by the loads. The controller features a smart tracking algorithm that maximizes the energy from the solar PV module(s) and charge the battery. - Page 6 generated in the solar panels is the same power that is transmitted into the battery bank. Power is the product of Voltage (V) x Amperage (A). Therefore, assuming 100% efficiency: Power In = Power Out Volts In * Amps In = Volts out * Amps out Although MPPT controllers are not 100% efficient, they are very close at about 92-95% efficient.
- Page 7 Four Charging Stages The Commander MPPT charge controller has a 4-stage battery charging algorithm for a rapid, efficient, and safe battery charging. They include: Bulk Charge, Boost Charge, Float Charge, and Equalization*. Bulk Charge: This algorithm is used for day to day charging. It uses 100% of available solar power to recharge the battery and is equivalent to constant current.
- Page 8 chemical reactions and all the charge current would turn into heat or gas. Because of this, the charge controller will reduce the voltage charge to smaller quantity, while lightly charging the battery. The purpose for this is to offset the power consumption while maintaining a full battery storage capacity.
-
Page 9: Additional Components
Solar Station Monitor PC software and update the firmware. It connects to the RS-485 port on the controller. Download the PC software through Renogy’s website under the “Downloads” section Optional Components Optional components that require a separate purchase: External Battery (RTC): Allows for the access to the charge controller’s saved settings,... -
Page 10: Identification Of Parts
Identification of Parts Top View Front View (Hatch Removed) -
Page 11: Pv Array Requirements
Key Parts 1. Grounding Bolt 2. LCD Display 3. Battery LED 4. PV LED 5. Fault LED 6. Navigation Buttons 7. RS-485 port—monitor controller through PC and update firmware 8. RTC Battery Slot—model is CR2032 9. Remote Temperature Sensor Port—optional accessory to remotely monitor battery temperature 10. -
Page 12: Installation
1. PV Actual Power ≤ controller rated charge power, the controller charge battery at the actual maximum power point. 2. PV Actual Power ≤ controller rated charge power, the controller charges the battery at the rated power. WARNING: The Commander will be damaged if the PV array is 3X greater than the actual operating power of the controller. - Page 13 CAUTION: Do not over-torque or over tighten the screw terminals. This could potentially break the piece that holds the wire to the charge controller. CAUTION: Refer to the technical specifications for max wire sizes on the controller and for the maximum amperage going through wires. You are now ready to begin connecting your battery to your charge controller.
- Page 14 Solar Panels Computer connection...
- Page 15 Temperature sensor (Not Polarity Sensitive)
- Page 16 Mounting Recommendations NOTE: The Commander MPPT 60 controller requires at least 6 inches(150mm) of clearance above and below for proper air flow. Ventilation is highly recommended if mounted in an enclosure. WARNING: Never install the controller in a sealed enclosure with flooded batteries. Gas can accumulate and there is a risk of explosion.
-
Page 17: Operation
Operation After connecting the battery to the charge controller, the controller will turn on automatically. The user will be prompted by an initialization screen, followed by the charge controller’s rated parameters, and finally the default monitoring screen. Rated Parameters Rat.Volt 48.0V Charg.Cur 60.0A... -
Page 18: Monitoring
NOTE: The values found in your controller are default values and will not necessarily match the ones listed. The values on this table are to show the user what the different screens are used for. NOTE: You do have to program the control. These parameters are for extra features. -
Page 19: Log Info
Indicates the amount of energy that has been Generated Energy generated for the day in terms of kilowatt-hours per 55 kWh/D PV Power day. The PV power indicates how much power the PV 0.0 W modules have generated. Indicates the total amount of energy generated and in Total Generated kilowatt-hours per day. -
Page 20: Clock Set
The Alarm Log will display any kind of faults or <1>Work Log warnings that the charge controller experienced while <2> Alarm Log having the solar system connected. As in the previous Log, users can cycle through how many alarm logs are available and observe the data. -
Page 21: Control Para Set
NOTE: In some models, users might be prompted to enter a password. Simply put “0” all the way through and press OK. 5. Control Para Set Use the keys to maneuver through the screens and to access the Menu Press to highlight the parameter and use the... - Page 22 Boost Rect Vol Parameters for Boost Voltage Reconnect and Boost 13.2 V Low Volt Rect Under-Voltage Reconnect. 12.6 V Under Volt Rect Parameters for under voltage reconnect and under 12.2 V voltage warning. Under Volt Warn 12.0 V ...
-
Page 23: Sys Password
6. Sys Password Use the keys to maneuver through the screens and to access the Menu Press to highlight the parameter and use the keys to change the parameter. Press to confirm and save the settings. Setting a password for the controller prohibits the user Sys Password from programming the controller unless the password Ori.PSW: 000000... -
Page 24: System Status Icons
System Status Icons BATTERY SYSTEM Day/ PV Battery System Charging Charging Normal Night/ PV Battery System Level Full Fault Charging Battery Over Discharge LED Indicators Charging LED Indicator Status Charging Green (Blinking) Not Charging Green (Off) Battery LED Indicator Status Normal Green (Solid) Battery Full... -
Page 25: Commander Protections
Low voltage disconnect Red (Solid) Battery over temperature Red (Blinking) High voltage disconnect Green (Fast Blinking) Fault LED Indicator Status Normal Red (Off) Current is abnormal Charging overcurrent Red (Blinking) PV Overvoltage The following LED indicators must be occurring at the same time for the Charging LED and Battery LED Status Charging LED... -
Page 26: System Status Troubleshooting
Battery Reverse The controller will not operate if the battery wires are switched. Polarity Wire them correctly to resume normal controller operation. If the temperature of the controller heat sink exceeds 85 C, the Over-Temperature controller will automatically start the protection and recover once conditions are below 75 System Status Troubleshooting Description... -
Page 27: Maintenance
Maintenance WARNING: Risk of Electric Shock! Make sure that all power is turned off before touching the terminals on the charge controller. For best controller performance, it is recommended that these tasks be performed from time to time. 1. Check that controller is mounted in a clean, dry, and ventilated area. 2. -
Page 28: Technical Specifications
Series: Total Amperage = I = 5.75A * 1.56 Fuse = minimum of 5.75 * 1.56 = 8.97 = 9A fuse Parallel Total Amperage = I = (5.75A + 5.75A) * 1.56 Fuse = minimum of 11.5 * 1.56 = 17.94 = 18A fuse Technical Specifications Electrical Parameters Model... -
Page 29: Charging Parameters
Float voltage 13.8V 13.8V 13.8V 9~17V Boost return voltage 13.2V 13.2V 13.2V 9~17V Low voltage 12.6V 12.6V 12.6V 9~17V reconnect Under voltage 12.2V 12.2V 12.2V 9~17V recover Under voltage 9~17V warning Low Voltage 11.1V 11.1V 11.1V 9~17V Disconnect Discharging Limit 10.6V 10.6V 10.6V... - Page 30 the over-voltage condition is remedied ultimately reducing the voltage to a user defined charging voltage. Equalization Voltage—equalization voltage is a corrective over-charge of the battery. The user should consult their battery manufacturer regarding specific battery equalization capacity. This parameter sets the equalization voltage to set the battery at when it reaches the equalization state.
-
Page 31: Mechanical Parameters
Mechanical Parameters Model Commander 60A MPPT Overall Dimension 449mm x 208mm x 107mm | 17.7in x 8.2in x 4.2in Mounting 430mm x 180mm | 16.9in x 7.1in Max Terminal 4 AWG Net Weight 5.5 kg | 12.1 lbs. Φ10 Mounting Holes Environment Parameters Model Commander 60A MPPT... -
Page 32: Conversion Efficiency Curves
Conversion Efficiency Curves 1. Solar MPPT Voltage (36V, 54V, 72V) / System Voltage (12V) 2. Solar MPPT Voltage (36V, 54V, 72V) / System Voltage (24V) 3. Solar MPPT Voltage (54V, 72V, 90V) / System Voltage (36V) - Page 33 4. Solar MPPT Voltage (72V, 90V, 108V) / System Voltage (48V)
-
Page 34: Pc Software
PC Software The Commander MPPT charge controller has a special feature where users are able to remotely monitor the status of their charge controller through the USB connection cable provided. Remote monitoring can be applied to more than one Commander MPPT charge controller with their unique identification numbers. - Page 35 Real Time Monitoring...
- Page 36 Control Parameter Load Configuration...
-
Page 37: Dimensions
Dimensions Renogy reserves the right to change the contents of this manual without notice. For the most up to date manual, visit out download page at www.renogy.com Revision: 10/27/2017...
Need help?
Do you have a question about the Commander Series and is the answer not in the manual?
Questions and answers