Table of Contents
Advertisement
Quick Links
Advertisement
Table of Contents

Related Manuals for Igloohome Mortise 2


Summary of Contents for Igloohome Mortise 2
- Page 1 Installers & User guide Mortise 2. Version 0.1 01/20 IGM3...
- Page 2 Mortise 2. In the meantime, you should follow igloohome on Facebook and Youtube! Like us on Facebook Visit our Youtube As our igloohome app is frequently updated, there may be changes to this manual. Please refer to our website igloohome.co/support for the latest version of the manual.
-
Page 3: Table Of Contents
Table of Contents What’s Included Specifications Installation Guide Requirements Preparing the Door Installation Instructions User Guide Lock Anatomy Features Unlocking from the Outside Unlocking from the Inside Locking from the Outside Locking from the Inside Child & Pet Safety Handle Function App Onboarding Managing Access in App 9V Jumpstart... -
Page 4: What's Included
What’s Included Drill Sheet size: 186mm x 240mm For Left-hand Door IGM3/4 Drill Template STEP 2 Align this Centre Line to the desired door thickness of the mortise lockcase to be STEP 1 inserted into door edge. 32mm Place drill template on the (1-1/4") inside door surface. -
Page 5: Specifications
Specifications Model igloohome Smart Mortise 2 Battery Type 8 x AA* Alkaline Battery Life Up to 18 months Emergency Power 9V Alkaline Battery Operation Temp -25°C to 55°C Storage Temp -40°C to 65°C IP Rating IP64 Material AI, Zinc Alloy, ABS Weight Net: 3.44kg, Gross: 3.56kg... -
Page 6: Installation Guide
Installation Guide Requirements Door Thickness Clearance 73mm (2.87”) 40mm-70mm >190mm (7.48”) (1.57” - 2.75”) (with handle) Mortise Assembly Length Dead bolt Latch bolt Cable... - Page 7 Screw Specifications • 15mm (0.23”) • 20mm For doors with thickness 40 - 50mm (0.78”) (1.57” - 1.98”) • 30mm For doors with thickness 50 - 60mm (1.18”) (1.98” - 2.36”) • 45mm For doors with thickness 60 - 70mm (1.77”) (2.36”...
-
Page 8: Preparing The Door
Gap between door and door frame: <3mm (0.01”) Door and door frame material : Wood Note: Not for metal gates, glass doors or sliding doors. If you are unsure if your door is suitable, send us web links to your door pictures to support@igloohome.co... - Page 9 How to use the Drill Sheet Drilling (Door) Fold here Make sure this is before drilling aligned to the centre holes for side of door edge Door edge Chiselling Depth Width: 2 - 3mm (0.0079” - 0.01”) Door edge Mark the center of the holes and then drill for accuracy.
-
Page 10: Installation Instructions
Installation Instructions Determine the position of the door handle and pull until it clicks. Front Assembly Back of Front Assembly For Left- For Right- Handed Handed Door Door Releasing of Catch In case you have positioned the door handle wrongly, release the handle catch that can be found behind the front / back lock assembly. - Page 11 Install Mortise Flat side of the latch faces in Mortise Pin Inside Screws 15mm (0.23”) Mortise Shaft Install Outer Body...
- Page 12 Install Inner Body Mortise Cable Outer Body Cable * Chip is attached to the back assembly Screws 20mm (0.78”) 14mm (0.55”) 20mm (0.78”) Install Striker on the door frame. Ensure to chisel appropriately to the correct measurements. Case Striker Screws 15mm (0.23”) Installation Confirmation...
-
Page 13: User Guide
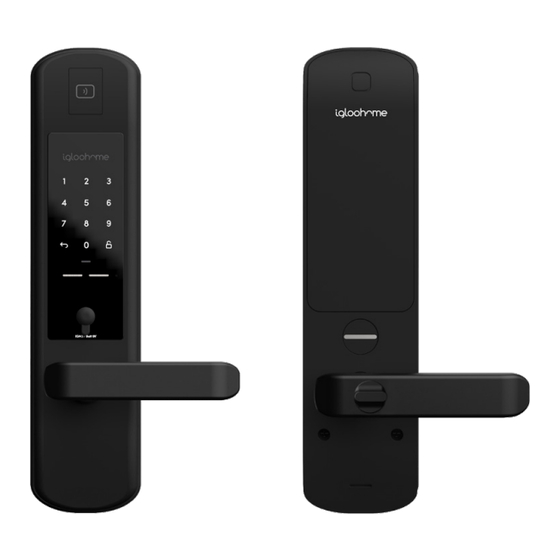
User Guide Lock Anatomy Inner Body Outer Body RFID Reader Touch Screen Keypad Battery Cover Unlock Tri-Coloured LED 9V Jumpstart Emergency Keyhole Multi-Function button Safety Button Outer Handle Inner Handle Clear... -
Page 14: Features
Features PIN / Bluetooth/ RFID Unlock Master PIN Code Bluetooth Master Key The igloohome Mortise unlocks with a The igloohome Mortise unlocks with permanent Master PIN Code. Bluetooth via the app. User PIN Code Bluetooth Guest Key The mobile app can generate user... - Page 15 Features Security / Alarms Fire Detection Alarm Obstruction Alarm When the sensor on the inside of Will keep ringing when the Mortise the door detects a temperature lock is unable to lock/unlock fully. between 50°C - 70°C for a sustained This happens when the lock is low in period of time, the door will unlock battery, or the mortise alignment is...
-
Page 16: Unlocking From The Outside
Unlocking from the Outside Bluetooth 1. Open your igloohome app 2. Tap on the “Bluetooth Unlock” button 3. The status indicator will flash green twice with 4 short ascending tone once unlocked. Home Mortise 2 PIN Code 1. Press any button on the keypad to wake device up 2. - Page 17 RFID 1. Hold the registered card and move it closer towards the “RFID icon” on the top of the Mortise 2. The status indicator will flash green twice with 4 short ascending tone once unlocked.
-
Page 18: Unlocking From The Inside
Unlocking from the Inside Handle Manually unlock by holding the handle down. - Page 19 Multi-Function Button Press the Multi-Function button to unlock. The multi-function button will only rotate for door thickness less than 55mm.
-
Page 20: Locking From The Outside
Locking from the Outside Auto Relock Manual Relock The igloohome Mortise relocks automatically Press and hold the Unlock icon on the bottom when door is closed. User can configure the right of the keypad for 2 seconds until the delay or deactivate relock if they prefer to. -
Page 21: Locking From The Inside
Locking from the Inside Multi-Function Button In the case that auto-relock function is disabled or does not work, after closing the door, user can alternatively press the Multi-Function Button to manually lock the Mortise from the inside. The multi-function button will only rotate for door thickness less than 55mm. -
Page 22: Child & Pet Safety Handle Function
Child & Pet Safety Handle Function Activate 1. The function is deactivated by default. 2. To activate it, simply twist the safety button in the clockwise direction. 3. Then user is unable to unlock the Mortise from inside via the handle. - Page 23 Deactivate 1. To deactivate the function, simply grab the handle and use the thumb to push the upper part of the safety button away. 2. Then user is able to unlock the Mortise from inside via the handle again.
-
Page 24: App Onboarding
Test Factory PIN Unlock 1234567890 In the factory mode (before pairing), the PIN to unlock is Register as a Lock User a) Download igloohome from App store / Play store. b) Create an account and login. Pairing a) Select [Add new igloohome lock]... -
Page 25: Managing Access In App
Bluetooth Guest Key Bluetooth Guest Key can be shared with other users for mobile access. It allows your guests to unlock the igloohome smart lock via Bluetooth. There are 3 steps to using a Shared Bluetooth Key Under [Access], create [+Access] and choose [Bluetooth Key] under [Access Type]. -
Page 26: 9V Jumpstart
9V Jumpstart 9V Jumpstart Feature 1. Touch and hold the battery contacts against the 9V jumpstart pin on the lock and you will hear a series of beeps and the keypad will light up. 2. While holding the 9V battery to the jumpstart, key in your PIN code on the keypad followed by the ‘Unlock’... -
Page 27: Changing Batteries
Changing Batteries Press the square button on the battery Insert AA Batteries cover and the cover will release. Battery Cover Please use 8 AA batteries for optimal performance. Secure battery cover tightly by pressing down the square button. -
Page 28: Lock Behaviour
Lock Behaviour Keypad Security Lockout After several incorrect PIN code attempts, the igloohome Smart Mortise 2 keypad will be locked out and the security alarm will be triggered. Note: Bluetooth, RFID, Multi-Function Button, Handle and Physical Key can be used to unlock in this mode. - Page 29 Keypad Disabled Mode Keypad Disabled Mode prevents others from using PIN code to unlock when you are inside the property. It can be activated when the lock is locked. Note: Bluetooth, Multi-Function Button, Handle and Physical Key can be used to unlock in this mode and the Keypad will be enabled after successfully unlocked.
-
Page 30: Airbnb Connect
• If the access mail has been sent, changing these details will only affect the next reservation. • Changing these details on the igloohome app does not update the check-in/check-out time on the listing on the Airbnb website. Disconnect Airbnb Should you prefer to generate PIN codes for your guests manually, you may disconnect your Airbnb listing from the igloohome home listing with the steps below. -
Page 31: Audio And Led Indications
Audio and LED Indications Actions Indications Bluetooth Connection Status indicator flashes Blue Ascending 4 fast tones after unlocked Successfully Unlocked and flash Green LED 2 times 1 long beep after product is locked Successfully Locked and Green LED for 2 seconds Incorrect PIN 4 short beeps and flash Red LED 2 times Invalid RFID... -
Page 32: Troubleshoot
1 hour of generation sensor has been installed on the door • Update your igloohome app to the latest version frame • Switch to a new set of batteries Slow locking / Unlocking Generated PIN codes do not work •... - Page 33 For enquiries go to: igloohome.co/support...
Need help?
Do you have a question about the Mortise 2 and is the answer not in the manual?
Questions and answers