Schwinn MPower Echelon2 Console Installation Manual
Hide thumbs
Also See for MPower Echelon2 Console:
- Service manual (78 pages) ,
- Installation manual (30 pages) ,
- Owner's manual (28 pages)

Related Manuals for Schwinn MPower Echelon2 Console


Summary of Contents for Schwinn MPower Echelon2 Console
- Page 1 Core Health & Fitness MPower™ Echelon2 Console MPower™ Echelon2 Power Upgrade MPower™ Echelon2 External Wiring Kit INSTALLATION GUIDE...
-
Page 2: Table Of Contents
TABLE OF CONTENTS TABLE OF CONTENTS ..............................2 INTRODUCTION ............................. 3 WHAT’S IN THE BOX? ............................. 4 INSTALLATION ............................. 7 AC™ SPORT (ALL SKUs) & AC™ PERFORMANCE (SKU 100175) .......... 7 AC™ PERFORMANCE (SKU 9-7320) & AC™ PERFORMANCE PLUS (ALL SKUs) .....20 CALIBRATION ............................ -
Page 3: Introduction
This installation guide details how to install and setup the following: • Schwinn® MPower™ Echelon2 Console, P/N 740-8727 • Schwinn® MPower™ Echelon2 Optional Power Upgrade, P/N 740-8730 • Schwinn® MPower™ Echelon2 External Wiring Kit, P/N 740-8875 Use the matrix below to determine which confi guration is appropriate for the install: Bike + Sensor Confi g. -
Page 4: What's In The Box
WHAT’S IN THE BOX? The complete contents of the box include the following parts. If any parts are missing from the box, contact customer service. SCHWINN® Echelon2 (Part #740-8727) Package includes components listed below Index Part Number Description 740-8727 SCHWINN® Echelon2 110-3640 SCREW, PHP, M4x0.7x10, SS... - Page 5 SCHWINN® Echelon2 Power Upgrade Kit (Part #740-8730) Package includes components listed below Index Part Number Description 740-8730 SCHWINN® Echelon2 POWER UPGRADE 110-3644 SCREW, M4X0.7X14, BHSC,HE,SS 740-8607 CALIBRATION TOOL, ZERO POINT, ACPP 740-8730-005 POWER SENSOR UPGRAGE PACKAGING 740-8931 POWER UPGRADE CABLE, RJ45...
- Page 6 SCHWINN® Echelon2 External Wire Kit (Part #740-8875) Package includes components listed below NOTE: The console cable must be externally routed on the AC™ Performance (100175 SKU ONLY) and all AC™ Sport models. This requires that the External Wiring Kit, 740-8875 be used. The console...
-
Page 7: Installation
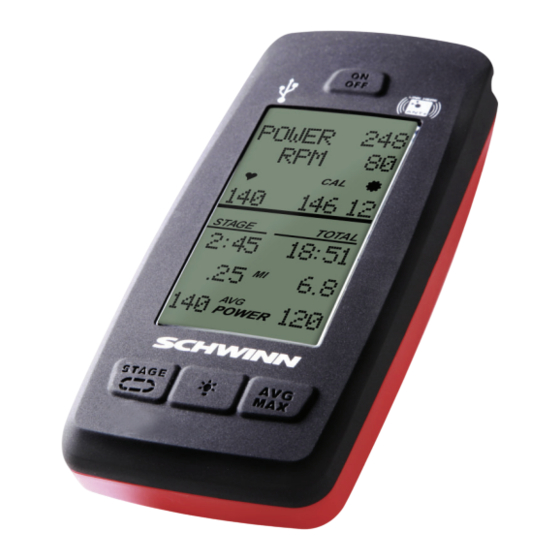
INSTALLATION Installing the Echelon2 with the RPM (Speed) Sensor & External Wiring Kit Insert batteries into console following the pattern in the case. Mount the console NOTE: On the AC Sport (ALL SKUs) the console mount attached to the bottom of the handlebar slider. Loosen pop pin Push handlebar slider forward to the limit Tighten pop pin... - Page 8 Mount the console bracket using three M5 x 14mm button head screws. Caution: over-tightening screws by using an impact, screw gun, etc. will damage the handlebar Secure the cosmetic cover with the M5 x 16mm screw Slide the console onto the bracket. Insert the M3 x 6mm pan head screw and tighten with the screw driver Remove the screw from under the handlebar, install one of the wire clips, and secure with the same screw.
- Page 9 If installing the Power sensor (740-8730), skip to Page 14, Step 1. Otherwise, continue to Step 4. Plug the console cable (740-8928 “RJ45 2-PIN LONG CABLE) RJ45 connector into the console then slide the grommet of the cable into the slot on the connector protective cap as shown.
- Page 10 Peel the non-stick strip off the plastic conduit base (yellow). Attach the base (blue) aligned to forward edge and lower edge of the frame tube. Insert the cable through the slot Snap the outer part of the cable duct onto the base with the cable inside Using a Phillips screw driver, remove the sweat guard Caution: Do not use a power drill in removing and...
- Page 11 Adapter Plate Remove the RPM sensor from the box and disassemble. Discard the adapter plate (blue) which is not used on this model bike. Plug the RPM sensor cable 2-pin connector into the RPM sensor connector Slide the cable grommet into the slot in the RPM sensor housing.
- Page 12 Remove the top and bottom screw from the front of the chain guard Position the RPM sensor as shown and reinstall the two chain guard screws. The RPM sensor should be appx. 2.63 mm 2.63 mm 2-3mm away from the fl ywheel, or about the width of a credit card.
- Page 13 Route the wire inside the conduit and snap the conduit outer cover on to the base Final wiring path shown to the right in green Installation complete, power on the display and spin the crank to ensure RPMs are displayed on the console. Page 13...
- Page 14 Plug the console cable (740-8931 “POWER UPGRADE CABLE, RJ45) RJ45 connector into the console then slide the grommet of the cable into the slot on the connector protective cap as shown. Attach the protective cap to the bracket using the two M3 x 12mm socket head cap screws, and tighten with the 2.5mm hex key Prior to installing the upper conduit, clean head tube with...
- Page 15 Peel the non-stick strip off the plastic conduit base (yellow). Attach the base (blue) aligned to forward edge and lower edge of the frame tube. Insert the cable through the slot Snap the outer part of the cable duct onto the base with the cable inside Using a Phillips screw driver, remove the sweat guard Caution: Do not use a power drill in removing and...
- Page 16 Plug console cable (blue) into the RJ45 connector at the front of the sensor, and the RPM cable (2-PIN SHORT SPEED SENSOR CABLE) (red) into the 2-pin connector on the underside of the power sensor. Slide each cable’s grommet into their respective slots in the power sensor case. (See inside view below) Attach sensor case to the resistance mechanism using the M4 x 6mm button head screws.
- Page 17 Adapter Plate Remove the RPM sensor from the box and disassemble. Discard the adapter plate (blue) which is not used on this model bike. Plug the RPM sensor cable 2-pin connector into the RPM sensor connector Slide the cable grommet into the slot in the RPM sensor housing.
- Page 18 Remove the top and bottom screw from the front of the chain guard Position the RPM sensor as shown and reinstall the two chain guard screws. The RPM sensor should be appx. 2.63 mm 2.63 mm 2-3mm away from the fl ywheel, or about the width of a credit card.
- Page 19 Route the wire inside the conduit and snap the conduit outer cover on to the base Installation complete, proceed to Page 28, Step 1 to cali- brate the console. Page 19...
-
Page 20: Ac™ Performance (Sku 9-7320) & Ac™ Performance Plus (All Skus)
Internal routing for AC™ PERFORMANCE (SKU 9-7320) & AC™ PERFORMANCE PLUS (ALL SKUs) Remove the handlebar from the bike Route the Power Upgrade Cable 740-8931 (blue) though the rear part of the handlebar using the grommet 740-8822 (yellow) in the front of the post Caution: do not route the wire through the front gap in the handlebar Caution: The console-to-power cable has diff erent... - Page 21 Insert batteries into console following the pattern in the case. Mount the console Loosen pop pin Push handlebar slider forward to the limit Tighten pop pin Mount the console bracket using three M5 x 14mm button head screws. Caution: over-tightening screws by using an impact, screw gun, etc.
- Page 22 Secure the cosmetic cover with the M5 x 16mm screw Slide the console onto the bracket. Insert the M3 x 6mm pan head screw and tighten with the screw driver Remove the screw from under the handlebar, install one of the wire clips, and secure with the same screw.
- Page 23 Plug the console cable (740-8931 “POWER UPGRADE CABLE, RJ45) RJ45 connector into the console then slide the grommet of the cable into the slot on the connector protective cap as shown. Attach the protective cap to the bracket using the two M3 x 12mm socket head cap screws, and tighten with the 2.5mm hex key Using a Phillips screw driver, remove the sweat guard...
- Page 24 Verify the updated bolt & magnet are installed on the bike as shown below. (Serials after XXXXXXDAY1642XXXX) Plug console cable (blue) into the RJ45 connector at the front of the sensor, and the RPM cable (2-PIN SHORT SPEED SENSOR CABLE) (red) into the 2-pin connector on the underside of the power sensor.
- Page 25 Route the wire around the frame point under the upper right sweat guard, then through cable clips secured by snap rivets (yellow) Re-mount the sweat guard Adapter Plate Remove the RPM sensor from the box and disassemble. Discard the adapter plate (blue) which is not used on this model bike.
- Page 26 Slide the cable grommet into the slot in the RPM sensor housing. Caution: Make sure the internal wires are coiled so that the screws don’t cut or compress the wire. Reinstall the RPM sensor cover into the housing Reinstall the M3 x 6mm Phillips Pan Head screw Remove the top and bottom screw from the front of the chain guard Position the RPM sensor as shown and reinstall the two...
- Page 27 Installation complete, proceed to Page 28, Step 1 to cali- brate the console. Page 27...
-
Page 28: Calibration
CALIBRATION Turn on console. Press and hold STAGE and “AVG/MAX” for 3-5 seconds to access the service menu. Once in the service menu, use the AVG/MAX button to scroll to the CALIBRATE menu. Press and release the LIGHT button to enter the menu. Scroll to CALIBRATE ZEROPOINT option and press the LIGHT button. - Page 29 Turn the brake knob clockwise until the brake mechanism makes contact with the calibration tool and press the LIGHT button. Caution: Do not over-tighten. The console will display that the Zeropoint is now set. Press the LIGHT button to exit CALIBRATE ZEROPOINT. Once the calibration passes, go to CALIBRATE CURRENT ANGLE and verify the angle is 0.0 (+/- 0.1 degrees).
-
Page 30: Service Menu
AVG/MAX buttons together for 3 to 5 seconds. If the passcode is set, enter the passcode to access. The passcode is a 3-digit number assigned by Schwinn and cannot be changed. Contact Schwinn support to obtain the passcode. To enter the passcode, use the... - Page 31 The latest version can be downloaded from the Schwinn Support website at https://support.corehandf.com/Software/ Instructions for updating fi rmware are shown below or can be viewed on Schwinn’s YouTube video at https://www.youtube.com/watch?v=7w2LlexQgAQ. Top Level Service Menu Default values are bold: •...
- Page 32 Calibration Menu - Echelon2 • Set Zero Point: Set tool on wheel then push Knob right to stop Push to set • Power Adjust: Calibration Menu - 4iiii • Zero Reset: Spin crank then push Left crank to 6 O’Clock Push to set •...
- Page 33 Pairing and Calibrating the 4iiii Powermeter: Press and hold STAGE and “AVG/MAX” for 3-5 seconds to access the service menu. Use AVG/MAX to scroll until SENSOR TYPE is displayed then push the back-light button to access the sen- sor menu. Ensure that “4iiii” is displayed as the sensor type. If the sensor type is set to “Echelon 2”...
- Page 34 © 2020 CORE HEALTH & FITNESS, LLC PART NUMBER 620-8327, REV H...
Need help?
Do you have a question about the MPower Echelon2 Console and is the answer not in the manual?
Questions and answers