
Related Manuals for SMART-AVI QWALL-HD


Summary of Contents for SMART-AVI QWALL-HD
- Page 1 QWALL-HD 4X4 HDMI Matrix & WALL System USER MANUAL QWALL-HD 4X4 HDMI Matrix & WALL System 1-800-284-2131 www.smartavi.com 4X4 HDMI Matrix & WALL System...
-
Page 2: Table Of Contents
Table of content TECHNICAL SPECIFICATIONS_____________________________________________________________ 3 WHAT’S IN THE BOX?_____________________________________________________________________ 4 QWALL-HD FRONT AND REAR___________________________________________________________ 4 INSTALLATION____________________________________________________________________________ 5 APPLICATION DIAGRAM__________________________________________________________________ 5 AVAILABLE CONFIGURATION_____________________________________________________________ 6 CONTROL USING THE FRONT PANEL_____________________________________________________ 7 CONTROL USING IR REMOTE CONTROL__________________________________________________ 8 CONTROL USING RS-232__________________________________________________________________ 9-10... -
Page 3: Technical Specifications
Technical Specifications VIDEO Video Bandwidth Single-link 340MHz [10.2Gbps] Resolution HDTV Up to 1080p PC Resolution Up to 1920 x 1080 Input Video Signal 1.2 volts Input DDC Signal 5 volts Single Link Range 1080p Format HDMI DVI Compliance Single-link DVI-D 2.0 Output Cable Length Up to 20 ft. -
Page 4: What's In The Box
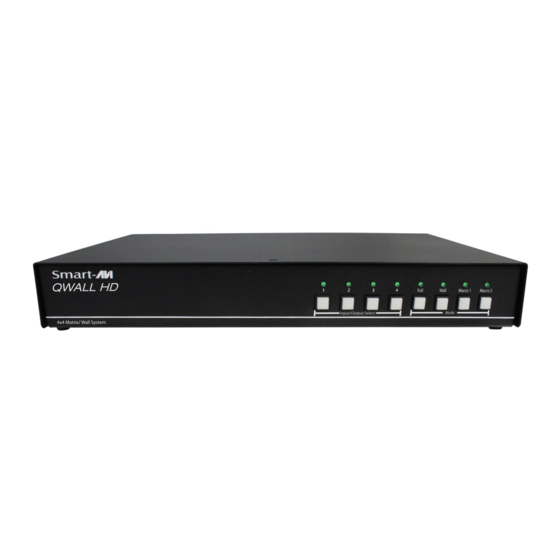
What’s in the box? PART NO. DESCRIPTION QWALL-HD 4x4 HDMI Matrix & WALL System. PS12VD3A-WLLMNT 12V DC, 3A (minimum) power adapter with center-pin positive polarity. SAVI-RMT IR Remote Control User Manual Qwall-hd rear Qwall-hd front 4X4 HDMI Matrix & WALL System... -
Page 5: Installation
2. Connect up to 4 HDMI inputs (i.e. PC, Blu-Ray Player, Digital Signage, etc.) to the HDMI INPUT ports of QWALL-HD using HDMI cables. 3. Connect up to 4 HDTVs to the HDMI OUTPUT ports of QWALL-HD using HDMI cables or HDMI-to-DVI adapters for DVI displays. -
Page 6: Available Configuration
Available configuration Video Wall Mode: User can select any of the four HD inputs and project the image across four HD screens (2x2 configuration). Clone Mode: User can select any of the four HD inputs and project the image individually on all four HD screens, with supported resolution up to 1920x1080 on each screen. -
Page 7: Control Using The Front Panel
To use Wall Mode, select this mode and the select the desired Input. To use the Macro buttons, user must access the web page of QWALL-HD and set each button to a specific preset. Once the user saves the Macro button from the web, QWALL-HD will always change to the specific preset with the selected input until the user updates QWALL-HD to perform a new macro. -
Page 8: Control Using Ir Remote Control
CONTROL USING IR REMOTE CONTROL COMMAND FUNCTION IN -> # -> WALL -> OK Set Input ‘#’ to Wall Mode IN -> # -> CLONE -> OK Set Input ‘#’ to Clone Mode Set Input ‘#’ to quickly set up matrix array of all IN ->... -
Page 9: Control Using Rs-232
Once the connection is established type ? And hit enter. The QWALL-HD should respond with a version number and a list of commands. When you connect to the QWALL-HD to a computer via an RS-232 connection, you will see an opening screen on startup. Below are some examples of RS-232 commands. - Page 10 Type ? To see the Main Menu list Type -i to view System Information. of commands. Port src res EDID HPD audio QWALL-HD v1.23.10 main menu 1 HDMI 1920x 540 CAT-6066 ON 0 2 HDMI 1920x 540 CAT-6066 ON 1 i - system information...
-
Page 11: Rs-232 Integration With Third Party Software
RS-232 INTEGRATION WITH THIRD PARTY SOFTWARE Smart-AVI RS-232 Protocol QWALL-HD Carriage return is represented in the examples by <CR> The HEX code for carriage return is 0D See Page 5 for an illustration of available modes. All typed characters must be upper case. -
Page 12: Control Using Tcp/Ip
Input and/or Output when prompted, clicking Submit to send the data to QWALL-HD to change accordingly. Wall Mode: Select the desired input and click Submit. This will set QWALL-HD to use all four monitors to set into video wall mode of the selected input. - Page 13 CONTROL USING TCP/IP (continued) Clone Mode: Select the desired input and click Submit. This will set QWALL-HD to use the selected input on all outputs. Splicing Mode: Select the desired input and preset and then click Submit. This will set QWALL-HD to “splice”...
- Page 14 Macro 2. Simply select a desired preset, assign it to a macro button, and click Submit. This will allow the user to quickly use any “splicing” preset. Please note that the preset will also use the latest Input sent to QWALL-HD. Simply use button 1-4 to switch into any Input after using the macro button.
-
Page 15: Web Configuration
QWALL-HD to perform a reboot before continuing operation. Firmware update Identify the COM port on your PC and connect to the DB9 serial connection of QWALL-HD Open a serial console and use Baudrate 9600 (in our example we use Hyperterminal). -
Page 16: Troubleshooting
Troubleshooting No Power Make sure that the power adapter is securely connected to the power connector of the unit. Check the output voltage of the power supply and make sure that the voltage value is around 12VDC. Replace the power supply. No Video ... -
Page 17: Limited Warranty Statement
Limited warranty statement A. Extent of limited warranty SmartAVI, Inc. warrants to the end-user customers that the SmartAVI product specified above will be free from defects in materials and workmanship for the duration of 1 year, which duration begins on the date of purchase by the customer. - Page 18 NOTICE The information contained in this document is subject to change without notice. SmartAVI makes no warranty of any kind with regard to this material, including but not limited to, implied warranties of merchantability and fitness for particular purpose. SmartAVI will not be liable for errors contained herein or for incidental or consequential damages in connection with the furnishing, performance or use of this material.
Need help?
Do you have a question about the QWALL-HD and is the answer not in the manual?
Questions and answers