Table of Contents
Advertisement
Quick Links
Advertisement
Table of Contents

Related Manuals for Kurtz Ersa i-CON 1


Summary of Contents for Kurtz Ersa i-CON 1
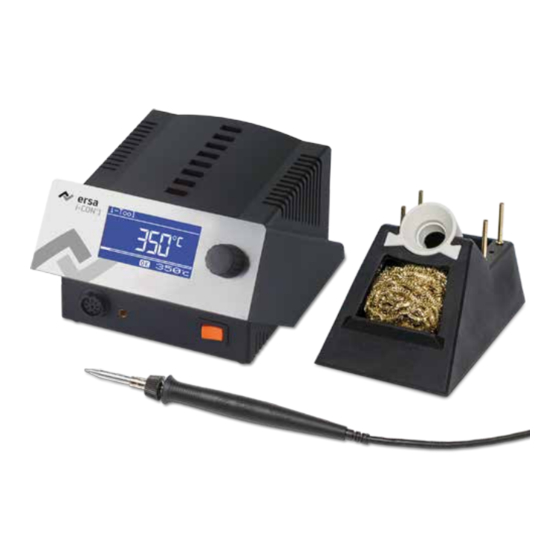
- Page 1 Ersa Soldering Station Brief instructions i-CON 1...
-
Page 2: Table Of Contents
Operation ....................... 6 Language selection ....................7 Adjusting the temperature ..................8 Soldering ........................ 8 4. The modes of the i-CON 1 ..................... 9 The Work mode ..................... 9 Parameter mode ....................9 Configuration mode ....................10 Contrast ....................... 11 5. -
Page 3: Introduction
They are used to highlight any texts containing explanations, informa- tion and hints. ■ This symbol identifies - action that is strictly required, or - instructions that must be strictly complied with. 3BA00179 • 2013-05-15 • Rev. 2 i-CON 1 / 3... -
Page 4: Commissioning
Before switching on, make sure that the mains voltage complies with the value specified on the type plate. ■ Check the correct fit of the soldering tip. ■ Switch off the soldering station by the mains switch. 3BA00179 • 2013-05-15 • Rev. 2 i-CON 1 / 4... - Page 5 Connect the power supply cable with the soldering station and the mains socket b. ■ Switch on the soldering station c. Attention! Danger of burning! The connected soldering tools will im- mediately heat up after switching on! 3BA00179 • 2013-05-15 • Rev. 2 i-CON 1 / 5...
-
Page 6: Functional Description
All setting steps and measured values are displayed in plain text in a clearly structured display window, which is simply referred to as “Display”. 3BA00179 • 2013-05-15 • Rev. 2 i-CON 1 / 6... -
Page 7: Language Selection
Switching off the soldering station ■ Press and hold the i-OP ■ Switch the soldering station on again ■ Keep the i-OP pressed until the [Configuration] menu appears; then release the i-OP. 3BA00179 • 2013-05-15 • Rev. 2 i-CON 1 / 7... -
Page 8: Adjusting The Temperature
■ Perform some soldering tests. If you are not satisfied by the result, you may adjust the parameters to match your requirements. Please read the following sections on this matter. 3BA00179 • 2013-05-15 • Rev. 2 i-CON 1 / 8... -
Page 9: The Modes Of The I-Con 1
After the station has been switched on, the switch-on dialog is displayed for approx. 2 seconds. This dialog shows the station name a and the software version b of the i-CON 1. After this the station will automatically change to working mode. Parameter mode The parameter mode for the soldering tool is activated by pressing the i-OP and keeping it pressed for 2 seconds. -
Page 10: Configuration Mode
Brief instructions Configuration mode To reach the configuration mode, keep the i-OP pushed for 5 seconds when you switch on the i-CON 1. Turn the i-OP in order to select a menu item; then press it: • [CHANGE] opens the [Configuration] menu •... -
Page 11: Contrast
Switch on the station and rotate the i-OP immediately. This activates the [Contrast] mode. 0,5 s ■ Adjust the desired contrast by turning the i-OP. ■ Confirm your input by pushing the i-OP. 3BA00179 • 2013-05-15 • Rev. 2 i-CON 1 / 11... - Page 12 Brief instructions Work mode Down/Upload Contrast mode Configuration mode Parameter mode 3BA00179 • 2013-05-15 • Rev. 2 i-CON 1 / 12...
-
Page 13: Changing Parameter Values
Select the desired parameter by turning the i-OP. ■ Press the i-OP to activate the cursor, pressing the i-OP subsequently de-activates the cursor. With the cursor activated, turning the i-OP accordingly changes the value of the parameter. 3BA00179 • 2013-05-15 • Rev. 2 i-CON 1 / 13... -
Page 14: Error Diagnosis And Remedy
Is the soldering tool correctly connected to the supply unit? Error Messages The i-CON 1 carries out an automatic error diagnosis. The result of a diagnosis is displayed as an error code: The triangular pictograph a appears in the display of the soldering station. -
Page 15: I-Tool
Brief instructions i-Tool Changing the hot soldering tip 72°F 40°C 3BA00179 • 2013-05-15 • Rev. 2 i-CON 1 / 15... -
Page 16: Changing The Cold Soldering Tip
Brief instructions Changing the cold soldering tip 72°F 40°C 3BA00179 • 2013-05-15 • Rev. 2 i-CON 1 / 16... -
Page 17: Warranty
Ersa GmbH. Ersa GmbH • Leonhard-Karl-Str. 24 • 97877 Wertheim / Germany Tel. +49 (0) 9342/800-0 • Fax -127 • e-mail: service.tools@kurtzersa.de • www.ersa.de 3BA00179 • 2013-05-15 • Rev. 2 i-CON 1 / 17...
Need help?
Do you have a question about the i-CON 1 and is the answer not in the manual?
Questions and answers