
Related Manuals for Roborock S6 MaxV


Summary of Contents for Roborock S6 MaxV
- Page 1 Roborock S6 MaxV Robot Vacuum Cleaner User Manual Before using the product, read this manual thoroughly and save it for future reference.
- Page 2 Safety Information FCC IC Statement Battery and Charging Product Overview Installation Instructions for Use Basic Parameters Troubleshooting FAQs...
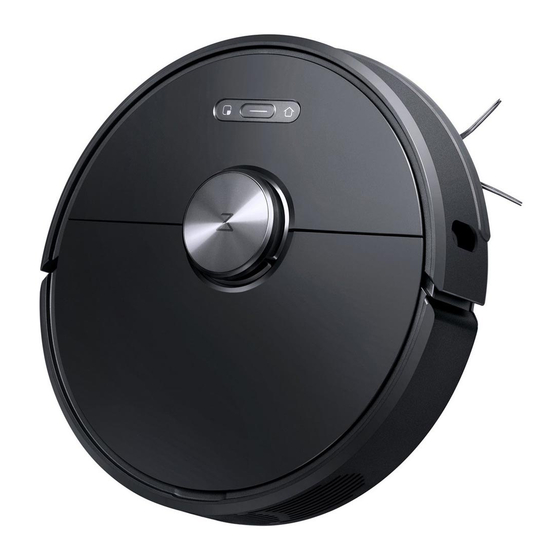
- Page 11 Product Overview Robot Spot Clean Press to start spot cleaning Clean/Power Press to start cleaning Power indicator White: Battery level 20%. Red: Battery level < 20% Flashing slowly: Charging or starting up Flashing red: Error Dock Press to return to Dock Note: Press any button to stop the robot during cleaning, returning to the Dock, or spot cleaning...
- Page 12 Product Overview Dustbin Robot WiFi indicator Dustbin lid Flashing slowly: Waiting for Dustbin latch connection Flashing quickly: Connecting Steady: WiFi connected System Reset Filter Air Vent Water Tank Latch Speaker...
- Page 13 Product Overview Accessories Charging Dock Moisture-proof Mat Power Cable Mop Cloth Bracket Mop Cloth...
- Page 14 Product Overview Robot and Sensors Dock Locator ReactiveAI Cameras Wall Sensor Infrared Fill Light Bumper Omni- Directional Wheel Charging Contact LiDAR Sensor Side Brush Main Wheel Vertical Bumper Main Brush Main Brush Cover Latch Water Tank...
- Page 15 Product Overview Mopping Module Water Tank Stopper Water Filter Water Tank Water Tank Latch Mop Cloth Slot Mop Cloth Bracket Mop Cloth Bracket Latch Mop Cloth Attachment Zone...
- Page 16 Product Overview Charging Dock Charging Dock Power Indicator Dock Location Beacon Charging Contacts...
- Page 17 Installation Important Information Tidy cables and loose items from the ground and move any unstable, If using this robot in a raised area, always use a secure physical barrier fragile, precious, or dangerous items to prevent personal injury or to prevent accidental falls that may result in personal injury or property property damage due to items becoming tangled in, struck by, or damage.
- Page 18 Installation Using the Robot Secure the charging dock with the adhesive tape. Place the charging dock the dock onto the double-sided tape to secure it in place. the power cable to the Charging Dock and place any exposed cable Note: into the cable slot.
- Page 19 Installation Attach the Moisture-Proof Mat Powering On and Charging Press and hold the button to power on the robot. Wait until the power light is steady, and then place the robot on the Charging Dock to of the double-sided tape attached to the bottom of the Moisture-Proof charge.
- Page 20 (Optional) Press and hold the buttons until you hear the The robot supports the Roborock or Mi Home app. Choose the one "Resetting WiFi" voice alert. Reset is complete when the WiFi that best meets your needs. Download the app Note: Search for "Roborock"...
- Page 21 Installation Using the Robot Reinstall the water tank Slide the water tank into the robot until you hear it lock with a click. Note: Remove the water tank Press the water tank latch and slide the tank backwards. Install the mop cloth Dampen the mop cloth and wring it until it stops dripping.
- Page 22 Installation Using the Robot Install the Mop Cloth Bracket Remove the Mop Cloth Bracket Slide the bracket along the back of the water tank. A click indicates that When the robot returns to the Charging Dock after cleaning, press the it is locked in place.
- Page 23 Instructions for use Note: Cleaning cannot start if the battery level is too low. Allow the robot to charge before restarting cleanup. Press and hold the button to power on the robot. The power indicator may be dragged by the robot, resulting in the disconnection of electrical appliances or damage of cables and property.
- Page 24 Instructions for use Charging Spot Cleaning Auto: After cleaning, the robot will automatically return to the Charging When the robot is in standby or pause mode, press the button to start Dock to recharge. spot cleaning. In this mode, the robot cleans an 1.5m x 1.5m square area Manual: In Pause mode, press the button to send the robot back to centered on the robot.
- Page 25 Instructions for use Selective Room Cleaning Scheduled Cleaning Select one or multiple rooms for cleaning in the app. Use the app to set start times for scheduled cleanings. The robot will return to the Charging Dock after each cleaning cycle. Note: A full map must have been created, and Map Saving mode switched on before this function can be used.
- Page 26 Instructions for use No-go Zones/Virtual Barriers/ No-Mop Zone the mop cloth Use the app to set no-go zones/virtual barriers/No-Mop Zone. The robot To add water or clean the mop cloth, press any button to stop the robot and remove the mopping module. After adding water or cleaning the mop cloth, reinstall the mopping module and press the button to continue.
- Page 27 Routine maintenance Main brush Using the main brush cleaning tool Clean weekly 1. Turn over the robot, press the latch, and remove the main brush cover. Use the tool blade to cut away entangled hair on the brush and to clean 2.
- Page 28 Routine maintenance Clean weekly Open the top cover, squeeze the Dustbin latches and take out the Open the Dustbin lid as indicated by the arrow and pour out the dirt. Dustbin.
- Page 29 Routine maintenance Clean every two weeks Open the Dustbin lid as indicated by the arrow and pour out the contents. Note: Fill the Dustbin with clean water and close the cover. Gently shake the Dustbin, then pour out the dirty water. Note: To prevent blockage, only use fresh water without cleaning liquid.
- Page 30 Routine maintenance Battery Water tank Clean as required The robot is equipped with a built-in high-performance lithium-ion battery 1. Open the water tank. pack. To maintain battery performance, keep the robot charged during normal use. 3. Fill the tank with water, shake it, then pour out the water. Note: Mop cloth to avoid battery damage caused by overdischarge.
- Page 31 Routine maintenance Omni-Directional Wheel Reset the System Clean as required 1. Turn over the robot. If the robot does not respond when a button is pressed or cannot be 2. Use a tool, such as small screwdriver to pry out the axle and take out the wheel.
- Page 32 Routine maintenance Robot sensors Clean monthly Use a soft dry cloth to wipe and clean all sensors, including: 1. ReactiveAI Cameras 3. Wall sensor on the right side of the robot 4. Charging contacts at the bottom of the robot ReactiveAI Cameras Wall Sensor Charging Contacts...
- Page 33 Routine maintenance Holiday Energy Saving Function When the robot is docked, press and hold "Recharge" for 10 seconds or until you hear an alert sound. This will activate Holiday mode. In this mode the robot will switch to Low Power mode to minimize power consumption. This includes a dimming of the LED indicator, and the stopping of all non-charging related functions including cleaning, remote control over WiFi, and more.
- Page 34 Basic parameters Robot Charging Dock Name Parameters Name Parameters Appearance and Dimensions 353×350×96.5mm Appearance and Dimensions 151×130×98mm Battery 14.4V/5200mAh lithium battery Rated Power Weight Approx. 3.7kg Rated Input 100-240VAC Wireless Connection WiFi Smart Connect Rated Output 20VDC 1.2A Rated Voltage 14.4VDC Rated Frequency 50-60Hz...
- Page 35 Troubleshooting Error Solution Error 1: Rotate the laser head to check that it turns The LDS unit is jammed. Remove any items blocking it then move the robot to a freely. new location and restart. The bumper is stuck. Tap the bumper repeatedly to dislodge any jammed items. If Error 2: Clean and lightly tap the bumper.
- Page 36 Malfunction due to an internal error. Reset the system. Note: A system reset may not resolve all problems. If the problem persists after using the recommendations in the table above, please email our after-sales service team: US/Non-Europe Support: support@roborock.com Europe Support: support@roborock-eu.com...
- Page 37 Abnormal WiFi connection. Reset the WiFi, download the latest mobile app and retry. Unable to connect to WiFi Unable to connect to WiFi. There may be an error with your router settings. Contact Roborock customer service for help with troubleshooting.
- Page 38 FAQs Problem Solution The battery level is too low. Scheduled cleaning can only begin when the battery level is Scheduled cleaning is not working above 20%. Is power always being drawn when the robot is on The robot will draw power while it is docked to maintain battery performance, but power the Charging Dock? consumption is extremely low.
Need help?
Do you have a question about the S6 MaxV and is the answer not in the manual?
Questions and answers