Avaya WLAN 8100 Series Installation Job Aid
With external antenna
Hide thumbs
Also See for WLAN 8100 Series:
- Reference (382 pages) ,
- Regulatory information (160 pages) ,
- Quick start manual (119 pages)
Advertisement
Quick Links
Installation Job Aid (English) for Avaya WLAN 8100 series- WLAN
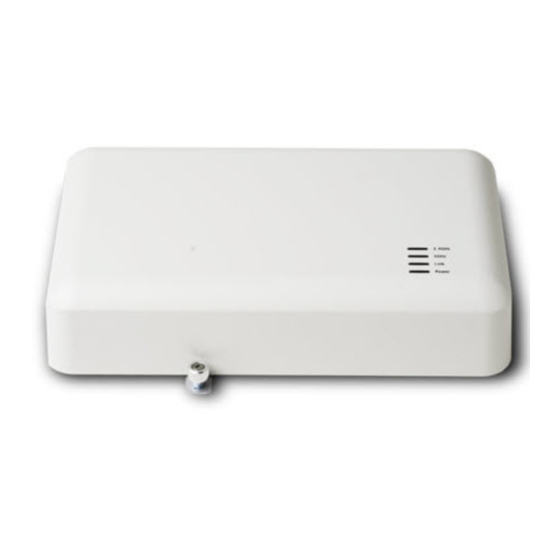
AP 8120 with External Antenna
How to get help
To access the complete range of services and support that Avaya provides, go to www.avaya.com.
You can also go to
• technical documentation
• product training
• technical support
If you purchased a service contract for your Avaya product from a distributor or authorized reseller
and you need assistance, contact the technical support staff for that distributor or reseller.
Safety Messages
Caution:
The Avaya WLAN AP 8120 with External Antenna radios are disabled by default and can be
enabled only by a system administrator.
Warning:
This situation or condition can cause injury.
Warning:
High voltage. This situation or condition can cause injury due to electric shock.
Warning:
Only qualified service personnel must perform installation. Read and follow all warning notices
and instructions marked on the product or included in the documentation.
Warning:
Install this device in such a manner as to maintain a minimum of 24.9 cm (9.8 inches)
separation distance between the radiating element(s) and all persons. This safety warning
conforms with FCC radio frequency exposure limits.
©
2014 Avaya Inc.
Installation Job Aid (English) for Avaya WLAN 8100 series- WLAN AP 8120 with External
Antenna
www.avaya.com/support
to access the following pages:
Release 3.0
NN47251-311
Issue 02.01
June 2014
1
Advertisement

Related Manuals for Avaya WLAN 8100 Series


Summary of Contents for Avaya WLAN 8100 Series
- Page 1 • technical documentation • product training • technical support If you purchased a service contract for your Avaya product from a distributor or authorized reseller and you need assistance, contact the technical support staff for that distributor or reseller. Safety Messages...
-
Page 2: Cable Requirements
Avaya also recommends that you clean out loose debris from the internal surfaces before connecting. June 2014 Installation Job Aid (English) for Avaya WLAN 8100 series- WLAN AP 8120 with External Antenna... - Page 3 Perform the following procedure to mount a wireless LAN access point on a wall: Procedure 1. Locate the appropriate position of the wall anchors. The wall anchors should be 95mm apart horizontally and 80mm apart vertically. June 2014 Installation Job Aid (English) for Avaya WLAN 8100 series- WLAN AP 8120 with External Antenna...
- Page 4 3. Slip the wall bracket over the heads of the screws and slide the bracket to the right as viewed facing the wall. June 2014 Installation Job Aid (English) for Avaya WLAN 8100 series- WLAN AP 8120 with External Antenna...
- Page 5 5. Align the mounting tabs on the bottom of the access point sheet metal enclosure with the vertically oriented keyhole slots in the mounting bracket. June 2014 Installation Job Aid (English) for Avaya WLAN 8100 series- WLAN AP 8120 with External Antenna...
- Page 6 Laird antennas with arrows showing mast (left) and wall mount (right) options If you are installing TYCO antennas, attach mounting brackets to the wall and attach the antennas to the mounting brackets. June 2014 Installation Job Aid (English) for Avaya WLAN 8100 series- WLAN AP 8120 with External Antenna...
- Page 7 7-10 in·lbf (0.8–1.1 N·m) for stainless steel connectors. Flats are also provided on the cable side of the connector assembly so that you use a second wrench to prevent it rotating and June 2014 Installation Job Aid (English) for Avaya WLAN 8100 series- WLAN AP 8120 with External Antenna...
- Page 8 2. Identify an appropriate location on the ceiling grid where the ceiling T-bars are safely accessible and where the ceiling tiles can be temporarily elevated and cleared away from the June 2014 Installation Job Aid (English) for Avaya WLAN 8100 series- WLAN AP 8120 with External Antenna...
- Page 9 Securing the two brackets in this manner is essential to prevent them from disengaging from one another. Tighten the captive fastener screw securely. June 2014 Installation Job Aid (English) for Avaya WLAN 8100 series- WLAN AP 8120 with External Antenna...
- Page 10 6. Mount the external antennas to the wall within the specified distance from the access point. June 2014 Installation Job Aid (English) for Avaya WLAN 8100 series- WLAN AP 8120 with External Antenna...
- Page 11 5G #1 5G #2 5G #3 External Antenna inputs/ 180 degree TYCO antenna 70 degree V-Pol H-POL V-POL V-Pol H-POL V-POL Laird antenna inputs June 2014 Installation Job Aid (English) for Avaya WLAN 8100 series- WLAN AP 8120 with External Antenna...
- Page 12 9. Make electrical connections and return ceiling tiles. June 2014 Installation Job Aid (English) for Avaya WLAN 8100 series- WLAN AP 8120 with External Antenna...
Need help?
Do you have a question about the WLAN 8100 Series and is the answer not in the manual?
Questions and answers