Flashforge ADVENTURER 3 Quick Start Manual
Hide thumbs
Also See for ADVENTURER 3:
- User manual (33 pages) ,
- Quick start manual (20 pages) ,
- User manual (52 pages)

Related Manuals for Flashforge ADVENTURER 3


Summary of Contents for Flashforge ADVENTURER 3
- Page 1 ADVENTURER 3 / 冒险家 3 SZ16-ZN/EN-A05 Quick Start Guide 快速启动指南 中文P11 This guide is only applicable to FLASHFORGE Adventurer3 3D printer 本手册仅适用于闪铸科技 Adventurer3 3D打印机...
- Page 3 Unpacking 1 . Open the box. 2. Remove wrapping paper box on the top, there is a Quick start, an after-sales service, an accessory kit, a power cable and a roll of material on the plastic box. 3 . Take out the printer of the carton, remove 4 .
- Page 4 7. Turn on the power switch. 8. Open the front door. Build Network Preheat Language Status Tools Setting About Calibration Home Filament < < 1/ 3 9. Tap [Tools]-[Setting] on the touch screen as the picture Move Camera showed above, tap [Move]. FilamentCheck <...
- Page 5 X: 20.00 Y: 45.00 Z: 36.00 10. Tap the upper arrow in the moving page to make the extruder raises for removing the paper box on the bottom easier. 11. Squeeze wrapping paper box to the 12. Unboxing completed! Recommended that middle slighly and take it out.
-
Page 6: Kit Contents
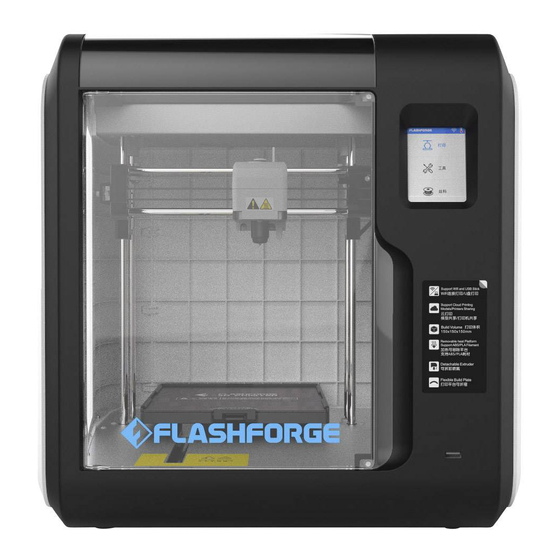
Please refer to FlashForge official website www.flashforge.com to download the newest User Guide and Quick Start Guide. (SUPPORT-Support Center - Select a Product) 本手册仅适用于闪铸科技 Adventurer3 3D打印机 This guide is only applicable to FLASHFORGE Adventurer3 3D printer Quick Start Guide Screwdriver Unclogging Pin Tool... - Page 7 Getting to know your Adventurer 3 1. Filament guide tube 2. Filament guide tube joint 3. Extruder base 4.Cooling Fan 5. Removable nozzle 6. Extruder cables 7. Clip 8. Led light 9. Turbo Fan Baffle 10. Front door 11.Y-Axis sliding slot 12.Platform base...
-
Page 8: First Print
First Print /235℃ Build Load Heating extruder... Tools Change Filament Cancel 1. Tap [Filament], tap [Load], after load completed, tap [OK]. 2. As shown on the left, loading starts when the extruder heated to target temperature. /235℃ 3. Open the filament cover, insert the filament into the filament intake, push filament into the feeding wheel Preheat completed, until some resistance is sensed. - Page 9 Mind the loading direction of filament, make sure to be clockwise as the picture showed. /235℃ 4. Load completed when you see filament come out of extruder, tap [OK]. Put the spool of filament on the spool holder, close the filament cover. Press ok when new color appears...
- Page 10 Model Print 6.67GB Build Not Available Tools No job Filament 1. Tap [Build], choose the file path: Print from local memory card. 20mm_Box- PLA.gx < < 2. Locate the model file in the model list, Tap on its right to start printing; or tap model file picture or file name to enter model details page, tap to start printing.
- Page 11 Model Remove As showed in picture, press down dotted line area and draw out the removable build plate. Notices When printing completed, extruder and build plate may still hot, please start operating after cooling down! 2 . Bend the build plate, the plate will produce certain deformation, seperating the plate away from the bottom of model (Please use a scraper to assist removing when model is too small or big).
-
Page 12: Change Filament
Change Filament /235℃ Load Heating extruder... Change Cancel 1 . Tap [Filament], tap [Change], extruder starts preheating. 2 . Open the filament cover. 3 . Pull out the filament as the picture 4 . Insert new filament into the filament intake showed above. - Page 13 开 箱 1 . 打开纸箱。 2 . 取出顶部的纸塑盒,在纸塑盒上装有一份 快速启动指南、一份售后服务卡、一个工 具包、一根电源线和一卷耗材。 3 . 从纸箱中抱出打印机,去除包裹打印机 4 . 撕除打印机上的固定胶带和前门保护袋。 的气泡袋。 5 . 取出电源线,插入打印机电源线接口。 6 . 将电源线另一头插入插座,接通电源。...
- Page 14 7 . 打开电源开关开机。 8 . 打开打印机前门,准备取出内部的纸塑盒。 Build Network Preheat Language Status Tools Setting About Calibration Home Filament < < 1/ 3 9 . 冒险家3打印机在出厂时默认设置是英文,请根据以下 设置转换为中文。在触摸屏上依次点击[Tools]、 [Setting]、[Language]、[中文],然后点击返回箭头 返回。 < <...
- Page 15 X: 20.00 Y: 45.00 Z: 36.00 状态 语言 移动 相机 校准 回零 丝料检测 喷头灯 < < < < 1/ 3 2 / 3 10. 在屏幕上点击向右翻页的箭头进入第二页,点击[移动]。在移动界面按住Z轴向上的箭头 升起打印平台,以便取出下方的纸塑盒。移动完成后点击返回键返回主界面。 11. 轻轻向中间挤压纸塑盒,然后取出。 12. 开箱完成!建议您保管好这些包装材料, 便于以后的搬运或保存。...
- Page 16 Download Please refer to FlashForge official website www.flashforge.com to download the newest User's Guide, Software and Instruction Videos. (Support-Support Center-Select a Product) 本手册仅适用于闪铸科技 Adventurer3 3D打印机 This guide is only applicable to FLASHFORGE Adventurer3 3D printer 快速启动指南 十字螺丝刀 通针 内六角扳手 润滑脂...
- Page 17 部件介绍 1. 导丝管 2. 导丝管接头 3. 喷头座 4. 风扇 5. 可拆卸喷嘴 6. 喷头排线 7. 夹扣 8. Led灯 9. 导风嘴 10. 前门 11. Y轴滑槽 12. 平台座 13. 可移除平台板 14. 触摸屏 15 U盘接口 16. 电源开关 17. 电源线接口 18. 料盘架 19. 丝盘盖 20. 丝盘盖把手 21.
- Page 18 填装耗材 /235℃ 打印 进丝 喷头加热中... 工具 换丝 换丝 取消 1. 点击屏幕中的[换丝]-选择[进丝]-喷头开始加热。 2 . 如左图所示, 喷头加热到目标温度后开始进丝。 /235℃ 3 . 如下图所示, 打开料盘盖,将丝料插入进丝口,推入 加热完成,开始进丝... 送丝轮内,感受到一定阻力时即可。 注:请务必确认丝料已推入送丝轮! 确认...
- Page 19 请务必注意丝盘的出丝方向,确保按图中所示方向(顺时针)出丝。 4. 当喷嘴开始出丝时请勿立即停止进丝,直到耗材均匀出丝为止。将耗材置于料盘架上, 盖上料盘盖。 /235℃ 待喷头出丝时,表明换丝完成 确认 5. 点击[确认],返回主界面。...
- Page 20 首次打印 6.67GB 打印 1. 打印开始前请确保耗材安装 正确,没有打结或卡住; U盘未插入 3. 喷头内可能残留少量耗材, 工具 请进丝一段时间,确保上一 次打印的耗材已全部挤出; 无任务 4. 打印开始前请将喷头耗材清 理干净; 5. 不可以在长时间无人看守的 换丝 情况下使用3D打印机; 1 . 选择[打印] - [内部存储]。 20mm_Box- PLA.gx < < 2 . 在模型列表中选择 模型,点击 开始打印;或点击模型图片或文件名进入 模型 详情页,然后点击 开始打印。 20mm_Box-P... 0 h 10 min 0.70M 7.49 打印完成!
- Page 21 模型移除 1 . 如上图所示,在虚线区域向下按压,同时向外抽出打印平台。 注意事项 打印完成时,喷嘴和打印平台可能仍处于高温状态,建议冷却后再进行取模型操作! 2 . 弯折平台板,平台板会有一定形变与模型底部脱离(模型较小或较大时 建议使用铲刀辅助)。...
- Page 22 更换丝料 /235℃ 进丝 喷头加热中... 换丝 取消 1 . 点击[丝料]-[换丝], 喷头将启动加温。 2 . 打开料盘盖。 3 . 根据屏幕提示拔出丝料。 4 . 将新丝料插入进丝口,推入送丝轮内, 感受到一定阻力时即可。 /235℃ /235℃ 退丝完成,将丝料拔出后, 待喷头出丝时,表明换丝完成。 请插入新的丝料,点击确定。 确认 确认 5 . 新耗材插入后点击[确认]开始进丝。看到耗材从喷头均匀 6 . 将新料盘置于料盘架上, 盖上料盘盖。 出丝后,说明换丝完成,点击[确认]。...
- Page 24 售后专线:support@flashforge.com After-Sales Service: support@flashforge.com 电话: 4008866023 官方网站:www.sz3dp.com 地址:浙江省金华市仙源路518号...
Need help?
Do you have a question about the ADVENTURER 3 and is the answer not in the manual?
Questions and answers