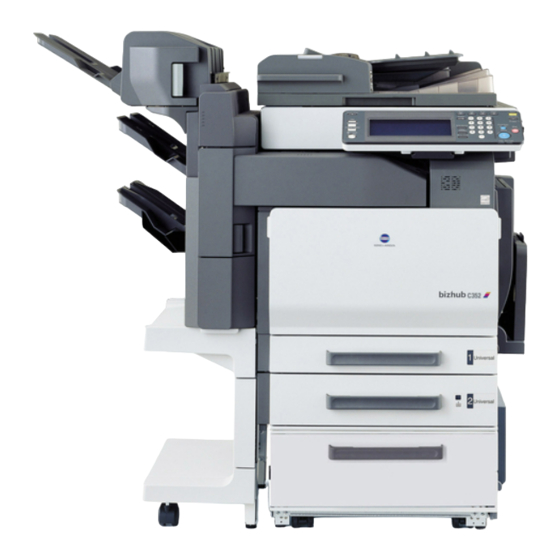
Konica Minolta bizhub C352 Installation Manual
Hide thumbs
Also See for bizhub C352:
- User manual (628 pages) ,
- Specification & installation manual (17 pages) ,
- Network fax operations (388 pages)
Table of Contents
Advertisement
Quick Links
<Important>
Be sure to correctly follow the procedures in order as explained in this Installation Manual.
If you do not follow the procedure in order, the image trouble may occur.
I. Outline of Installation Procedures
PC-103
SP-501
When installing the machine and associated options as a system, follow the order shown on the upper.
Note:
• For the detailed installation procedures for each option, follow the instructions given in the corresponding
Installation Manual and perform the procedures correctly.
• When placing the machine on the floor, make sure to use the Paper Feed Cabinet or the Desk to secure
the performance and the quality of the product.
• Once the Power Switch is turned ON, do not turn OFF it until the installation work has been completed.
• Lifting the machine in an awkward position or transporting it in a poorly balanced position could result in
personal injury. When transporting the machine, assign an adequate number of persons to the job and
ensure that each person can take a good position of not being excessively loaded.
(mass: approx. 103 kg (227 lb))
INSTALLATION MANUAL
PC-203
Dehumidifier Heater 1C
Machine
DF-608
Electron System Options
FS-514
MT-501
OT-601
WT-501
PC-403
DK-502
✱ Electron System Options
SC-503
EM-309
OC-501
VI-503
IC-406
MK-706
PK-510
FK-502
EK-702
SD-503
SA-501
ML-501
VK-501
9J06IXC001DA
E-1
Applied Machine:
FK-502
9J06-9621-01
Advertisement
Table of Contents

Related Manuals for Konica Minolta bizhub C352


Summary of Contents for Konica Minolta bizhub C352
- Page 1 INSTALLATION MANUAL Applied Machine: <Important> Be sure to correctly follow the procedures in order as explained in this Installation Manual. If you do not follow the procedure in order, the image trouble may occur. I. Outline of Installation Procedures PC-103 PC-203 PC-403 DK-502...
-
Page 2: Accessory Parts
II. Installation Space (unit: mm (inch)) IV. Accessory parts bizhub C352 + FS-514 + SD-503 + DF-608 Name Q’ty + PC-403 1. Imaging Unit (IU): Y,M,C,BK 1212 2. User’s Guide Holder (7-1/2) (47-11/16) (13-7/16) 3. User’s Guide (Copy Operations) 4. User’s Guide (Network Scanner Operations) 5. -
Page 3: Removing The Machine
V. Removing the Machine Note: • Keep the Harness for the Dehumidifier Heater 1. Open the shipping carton and remove the IU car- at hand. It is necessary for mounting the Dehu- ton and machine carton. midifier Heater. 2. Pull out the handles. •... -
Page 4: Removing Protective Tape, Packing And Other Shipping Materials
VI. Removing Protective Tape, Packing 4. Slide out the 1st drawer and remove protective tape and packing materials from the inside of the and Other Shipping Materials drawer. 1. Remove protective tape from different parts of the machine. 9J06IXC135DA 9J06IXC004DB 5. - Page 5 VII. Installing the IU 4. Keeping the IU in the level position, insert it all the way as far as it will go. 1. Open the front door. Note: • Make sure that the color is same between inserting port and the IU. •...
-
Page 6: Installing The Toner Cartridge
VIII. Installing the Toner Cartridge 3. Push the toner cartridge all the way in. Note: Note: Make sure that the toner cartridge is pushed all the Since cartridge is not furnished with the machine, way in. purchase toner cartridge (of different colors) sepa- rately. - Page 7 IX. Connecting the Power Cord and 4. Attach the cap A and B furnished with the machine. Mounting the Accessory parts 1. Connect the power cord. 9J06IXC016DB 5. Attach the connector cover furnished with the 4038IXC028DA machine. 2. Fit the cord clamp furnished with the machine over the power cord (one screw furnished with the machine).
-
Page 8: Installing The User's Guide Holder
X. Installing the User’s Guide Holder XII. Adjusting Touch Panel Install the user’s guide holder. 1. Turn ON the Main Power Switch and then Sub Power Switch. Note: Turning power ON will display the screen below. Ignore the message and proceed to the step 2. 4038IXC026DA XI. - Page 9 XIII. Setting Gradation Adjust 7. Place about ten sheets of A3 or Ledger paper on the test pattern placed on the original 1. Set that A3 or Ledger paper is loaded in glass. the drawer. Lower the original cover, if the machine is so 2.
- Page 10 13. Place about ten sheets of A3 or Ledger 19. Place about ten sheets of A3 or Ledger paper on the test pattern placed on the original paper on the test pattern placed on the original glass. glass. Lower the original cover, if the machine is so Lower the original cover, if the machine is so equipped.
-
Page 11: Date/Time Setting
XIV. Date/Time Setting XV. Install Date 1. Make sure that the Service Mode screen is dis- played. 2. Display the Date & Time Setting screen. (To display the Date & Time Setting screen, press Stop → 1 → 1 → 4 → 4 → Clear on the Control Panel.) 4037IXE567DA 1. -
Page 12: Affixing The Label
XVII. Unit Change XIX. Affixing the Drawer Labels Affix the drawer label. Note: This function allows the user to select the type of message that will appear when the replacement time arrives for each of the different units. Drawer Label 4038IXC029DA 4037IXE535DA For loading the paper as well as setting the paper... - Page 13 XXI. Adjusting Registration of Paper 7. Select the function to be used as follows: DUP Print Positioning: Side Edge → 3rd. Source Options 8. Press the start key. A test print will be produced. <1 Way Paper Feed Cabinet, Large Capacity Cabi- net>...
- Page 14 <2 Way Paper Feed Cabinet> 7. Select the function to be used as follows: DUP Print Positioning: Side Edge → 3rd. 1. Display the Service Mode screen. (For details of how to display the Service Mode 8. Press the start key. screen, see the service manual.) A test print will be produced.
-
Page 15: Connecting Cables
XXII. Check through Test Print XXIV. Network Setting Make operation checks using “Setting Information Make the TCP/IP address setting for the network. Print.” Note: 1. Select the function to be used as follows: Consult the network administrator for the setting Utility/Counter →... - Page 16 WT-501 Working Table INSTALLATION MANUAL I. Accessory parts II. Installing the Working Table 1. Remove the two rubber caps at the locations on Name Shape Q’ty the left side surface of the machine shown on the 1. Working Table right. 4036U028AA 2.
Need help?
Do you have a question about the bizhub C352 and is the answer not in the manual?
Questions and answers