Konica Minolta BizHub C352 User Manual
Copy, print, scan
Hide thumbs
Also See for BizHub C352:
- User manual (628 pages) ,
- Specification & installation manual (17 pages) ,
- Installation manual (17 pages)
Table of Contents

Related Manuals for Konica Minolta BizHub C352


Summary of Contents for Konica Minolta BizHub C352
- Page 1 Copy, Print, Scan User Guide 1.1 TEXAS A&M UNIVERSITY at QATAR Get Support: helpdesk@qatar.tamu.edu http://technology.qatar.tamu.edu...
-
Page 2: Table Of Contents
BizHub C352 User Guide Table of Contents Important Information Before First Use BizHub C352 Control Panel General copy operations To make a copy Feeding the original Scanning the original in separate batches (“Separate Scan” setting) Scanning a multi-page original from the original glass... -
Page 3: Important Information Before First Use
BizHub C352 User Guide Important Information Before First Use Before you can print, copy or scan to the Konica BizHub C352, you must visit the Information Technology Services Helpdesk to properly setup your user account. If this was not done during a training orientation session with you, please contact the ITS Helpdesk to set this up. -
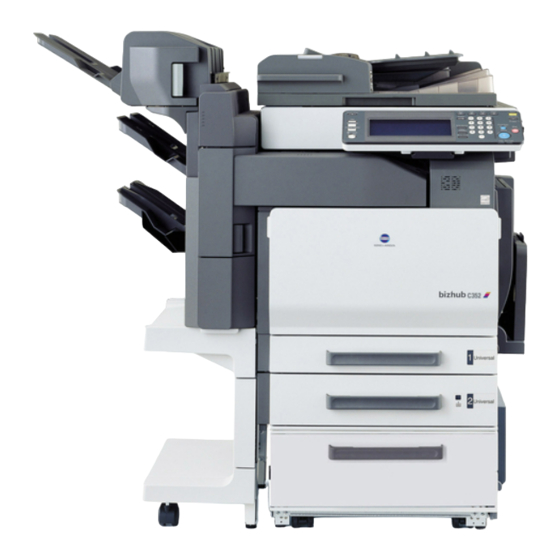
Page 4: Bizhub C352 Control Panel
BizHub C352 User Guide BizHub C352 Control Panel Figure 1 Icon Name Description [Power Save] key Press to enter Power Save mode. While the machine is in Power Save mode, the indicator on the [Power Save] key lights up in green and the touch panel goes off. - Page 5 BizHub C352 User Guide Main power indicator Lights up in green when the machine is turned on with the auxiliary power button. Data indicator Flashes in green while a print job is being received. Lights up in green when data is being printed.
-
Page 6: General Copy Operations
BizHub C352 User Guide General copy operations This section contains information on the general operation for making copies with the Konica BizHub C352. The following procedure describes how to copy a single-sided original using basic copy operations. To make a copy 1. -
Page 7: Feeding The Original
BizHub C352 User Guide Feeding the original The original can be fed in either of the following two ways. Be sure to position the original correctly according to the type of original being copied. ADF stands for Automatic Document Feeder and is used when referring to the top-loader on the printer for automatic document feeding –... - Page 8 BizHub C352 User Guide 1. Slide the lateral guides to fit the size of the original. Figure 5 2. Load the original face up in the original feed tray. Load the original pages so that the top of the original is toward the back or the right side of the machine.
- Page 9 BizHub C352 User Guide To place the original on the original glass When placing the original on the original glass, be sure to lift open the ADF or the original cover at least 15°. If the original is placed on the original glass without the ADF or the original cover being lifted at least 15°, the correct original size will not be...
- Page 10 BizHub C352 User Guide 3. Align the original with the mark in the back-left corner of the original scales. For transparent or translucent originals, place a blank sheet of paper of the same size as the original over the original.
-
Page 11: Scanning The Original In Separate Batches ("Separate Scan" Setting)
BizHub C352 User Guide Scanning the original in separate batches (“Separate Scan” setting) A large original can be divided and scanned in a number of batches. A maximum of 100 original pages can be loaded into the ADF at one time. - Page 12 BizHub C352 User Guide After the original has been scanned, the following message appears. Figure 13 3. Load the next batch of the original, and then press the [Start] key. Repeat this step until all pages of the original have been scanned.
-
Page 13: Scanning A Multi-Page Original From The Original Glass
BizHub C352 User Guide Scanning a multi-page original from the original glass When making double-sided or combined copies using the original glass, place each page of a multi-page original on the original glass to scan it. The following procedure describes how to place single-sided original pages on the original glass to make double-sided copies. - Page 14 BizHub C352 User Guide Repeat this step until all pages of the original have been scanned. The buttons that appear in the Change Setting screen differ depending on the specified settings. Settings for the following can be changed… Simplex/Duplex, Bind, Zoom, Frame Erase, Center Erase, Original Size 8.
-
Page 15: Selecting A Color Setting
BizHub C352 User Guide Selecting a color setting The following five Color settings are available. The default setting is “Auto Color”. Figure 17 To select a color setting The following procedure describes how to select a Color setting. 1. In the Basic screen, touch [Color]. The Color screen appears. -
Page 16: Selecting The Original And Copy Type Settings (Simplex/Duplex Settings)
BizHub C352 User Guide Selecting the original and copy type settings (Simplex/Duplex settings) The type of original and copy can be specified. 1. In the Basic screen, touch [Simplex/Duplex]. The Simplex/Duplex screen appears. 2. Select your desired setting from Figure 17 below. -
Page 17: Specifying The Density Settings
BizHub C352 User Guide Specifying the density settings The density can be adjusted to print a copy that is darker or lighter than the current print result. Adjusting the print density (Density settings) 1. In the Basic screen, touch [Quality/Density]. The Quality/Density screen appears. -
Page 18: Selecting Finishing Settings
BizHub C352 User Guide Selecting finishing settings Various settings are available for sorting and finishing copies when they are fed into the finishing tray. Note The factory default setting is “Group”. The following five Finishing settings are available. Figure 19... -
Page 19: To Bind Copies With Staples
BizHub C352 User Guide Figure 20 To bind copies with staples 1. In the Basic screen, touch [Finishing]. The Finishing screen appears. 2. Under “Staple”, touch either [Corner] or [2 Position]. To cancel the Staple settings, touch [Corner] or [2 Position] again to deselect it. -
Page 20: Punching Holes In Copies (Punch Settings)
BizHub C352 User Guide Punching holes in copies (Punch settings) In order for holes to be punched in the copies, all of the following conditions must be met. The paper width must be between 182 mm and 297 mm. The paper length must be between 182 mm and 432 mm. -
Page 21: Specifying Center Binding
BizHub C352 User Guide Specifying Center Binding The paper that is fed out can be folded in half and stapled at two places along the vertical center. Figure 21... - Page 22 BizHub C352 User Guide To bind copies at the center (“Fold & Staple”) When the “Fold & Staple” setting is selected, the following default settings are automatically selected. "1 2", “Left” Page Margin setting, “Booklet”. Recommended zoom ratio when a Booklet setting is selected (e0.707)
-
Page 23: Stopping / Deleting Print Jobs
BizHub C352 User Guide Stopping / deleting print jobs The following procedure describes how to stop scanning the original and stop the printing operation. To stop/delete print job If an original is being scanned for a job, pressing the [Stop] key stops scanning. -
Page 24: General Scanning Operations
BizHub C352 User Guide General scanning operations Press the [Scan] key in the control panel to display the Scan mode screen. The displayed functions and modes can be selected by gently touching the buttons that are displayed in the screen. -
Page 25: Sending Data In An Email Message (Scan To Email)
BizHub C352 User Guide Sending data in an email message (Scan to email) The Scan to E-mail operation is used to send images scanned on this machine to an e-mail address as an attachment. 1. Press the [Scan] key on the control Panel. The Scan mode appears. -
Page 26: Selecting Group Addresses
BizHub C352 User Guide Selecting group addresses 1. Press the [Scan] key on the control Panel. The Scan mode appears. 2. Touch [Group]. Touching the button for a group displays the list of members registered in the group. 3. Select the desired destinations and then touch [OK]. -
Page 27: General Printing Operations
Please see the “Output method” instructions on page 34 for information on how to print securely. Note: If this is your first time to use the Konica BizHub C352 to print from your computer, please make sure to have your account setup with ITS prior to printing. - Page 28 Note: If this is your first time to use the Konica BizHub C352 to print, you must select the [Preferences] button or the [Properties] button on the Print dialog box to enter your user authentication details.
-
Page 29: Setting Printing Preferences
BizHub C352 User Guide Setting printing preferences There are several different print options available for the Konica BizHub C352. If you select the [Preferences] button or the [Properties] button on the Print dialog box, you should see the following dialog box. From here, you can select your desired settings. -
Page 30: Orientation
BizHub C352 User Guide Orientation You can specify “Portrait” or “Landscape” as the orientation of the page being printed. Figure 30 Original size and output size You can specify the original document size and the output paper size. By specifying each size, you can specify the enlargement and reduction ratio. -
Page 31: Input Tray (Paper Source)
BizHub C352 User Guide Input tray (Paper source) You can select the input tray as the paper source for printing. When changing the paper type, you can select an input tray according to the paper type. Figure 33 Paper type You can specify the paper type being printed. -
Page 32: Binding Position
BizHub C352 User Guide Binding position The default binding position is “Auto” which determines the binding position based on the orientation of the original. The options for “Left”, “Top”, and “Right” are shown below. Figure 36 Combination (printing multiple pages on one page) You can print multiple document pages on one page. - Page 33 BizHub C352 User Guide Figure 37...
-
Page 34: Stapling And Hole Punching
BizHub C352 User Guide Stapling and hole punching Documents can be stapled together or holes can be punched into the document. By specifying the file margin, you can specify the margin for stapling or hole punching. Figure 38 Output method (Job management) You can select “Print”... - Page 35 BizHub C352 User Guide 4. Once you press [OK] to start your print job, you will receive the following confirmation. Press [OK] once again to start your Secure Print job. Figure 40 To retrieve a Secure Print job 1. At the Konica BizHub unit that you sent your Secure Print job to, login with your TAMUQ username and password.
-
Page 36: Sorting (Collating) And Classifying (Offset)
BizHub C352 User Guide Sorting (collating) and classifying (offset) You can print the complete document sets the specified number of times or each page the specified number of times. By specifying offset, the output position can be shifted and output to the front and back for each copy.
Need help?
Do you have a question about the BizHub C352 and is the answer not in the manual?
Questions and answers