Table of Contents
Advertisement
Quick Links
The #1 Source for Donut and Bakery Equipment
O P E R A T O R ' S M A N U A L
T E C H N I C A L S U P P L E M E N T
P A R T S A N D E L E C T R I C A L D I A G R A M S
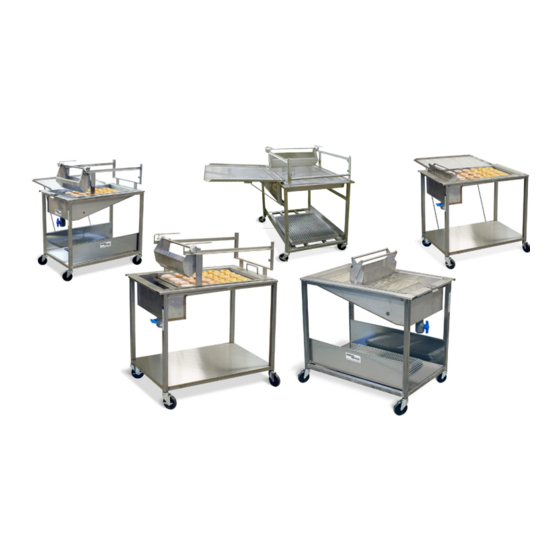
HG18EZ • HG24EZ • HG18C • HG24C
ITEM NUMBERS
22528
HG18C
22529
HG18EZ
SERIAL NUMBER
Item Number / Serial Number are listed on a data tag attached to the equipment.
This manual should only be used with the Item Number(s) shown above.
SUPPORT
Donut Glazer
22530
HG18EZ
22569
HG18EZ 24
USA/Canada 1-800-578-2547
International (+1) 253-886-5340
www.belshaw.com
22569-1
HG18EZ
22534
HG24C
Email service@belshaw.com
Web www.belshaw.com
22536
HG24EZ
(Other)
Advertisement
Table of Contents

Subscribe to Our Youtube Channel
Related Manuals for Belshaw Brothers HG18EZ


Summary of Contents for Belshaw Brothers HG18EZ
- Page 1 T E C H N I C A L S U P P L E M E N T P A R T S A N D E L E C T R I C A L D I A G R A M S Donut Glazer HG18EZ • HG24EZ • HG18C • HG24C ITEM NUMBERS 22528 ...
- Page 2 BELSHAW-ADAMATIC FREIGHT IMPORTANT DAMAGE POLICY Keep This Manual For Future Reference. Belshaw-Adamatic has made every effort to ensure that your equipment arrives in excellent condition. For your protection, please inspect your shipment for any signs of damage that may have occurred during transport. Please note any damage that is found during inspection and file a freight claim with the shipping company...
-
Page 3: Table Of Contents
Contents ABOUT THE HG18-HG24 SERIES GLAZERS ......................4 ASSEMBLY – HG18EZ ..........................5 ..........................5 NITIAL LEANING AND ANITATION ............................... 5 SSEMBLING THE LAZER ASSEMBLY – HG24EZ ..........................7 ..........................7 NITIAL LEANING AND ANITATION ............................... 7 SSEMBLING THE LAZER ASSEMBLY –... -
Page 5: About The Hg18-Hg24 Series Glazers
Kettle, it could cause someone to glaze. slip on the floor and be seriously injured. • HG18EZ and HG24EZ Glazers BE CAREFUL never to get glaze, use the EZLift rail system. The water, or other materials on the glaze applicator slides on a floor. -
Page 6: Assembly - Hg18Ez
1. REMOVE the HG18EZ Glazer from box and discard all packing materials. 2. WASH, RINSE AND SANITIZE all the parts of the HG18EZ Glazer before use. (See Cleaning, Section 7.) Assembling the Glazer See Figure 1 opposite. Glazer may be partially assembled on delivery. - Page 7 5. ASSEMBLE the Upper Frame (7) onto the Screen Support (9) by inserting the pin on the Upper Frame into the top of the slot on the Screen Support and sliding it down. (See Figure 2.) Figure 2, Screen Support Slot 6.
-
Page 8: Assembly - Hg24Ez
Assembly – HG24EZ Initial Cleaning and Sanitation 1. REMOVE the HG24EZ Glazer from box and discard all packing materials. 2. WASH, RINSE AND SANITIZE all the parts of the Glazer before use. (See Cleaning, Section 7.) Assembling the Glazer See Figure 4 opposite. Glazer may be partially assembled on delivery) 3. - Page 9 8. ASSEMBLE the Upper Frame (11) onto the Screen Support (13) by inserting the pin on the Upper Frame into the top of the slot on the Screen Support and sliding it down. (See Figure 5.) 9. ASSEMBLE the Glaze Applicator onto the top of the Figure 5, Screen Support Slot Upper Frame, aligning the...
-
Page 10: Assembly - Hg18C/Hg24C
Assembly – HG18C/HG24C Initial Cleaning and Sanitation 1. REMOVE the Glazer from box and discard all packing materials. 2. WASH, RINSE AND SANITIZE all the parts of the Glazer before use. (See Cleaning, Section 7.) Assembling the Glazer (See Figure 7 opposite.) Glazer may be partially assembled on delivery 1. -
Page 11: Assembly - Kettle Cover And Drain Tray (Optional)
4 Assembly – Kettle Cover and Drain Tray (optional) Installing the drain tray 3. Make sure that the Drain Tray Support Rod is inserted into the (optional) Mounting Brackets under the Drain Tray (Figure 10) 1. Find the Drain Tray support brackets (Figure 8) Figure 8, Drain Tray support brackets 2. - Page 12 Installing the Kettle Cover support brackets (optional, HG18 only) 1. Find the four Cover Support Brackets (Figure 12). Figure 14, Upper support brackets 4. Install the Kettle Cover on the side of the Glazer (Figure 15). Figure 12, Support brackets: Upper (top) and Lower (bottom) 2.
-
Page 13: Operation - Hg18Ez/Hg24Ez
5 Operation – HG18EZ/HG24EZ General Use of the Glazer To use the HG18EZ or HG24EZ Glazers, SET a screen of donuts onto the Screen Support, then PASS the Glaze Applicator over the donuts by the frame-supported applicator on the Glazer. - Page 14 6. TILT the Upper Frame assembly 7. ROLL the Glaze Applicator over down lifting the Glaze the donuts and return it to the Applicator out of the Kettle reservoir end to the Kettle. (See (See Figure 18) Figure 19.) 8. As it rolls, OPEN or CLOSE the handles of the Glaze Applicator to allow glaze to flow evenly over the donuts.
-
Page 15: Operation - Hg18C/Hg24C
6 Operation – HG18C/HG24C to allow glaze to flow evenly General Use of the Glazer over the donuts. To use the HG18C or HG24C Glazer, 7. Return the Glaze Applicator to PLACE a screen of donuts onto the the reservoir end of the Kettle. Screen Support, then PASS the 8. -
Page 16: Cleaning
Cleaning IMPORTANT Cleaning the Glazer Casters with brakes can be locked For your safety, observe the following during operation to keep glazer warnings throughout the entire stationary. DO NOT forget to unlock cleaning process. brakes on wheels after operation, as Once a day, clean as explained below: most bakery floors are very hard on rubber wheels. -
Page 17: Maintenance
Maintenance In order to ensure the intended and safe operation of the HG18-HG24 Series Glazers, follow all procedures and instructions listed in the manual. Parts Lists (See following pages) Belshaw-Adamatic Bakery Group HG18/HG24 Donut Glazers, MN-1744 CALL 206-322-5474 or EMAIL service@belshaw.com for SUPPORT... - Page 19 MARK FOR OR EZLIFT YOUR GLAZER ITEM NUMBER MODEL SCREEN SIZE APPLICATOR 22528 HG18C 17” x 25” STANDARD 22529 HG18EZ 17” x 25” EZLIFT 22530 HG18EZ 17” x 25” EZLIFT 22569 HG18EZ 17” x 25” EZLIFT ...
- Page 20 DIAGRAM: HG18-2016 USE ONLY FOR MODEL: HG18C ITEM NUMBER: 22528 TO IDENTIFY MODEL AND ITEM NUMBER, SEE DATA TAG ON GLAZER © Belshaw Adamatic Bakery Group, Auburn, WA 98001 USA. All Rights Reserved. 07/17 DIAGRAMS PAGE...
- Page 21 DIAGRAM: HG18EZ-2012 / HG18EZ-2013 USE ONLY FOR MODEL: HG18EZ ITEM NUMBERS: 22529, 22530 TO IDENTIFY MODEL AND ITEM NUMBER, SEE DATA TAG ON GLAZER Use 5A and 6A for 22529 Use 5B and 6B for 22530 © Belshaw Adamatic Bakery Group, Auburn, WA 98001 USA. All Rights Reserved. 07/17...
- Page 22 DIAGRAM: HG18EZ-2012 / HG18EZ-2013 USE ONLY FOR MODEL: HG18EZ ITEM NUMBERS: 22569, 22569-1 TO IDENTIFY MODEL AND ITEM NUMBER, SEE DATA TAG ON GLAZER Use 1A and 2A for 22569-1 Use 1B and 2B for 22569 © Belshaw Adamatic Bakery Group, Auburn, WA 98001 USA. All Rights Reserved. 07/17...
- Page 23 DIAGRAM: HG18EZ-2012 / HG18EZ-2013 USE ONLY FOR MODEL: HG18EZ ITEM NUMBERS: 22536 TO IDENTIFY MODEL AND ITEM NUMBER, SEE DATA TAG ON GLAZER © Belshaw Adamatic Bakery Group, Auburn, WA 98001 USA. All Rights Reserved. 07/17 DIAGRAMS PAGE...
- Page 24 DIAGRAM: HG24-2014 USE ONLY FOR MODEL: HG24C ITEM NUMBER: 22534 TO IDENTIFY MODEL AND ITEM NUMBER SEE DATA TAG ON GLAZER © Belshaw Adamatic Bakery Group, Auburn, WA 98001 USA. All Rights Reserved. 07/17 DIAGRAMS PAGE...
- Page 25 DIAGRAM: HG24EZ-2012 USE ONLY FOR MODEL: HG24EZ ITEM NUMBER: 22536 TO IDENTIFY MODEL AND ITEM NUMBER SEE DATA TAG ON GLAZER © Belshaw Adamatic Bakery Group, Auburn, WA 98001 USA. All Rights Reserved. 07/17 DIAGRAMS PAGE...
- Page 26 DIAGRAM: HG18-0527 USE ONLY FOR MODELS: HG18C, HG24C ITEM NUMBERS: 22528, 22534 TO IDENTIFY MODEL AND ITEM NUMBER, SEE DATA TAG ON GLAZER © Belshaw Adamatic Bakery Group, Auburn, WA 98001 USA. All Rights Reserved. 07/17 DIAGRAMS PAGE...
- Page 27 DIAGRAM: HG18EZ-1004 USE ONLY FOR MODELS: HG18EZ ITEM NUMBERS: 22529, 22530 TO IDENTIFY MODEL AND ITEM NUMBER, SEE DATA TAG ON GLAZER © Belshaw Adamatic Bakery Group, Auburn, WA 98001 USA. All Rights Reserved. 07/17 DIAGRAMS PAGE...
- Page 28 DIAGRAM: HG18EZ-1007 USE ONLY FOR MODELS: HG18EZ ITEM NUMBERS: 22569, 22569-1 TO IDENTIFY MODEL AND ITEM NUMBER, SEE DATA TAG ON GLAZER © Belshaw Adamatic Bakery Group, Auburn, WA 98001 USA. All Rights Reserved. 07/17 DIAGRAMS PAGE...
- Page 29 DIAGRAM: HG24EZ-1000 USE ONLY FOR MODELS: HG24EZ ITEM NUMBERS: 22536 TO IDENTIFY MODEL AND ITEM NUMBER, SEE DATA TAG ON GLAZER © Belshaw Adamatic Bakery Group, Auburn, WA 98001 USA. All Rights Reserved. 07/17 DIAGRAMS PAGE...
- Page 30 DIAGRAM: HG18EZ-1002 USE ONLY FOR MODELS: HG18C, HG18EZ ITEM NUMBERS: 22528, 22529, 22530, 22569, 22569-1 TO IDENTIFY MODEL AND ITEM NUMBER, SEE DATA TAG ON GLAZER © Belshaw Adamatic Bakery Group, Auburn, WA 98001 USA. All Rights Reserved. 07/17 DIAGRAMS PAGE...
- Page 31 DIAGRAM: HG18EZ-1003 USE ONLY FOR MODELS: HG18C, HG18EZ ITEM NUMBERS: 22528, 22529, 22530, 22569, 22569-1 TO IDENTIFY MODEL AND ITEM NUMBER, SEE DATA TAG ON GLAZER © Belshaw Adamatic Bakery Group, Auburn, WA 98001 USA. All Rights Reserved. 07/17 DIAGRAMS PAGE...
- Page 32 DIAGRAM: HG24EZ-1002 USE ONLY FOR MODELS: HG24C, HG24EZ ITEM NUMBERS: 22534, 22536 TO IDENTIFY MODEL AND ITEM NUMBER, SEE DATA TAG ON GLAZER © Belshaw Adamatic Bakery Group, Auburn, WA 98001 USA. All Rights Reserved. 07/17 DIAGRAMS PAGE...
- Page 33 DIAGRAM: HG24EZ-1003 USE ONLY FOR MODELS: HG24C, HG24EZ ITEM NUMBERS: 22534, 22536 TO IDENTIFY MODEL AND ITEM NUMBER, SEE DATA TAG ON GLAZER © Belshaw Adamatic Bakery Group, Auburn, WA 98001 USA. All Rights Reserved. 07/17 DIAGRAMS PAGE...
- Page 34 Belshaw Adamatic Bakery Group Limited Warranty / Return Policy Subject to the terms and limitations set forth in this limited warranty (“Limited Warranty”), Belshaw Adamatic Bakery Group (also referred to as “the Manufacturer”) warrants to the original purchaser (“Purchaser”) of Manufacturer’s equipment and parts (“Products”), Belshaw Adamatic Bakery Group’s manufacture and assembly of Products to be free from defects in workmanship and material which would result in product failure under normal use and service.
- Page 35 Warranty Claims In case of warranty claims relating to your Product, you must follow the instructions below. Report Claims to Your Authorized Distributor or Dealer or to Belshaw Adamatic Bakery Group As soon as you discover a problem, contact the Distributor or Dealer from whom you purchased the Product or Belshaw Adamatic Bakery Group.
- Page 36 Serving bakeries for 95 years BELSHAW ADAMATIC BAKERY GROUP 814 44th Street NW, Suite 103 Auburn, WA 98001 USA SUPPORT 1-800-BELSHAW 1-800-578-2547 (USA/Canada) (+1) 206-322-5474 (Worldwide) service@belshaw.com www.belshaw.com an Ali Group Company The Spirit of Excellence...
Need help?
Do you have a question about the HG18EZ and is the answer not in the manual?
Questions and answers