
Related Manuals for Rice Lake iDimension Plus XL


Summary of Contents for Rice Lake iDimension Plus XL
- Page 1 iDimension Plus XL ® Static Dimensioning System Assembly Instructions April 30, 2020 PN 198810 Rev A...
- Page 2 All information contained within this publication is, to the best of our knowledge, complete and accurate at the time of publication. Rice Lake Weighing Systems reserves the right to make changes to the technology, features, specifications and design of the equipment without notice.
-
Page 3: Table Of Contents
Connect the USB Display to Scanning Head ............. . 10 Technical training seminars are available through Rice Lake Weighing Systems. - Page 4 Plus XL Assembly Instructions Rice Lake continually offers web-based video training on a growing selection of product-related topics at no cost. Visit www.ricelake.com/webinars www.RiceLake.com Visit our website...
-
Page 5: Introduction
Introduction Introduction This assembly must be completed prior to assembling and installing the iDimension Plus XL to the optional stand and configuring the unit for use. When interfacing the unit to third party software, please refer to the software manufacturer’s documentation for setup and configuration parameters as necessary. -
Page 6: Safety
Do not operate or work on this equipment unless this manual has been read and all instructions are understood. Failure to follow the instructions or heed the warnings could result in injury or death. Contact any Rice Lake Weighing Systems dealer for replacement manuals. -
Page 7: Mounting And Installation Consideration
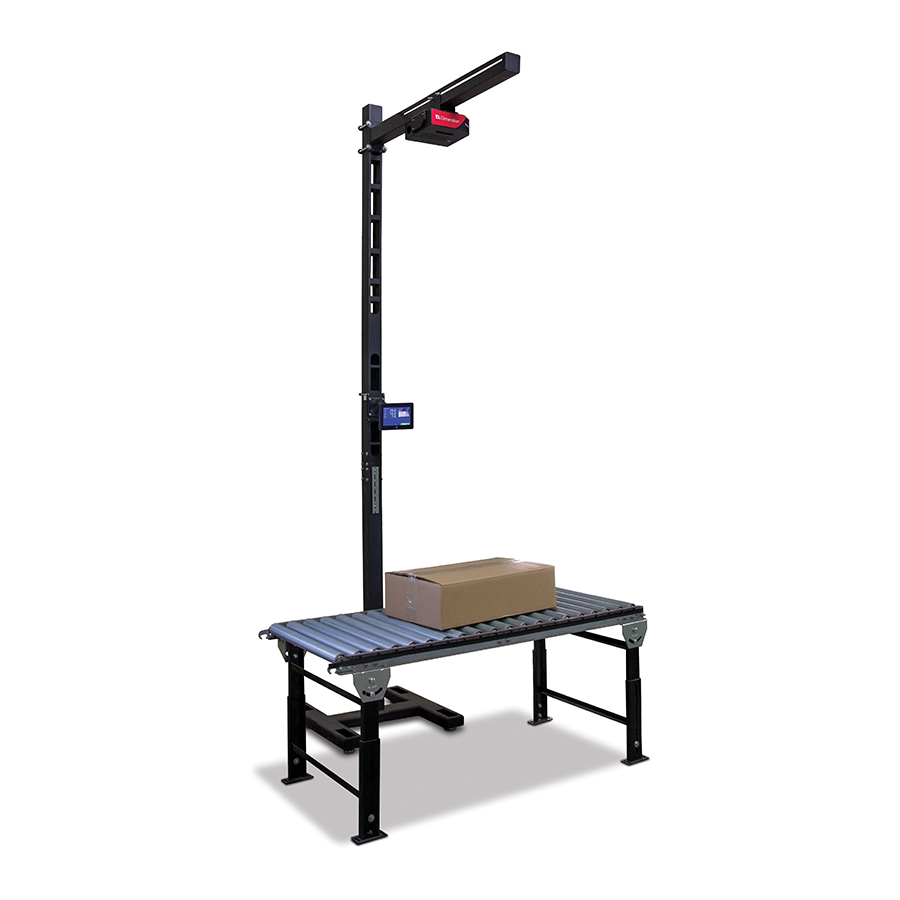
Plus using the setup wizard from the USB display and QubeVu Manager embedded firmware. The iDimension Plus XL can be installed at either 60.2'' in a Legal for Trade application or 79'' in non-Legal for Trade mode using the setup wizard. Installing at 79'' increases the maximum measurement applications provided by the iDimension Plus table top stand, as shown below. -
Page 8: Replacement Parts
This section provides an overview of the parts featured within the packaging for the iDimension Plus XL. Unpacking Immediately after unpacking the iDimension Plus XL, visually inspect the contents to ensure all components are included and undamaged. If any parts were damaged in shipment, notify Rice Lake Weighing Systems and the shipper immediately. -
Page 9: Assembly
Assembly Assembly This section provides an overview of iDimension Plus XL assembly instructions. Unit Assembly To assemble the iDimension Plus XL, follow the procedure below: 1. Remove scanning head and DC power supply from packaging. 2. Remove the rear cover from the scanning head by loosening and removing the three Phillips screws (screw locations... - Page 10 Plus XL Assembly Instructions 4. Insert USB, ethernet and power supply cables through the cable slot. Figure 3-3. Feed Cables Through Head 5. Secure cable connections to the scanning head (Table 3-1): Figure 3-4. Scanning Head Item No. Description...
- Page 11 Step 5 on page Phillips Screw Phillips Screw Phillips Screw (Located on the side of the cover) Figure 3-6. Scanning Head with Rear Cover Secured 7. Assemble the mounting bracket (Section 3.1.1 on page © Rice Lake Weighing Systems ● All Rights Reserved...
-
Page 12: Mounting Bracket Assembly
1. Secure the power supply to the mounting bracket using the provided cable ties (2). Figure 3-7. Secure Power Supply 2. Secure the mounting bracket on top of the scanning head, see the iDimension Plus XL Single and Dual Arm Stands Addendum (PN 199199) for installation instructions. - Page 13 3. Add a spacer between the bracket and scanning head. Figure 3-9. Add Spacer 4. Reinstall the three scanning head mounting screws removed in Step 3 on page Figure 3-10. Reinstall Scanning Head Mounting Screws © Rice Lake Weighing Systems ● All Rights Reserved...
-
Page 14: Connect The Usb Display To Scanning Head
Plus XL Assembly Instructions 5. Mount the assembly to stand using the iDimension Plus XL Single and Dual Arm Stands Addendum (PN 199199). Figure 3-11. Assembled Mounting Bracket Connect the USB Display to Scanning Head Once the scanning head and the stand assembly are assembled: 1. - Page 16 Specifications subject to change without notice. Rice Lake Weighing Systems is an ISO 9001 registered company. 230 W. Coleman St. • Rice Lake, WI 54868 • USA U.S. 800-472-6703 • Canada/Mexico 800-321-6703 • International 715-234-9171 • Europe +31 (0)26 472 1319 April 30, 2020 www.ricelake.com...
Need help?
Do you have a question about the iDimension Plus XL and is the answer not in the manual?
Questions and answers