
Subscribe to Our Youtube Channel
Related Manuals for Torrey W-LABEL Series


Summary of Contents for Torrey W-LABEL Series
- Page 1 OWNER’S MANUAL LABELING PRINTING SCALES W-LABEL Series BEFORE OPERATING THIS SCALE, PLEASE READ THIS MANUAL THOROUGHLY REV 0...
-
Page 2: Table Of Contents
INDEX .................................... 1 1. - INTRODUCTION............................5 2.- TECHNICAL SPECIFICATIONS DESCRIPTION..................6 3. - LABEL WEIGHING SCALE PARTS & THERMAL PAPER ROLL............7 4. - USAGE RECOMENDATIONS........................10 4.1.-INFORMATION OF PRODUCT TYPES....................10 5. - DISPLAYS DESCRIPTION........................11 5.1. - Page 3 Label Printing Scale 13.1.2. ETHERNET INFO..........................30 13.1.3- NETWORK INFO ADHOC <HOT SPOT> ..................31 13.2.- TYPE OF CONNECTION CONFIGURATION................. 33 WIFI (Only for scales with WIFI antenna) ETHERNET, ADHOC <HOTSPOT>, to get into any of these presses ENTER......................... 33 13.2.1.- WIFI CONNECTION CONFIGURATION.
- Page 4 19.5.- PAPER FEED............................ 54 20.- PLU SELECTION..........................54 21.- NON-PLU SALE..........................55 22.- NON-PLU NON WEIGHTABLE SALE....................55 23.- PRODUCT SALE............................. 56 23.1.- PRE – PACKING MODE– WEIGHABLE PRODUCTS SALE............. 56 23.2.- PRE-PACKING MODE – NON-WEIGHABLE PRODUCTS SALE..........57 23.3.- PRE-PACKING MODE –...
-
Page 5: Introduction
Label Printing Scale 1. - INTRODUCTION. The newest labeling scale W-LABEL offers a weighing method and a very easy way to sell products precisely. Users will be able to monitor their sales behavior, returns and effectiveness of your workers. It also has a remote administration system and the capacity to connect to several scales at the same time. -
Page 6: Technical Specifications Description
2.- TECHNICAL SPECIFICATIONS DESCRIPTION. A table showing the characteristics of the WLABEL Scale in the capacities of 40 Model W-LABEL40L Capacity. 40 lb. Minimum Division. 0.010 lb. Programmable memories. 500 PLUs Interface. Keyboard Included Power cord Power 110/220 VCA 60/50Hz Max Tare 9,99 lb. -
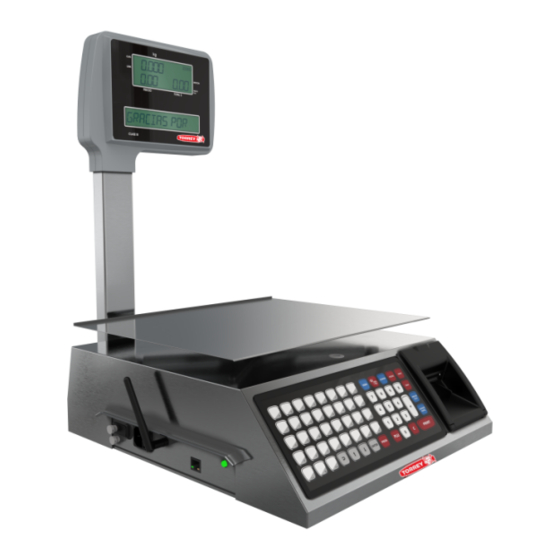
Page 7: Label Weighing Scale Parts & Thermal Paper Roll
Label Printing Scale Net Weight 27.833 lb. 27.833 lb. Weight with packaging 37.478 lb. 37.478 lb. 3. - LABEL WEIGHING SCALE PARTS & THERMAL PAPER ROLL. Within the scale’s package W-Label you will find the following: • 1 Scale W-LABEL. •... - Page 8 Calibration Label Roll. Seal. Adjustable leveling feet Printer. Power In. On / OFF Button Antenna Input. Ethernet Connection. 3.1. - LABELING PRE-PACKING MODE * Printer Opening: Pull the release lever on the right side of the scale toward the front of the scale as shown in the image on the left.
- Page 9 Label Printing Scale 2. - Place the roll of labels in the roll holder. 3. - Unroll 30cm and remove 6 labels from the roll manually, make sure it passes under the tensioners and through the paper sensor. 4. Wrap the remaining residue of the roll counterclockwise. 5.
-
Page 10: Usage Recomendations
2. - Place the ticket roll in the secondary roll holder. 3. - Unroll 20cm of paper make sure it passes under the tensioner and through the paper sensor. 4. - Allow 5cm of thermal paper to print out of the printer. 5. -
Page 11: Displays Description
Label Printing Scale Other Products. They are products whose unit price is in function of 1 lb. of their weight and they have not been programmed previously in the scale. Non-Weighable Other Products. They are products whose unit price is in function of 1 piece and have not been programmed previously in the scale. -
Page 12: Touchpad Description
1. - Display of weight / quantity. Shows the quantity of product being sold. 2. - Display unit price. Shows the unit price of the selected product. 3. - Display of total price. Shows the total price of the sale. 4.-Message display and PLU name. - Page 13 Label Printing Scale Alphanumeric keyboard: Opens the list of sellers registered and allows to select some to register their transactions. Allows the output of a label or a small stretch of thermal paper (ticket). Activates the Change operation, for more information, see Section 24.
- Page 14 Enter the configuration menu with the user code. (Default 123456) It takes the numeric value entered as a PLU number, searches it in the Database and, if found, displays it on the display. In case of no the beacon will only emit a beep and will not show anything.
- Page 15 Label Printing Scale Delete previous character. Space bar. Displays special symbols that are not on the keyboard. GO / ENTER The alphabetic keyboard when in PRODUCT ENTRY mode (enabled) is used to enter the name of the product while a sale is being made. The alphabetic keyboard when in DIRECT ACCESS mode (enabled) is used to enter the PLUs stored in the internal memory.
-
Page 16: Entering The Setup Menu
7. - ENTERING THE SETUP MENU. This operation will be performed each time the user needs to modify any parameters previously set. 1.-Press the PROG button the word PASS will immediately appear in the advertising display: At this point, press the 123456 sequence and then press ENTER to enter the configuration menu. -
Page 17: Certain Amount Of A Given Product
Label Printing Scale 8.1.- WHAT ARE THE PRE-PACKING MODE (LABEL) OR POINT OF SALE (TICKET) MODE?. The pre-packing mode is useful when it is desired to pre-pack containers or trays with a certain amount of a given product. The point of sale mode will help you to issue descriptive tickets with the information of the products sold as well as give the exact change. -
Page 18: Miscellaneous Product Configuration
4.-Choose between the two options, TAG for PRE-PACKING mode or TIKET for POINT OF SALE mode. Choose with the DIRECTION ARROWS Then press ENTER. 5.-When you save the changes, return to the OPERATION MODE menu, to exit and return to the normal functions of the scale only press the RETURN key 3 times. - Page 19 Label Printing Scale 1.- Enter the GENERAL 1 submenu following the steps described in section 7 entered the setup menu p. 14 2.- Enter the submenu by pressing ENTER 3.-With the direction arrows choose the option. MISCELLANEOUS PRODUCTS and press ENTER 4.- with the direction arrows select the option you find more convenient.
-
Page 20: Fixed Price Setting
10.- FIXED PRICE SETTING. The fixed price setting prevents a product price (PLU) from being modified by the seller during the sales process. When the price lock is enabled the scale will ask for the administrator password (123456 by default) to accept the new price (this price will not be stored in the scale memory). -
Page 21: Keyboard Mode Settings
Label Printing Scale 5.- Saving the changes returns you to the PRICE LOCK submenu, to exit and return to the normal functions of the scale just press the BACK key 3 times. 11.- KEYBOARD MODE SETTINGS. The keyboard has two setup options, DIRECT ACCESS mode and PRODUCT INPUT mode. -
Page 22: Products Configuration
4.- Use the ADDRESS arrows to select the option that suits you best. Press ENTER this will save the changes you’ve made. 5.- Saving the changes returns you to the FIXED PRICE submenu, to exit and return to the normal functions of the scale just press the BACK key 3 times. -
Page 23: Creating A Product
Label Printing Scale 12.1.- CREATING A PRODUCT. 1.- To create a new product enter the CREATE PRODUCT option by following the steps in section 12 product configuration p.19 and then the sequence of this section. You will use arrow keys and the ENTER button 2.- Press ENTER 2.1.- Type the name of the new... - Page 24 6.1- scale default 6.-Press: assigns a new code for the ENTER. product, this changed by the user once he presses ENTER. 7.- Press Key 7.1- Enter the number of days. ENTER. (from 1 to 999) Expiration The product will be fit for shall be consumption expressed in...
-
Page 25: Edit A Product
Label Printing Scale 12.2.- EDIT A PRODUCT. 1.- To edit a product get into the “Edit Product” option and follow section 12 steps. 1.1.- Press ENTER to get into the option. You will only use the arrow keys to move around the options. ENTER key and the red-letter C. - Page 26 5.1.- To erase a PLU number 5.- To edit press the red-letter C PLU numbers press key: ENTER 5.2.- Type the new code 8.- To edit a product’s type press: ENTER 8.1.- Choose the option you’d like to edit with the arrow keys and then press ENTER.
-
Page 27: Delete A Product
Label Printing Scale 11.- To save changes 11.1- Wait for a few press ENTER seconds till the scale finishes saving changes and you will be thrown back to the submenu CANCEL: To cancel a product changes use the arrow keys to go to the cancel option and press ENTER. -
Page 28: 13-Red Settings
3.1.- If so press ENTER. 3.2.- if you wish to cancel deleting a product press the red-letter C. 13-RED SETTINGS. The network option helps you choose the network type of your scale for connectivity with third party apps. 1.- Go into the NETWORK menu option from the main menu configuration p 14. 2.- With the arrow keys select the options 3.- Then press ENTER. -
Page 29: 1- Wifi Info
Label Printing Scale 13.1.1- WIFI INFO. In this option the scale will show you the WIFI information regarding the type of connection. 1.- Follow section 13 instructions and select NETWORK INFO. 2.- Press ENTER to get into the Sub Menu. And with the arrow keys you can watch the Network information complete such as: (WIFI, STATUS- CONNECTED / DISCONNECTED, RED- SCALE_LINK_#, IP#,... -
Page 30: Ethernet Info
Shows the Network MASK. Shows the scale’s data gateway. 13.1.2. ETHERNET INFO. Into this option you will see the Ethernet option. 1.- Follow section 13 steps and select Network Info 2.- Press ENTER to get into the menu. And with the arrow keys to see the different options that it has such as:(ETHERNET, STATUS- CONNECTED/ DISCONNECTED, RED- SCALE_LINK_#, IP#, MASK#,... -
Page 31: 3- Network Info Adhoc
Label Printing Scale Shows the Network’s MASK. Shows the scale’s Gateway. To be out of the menu just press the back button 4 times. 13.1.3- NETWORK INFO ADHOC <HOT SPOT> Inside this option you’re able to see the whole network information of ADHOC Connection. 1.- Follow section 13th steps into this option. - Page 32 Indicates if the scale is connected to a device. Network name the scale generates automatically. Shows the IP address of the scale. Shows the Network Mask. Shows data gateway of the scale. To be off the menu just press the back button 4 times. WLABEL Series...
-
Page 33: Type Of Connection Configuration
Label Printing Scale 13.2.- TYPE OF CONNECTION CONFIGURATION. 1.- Follow section 13 instructions to know your way into this menu. 1.1- Press ENTER to get into the menu. And move around with the arrow keys to see all the different options: WIFI (Only for scales with WIFI antenna) ETHERNET, ADHOC <HOTSPOT>, to get into any of these presses ENTER. -
Page 34: Wifi Connection Configuration
is made between the scale, and a mobile device in the The Adhoc <Hot Spot> connection absence of modem. 13.2.1.- WIFI CONNECTION CONFIGURATION. (Only for Scales with WIFI Connectivity Available). 1.- Follow section 13th steps and then select WIFI by pressing ENTER. 2- Wait a few seconds while the scale configures this option and saves changes, once it ends it goes automatically into the “Look for network”... - Page 35 Label Printing Scale 2.1.1.- To look for the WIFI connection of your preference scroll down the list of networks available using the arrow keys and once you find the right one press ENTER. 2.1.2.- Type the WIFI password and once you finish press ENTER Use the following keys: CAPS to change from Capitalized words to normal, DEL or C to erase characters.
-
Page 36: Ethernet Configuration
Once you press ENTER, you’ll be able to see the network characteristics already stablished: Network Type, Connection Status, Network Name, IP Address, Network Mask, Gateway. The connection indicator on the scale should be active by now, see reference (5.1, P. 10). 13.2.2.- ETHERNET CONFIGURATION. - Page 37 Label Printing Scale 3.- The connection indicator goes active, see reference ( 5.1, p. 10 ) Press ENTER to get into the configuration parameters. Once inside, by the arrow keys you can choose between the IP options, DINAMIC IP and STATIC IP. 3.1.- When choosing DYNAMIC IP, the scale configures automatically the necessary parameters for it to work dynamically on the scale.
- Page 38 To erase a digit, press the DEL key or the C key, once finished editing the IP address press ENTER, then it will show the message Type in Network Mask. 3.2.2-. By default, the network mask is 255.255.255.0 using the arrow keys you can move around the digits, you will notice your current position due to the digit blinking when selected, you can replace the digit with a...
-
Page 39: Adhoc
Label Printing Scale 13.2.3.- ADHOC <HOT SPOT> CONECTION CONFIGURATION. 1.- Follow the steps on section 13.2 type of connection configuration P.28 and choose ADHOC <HOT SPOT> by pressing ENTER. 2- Wait a few seconds while the scale activates this function and saves changes, once done, it goes automatically into SETTINGS.Conection Configuration - Page 40 3.1.2.- Press ENTER to place an 8-character long password 3.1.3.- You can use letters and numbers on this one. The CAPS key allows you to go from capitalized letters to normal and vice versa, You can erase characters by using the DEL key or the C key, With the arrow keys you can move around the digits.
-
Page 41: Printer Configurations
Label Printing Scale 14.-PRINTER CONFIGURATIONS. Inside this option you can configure the automatic printing and the contrast of printer on labels or tickets. 1.- Go into the SETTINGS menu option following the steps of section 7 p. 14 2.- With the arrow keys select 4 PRINTER and press ENTER Inside this menu you can find the options: AUTO PRINT, CONTRAST Choose any of the options with the arrow keys and press ENTER to... -
Page 42: Printer Contrast Settings
14.2.- PRINTER CONTRAST SETTINGS. On this option you can configure the printer contrast. Level 1 it’s the clearest and level 10 it’s the darkest. 1.- Follow section 14 steps P.33 and choose CONTRAST. 2.- Press ENTER to go into this option and by using the arrow keys you can go onto the contrast levels. -
Page 43: 15-Date And Time Settings
Label Printing Scale 15-DATE AND TIME SETTINGS. This menu option will help you be synchronized with your business and it makes it easier to manage a business. 1.- Go into the menu option 5 DATE AND TIME by following section’s 7 steps p. 14 2.- Using the arrow keys select the option 5 DATE AND TIME, and press ENTER Inside this menu you can find the following options: SEE DATE AND TIME, SET DATE,... -
Page 44: Set Date
15.2.- SET DATE. This menu option allows you to configure the date on your scale. 1.- Follow section 15 steps P.36 and choose SET TIME. 2.-Press ENTER to go into this option. 3.- You can move around the digits with the arrow keys. Use the numeric pad to replace characters and to delete a digit press the DEL key or the C key. -
Page 45: Date Format Settings
Label Printing Scale This menu option allows you to set the time on the scale. 1.- Follow section 15 steps P.36 and choose SET TIME. 2.- Press ENTER to get into this option. 3.- Use the arrow keys to move around the digits and replace any of the digits with the number pad or press the DEL key or C key to erase a digit. - Page 46 This menu option allows you to change the date format shown on scale. (MM/DD/AAAA DD/MM/AAAA) 1.- Follow section 15 steps P.36 and choose DATE FORMAT. 2.-Press ENTER to get into this option. 3.- Choose the format you like the most with the arrow keys and press ENTER to select it, the scale will save this selected format.
-
Page 47: Memory Settings
Label Printing Scale 16.-MEMORY SETTINGS. The memory settings allow you to erase products end sales. 1.- Get into the 6 MEMORY menu option following section 7 steps p. 14 2.- With the arrow keys go to 6 MEMORY and press ENTER to go into it. -
Page 48: Delete Products
16.2.- DELETE PRODUCTS. This option allows you to delete all the products saved in the scale’s memory. 1.- Get into the 6 MEMORY menu option following section 7 steps p. 14 and choose DELETE PRODUCTS. 2.- Press ENTER to go into the option. 3.- The scale will show you a message saying: DELETE ALL PRODUCTS? If you want to cancel this operation press the RETURN key or... - Page 49 Label Printing Scale 3.- the scale will show a message saying: DO YOU WISH TO DELETE EVERYTHING? If you wish to cancel press the return key or the c key. Press ENTER to confirm and initiate the process. 4.-The scale will ask you for the user’s password (usually 123456) to proceed with the operation.
-
Page 50: Language Settings
17.-LANGUAGE SETTINGS. This option configures the menu language, home screen remains the same. 1.- Follow section’s 7 steps p. 14 2.- Using the arrow keys go to Language and press ENTER On this menu option you will find the following selections: Spanish, English. -
Page 51: Scale Information
Label Printing Scale 18.-SCALE INFORMATION. 1.- Follow section 7 steps to go into this option p. 14 2.- With the arrow keys go the 8th option and press ENTER. Inside this menu option you can find the different messages: SERIAL NUMBER, SOFTWARE VERSION. -
Page 52: Scale's Operation
19.- SCALE’S OPERATION 19.1.- ADJUST TO ZERO. To assure the new cero reference make sure the scale doesn’t have any weight on it and press the CERO key: 19.2- TARE FUNCTION. Tare function is used when a product has a container that adds weight to the product. -
Page 53: Agent Selection
Label Printing Scale 19.3.- AGENT SELECTION. To select an agent from the scale, press the VEND key on the scale’s keyboard and it will show a menu that shows the agents list: Use the arrow keys to move around the list and press ENTER to select the agent on the scale. -
Page 54: Paper Feed
To be off the function just press the FIXED PRICE button again. By doing this the indicator of this function goes off. 19.5.- PAPER FEED. This function allows you to have a portion of the paper or a label in blank. To activate this function just press the ADVANCE PAPER button and the display will show the NEG indicator. -
Page 55: Non-Plu Sale
Label Printing Scale 21.- NON-PLU SALE. Follow section 9 steps p.16 . and choose ENABLE. Go back to the main Screen by pressing the RETURN key 3 times. Type the non plu name on the scale and press ENTER, once done the new product will appear on the publicity display. -
Page 56: Product Sale
3.- Once you type in the number of quantities to sale the scale calculates the total for the customer to pay. Press the PRINT key on the scale. To cancel this function, press the red C key on the scale twice. Once the label has been printed the Screen will go back to its normal state. -
Page 57: Pre-Packing Mode - Non-Weighable Products Sale
Label Printing Scale 2.- wait till the weight on the scale is stable and the Screen shows 0.000. 3.- If you don’t want to repeat the las steps over and over you can press STATIC PRICE to work with the same product and price: 23.2.- PRE-PACKING MODE –... -
Page 58: Pre-Packing Mode - Sell Of Several Weighable Products
3.- Once the sale is made the scale will go back to the main Screen. If you don’t want to go over these steps several times you can always use the FIXED PRICE: 23.3.- PRE-PACKING MODE – SELL OF SEVERAL WEIGHABLE PRODUCTS. To sell several products you must follow these steps: Follow section 11 steps p. -
Page 59: Pre-Packing Mode- Sale Of Non-Weighable Non-Plu Products
Label Printing Scale 4.- Once the label has been printed, the scale’s display will go back to normal. If you don’t want to go around this step over and over press STATIC PRICE: 23.4.- PRE-PACKING MODE– SALE OF NON-WEIGHABLE NON-PLU PRODUCTS. To sell a non plu non weighable product you must follow the next steps: Follow section 11 steps p. - Page 60 2.- The display will show Price and weight right away. Press the plus button and do the first step again for the next plu. Doing this several times the scale shows you the number of item’s you’re selling and the total price. The same function applies to sell by quantity after typing the product in and pressing the X key and number of pieces to sell.
-
Page 61: Apply Discounts
Label Printing Scale 24.- APPLY DISCOUNTS. This function allows the user apply discounts to the products they’re selling: To apply a discount there must be at least 2 products on list to sell. Press the –D/DEV PLU key. By using the arrows keys, you can either choose the discount to apply or select to cancel the sale. -
Page 62: Returns
25.- RETURNS. This operation allows you to make returns of a product before been charged to the customer are vent after been charged. 25.1 IMMEDIATE RETURN. To make an immediate return follow these steps: To apply this function on the scale there must be at least a product n list to sell and not been charged yet or printed the ticket of the sale. -
Page 63: Later Return
Label Printing Scale 25.2 LATER RETURN To apply this return there must be at least a product in the list of the sale and it should be charged to the customer already. To achieve a later return, follow these steps: Place the product on the scale. -
Page 64: Change Operation (Ticket)
26.- CHANGE OPERATION (TICKET). This function allows you to calculate the change to give to the customer. Once you have the sale ready to be charged to the customer and you need to calculate how much you must give back to the customer follow the next steps: On the image you have 3 items on the list and a total amount of 493.75, to know how much change you must give press the plus key followed by the blue change button. -
Page 65: Scale Link Mobile App
With Scale Link Mobile App, you can manage, configure and review sales reports in real-time directly from compatible Torrey´s scales. You can stablish a communication with Torrey´s scale directly, once the communication has been stablished, you can use the following functionalities: MANAGE •... - Page 66 Scale Link Mobile App is available on the following stores: Apple devices requires iOS 10.3 or later. Compatible with iPhone, iPad and iPod Touch. Android devices requires Android 5.0 or later. Compatible with Android Phone and Tables. WLABEL Series...
-
Page 67: Set Connection With Scale
Scalelink software on your PC, the mobile device and pc must be connected to the same network. This manual no cover this connection type, for more reference how to use it, you can visit this url: http://torrey-cloud.com/downloads/... - Page 68 27.1.1.- CONNECTING USING HOTSPOT. Before you stablish a communication with scale, you need to follow the steps on section 13.2.3 to active and set ADHOC<HOT SPOT> on scale. After you configure correctly your scale ADHOC<HOT SPOT>, need connect to network that your scale created.
- Page 69 Label Printing Scale 27.1.2.- CONNECTING USING WIFI/ETH. Before you stablish a communication with scale, you need to follow the steps on section 13.2.1 – 13.2.2 to active and set WIFI and ETHERNET configuration on scale. Search and select the network on your mobile device, the network must be the same where scale is connected to.
-
Page 70: Product Section
27.2.- PRODUCT SECTION. On this section you can view product´s list, add and edit products within your scale directly from Scale Link App. 1. For create a new product within your scale. 2. Press on product item to edit it within your scale. 3. -
Page 71: Agent Section
Label Printing Scale 27.3.- AGENT SECTION. On this section you can view agent´s list, add and edit agents within your scale directly from Scale Link App. 1. For create a new agent within your scale. 2. Press on agent item to edit it within your scale. 3. -
Page 72: Offer Section
27.4.- OFFER SECTION. On this section you can view offer´s list, add and edit offers within your scale directly from Scale Link App. 1. For create a new offer within your scale. 2. Press on offer item to edit it within your scale. 3. -
Page 73: Additional Information Section
Label Printing Scale 27.5.- ADDITIONAL INFORMATION SECTION. On this section you can view offer´s list, add and edit offers within your scale directly from Scale Link App. 1. For create a new additional information within your scale. 2. Press on additional information item to edit it within your scale. 3. -
Page 74: Report Section
27.6.- REPORT SECTION. On this section you can view and export a history of your sale´s report directly from Scale Link App. 1. First time you access this section you see Last Update empty. 2. Button to download real-time sale´s report from scale. 3. -
Page 75: Settings Section
Label Printing Scale 27.7.- SETTINGS SECTION. When you access this section from Scale Link´s menu, it will show you a submenu with available modules to manage directly from app, the next screenshot shows which modules you can manage to apply in scale. Publicity Section to configure publicity messages for your customers. - Page 76 27.7.1.- PUBLICITY. This section allows to modify the default publicity messages for scale´s rear display. Your customers are going to see theses message in scale´s torret. First time you access this section, you will see defaults messages for rear display. You can change this message accord to your needs.
- Page 77 Label Printing Scale 27.7.2.- SETTINGS. This section allows you to enable and disable scale´s functions such as general options, security password and date time formats. 1. Panel for enable or disable scale´s functions. 2. Panel for change Admin and Supervisor password. 3.
- Page 78 You can enable or disable scale´s functions, options you will find to enable or disable are: Allow non-PLU: It allows you to sell non- PLU products with the scale. Allow Discounts: Allows you to apply up to 99% discounts to products using a supervisor password on the scale.
- Page 79 Label Printing Scale Users can change the administrator and supervisor passwords of the scale The different types of date formats are: dd/MM/yyyy This can be understood as Day/month/year. MM/dd/yyy This can be understood as month/day/year. To have a 24 hours format select 24 Hours.
- Page 80 27.7.3.- HEADLINES. On this section you can change and configure until 15 headers for customer´s ticket. Once you configure the customer´s ticket, you can press check mark image button for save the changes. WLABEL Series...
- Page 81 Label Printing Scale 27.7.4.- SHORTCUTS. On this section you can configure scale´s shortcuts, W-Label can save until 35 shortcuts for your products. 1. You can select any product of your scale and set the shortcut. 2. If you want to delete or replace one shortcut, you need to make a swipe left with your finger to make visible the Eliminate button.
- Page 82 27.7.5.- BARCODE. This Screen allows you to choose from 2 predefined formats based on the type of paper on the scale. Printing format panel. Barcode configurations panel. WLABEL Series...
- Page 83 Label Printing Scale Choose the barcode format you feel more comfortable with, barcode gets composed by the following parameters: Letter Meaning Recommendation AGENT CONSECUTIVE Product’s code Product’s weight Total Department Product’s number Prefix Not read digit Checker (non-editable –automatic) Code Format – Weight: EAN13: P C C C C C C W W W W W V UPC12:...
- Page 84 To customize the barcode format, choose CUSTOM introduce the content according to the list below. - Prefix: Allows you to see and modify the prefix that gets printed at the beginning of the ticket. - Department: Allows you to see and modify the department number assigned to the scale.
- Page 85 Label Printing Scale 27.7.6.- TEXT. This section allows you to modify the messages appearing on sale tickets or labels. This text gets printed Weight’s Text: on top of the weight indicator. It’s Weight lb. by default. Price Text: this text gets printed on top of the Price indicator.
- Page 86 Cash Text: this text gets printed on top of the amount received by the customer. Change Text: This text gets printed on the left side of the amount to give back to the customer. Date’s Text: This text gets printed on top of the date on the ticket.
Need help?
Do you have a question about the W-LABEL Series and is the answer not in the manual?
Questions and answers