Table of Contents
Advertisement
Advertisement
Table of Contents

Related Manuals for Torrey LSQ-40L


Summary of Contents for Torrey LSQ-40L
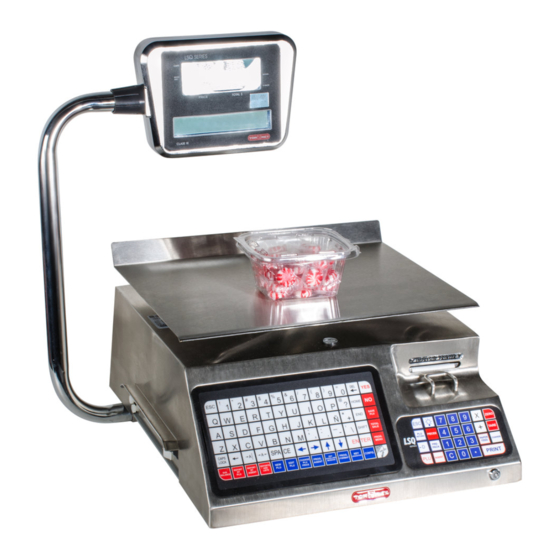
- Page 1 LSQ-40L LABEL PRINTING SCALE QUICK START MANUAL REV 1.0...
-
Page 2: Table Of Contents
PAGE 1 INDEX Before you begin……………………………………………………………2 Cleaning the scale Requirements for using a computer to program Setting up scale for first use………………………………………………..4 Testing printer Printing your first label……………………………………………………..5 Setting up the network……………………………………………………..6 Connecting the devices Installing the software Configuring you computer Configuring your scale(s)…………………………………………………..7 Starting up the software……………………………………………………8 Adding scales to the network... -
Page 3: Before You Begin
Page 2 BEFORE YOU BEGIN Please read this section carefully. The following has some important safeguards to prevent damage or failure of your scale. CLEANING THE SCALE: 1). You may use stainless cleaner or mild soap to wipe down the metal areas of the scale. - Page 4 Page 3 Network Adapter with category 5 cables The picture above shows an example of a 5 port hub. One computer and up to 4 scales can be connected for programming. NOTE: It is not necessary to have a computer to program your scale. Programming can be done by using the keyboard on the scale.
-
Page 5: Setting Up Scale For First Use
Page 4 SETTING UP THE SCALE FOR FIRST TIME 1). Carefully unpack scale from it’s box. Lift the indicators arm all the way up until it stops. Adjust the correct angle of the indicator by loosening the black nut on the arm next to the indicator. -
Page 6: Printing Your First Label
Page 5 TO PRINT A LABEL (contd): 1). Place a product on the platter. Enter in the price. Press PRINT. A label should dispense with printed information such as weight, date, total sale, etc. NOTE: The printer will not print a label if no price is entered, no weight is on the platter or negative weight is displayed on the indicator. -
Page 7: Setting Up The Network
____________________________ 1). Connect up the equipment as shown in the drawing below. 2). Place the Scalenet (LSQ-40L) software CD in your drive. The auto install should begin automatically. Complete the installation as instructed. NOTE: This software is intended to run on a Windows XP operating system with SP2 (Service Pack 2) installed only. -
Page 8: Configuring Your Scale(S)
7). Enter in the IP address 131.1.100.100. Click OK. Page 7 NOTE: If you are already using a network connection for another application, you may want to create a new connection and configure it for scale communications. CONFIGURING YOUR NETWORK ON THE SCALE: The scales network IP address should already be configured from the factory. -
Page 9: Starting Up The Software
STARTING UP THE LSQ-40L SOFTWARE (Be sure your scale and hub are powered up and connected at this time) 1). Launch the LSQ-40L software. On the logon screen, do not enter a password. Click on ACCEPT to continue. 2). At the top of the screen, click on MAINTENANCE and then SCALE MASTER. -
Page 10: Configuring General Information
SCALE MASTER allows you to add new scales to the network. You will have to add each scale to the network one at a time. As long as you use the same computer each time you communicate to your network, you should not have to add them again. -
Page 11: Adding Products
Page 10 ADDING PRODUCTS TO THE SCALE: 1). Click on NETWORK, then NET DISTRIBUTION (keep this window open while programming). On the left side of the screen, you can see your scale(s) and a Group1 icon. This is the network tree. You can drag and drop scales into different groups. You can also create/delete groups by right clicking in the tree box. -
Page 12: Moving Products To/From Scale
Dept: Department product belongs to by entering a number (must be defined in the department table). Type PLU: Determines how the product is to be sold. Weighed/Lock Sold per pound/Price per pound locked Weighed/Unlock Sold per pound/Price per pound can be changed Unweighed/Lock Sold per unit. -
Page 13: General Configuration
Page 12 GENERAL CONFIGURATION: This will configure label printing features, and lock/unlock other features, setting up the bar code, etc. Click on CONFIGURATION, then READ. SCROLLING MESSAGE: This message will scroll across your indicator when there are no sales in progress. INGREDIANTS: The number of lines dedicated for ingredient text on the label. -
Page 14: Printed Text On Labels
You can select from 4 different bar code configurations or select CUSTOMIZED to configure your own. This depends on your POS system and the information you want in the bar code. If you do not want a bar code, follow these steps: 1). -
Page 15: Passwords
HEADLINES TAB: Enter in the information you want printed at the top of the label. This is usually a store name, etc. The amount of lines that will be printed is configured in the GENERAL TAB. PASSWORDS: You can set additional passwords to prevent unauthorized programming. However resetting passwords because they were lost will require the machine to be returned to the factory. -
Page 16: Edit Scrolling Message
8). TEXT will appear again. Arrow down until you see SIZE (1-6). Press ENTER. 9). Press DEL. Enter the font size you want. (1=smallest 5=largest). Press ENTER. NOTE: The larger you make the font, the more space is used on the label. Also less characters will appear on label. -
Page 17: Configuration
3). Press DEL to erase previous text. 4). Type in new text you want displayed. Press ENTER. Page 16 CONFIGURATION: This sets up the scales time, date, and prefences of the scale. Extreme care should be used as some features can cause loss of memory or be locked out of programming features. -
Page 18: Setting Up Label Print
CONTRAST (LIGHT/DARKESS OF PRINT [1=LIGHT 2=DARK]) RESET MEMORY (PLUS = erases all plu’s from memory – TOTAL=erases ALL memory) MENU (ENABLED= Can enter PROGRAMMING MODE without using a key by pressing the PROG MENU button). VERSION (Displays the firmware version of scale – Not a user function). 3). -
Page 19: Placing Text On Label
If your POS system cannot recognize the bar code, you may have to alter the way the bar code encodes the product data (makes the barcode). 1). Enter PROGRAMMING MODE. 2). Press PROG FORMAT. 3). Press ENTER when you see FORMAT. 4). -
Page 20: Set Up Text On Label
Some planning on how to layout the label is strongly recommended before proceding. One way to do this is by using the template below. LEFT CENTER RIGHT LINE 1 LINE 2 LINE 3 LINE 4 LINE 5 LINE 6 LINE 7 LINE 8 LINE 9 LINE... -
Page 21: Add Plu's
3). Press ENTER when you see FORMAT. 4). Use arrow up/dn to find LABEL W/ GAP. Press ENTER. 5). Use arrow up/dn to find CUSTOMIZED. Press ENTER. 6). The next two questions are the width and length of the label. The scale has a sensor to detect the end of the label, so there is no need to change the dimensions. -
Page 22: Key Assignation
2). Press NEW PLU. 3). Enter in the plu number (1 to 300) and press ENTER. 4). Enter the information or you can press ENTER on optional lines. 5). When NEW PLU appears again, you can type in another product or ESC to go back to PROGRAMMING MODE KEY ASSIGNATION: During normal operation of the scale, you can type a plu# and press PLU to pull a... -
Page 23: Troubleshooting
Page 22 TROUBLESHOOTING PROBLEM CAUSE SOLUTION PAGE Twist plug as you are inserting in Scale will not turn on Power not getting to scale scale. Fuse Blown Replace fuse No power at oulet Plug in at a different outlet Too many labels come Too much text attempting Remove some of the text that is to be printed... - Page 24 Label comes out but Print board Replace board print Printhead Replace printhead Printer error Print board Replace board Printhead Replace printhead Cannot communicate IP adress wrong Check scales ip adress using computer Disable all networks except the one for scale in computer Cable pluged in wrong on hub Check configuration Not using a cat 5 ethernet cable...
Need help?
Do you have a question about the LSQ-40L and is the answer not in the manual?
Questions and answers