Advertisement
INTRODUCTION ART. 562B
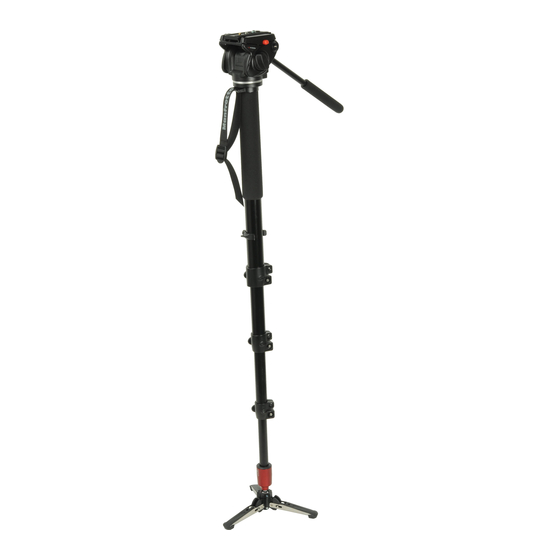
Designed for compact mini DV and HDV cameras, the Fluid Video Monopod is highly
portable and offers fold up stainless steel feet for additional stability on uneven ground.
KEY FEATURES
• Fluid pan base with folding legs
• Rapid action, lever leg extension locks
1B
SET UP
To adjust the height of the monopod, rotate lever "A" on the locking collar "N".
When the required height is achieved, lock lever "A"
REMOVE THE PLATE
2B
Remove the plate "B":
- Turn lever "C" anticlockwise.
- Press the spring bottom "D" and pull out the plate "B" as shown in figure 2B.
2B
3
ASSEMBLING CAMCORDER/CAMERA
&
The plate "B" (fig. 2B) is supplied with 1/4" camera screws "E" and 3/8" camera screws "F".
To remove the screw not used proceed as follow:
- lightly press the rubber cap "G" with your finger
- remove the screw not used
- reposition the cap "G" to prevent the screw from being lost.
NOTE
The head is provided with threaded housing for the screw not used (hole for 1/4" screw
"H", hole for 3/8" screw "L").
Fix the camcorder/camera onto plate "B" (fig. 3) by screwing camera 1/4" screw "E" or
3/8" screw "F" into the camcorder's threaded hole WITHOUT APPLYING FORCE (using
for example a coin).
If the camcorder has a hole for anti-rotation, insert the pin "M" (fig. 2B) on the hole before
screwing camera screw.
Before fully locking, align the camcorder lens with the camera plate "B".
4B
MOUNTING THE CAMCORDER/CAMERA
Insert the camera plate "B" as shown in figure 4B until locking button "D" clicks.
Holding the camcorder/camera, find the balance point.
Lock the plate "B" in the position reached by screwing the locking knob "C".
REMOVE THE CAMCORDER/CAMERA FROM THE ADAPTER
Whenever the camcorder/camera needs to be removed from the adapter, hold the camera
securely in one hand while operating locking lever "C" and safety button "D" with the other
hand.
NOTE: The angle of the lever on the ratchet lever "C" (fig. 2B) can be repositioned as
required without effecting the lock itself. Pull the lever outwards, rotate as required and
release and it will locate in the new position.
5
6
FOLDING BASE
&
How to open (5): open the 3 legs "S" by spreading them as shown in figure 5.
How to fold (6): pull the pin "T" as shown in figure and at the same time fold each leg "S".
7
USE
The monopod is designed with a fluid base "X": it allows to eliminate vibration during the
pan movement (see figure 7).
8
NOTE
The base allows to tilt the equipment out from vertical axis (see figure 8):
We recommend not to leave the monopod standing alone but always keep it with
your hand.
9
MAINTENANCE
If the ball "W" becomes too free after using, you can reach again the right friction by
tightening a bit the adjustment screw "Y" (see figure 9) – please do not unscrew the others
two screws "U".
10
LEG LOCK TENSION ADJUSTMENT
If the telescopic leg extensions slip even after having tightened the locking lever "A",
the locking tension will need to be adjusted. In order to do this:
- remove cap "K"
- release lock lever "A"
- turn the screw "P" clockwise using the special key "Q" provided on one of the tripod
legs.
Normally a third of a turn will be sufficient to achieve the correct locking tension.
Cod. 561,13 - 02/07
Copyright © 2006 Manfrotto Bassano Italy
INSTRUCTIONS
561B
562B
200 cm
2 kg
4 kg
193 cm
1,43 kg
78.7"
4.4 lbs
8.8 lbs
76"
3.15 lbs 17.6 lbs
8 kg
Advertisement
Table of Contents

Summary of Contents for Manfrotto 561B
- Page 1 1,43 kg 8 kg legs. 78.7” 4.4 lbs 8.8 lbs 76” 3.15 lbs 17.6 lbs Normally a third of a turn will be sufficient to achieve the correct locking tension. Cod. 561,13 - 02/07 Copyright © 2006 Manfrotto Bassano Italy...
- Page 2 INTRODUCTION ART. 561B art. 561B art. 561B art. 561B Designed for compact mini DV and HDV cameras, the Fluid Video Monopod is highly portable and offers fold up stainless steel feet for additional stability on uneven ground. M E F KEY FEATURES •...


Need help?
Do you have a question about the 561B and is the answer not in the manual?
Questions and answers