
Related Manuals for KANSAI SPECIAL SX Series


Summary of Contents for KANSAI SPECIAL SX Series
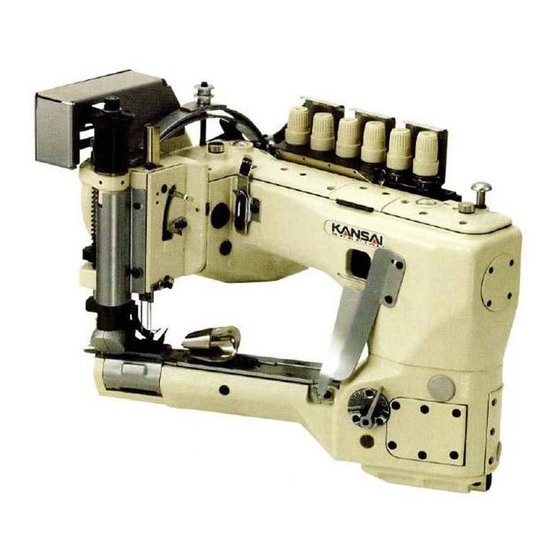
- Page 1 INSTRUCTION Industrial Sewing Machines SX6003P First published : November 2001 No. 010117...
- Page 2 INTRODUCTION INTRODUCTION INTRODUCTION Thank you for your purchasing Kansai Special's SX6000 Series. Read and study this instruction manual carefully before beginning any of the procedures and save it for later use. This instruction manual describes adjustments and maintenance procedures on this machine.
-
Page 3: Table Of Contents
CONTENTS CONTENTS CONTENTS CONTENTS 1. SPECIFICATIONS 10. ADJUSTING THE FEED ROLLER 1-1 Description 10-1 Adjusting the movement amount of the ・・・・・・・・・・・・・・・・・・・・・・・・・・・・・・ 1-2 Stitch type feed roller ・・・・・・・・・・・・・・・・・・・・・・・・・・・・・・・ ・・・・・・・・・・・・・・・・・・・・・・・・・・・・・ 10-2 Feed roller pressure ・・・・・・・・・・・・・・・・・・・・ 2. NEEDLES & THREADING THE MACHINE 10-3 Disassembling, reassembling and adjusting the feed roller ・・・・・・・・・・・・・・・・・・・・・・・・・... -
Page 4: Specifications
【1】SPECIFICATIONS 1 1 1 1 - - - - 1 Description 1 Description 1 Description 1 Description High speed feed-off-the-arm machines with differential feed 1 1 1 1 - - - - 2 2 2 2 Stitch type Stitch type Stitch type Stitch type JIS401 double chainstitch machines... -
Page 5: Threading
2 2 2 2 - - - - 3 Threading 3 Threading 3 Threading 3 Threading Thread the machine correctly by referring to the illustration below. To thread the loopers, lay the looper holder down using the looper drawing device. ■To lay the looper holder down When the needle bar is at the bottom of its stroke, press push button G. -
Page 6: Motor & Belt
4 4 4 4 - - - - 1 1 1 1 Oil Use Kansai Special's genuine oil. (Part No.28 - 617) 4 4 4 4 - - - - 2 2 2 2 To fill the machine with oil... -
Page 7: Putting A Small Amount Of Oil
4 4 4 4 - - - - 4 4 4 4 Putting a small amount of oil Putting a small amount of oil Putting a small amount of oil Putting a small amount of oil Put a small amount of oil onto the positions shown in the illustration. 4 4 4 4 - - - - 5 5 5 5 Replacing the oil Replacing the oil Replacing the oil... -
Page 8: Sewing Machine Installation
【5】SEWING MACHINE INSTALLATION 5 5 5 5 - - - - 1 1 1 1 Cutting the Cutting the machine table machine table Cutting the Cutting the machine table machine table ■Type A (clutch motor) - Page 9 ■Type B (clutch motor)
- Page 10 ■Type C (servo motor)
-
Page 12: Installing The Mount Base
5 5 5 5 - - - - 2 Installing the mount base 2 Installing the mount base 2 Installing the mount base 2 Installing the mount base Refer to the Parts list page 25~30. ■Install the mount base correctly by referring to the illustration right. -
Page 13: Timing Of The Loopers To The Needles
【6】TIMING OF THE LOOPERS TO THE NEEDLES ■Timing of the looper to the needle is factory-set properly. However, when disassembling the needle bar mechanism, looper mechanism or using a new part, this timing should be readjusted. Refer to the following procedures. 6 6 6 6 - - - - 1 To adjust the timing 1 To adjust the timing 1 To adjust the timing... -
Page 14: Angle And Height For Installing The Loopers
6 6 6 6 - - - - 2 Angle and height for installing the loopers 2 Angle and height for installing the loopers 2 Angle and height for installing the loopers 2 Angle and height for installing the loopers Insert loopers A, B and C fully into looper holders D, E and F. -
Page 15: Relationship Between The Needles And Needle Plate
6 6 6 6 - - - - 6 Relationship between the needles and needle plate 6 Relationship between the needles and needle plate 6 Relationship between the needles and needle plate 6 Relationship between the needles and needle plate When the height of the needle bar is adjusted, check to see if each needle is centered in its needle drop hole. -
Page 16: Adjusting The Needle Guard
【7】ADJUSTING THE NEEDLE GUARD When the looper moves to the right from the extreme left end of its travel, the looper passes behind the needle. When the point of the looper has reached the centerline of the needle, the needle should be 0 ~ 0.5mm deflected by needle guard M. -
Page 17: Stitch Length
8 8 8 8 - - - - 3 3 3 3 Stitch length Stitch length Stitch length Stitch length Adjustable from 2.1mm to 4.2mm with no steps. The number of stitches per inch (25.4mm) is as follows. Stitch Number of length stitches per inch 4.2mm... -
Page 18: Disassembling And Reassembling The Presser Foot
9 9 9 9 - - - - 2 Disassembling and reassembling the presser foot 2 Disassembling and reassembling the presser foot 2 Disassembling and reassembling the presser foot 2 Disassembling and reassembling the presser foot ■To disassemble the presser foot Move the presser bar all the way to the up position by pressing the presser foot lift pedal. -
Page 19: Adjusting The Feed Roller
【10】ADJUSTING THE FEED ROLLER 1 1 1 1 0 0 0 0 - - - - 1 1 1 1 Adjusting the movement amount of the feed roller Adjusting the movement amount of the feed roller Adjusting the movement amount of the feed roller Adjusting the movement amount of the feed roller Loosen screw C. -
Page 20: Adjusting The Stitch Formation
【11】ADJUSTING THE STITCH FORMATION 1 1 1 1 1 1 1 1 - - - - 1 1 1 1 Needle thread tension Needle thread tension Needle thread tension Needle thread tension ■Secure needle thread eyelet (left) A in the slot on the lower part of needle thread eyelet (right) B. -
Page 21: Cleaning The Machine
【12】CLEANING THE MACHINE At the end of each day, remove the presser foot and the needle plate and then clean the slots of the needle plate and the area around the feed dogs.
Need help?
Do you have a question about the SX Series and is the answer not in the manual?
Questions and answers