Table of Contents
Advertisement
Advertisement
Table of Contents

Related Manuals for MTI Designer 112


Summary of Contents for MTI Designer 112
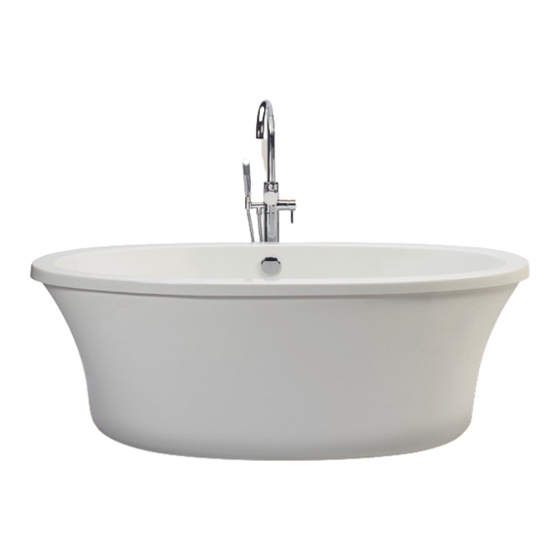
- Page 1 Installation and Operational Manual Effective April 1, 2020 Designer Collection Freestanding Tubs Installer: This booklet must be given to the product owner. Please note important information below: Distributor Name # Model # Manufacturer’s Date Serial / Registration # mtibaths.com...
- Page 2 Owner’s Manual and Installation Guide Thank you for purchasing an MTI bath product. You have chosen the best-built cross-linked acrylic tub in America. We know that it will give you many years of pleasure. The instructions in this booklet will provide you with the information you need to install and operate this unit.
-
Page 3: Table Of Contents
Table of Contents Important Safety Instructions........1 Bath Installation Instructions ........2-7 Product Inspect & Test Procedures ....2 Important Information -Freestanding Bath ..3 Rough-In Charts ........... 4-5 Drain Installation ............6 Plumbing & Electrical ..........7 System & Options Installation Instructions ..8-10 Electrical Requirements ......... -
Page 4: Important Safety Instructions
Acrylic Freestanding Tubs Important Safety Instructions This manual contains information and instructions for proper handling, operation and maintenance of your MTI bathtub. Failure to follow these instructions could result in personal injury, electrical shock or fire. WARNING: WHEN USING ELECTRICAL PRODUCTS, BASIC PRECAUTIONS SHOULD BE FOLLOWED INCLUDING THE FOLLOWING: Do not permit children to use this unit unless they are closely supervised by an adult at all times. -
Page 5: Bath Installation Instructions
6. If any leaks or operating problems are discovered, do not complete installation until problems are resolved. MTI will not be responsible for leaks claimed after the tub is installed, nor any costs involved with removing or reinstalling the tub or the costs of any surrounding materials or labor. See troubleshooting section of this manual, call for assistance at 800-783-8827 or email service@mtibaths.com. -
Page 6: Important Information -Freestanding Bath
Contact the freestanding faucet kit manufacturer for alternate installation instructions. Drain and Overflow – MTI offers a variety of waste and overflow kits. A direct connect toe tap drain kit comes standard with tub models that include an integrated overflow. For other freestanding models, we recommend using our low-profile cable driven drain kit. -
Page 7: Rough-In Charts
See page 6 for installation instructions for tubs with and without access from below. **Model 204 is a Clawfoot Tub designed for a decorative drain kit with exposed piping. MTI recommends purchase of our exposed decorative drain kit for best fit. See important installation information at the bottom of page 3 and follow manufacturer’s drain installation instructions for selected waste &... - Page 8 Rough-In Chart For Freestanding Tubs With Direct Tee Drain MTI RECOMMENDS USING CLEAR 100% SILICONE SEALANT. DO NOT USE PLUMBER’S PUTTY. Tub models with direct-tee toe tap drain kits are designed to install with tub drain aligned directly above drain pipe.
-
Page 9: Drain Installation
• Thread the PVC drain fitting onto the waste flange. MTI recommends using a small amount of clear silicone on the threads of the PVC drain fitting to act as a thread sealant. Tighten until it seats, plus one quarter turn. -
Page 10: Plumbing & Electrical
*NOTE: Air blowers do not require a bonding conductor. ¹MTI does not warrant leaks associated with improper drain or valve installation and will not be responsible for any costs involved with removing or reinstalling the tub. Failure to check floor for flat & level surface, or properly water test the tub & drain, which could will result in improper drainage of the bath, is the reponsibility of the installer. -
Page 11: System & Options Installation Instructions
A keypad (on/off device) installed remote of the tub must always be connected with one continuous cable. Never use a spliced or coupled data cable. MTI can provide a data cable up to a 12’ length. Cables in excess of 12’ may be acquired from local electronics suppliers. -
Page 12: Air Bath Installation
4. Do not crush or kink any of the connections. 5. Extensions: Do not attempt to disconnect any cables extending from the tub. Extensions are available through MTI’s Technical Service Department. See page 8 for more details. 9 / mtibaths.com... -
Page 13: Optional Equipment Installation
Do not attempt to disconnect or splice Radiance® or Chromatherapy cables installed on or extending from the tub. Extensions are available through MTI’s Service Department. See page 8 for more details. All system components must be accessible for future servicing. Test prior to completing installation. -
Page 14: Operation Instructions
Installation and Operational Manual ° Designer Collection ° Acrylic Freestanding Tubs Operation Instructions - Combined Therapy Standard Airbath #1 System ON/OFF 1st Press: The blower starts. LED indicator light on. 2nd Press: The blower stops. LED indicator light off. Note: Blower automatically stops after 20 minutes. - Page 15 Installation and Operational Manual ° Designer Collection ° Acrylic Freestanding Tubs Operation Instructions - Combined Therapy Airbath with LED Lights and Radiance® #4R System ON/OFF FOR RADIANCE 1st Press: Turns on both heated zones LED indicator light on. 2nd Press: Turns off Radiance system. LED indicator light off. ON/OFF: AIRBATH 1st Press: The blower starts.
- Page 16 Elite Airbath with Spa Mode Keypad style and functions may vary according to tub model and selected options. See product specification sheet for details or contact MTI Baths. #4 Digital System ON/OFF: AIRBATH 1st Press: The blower starts. LED indicator light on.
-
Page 17: Optional Equipment
Installation and Operational Manual ° Designer Collection ° Acrylic Freestanding Tubs Independent Chromatherapy ON/OFF: PRESS THE ON/OFF BUTTON - LIGHT MUST BE ON FOR ANY MODE TO FUNCTION. 1st Press: White light. LED light on (White is only available when the system is initially turned on). 2nd Press: Light off. -
Page 18: Care And Cleaning Instructions
SCULPTED FINISH ACRYLIC TUB SHELL MTI Sculpted Finish baths are a unique, hand-crafted, custom product. The care & cleaning must be strictly followed. Never use anything other than mild dish soap diluted in warm water to clean the exterior of the bath. -
Page 19: Troubleshooting
Q. Is it safe to use bath salts or bath oils in my air bath? A. Water soluble products such as bath salts are fine to use, however, MTI does not recommend the use of heavy bath oils. If bath oil is used, refer to the cleaning section of your manual for proper after care and cleaning instructions. -
Page 20: Residential Warranty
Warranty Extent & Limitations: Warranty coverage begins on date of purchase regardless of installation date. The warranty registration card must be mailed to MTI Baths at 670 N. Price Rd. Sugar Hill, Georgia 30518 or completed online at mtibaths.com/support/online-warranty... - Page 21 Exceptions for Alaskan and Canadian Customers: MTI Baths extends the complete Residential Limited Lifetime Warranty to any Designer Collection tub installed within a 75-mile radius of an Authorized MTI Distributor. Any installation site outside the 75-mile radius will be covered for two years, parts only.
-
Page 22: Commercial Warranty
Warranty Extent & Limitations: Warranty coverage begins on the date of purchase regardless of installation date. The warranty registration card must be filled out by the purchaser and mailed to MTI Baths at 670 N. Price Rd. Sugar Hill, Georgia 30518 or completed online at mtibaths.com/support/online-warranty... - Page 23 Display Models: Display floor models and overstock sale units are excluded from this warranty. Drain Kits & Finishes: Drain kits that are sold by MTI are not manufactured by MTI and are excluded from this product warranty. Many drain kits and accessories carry a factory warranty direct from the manufacturer. Terms vary among manufacturers.
- Page 24 MTI Baths Made in the USA 670 North Price Road Sugar Hill, GA 30518 mtibaths.com p: (800) 783-8827 © Copyright 2020 by MTI Baths, Inc. f: (800) 438-8827 Modification Rights Reserved. 0120...
Need help?
Do you have a question about the Designer 112 and is the answer not in the manual?
Questions and answers