Advertisement
Quick Links
ITEM
QUANTITY
1
1
2
1
3
1
4
1
5
1
6
1
7
1
8
1
9
1
10
1
11
1
12
2
13
2
14
6
15
6
16
6
17
18
18
4
19
22
20
6
21
16
22
10
23
10
24
10
25
8
26
4
27
10
28
12
ANTI-SEIZE LUBRICANT MUST BE USED ON ALL STAINLESS STEEL FASTENERS TO PREVENT THREAD DAMAGE AND GALLING
Westin Automotive Products, Inc.
320 W. Covina Blvd
San Dimas, Ca. 91773
P.N.: 75-5831135-RevA
ECO #: W18-0228
INSTALLATION INSTRUCTIONS
APPLICATION:
2019 Chevrolet Silverado 1500 (Excl. 2019 Silverado LD)
PART NUMBER:
58-31135
CONTENT
DESCRIPTION
HDX BUMPER
DRIVER MOUNTING BRACKET
PASSENGER MOUNTING BRACKET
DRIVER SUPPORT BRACKET A
PASSENGER SUPPORT BRACKET A
FOG LIGHT BRACKET A
FOG LIGHT BRACKET B
FOG LIGHT BRACKET C
FOG LIGHT BRACKET D
DRIVER SUPPORT BRACKET B
PASSENGER SUPPORT BRACKET B
SENSOR BRACKET
PARKING SENSOR PLUG
LONG M12 HEX HEAD CAP SCREW (YELLOW ZINC)
SHORT M12 HEX HEAD SCREW (YELLOW ZINC)
MEDIUM M12 HEX HEAD CAP SCREW (YELLOW ZINC)
M12 SERRATED FLANGE NUT (YELLOW ZINC)
M12 HEX NUT (YELLOW ZINC)
M12 SPLIT LOCK WASHER (YELLOW ZINC)
LARGE M12 FLAT WASHER (YELLOW ZINC)
SMALL M12 FLAT WASHER (YELLOW ZINC)
M10 HEX HEAD CAP SCREW (YELLOW ZINC)
M10 SPLIT LOCK WASHER (YELLOW ZINC)
M10 FLAT WASHER(YELLOW ZINC)
M6 HEX HEAD CAP SCREW (BLACK ZINC)
M6 ROUND HEAD SQUARE NECK CAP SCREW (BLACK ZINC)
M6 HEX NUT (BLACK ZINC)
M6 SPLIT LOCK WASHER (BLACK ZINC)
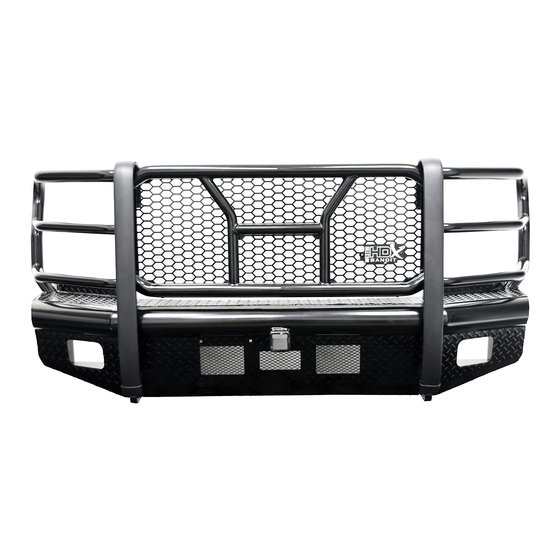
HDX BANDIT FRONT BUMPER
Thank you for choosing Westin products
for additional installation assistance please call
1
TOOLS NEEDED
18MM SOCKET
18MM WRENCH
19MM SOCKET
19MM WRENCH
10MM SOCKET
10MM WRENCH
15MM SOCKET
RATCHET
TORQUE WRENCH
PLIERS
UTILITY KNIFE
Customer Service (800) 793-7846
www.westinautomotive.com
DATE: 08/21/2019
Advertisement

Related Manuals for Westin HDX Bandit


Summary of Contents for Westin HDX Bandit
- Page 1 M6 SPLIT LOCK WASHER (BLACK ZINC) ANTI-SEIZE LUBRICANT MUST BE USED ON ALL STAINLESS STEEL FASTENERS TO PREVENT THREAD DAMAGE AND GALLING Westin Automotive Products, Inc. Thank you for choosing Westin products 320 W. Covina Blvd for additional installation assistance please call San Dimas, Ca.
- Page 2 Carefully read and understand all instructions before attempting installation. Failure to identify damage before installation could lead to a rejection of any claim. Westin Automotive Products, Inc. Thank you for choosing Westin products 320 W. Covina Blvd for additional installation assistance please call San Dimas, Ca.
- Page 3 6. Unplug any wire connections and remove the bumper. Fig 3 Fig 4 Westin Automotive Products, Inc. Thank you for choosing Westin products 320 W. Covina Blvd for additional installation assistance please call San Dimas, Ca. 91773 Customer Service (800) 793-7846 www.westinautomotive.com...
- Page 4 Note: Fog light brackets “A” and “B” belong to the driver side while fog light brackets “C” and “D” belong to the pas- senger side 9. If equipped, reinstall sensors on to the HDX Bandit bumper. Note: A separate parts kit will need to be purchased in order to install parking sensors. Refer to PN 58-30005 for instructions.
- Page 5 M12 bolt side facing towards the front of the vehicle. See Figures 9-11. Fig. 7 Fig. 8 Mount to frame Driver side shown Westin Automotive Products, Inc. Thank you for choosing Westin products 320 W. Covina Blvd for additional installation assistance please call San Dimas, Ca. 91773 Customer Service (800) 793-7846 www.westinautomotive.com P.N.: 75-5831135-RevA...
- Page 6 Passenger side will require (2) Short M12 Hex Head Bolts Driver side shown Westin Automotive Products, Inc. Thank you for choosing Westin products 320 W. Covina Blvd for additional installation assistance please call San Dimas, Ca. 91773 Customer Service (800) 793-7846 www.westinautomotive.com...
- Page 7 12. With help, lift the HDX Bumper (1) into place between the Mount Brackets (2,3) and attach with supplied M12 Hardware. See Figure 12. CAUTION: The HDX Bandit Bumper is ver y heavy. The use of a floor jack or hoist is r ecommended.
- Page 8 Hardware to 30-35 ft-lbs, M12 to 45-50 ft-lbs. Fig 13 Fig 14 Trim Inner Fender liner Westin Automotive Products, Inc. Thank you for choosing Westin products 320 W. Covina Blvd for additional installation assistance please call San Dimas, Ca. 91773 Customer Service (800) 793-7846 www.westinautomotive.com...
-
Page 9: Installation Complete
STAINLESS STEEL PRODUCTS CAN BE CLEANED WITH MILD SOAP AND WATER. STAINLESS STEEL POLISH SHOULD BE USED TO POLISH SMALL SCRATCHES. GLOSS BLACK FINISHES SHOULD BE CLEANED WITH MILD SOAP AND WATER. Westin Automotive Products, Inc. Thank you for choosing Westin products 320 W. Covina Blvd for additional installation assistance please call San Dimas, Ca. 91773 Customer Service (800) 793-7846 www.westinautomotive.com... - Page 10 AND SAFETY. DRILLING: Most Westin products do not require drilling for installation. If drilling is defined as required, use caution when drilling a vehicle. FAILURE TO REVIEW AN AREA TO BE DRILLED MAY RESULT IN PERSONAL INJURY AND/OR INJURY TO OTHERS AS WELL AS VEHICLE DAMAGE.
Need help?
Do you have a question about the HDX Bandit and is the answer not in the manual?
Questions and answers