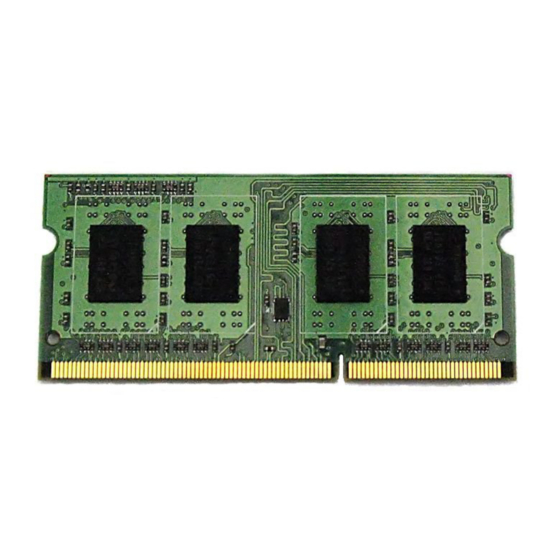
Overland Storage SnapServer XSD 40 Remove & Replace / Add-On Instructions
Add-on/spare dimm instructions
Hide thumbs
Also See for SnapServer XSD 40:
- Configuration manual (16 pages) ,
- Instructions (4 pages) ,
- Quick start manual (4 pages)
Table of Contents
Advertisement
Quick Links
Add-on/Spare DIMM Instructions
This document describes how to add an additional or remove
and replace an existing DIMM (Dual In-line Memory Module)
in a SnapServer XSD 40 from Overland Storage.
WARNING:
To reduce the risk of electric shock or damage to
equipment, always remove any power cords while working
with the unit.
WARNUNG:
Um das Risiko eines elektrischen Schlags oder
Schäden am Gerät zu vermeiden, ziehen Sie stets den
Netzstecker, bevor Sie an der Einheit arbeiten.
AVERTISSEMENT:
Pour réduire le risque de choc électrique
ou endommagement de l'équipement, retirez toujours les
cordons électriques en travaillant avec l'appareil.
CAUTION:
While working with the unit, observe standard
Electrostatic Discharge (ESD) precautions to prevent damage
to micro-circuitry or static-sensitive devices.
Register the Add-on DIMM
NOTE: If you are only replacing an existing DIMM, skip ahead to
the next section,
When adding a second DIMM to your unit, you must first
register it to activate the warranty. Technical and warranty
support are not available until this is done:
1. Go to the Overland Storage website
http://www.overlandstorage.com/
Selec
2.
t
Service & Support > My Products
3. At the
Site
Login, enter your e-mail address and
password, and click
4. Click the
Manage Products
5. From the Product Selector drop-down list, select the
XSD 40 in which you are installing the extra DIMM.
6. Click
Add a Component
7. Enter the DIMM information.
8. Click
Save & Exit
.
IMPORTANT: Your warranty certificate will be emailed to you.
Follow the instructions included in the email to complete the
registration process.
10400592-001
.
GO
.
button.
.
©2014 Overland Storage, Inc.
SnapServer
XSD 40
®
Enter
Enter
5325301507-XSD 40 s/n: 0247
Page 1 of 4
Advertisement
Table of Contents

Summary of Contents for Overland Storage SnapServer XSD 40
- Page 1 Add-on/Spare DIMM Instructions This document describes how to add an additional or remove and replace an existing DIMM (Dual In-line Memory Module) in a SnapServer XSD 40 from Overland Storage. WARNING: To reduce the risk of electric shock or damage to equipment, always remove any power cords while working with the unit.
- Page 2 1. Press the latches on each end of the DIMM. 2. Unseat the DIMM by pulling it straight out. 3. If desired, repeat Steps 1–2 to replace the second DIMM. DIMM slot 10400592-001 Page 2 of 4 ©2014 Overland Storage, Inc.
- Page 3 4. Reinstall the thumb screw on the back of the unit to secure the panel. IMPORTANT: If this is a new appliance install, continue with the SnapServer XSD 40 Quick Start Guide instructions. Reattach Cables and Power Cord 1. Reattach all cables to the same connections as before.
- Page 4 Return Old Parts to Overland 1. Place the old part in the anti-static bag and put it in the replacement part’s box. 2. Use an RMA to return the part to Overland Storage. For return shipping details and RMA number, go to: http://docs.overlandstorage.com/return-instructions http://support.overlandstorage.com...


Need help?
Do you have a question about the SnapServer XSD 40 and is the answer not in the manual?
Questions and answers