
Related Manuals for Dobot CR Series


Summary of Contents for Dobot CR Series
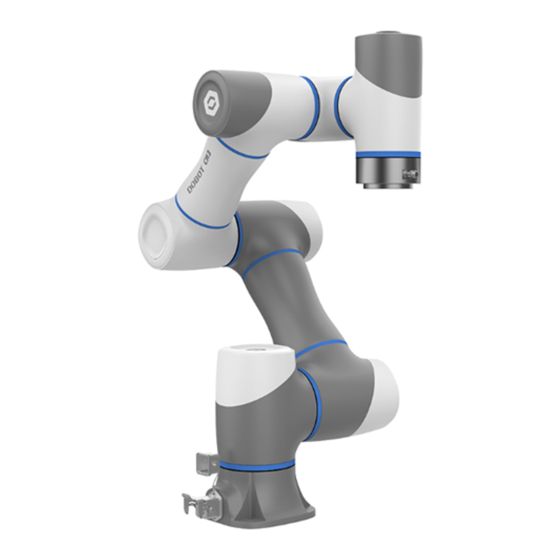
- Page 1 Dobot CR Series Robot APP User Guide Issue: V3.7 Date: 2020-11-13 Shenzhen Yuejiang Technology Co., Ltd...
- Page 2 Even if follow this document or any other related instructions, Damages or losses will be happening in the using process, Dobot shall not be considered as a guarantee regarding all security information contained in this document.
- Page 3 Dobot CR Series Robot APP User Guide Issue V2 (2020-07-08) User Guide Copyright © Yuejiang Technology Co., Ltd...
-
Page 4: Preface
Dobot CR Series Robot APP User Guide Preface Purpose This Document describes how to use Dobot CR series robots with APP, making it easy for users to fully understand and use it. Intended Audience This document is intended for: Customer ... -
Page 5: Table Of Contents
Dobot CR Series Robot APP User Guide Contents Precautions........................i Preface..........................iii Function Description of Software................3 Fast Connection........................5 Setting..........................5 Set Jog........................5 Set Playback......................6 Coor User......................7 Coor Tool......................10 Safe Set........................13 Remote Control....................16 Robot Pose......................20 Installation......................21 Manufactory Set.................... - Page 6 Dobot CR Series Robot APP User Guide Modbus Register Description................67 Command Description..................68 Issue V2 (2020-07-08) User Guide Copyright © Yuejiang Technology Co., Ltd...
-
Page 7: Function Description Of Software
Dobot CR Series Robot APP User Guide Function Description of Software The robot supports Android/iOS tablet operation and PC operation. This manual uses Android tablet as an example. The interface is shown in , and its detailed description is shown in Figure 1.1... - Page 8 Dobot CR Series Robot APP User Guide Description Manager: Set parameters Monitoring module shortcuts Set speed ratio Robotic arm enable button The icon is green when robot motor is in the enabled status Tshe icon is red when robot motor is in the disabled status...
-
Page 9: Fast Connection
Dobot CR Series Robot APP User Guide for a long time, the screen is automatically locked. The unlock password is 000000 by default. Fast Connection Prerequisites The controller has been connected to the WiFi module. The APP supports WiFi function. -
Page 10: Set Playback
Dobot CR Series Robot APP User Guide Set Playback Set the maximum velocity, acceleration, and jerk in the Joint and Cartesian coordinate system when running robot programs, as shown in Figure 1.3. Figure 1.3 Playback parameters When doing jogging or playback, the method calculating the velocity and acceleration for each axis (in Joint or Cartesian coordinate system) is shown as follows. -
Page 11: Coor User
Dobot CR Series Robot APP User Guide Figure 1.4 Jump parameters Coor User When the position of workpiece is changed or a robot program needs to be reused in multiple processing systems of the same type, you can create coordinate systems on the workpiece to simplify programming. - Page 12 Dobot CR Series Robot APP User Guide Figure 1.5 Point Line: Confirm a straight line by any two points A and B. The direction from A to B is defined as the positive direction of Y-axis, The Z-axis of Tool coordinate system of which point A is the origin is projected into the vertical plane that confirmed by points A and point B, we can define it as the positive direction of Z-axis.
- Page 13 Dobot CR Series Robot APP User Guide Figure 1.6 Line Area: User coordinate system is created by three-point calibration method. Move the robot to three points A(x1, y1, z1), B(x2, y2, z2), and C(x3, y3, z3). Point A is defined as the origin and the line from point A to Point B is defined as the positive direction of X-axis.
-
Page 14: Coor Tool
Dobot CR Series Robot APP User Guide Take the establishment of User 1 coordinate system as an example. Prerequisites The robot has been powered on. The robot is enabled. The robot is in the Cartesian coordinate system. ... - Page 15 Dobot CR Series Robot APP User Guide each gripper to a Tool coordinate system. There are totally 10 groups of Tool coordinate systems. Tool 0 coordinate system is the predefined Tool coordinate system which is located at the robot flange and cannot be changed.
- Page 16 Dobot CR Series Robot APP User Guide Figure 1.10 Tool Coordinate page NOTE Rx, Ry, Rz are the orientation data, which are designated by rotating the tool center point (TCP) around the X, Y, Z axes under the selected Tool coordinate system.
-
Page 17: Safe Set
Dobot CR Series Robot APP User Guide Safe Set In the safety setting module, you can set safety parameters such as collision detection, power control, joint braking, etc. This module must be operated with the programmer authority or manager authority. - Page 18 Dobot CR Series Robot APP User Guide Figure 1.12 Safety Hit Parameter Description Avoid speed Range: 1~500, recommend value: 100 Avoid distance Range: 0~200, recommend value: 80 Avoid acceleration Range: 1~50000, recommend value:1000 Recovery speed Range: 1~500, Recommend value: 100...
- Page 19 Dobot CR Series Robot APP User Guide Figure 1.13 Joint brake 1.2.5.4 Power Control When the emergency stop switch is pressed, the robot will power off. You can click Power On on the Setting > Safe Set > Power control page to power on the robot. Also, you can power off the robot on this page.
-
Page 20: Remote Control
Dobot CR Series Robot APP User Guide The load is weight of the end effector and work piece, which must not exceed the maximum load. You can set the load on the Setting > Safe Set > Terminal load page. - Page 21 Dobot CR Series Robot APP User Guide I/O interface Description DI 12 Continue to run DI 13 Pause running in the I/O mode DI 14 Stop running and exit the I/O mode DI 15 Start to run in the I/O mode...
- Page 22 Dobot CR Series Robot APP User Guide Figure 1.16 Remote control page Right now, only the emergency stop button and the real-time coordinates displaying section are available. The robot will move as the selected offline project. If the stop signal is triggered, the remote I/O mode will be invalid.
- Page 23 Dobot CR Series Robot APP User Guide Register address (Take a PLC Register address (Robot Description as an example) system) 00005 Emergency stop and exit the remote Modbus mode 00006 Clear alarm iscrete input register 10001 Auto-exit 10002 Ready status...
-
Page 24: Robot Pose
Dobot CR Series Robot APP User Guide Figure 1.17 Remote control page Right now, only the emergency stop button and the real-time coordinates displaying section are available. The robot will move as the selected offline project. If the stop signal is triggered, the remote Modbus mode will be invalid. -
Page 25: Installation
Dobot CR Series Robot APP User Guide Figure 1.18 Posture setting Package Point: Click to move robot to the factory point. Home Point: Long press to move robot the homing point. Custom Posture: Click to move robot to the user-defined point. -
Page 26: Manufactory Set
Dobot CR Series Robot APP User Guide Figure 1.19 Installation setting Manufactory Set Generally, this module is used by Dobot support engineer or factory member with manager authority. The details will not be described in this topic. Software Set This module is operated with manager authority. - Page 27 Dobot CR Series Robot APP User Guide 1.2.10.2 File Import/Export This function is used to import or export file from controller which can improve reusability. Figure 1.21 Import/export file 1.2.10.3 WiFi Set The robot system can be communicated with external equipment by the WiFi module. You can modify the WiFi name and password on the Setting >...
- Page 28 Dobot CR Series Robot APP User Guide 1.2.10.4 IP Setting The robot system can be communicated with external equipment by the Ethernet interface which supports TCP, UDP and Modbus protocols. The default IP address is 192.16.5.1. In real applications, if the TCP or UDP protocol is used, the robot system can be a client or a server based on site requirements;...
-
Page 29: Process
Dobot CR Series Robot APP User Guide Figure 1.24 User manage Process This module must be operated with programmer authority or manager authority. Drag Teach You can drag robot to teach by APP or function keys on the end of robot. -
Page 30: Monitor
Dobot CR Series Robot APP User Guide Button Description Click this button to open or close drag mode Click this button to save trajectory Click this button to start or stop playback. Select the recorded trajectory, and click Path playback to start trajectory playback... - Page 31 Dobot CR Series Robot APP User Guide Figure 1.26 I/O Monitor There are three features: Output, monitor and simulation. Output: Set the digital output or analog output with the operator authority or higher authority. Monitor: Check the status of the input and output with the observer authority or higher ...
-
Page 32: Robot Status
Dobot CR Series Robot APP User Guide Figure 1.27 Simulation Robot Status You can check data of the robot, joint load, and running log. Figure 1.28 Robot status Terminal This module must be operated with programmer authority or manager authority. - Page 33 Dobot CR Series Robot APP User Guide 1.4.3.1 Custom End You can install gripper plug-in, enable and control it on the Monitor > Terminal > Custom end page. In this topic, we take DH gripper as an example to describe.
- Page 34 Dobot CR Series Robot APP User Guide Figure 1.30 Setting page Figure 1.31 Control DH gripper 1.4.3.2 Terminal Hot Key After installing the gripper, you can set the end-effector shortcut key on this page, so that you can control the gripper by the control end effector button on the end of the robot.
-
Page 35: Programming
Dobot CR Series Robot APP User Guide Figure 1.32 Terminal hot key Programming This module must be operated with the programmer authority or manager authority. Project Description The robot program is managed in project form, including teaching points list, global variables, and program files. - Page 36 Dobot CR Series Robot APP User Guide Figure 1.34 Program Description Figure 1.35 Programming process Script Programming Script programming uses Lua as the programming language, as shown in Figure 1.36. Issue V2 (2020-07-08) User Guide Copyright © Yuejiang Technology Co., Ltd...
- Page 37 Dobot CR Series Robot APP User Guide Figure 1.36 Script programming Table 1.5 Button description Button Description Write program Set teaching points Command area, you can program with those commands Undo Recover Go back to the beginning of a line...
-
Page 38: Program Example
Dobot CR Series Robot APP User Guide Button Description Align code Delete thread Add thread. Up to 5 threads can be added Save program Blockly Program Blockly is graphical programming. The operation of the robot can be programmed through puzzles which is intuitive and easy to understand. - Page 39 Dobot CR Series Robot APP User Guide Figure 1.38 Select project template and name the project Figure 1.39 Script program page Issue V2 (2020-07-08) User Guide Copyright © Yuejiang Technology Co., Ltd...
- Page 40 Dobot CR Series Robot APP User Guide Figure 1.40 Set speed Arm is the arm orientation, Tool is tool coordinate system, User is User coordinate system. Figure 1.41 Save teaching points Issue V2 (2020-07-08) User Guide Copyright © Yuejiang Technology Co., Ltd...
- Page 41 Dobot CR Series Robot APP User Guide Table 1.6 Button description Button Description Add a teaching point Delete a teaching point Cover a point you can select a teaching point and click Cover to cover the current teaching point Move to a point...
- Page 42 Dobot CR Series Robot APP User Guide Figure 1.43 Finish programming Table 1.7 Button description Button Description Start button, click it to run program Debug button Click once: Start to debug a program, turns into Click twice: Start to run a program,...
- Page 43 Dobot CR Series Robot APP User Guide Button Description This button is valid only if turns into Issue V2 (2020-07-08) User Guide Copyright © Yuejiang Technology Co., Ltd...
-
Page 44: Program Language
Dobot CR Series Robot APP User Guide Program Language CC series controller encapsulates the robot dedicated API commands for programming with Lua language. This section describes commonly used commands for reference. Arithmetic Operators Table 2.1 Arithmetic operator Command Description Addition... -
Page 45: General Keywords
Dobot CR Series Robot APP User Guide Table 2.3 Logical operator Command Description Logical OR operator Logical NOT operator Logical AND operator General Keywords Table 2.4 General keyword Command Description break Break out of a loop local Define a local variable, which is available in the... -
Page 46: Motion Commands
Dobot CR Series Robot APP User Guide The robot global variables can be defined in the global.lua file, including global functions, global points, and global variables. Global function: function exam() print("This is an example") Define a joint coordinate point, of which R sets to 1, D sets to -1, N sets to 0, Cfg ... - Page 47 Dobot CR Series Robot APP User Guide Command Description in a straight line under the Cartesian coordinate system Move from the current position to the offset position in a point-to-point mode under the Cartesian coordinate system MoveJR Move from the current position to the offset position...
- Page 48 Dobot CR Series Robot APP User Guide Description Move from the current position to a target position in a point-to-point motion under the Joint coordinate system Required parameter: P: Indicate the joint angle of the target point, which cannot be obtained Parameter from the TeachPoint page.
- Page 49 Dobot CR Series Robot APP User Guide Table 2.11 Arc3 command SYNC Function Arc3(P1,P2, ” User=1 Tool=2 CP=1 SpeedS=50 AccelS=20 =1”) Description Move from the current position to a target position in an arc interpolated mode under the Cartesian coordinate system...
- Page 50 Dobot CR Series Robot APP User Guide Tool: Indicate Tool coordinate system. Value range: 0 - 9 SpeedS: Velocity rate. Value range: 1 - 100 AccelS: Acceleration rate. Value range: 1 - 100 Arch: Arch index. Value range: 0 - 9 ...
- Page 51 Dobot CR Series Robot APP User Guide SYNC: Synchronization flag. Value range: 0 or 1. If SYNC is 0, it indicates asynchronous execution, this command has a return immediately after calling it, regardless of the command process. If SYNC is 1, it indicates synchronous execution. After calling this...
- Page 52 Dobot CR Series Robot APP User Guide Table 2.16 GoR command SYNC Function GoR({OffsetX, OffsetY, OffsetZ},” User=1 Tool=2 CP=1 Speed=50 Accel=20 =1 ”) Description Move from the current position to the offset position in a point-to-point mode under the Cartesian coordinate system...
-
Page 53: Motion Parameter Commands
Dobot CR Series Robot APP User Guide Example Go(P1) MoveJR({20,20,10,0},"SYNC=1") Table 2.18 MoveR command Function MoveR({OffsetX, OffsetY, OffsetZ},” User=1 Tool=2 CP=1 SpeedS=50 AccelS=20 SYNC =1”) Description Move from the current position to the offset position in a straight line under the Cartesian... - Page 54 Dobot CR Series Robot APP User Guide Command Description when the motion mode is Move, Jump, Arc3, or Circle3 Arch Set the index of sets of parameters (StartHeight, zLimit, EndHeight) in Jump mode Set the continuous path function LimZ Set the maximum lifting height in the Jump mode Table 2.20 Accel command...
- Page 55 Dobot CR Series Robot APP User Guide Go(P1) The robot moves to point P1 with 20% velocity rate Table 2.23 SpeedS command Function SpeedS(R) Description Set the acceleration rate. This command is valid only when the motion mode is Move, Arc3, or...
-
Page 56: Six-Axis Force Sensor Commands
Dobot CR Series Robot APP User Guide Figure 2.1 Continuous path Table 2.26 LimZ command Function LimZ(zValue) Description Set the maximum lifting height in Jump mode Parameter zValue: The maximum lifting height which cannot exceed the Z-axis limiting position of the... - Page 57 Dobot CR Series Robot APP User Guide Table 2.29 Six-axis force sensor spiral command Function Spiral(P, User, Tool, Direction, SpeedC, Force, Insertion, Perturn, PeckMode, MaxValue) Description The robot arm performs a spiral motion between the current position and the specified position to find the hole position.
-
Page 58: Input/Output Commands
Dobot CR Series Robot APP User Guide Force: Rotation threshold (N) RotationSpeed: Rotation speed (°/s) MaxTorque: Maximum torque (Nm) PeckMode: Point contact mode (ON/OFF) MaxValue: Maximum spiral radius (mm) Example Rotation (P1, “User=1 Tool=2 Dirction=0 SpeedC =5 Force =10 RotationSpeed=5 MaxTorque=1 PeckMode=OFF MaxValue =45”) - Page 59 DOExecute Set the status of the digital output port (Immediate command) NOTE Dobot robot system supports two kinds of commands: Immediate command and queue command: Immediate command: The robot system will process the command once received regardless of whether there is the rest commands processing or not in the current controller;...
-
Page 60: Program Managing Commands
Dobot CR Series Robot APP User Guide Example DO(1,ON) Set the status of the digital output port 1to ON Table 2.35 Digital output command (Immediate command) Function DOExecute(index, ON | OFF) Description Set the status of digital output port (Immediate command) Parameter index: Digital output index. - Page 61 Dobot CR Series Robot APP User Guide Table 2.38 Sleep command Function Sleep(time) Description Set the delay time for all commands Parameter time: Delay time. Unit: ms Example while true do Speed(100) Go(P1) sleep(3) Speed(100) Accel(40) Go(P2) sleep(3) Table 2.39 Pause command...
- Page 62 Dobot CR Series Robot APP User Guide Description Start timing after all commands before this command are executed completely. Use in conjunction with ElapsedTime() command For example: Get the execution time that a piece of code takes Parameter None Return...
-
Page 63: Pose Getting Command
Dobot CR Series Robot APP User Guide Return Current time Example Go(P2, " Speed=100 Accel=100") local time1=Systime() for i=1,10 do Jump(P1, " Speed=100 Accel=100 Start=0 End=0 ZLimit=185") Jump(P2, " Speed=100 Accel=100 Start=0 End=0 ZLimit=185") local time2=Systime() local time = time2 - time1... -
Page 64: Tcp
Dobot CR Series Robot APP User Guide Return Joint coordinate of the current pose Example local armPose local joint = GetAngle() --Get the current pose local liftPose = {armOrientation = armPose , joint = {joint.joint[1], joint.joint[2], joint.joint[3], joint.joint[4]}, tool = 0, user = 0} Table 2.45 Create TCP command... - Page 65 Dobot CR Series Robot APP User Guide 4: If the robot is set as a client, it indicates that the connection is wrong. If the robot is set as a server, it indicates that receiving data is wrong Example Please refer to Program 2.1 and Program 2.2...
- Page 66 Dobot CR Series Robot APP User Guide Table 2.49 Release TCP network command Function TCPDestroy(socket) Description Release a TCP network Parameter socket: Socket object Return 0: Releasing TCP is successful 1: Releasing TCP is failed Example Please refer to Program 2.1 and Program 2.2 NOTICE Only a single TCP connection is supported.
- Page 67 Dobot CR Series Robot APP User Guide else print("Create failed ".. err) TCPDestroy(socket) else print("Create failed ".. err) Program 2.2 TCP client demo local ip="192.168.5.25" // External equipment such as a camera is set as the server local port=6001 // Server port...
-
Page 68: Udp
Dobot CR Series Robot APP User Guide else print("Create failed ".. err) Table 2.50 Create UDP network command Function err, socket = UDPCreate(isServer, IP, port) Description Create a UDP network Only a single connection is supported Parameter isServer: Whether to create a server. 0: Create a client; 1: Create a server... - Page 69 Dobot CR Series Robot APP User Guide Recbuf: Data buffer Please refer to Program 2.3 and Program 2.4 Example Table 2.52 Send data command Function UDPWrite(socket, buf, timeout) Description The robot as a client sends data to a server The robot as a server sends data to a client...
- Page 70 Dobot CR Series Robot APP User Guide Go(P2) print(buf) else print("Read error ".. err) break; else print("Create failed ".. err) Program 2.4 UDP client demo local ip="192.168.1.25" // IP address of the external equipment as a server local port=6200 // server port...
-
Page 71: Modbus
Dobot CR Series Robot APP User Guide Modbus Modbus Register Description Modbus protocol is a serial communication protocol. The robot system can communicate with external equipment by this protocol. Here, External equipment such as a PLC is set as the Modbus master, and the robot system is set as the salve. - Page 72 Dobot CR Series Robot APP User Guide Discrete input register Discrete input register Data type Description address (e.g.: PLC) address(Robot system) 11000-14096 999-4095 User-defined Input register Table 2.55 Input register description Input register address Input register address Data type Description (e.g.: PLC)
- Page 73 Dobot CR Series Robot APP User Guide Table 2.58 Set coil register command Function SetCoils(addr, count, table) Description Set the coil register in the Modbus slave This command is not supported when the coil register address is from 0 to 5 Parameter Addr: Starting address of the coils to set.
- Page 74 Dobot CR Series Robot APP User Guide “U32”: Read 32-bit unsigned integer (four bytes, occupy two registers) “F32”: Read 32-bit single-precision floating-point number (four bytes, occupy two registers) “F64”: Read 64-bit double-precision floating-point number (eight bytes, occupy four ...
- Page 75 Dobot CR Series Robot APP User Guide Description Set the holding register in the Modbus slave Parameter addr: Starting address of the holding registers to set. Value range: 0 - 4095 count: Number of the holding registers to set. Value range: 0 to 4096-addr...
Need help?
Do you have a question about the CR Series and is the answer not in the manual?
Questions and answers