Scania DC16 Operato's Manual
Xpi industrial engine
Hide thumbs
Also See for DC16:
- Installation manual (59 pages) ,
- Installation manual (20 pages) ,
- Installation manual (20 pages)
Table of Contents
Advertisement
Quick Links
Important information
Serious risk of injury
When working on the engine, for example when adjusting the drive belts and clutch, or when changing oil,
it is important not to start the engine. The engine could be damaged, but more importantly there is a serious
risk of injury.
For this reason, always secure the starting device or disconnect a battery cable before working on the engine.
This is especially important if the engine has a remote starter or automatic starting.
WARNING!
This warning symbol and text can be found next to those maintenance items where it is particularly impor-
tant to bear in mind the risk of injury.
Operator's manual
DC16 XPI Industrial engine
en-GB 2 719 634
Issue 12.0
IMPORTANT!
The owner is responsible for making sure that maintenance is carried out on time and in accordance with
the instructions.
The owner must entrust the maintenance, renewal and repair of emission-related components and systems
to a qualified workshop or person.
Advertisement
Table of Contents

Related Manuals for Scania DC16


Summary of Contents for Scania DC16
- Page 1 This warning symbol and text can be found next to those maintenance items where it is particularly impor- tant to bear in mind the risk of injury. Operator's manual DC16 XPI Industrial engine en-GB 2 719 634 Issue 12.0 IMPORTANT! The owner is responsible for making sure that maintenance is carried out on time and in accordance with the instructions.
-
Page 2: Table Of Contents
Particulate filter maintenance intervals..40 Scania Assistance ..... .109 Lubrication system ..... 41 General tightening torques for screw joints .110... -
Page 3: Start Of Warranty
The more we know about you, your company and your equipment, the more effectively we can adapt our services to you. If you have started to use a new Scania engine, it is very important that you send in the war- ranty start report to us immediately. -
Page 4: Engines
If any such part fails during the period of sequent owner, of a new Scania industrial diesel warranty coverage, it shall be repaired or re- engine (“You”) that the engine: placed by the engine manufacturer according to Subsection (4) below. -
Page 5: Parts Covered By The Warranty
Scania engines engine warranty for industrial engines Any warranted part which is scheduled for shall not be liable under this article to war- replacement as required maintenance in Sca- rant failures of warranted parts caused by the nia's written instructions for maintenance... -
Page 6: General Warranty Limitations
In addition, as the engine owner, You are respon- If other than Scania parts are used for mainte- sible for the performance of all scheduled main- nance, repair or replacement, the owner should... -
Page 7: Specific Warranty Exclusions
The replacement of expendable maintenance copy of the California Emission Control Warran- items such as filters, hoses, belts, oil, ther- ty Statement applicable to each new Scania en- mostat, exhaust system and coolant made in gine purchased. connection with scheduled maintenance ser- vices once these parts have been replaced. -
Page 8: California Emission Control Warranty Statement
Scania CV AB will repair your heavy-duty off- ty process. The ARB suggests that you pres- road engine at no cost to you including diagno- ent your off-road engine to a Scania CV AB sis, parts and labor. dealer as soon as a problem exists. The war- ranty repairs should be completed by the dealer as expeditiously as possible. -
Page 9: Scr Catalytic Converter
State of California to be a hazardous waste subject to Title 22, Califor- nia Code of Regulations. Before disposing of hazardous waste, review and follow all perti- nent federal and California requirements. OPM 300 en-GB © Scania CV AB 2020, Sweden... - Page 10 SCR catalytic converter. • Use a disposable overall and dispose of it properly after machining. • Eating, drinking or smoking while working is not permitted. OPM 300 en-GB © Scania CV AB 2020, Sweden...
-
Page 11: Introduction
• Modifications affecting the exhaust and in- The information in this Operator's manual was take systems must be approved by Scania. correct at the time of going to press. Scania re- serves the right to make alterations without prior Otherwise, the instructions in the Operator's notice. -
Page 12: Power Classes
Power classes Power classes Scania supplies engines in five different power classes: ICFN, Continuous service: Intended for contin- uous use and an unlimited number of operational hours per year at a total load factor of 100%. IFN, Intermittent service: Intended for periodic use, where the rated power is available for one hour per three-hour period. - Page 13 Power classes IFN, Intermittent service PRP, Prime power COP, Continuous Power ESP, Emergency standby power OPM 300 en-GB © Scania CV AB 2020, Sweden...
-
Page 14: Environment And Safety
Warning! Environmental responsibility All advisories preceded by Warning! are very important. They warn of serious faults and incor- Scania develops and produces engines that are as rect operation that could lead to personal injury. environmentally-friendly as possible. Scania has Example:... -
Page 15: Warnings And Advisories
This inspection should be done to detect fuel, oil there must be an effective device to extract ex- or coolant leaks, or anything else that may re- haust gases and crankcase gases. quire corrective action. OPM 300 en-GB © Scania CV AB 2020, Sweden... - Page 16 Parts of the body, clothes or dropped tools can get caught in rotating parts such as the fan and cause injury. For personal safety all ro- tating parts and hot surfaces must be fitted with guards. OPM 300 en-GB © Scania CV AB 2020, Sweden...
- Page 17 Particularly hot parts are engine ical attention. manifolds, turbochargers, oil sumps, as well as hot coolant and oil in pipes and hoses. • Change out of clothes which have spills on. OPM 300 en-GB © Scania CV AB 2020, Sweden...
- Page 18 Hot oil can cause burns and skin irritation. Wear Maintenance and repairs of injection equipment protective gloves and goggles when changing are to be carried out by an authorised Scania hot oil. workshop. Make sure that there is no pressure in the lubri- Always use Scania spare parts for the fuel and cation system before starting work on it.
- Page 19 Wear protective gloves and eye protection. Always use Scania spare parts for the fuel and If sulphuric acid comes in contact with the skin: electrical systems. Scania spare parts are de- Wash with soap and plenty of water.
-
Page 20: Engine Data Plate
Performance and certification code. The code indicates, together with the applica- tion code, the normal gross engine out- put. Example of an engine data plate. Code for application. A means for gen- eral industrial use. OPM 300 en-GB © Scania CV AB 2020, Sweden... -
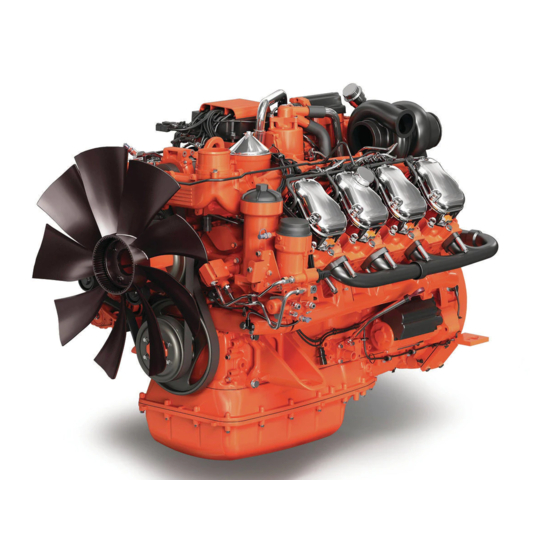
Page 21: Component Identification
Component identification Component identification Engine The illustration shows a normal version of a DC16 engine. The engine ordered may have different equipment. Centrifugal oil cleaner Oil filler Oil dipstick Nipples for draining and filling coolant (one on each side). Fuel filter... -
Page 22: Scr System
Coolant hose for tank and pump heating Exhaust gas temperature sensor sensor with control unit SCR catalytic converter Coolant valve sensor with control unit Reductant return hose Reductant tank 1. DC16 084A/384A/085A/385A only. OPM 300 en-GB © Scania CV AB 2020, Sweden... -
Page 23: Stage V
Oxidation catalytic converter Reductant pressure hose Particulate filter Reductant tank Exhaust gas temperature sensor Coolant hose for tank and pump heating Reductant doser Coolant hose, return from tank and pump heating OPM 300 en-GB © Scania CV AB 2020, Sweden... -
Page 24: Starting And Running
It is used when refuelling at a filling station. A filler filter with- out a magnet is also supplied for use when filling manually. OPM 300 en-GB © Scania CV AB 2020, Sweden... -
Page 25: Checks Before Running
Reductant pump suction nipple. Checks before running Carry out daily maintenance as described in the maintenance schedule prior to operation. See Maintenance interval. OPM 300 en-GB © Scania CV AB 2020, Sweden... -
Page 26: Starting The Engine
Never use starter gas or similar agents to help start the engine. This can cause an explosion in Scania recommends that an engine heater should the intake manifold and possible injury. be used if the engine will be used at temperatures below -10°C (14°F) or at an altitude of more than... - Page 27 2-10 minutes. 1. Applies only to engines certified according to Tier 4. The engine resumes normal torque after reduct- ant has been filled to a level of at least 20%. OPM 300 en-GB © Scania CV AB 2020, Sweden...
- Page 28 Flashes rapidly Torque is reduced (2 Hz) by 1% per minute to 50% of the highest torque. The engine speed is reduced to 60% of the nominal en- gine speed. OPM 300 en-GB © Scania CV AB 2020, Sweden...
- Page 29 Note: The torque reduction applies only to engines that are certified according to Tier 4. Some emergency vehicles do not have torque re- duction. OPM 300 en-GB © Scania CV AB 2020, Sweden...
- Page 30 – Stage V Note: The symbol and behaviour of the warning lamp depend on the installation of the engine in the machine. The Scania recommendation will lead to the behaviour and symbol described here, but this may differ between different machines. Warning...
- Page 31 Note: The symbol and behaviour of the warning lamp depend on the installation of the engine in the machine. The Scania recommendation will lead to the behaviour and symbol described here, but this may differ between different machines. Warning lamp...
- Page 32 At an in- creased load the coolant temperature rises to the normal value. OPM 300 en-GB © Scania CV AB 2020, Sweden...
- Page 33 45 minutes or less and is deactivated automati- cally. If the request is not confirmed, the engine is switched off after approx. 45 minutes, if the engine has been configured with engine shut- down. OPM 300 en-GB © Scania CV AB 2020, Sweden...
-
Page 34: Engine Shutdown
Run the engine without a load for a few min- utes if it has been run continuously with a heavy load. Switch off the engine. OPM 300 en-GB © Scania CV AB 2020, Sweden... -
Page 35: Checks After Running
The exhaust gas aftertreatment may be damaged if there is water or debris intrusion. Ensure that the transport protection is in place and remains there throughout the transport. OPM 300 en-GB © Scania CV AB 2020, Sweden... -
Page 36: Maintenance
• XL maintenance: Includes all maintenance items in the form. During a period, the sequence is S-M-S-L-S-M- S-L-S-M-S-XL. 1000 1500 2000 2500 3000 3500 4000 4500 5000 5500 6000 OPM 300 en-GB © Scania CV AB 2020, Sweden... - Page 37 Maintenance IMPORTANT! On delivery a Scania engine is optimised for its application. However, regular maintenance is necessary to: • prevent unplanned stops • extend the service life of the engine • maximise the long-term emission perfor- mance of the engine •...
-
Page 38: Engines With Few Hours Of Operation
Clean the engine with hot water. Also use a de- greasing agent, if necessary. Clean within the marked area. Do not spray water on the engine control unit, which is marked in the illustration. OPM 300 en-GB © Scania CV AB 2020, Sweden... -
Page 39: Maintenance Interval
2. XPI engines where Stage3/Tier3 or lower emissions legislation applies. 3. XPI engines where Stage4/Tier4 or lower emissions legislation applies. 4. Applies only to DC16 072. 5. The change interval depends heavily on the average load and application type. See the Maintenance interval, particulate filter section on the next page. -
Page 40: Particulate Filter Maintenance Intervals
Maintenance Particulate filter maintenance intervals IMPORTANT! Scania recommends using Scania LDF-4 engine oil. The graph can only be used if this condition is met. 16000 14000 12000 10000 8000 6000 4000 2000 The diagram shows calculated driving time before particulate filter renewal must be carried out on engines with the following 3 types of dynamic load: •... -
Page 41: Lubrication System
Lubrication system Lubrication system Oil grade Scania LDF stands for the Scania Long Drain Field test standard. Scania LDF oils have been carefully selected after extensive testing. The ap- proval is only granted to the highest grade engine oils available on the market. - Page 42 The illustration describes which ambient temperature in °C the viscosity class can handle for Scania-approved and market approved oil grades. Note that the Scania-approved oil grades have a greater temperature range than market approved oil grades.
- Page 43 EN950/EN15940/MK1 standard For operation at extremely low outdoor tempera- tures: Consult your nearest Scania workshop on how to avoid starting difficulties. If the engine is used in areas of the world where engine oil with ACEA or API classification is not available, the oil grade must be measured in actual operation.
- Page 44 However, there are only labels for oils with Scania LDF approval and oil grade ACEA E7. Stick on a new label if the oil type or oil grade is changed in favour of any of the oil types above.
-
Page 45: Oil Analysis
Lubrication system Oil analysis To be able to extend the oil change intervals us- ing an oil analysis, Scania LDF-3 and LDF-2 oils must be used. Certain laboratories offer engine oil analysis. The following conditions must remain fulfilled when the oil is changed: •... -
Page 46: Checking The Oil Level
Maximum angles of inclina- tion during operation 25° Maximum permissible angles of inclination dur- ing operation vary, depending on the type of oil 25° sump. See illustration. 30° 30° 25° 25° 30° 30° OPM 300 en-GB © Scania CV AB 2020, Sweden... -
Page 47: Changing The Oil
Oil capacity for low oil sump: Wait at least seven minutes. Min. 29 litres (7.6 US gallons) Check the level on the oil dipstick. Max. 37 litres (9.7 US gallons) OPM 300 en-GB © Scania CV AB 2020, Sweden... -
Page 48: Cleaning The Centrifugal Oil Cleaner
Let the oil run out from the rotor. x 1.5 Lift out the rotor. Wipe off the outside. Loosen the rotor nut and unscrew it about 1.5 turns. Note: Take care not to damage the rotor shaft. OPM 300 en-GB © Scania CV AB 2020, Sweden... - Page 49 Remove the strainer from the rotor cover. If the strainer is stuck, insert a screwdriver be- tween the rotor cover and strainer and care- fully prise them apart. OPM 300 en-GB © Scania CV AB 2020, Sweden...
- Page 50 Renew any damaged nozzles. Check that the bearings are undamaged. Renew damaged bearings. Fold and fit a new paper insert on the inside of the rotor cover as illustrated. OPM 300 en-GB © Scania CV AB 2020, Sweden...
- Page 51 Note: Take care not to damage the rotor shaft. Refit the rotor and rotate it by hand to make sure it rotates easily. OPM 300 en-GB © Scania CV AB 2020, Sweden...
-
Page 52: Operational Testing Of The Centrifugal Oil Cleaner
Use your hand to feel if the filter housing is vibrating. If the filter housing is not vibrating, disman- tle and check the centrifugal oil cleaner. OPM 300 en-GB © Scania CV AB 2020, Sweden... -
Page 53: Renewing The Oil Filter
Make sure the oil filter drain has emptied the Filter housing oil from the filter housing. Screw on the filter Flange screw cover firmly with the socket. Gasket Start the engine and inspect the filter housing for leaks. OPM 300 en-GB © Scania CV AB 2020, Sweden... -
Page 54: Air Cleaner
If the vacuum indicator's red plunger is fully vis- ible, renew the air cleaner filter element in ac- cordance with the following section. Air cleaner without safety cartridge. Filter element Vacuum indicator O-ring Cover OPM 300 en-GB © Scania CV AB 2020, Sweden... -
Page 55: Renewing The Air Cleaner Filter Element And Safety Cartridge
Renew the O-ring if it is damaged or hard. Assemble the air cleaner. Ensure that the O-ring is not outside the edg- Reset the vacuum indicator by pressing in the button marked in the illustration. OPM 300 en-GB © Scania CV AB 2020, Sweden... -
Page 56: Cooling System
The coolant should be changed when the cooling functioning antifreeze and corrosion protection system is cleaned: every 6,000 hours or at least may be used in Scania engines. Products not ful- every 5 years. See Changing the coolant and filling the demands in this section may lead to cleaning the cooling system. - Page 57 There is no risk of damage by freezing if the content of Scania antifreeze and corrosion inhibitor, or an equivalent mixture of a similar product, is at least 35% by volume.
- Page 58 In order to retain the corrosion protection and the Scania Ready Mix 50/50 higher boiling point, it is essential to use coolant Scania Ready Mix 50/50 is a ready-mixed cool- consisting of water mixed with antifreeze and ant containing 50% antifreeze (ethylene glycol) corrosion inhibitor (ethylene glycol).
- Page 59 Cooling system Antifreeze and corrosion protection concentration table, litres 35% by volume of Scania antifreeze provides sufficient corrosion protection. Example: • The total volume of the cooling system is 40 litres. • The measured concentration of ethylene gly- col is 35% by volume (freezing point -21°C).
- Page 60 15.9 19.8 23.8 39.6 14.8 16.9 21.1 25.4 42.3 15.9 20.3 22.5 26.9 44.9 16.6 21.4 23.8 28.5 47.6 17.7 20.1 22.7 25.1 30.1 50.2 18.5 21.1 23.8 26.4 31.7 52.8 OPM 300 en-GB © Scania CV AB 2020, Sweden...
-
Page 61: Checking The Coolant Level
Filling coolant. Only pour pre-mixed coolant into the cooling system. The following instructions apply to Scania ex- pansion tanks. For other types of expansion tanks, follow the manufacturer’s instructions. Open the expansion tank cover and check the coolant level. -
Page 62: Checking The Coolant's Antifreeze And Corrosion Protection
• If ice forms in the coolant, there are disrup- tions initially, but there is no immediate risk of damage. The engine should not be subject- ed to heavy loads when ice starts to form. OPM 300 en-GB © Scania CV AB 2020, Sweden... -
Page 63: Changing The Coolant And Cleaning The Cooling
Draining coolant with coolant pump Special tool Number, designation Illustration 2 443 679, coolant pump Open the expansion tank cap. OPM 300 en-GB © Scania CV AB 2020, Sweden... - Page 64 Repeat the procedure at the cooling system's lowest drainage point. The location of the lowest drainage point on the engine may dif- fer depending on engine application. OPM 300 en-GB © Scania CV AB 2020, Sweden...
- Page 65 Drain the coolant. Repeat the procedure at the cooling system's lowest drainage point. The location of the lowest drainage point on the engine may dif- fer depending on engine application. OPM 300 en-GB © Scania CV AB 2020, Sweden...
- Page 66 Oil residues often need to be rinsed repeatedly from the expansion tank and the ex- ternal heating system to be completely clean. Repeated washing is more effective and prefera- ble to using higher concentrations of detergent OPM 300 en-GB © Scania CV AB 2020, Sweden...
- Page 67 20-30 minutes. Drain the water from the cooling system. Refit the thermostats. Fill the cooling system with new coolant as described in the next section. OPM 300 en-GB © Scania CV AB 2020, Sweden...
- Page 68 Do not start the engine until the correct coolant level has been obtained. If the engine is started with an insufficient coolant level, it can damage the coolant pump shaft seal, which leads to cool- ant leakage. OPM 300 en-GB © Scania CV AB 2020, Sweden...
- Page 69 Air pockets may still be left in the cooling sys- tem. These will disappear after the engine has been operated for a period of time. Therefore, the coolant may need topping up at a later stage. OPM 300 en-GB © Scania CV AB 2020, Sweden...
- Page 70 Therefore, the coolant may need topping up at a later stage. After filling, it may be good to start the engine and check that no coolant leakage occurs. OPM 300 en-GB © Scania CV AB 2020, Sweden...
-
Page 71: Fuel System
Be extra careful and always use clean, lint-free and dust-free clothes and disposable gloves when working on the fuel system. Scania recom- mends using Tegera 848 gloves. Clean tools before they are used and do not use any worn or chrome-plated tools. Material and flakes of chrome may come off. -
Page 72: Checking The Fuel Level
If the fuel tank has been run dry or if the engine has not been used for a long time, bleed the fuel system. See the section Bleeding the fuel system. OPM 300 en-GB © Scania CV AB 2020, Sweden... -
Page 73: Renewing The Fuel Filters
If the fuel tank is positioned higher than the fuel filter housing, the shut-off valve between the fuel tank and the fuel filter housing must be closed. This is to prevent fuel running into the fuel filter housing. OPM 300 en-GB © Scania CV AB 2020, Sweden... - Page 74 IMPORTANT! Start with the water separating prefilter (A). Do not open the main filter cover (B) until the filter housing for the water separating prefilter is com- pletely drained. OPM 300 en-GB © Scania CV AB 2020, Sweden...
- Page 75 Draw out re- maining fuel and any particles using the suc- tion tool or a similar tool. Keep the suction tool hose in the filter hous- ing for the water separating prefilter (A). OPM 300 en-GB © Scania CV AB 2020, Sweden...
- Page 76 Fuel from the main filter housing (B) will flow into the water separating prefilter hous- ing (A). Leave the suction tool in the water separating prefilter housing until it is com- pletely drained of fuel. OPM 300 en-GB © Scania CV AB 2020, Sweden...
- Page 77 IMPORTANT! Do not use an adjustable spanner or other open tool to remove the filter covers, as the filter cov- ers may then get damaged. OPM 300 en-GB © Scania CV AB 2020, Sweden...
- Page 78 It is important to remove remaining fuel and par- ticles from the filter housings to prevent fuel sys- tem contamination. Undo the old filter element from the cover by carefully bending it to one side. OPM 300 en-GB © Scania CV AB 2020, Sweden...
- Page 79 Start the engine and check that there is no fuel leakage between the filter covers and fil- ter housings. If there is leakage, undo the fil- ter covers and start again from step 4. OPM 300 en-GB © Scania CV AB 2020, Sweden...
-
Page 80: Bleeding The Fuel System
Description Illustration Suction tool Note: Scania recommends bleeding the fuel system us- ing suction tools rather than with a hand pump. This is a quicker and simpler method, which en- sures a complete bleeding. Open the bleed nipple on the high pressure pump and connect the suction tool. - Page 81 0.2 mm restriction valve in which the fuel continuously flows on to the return pipe and takes with it any air in the circuit. Start the engine and check that there are no leaks. OPM 300 en-GB © Scania CV AB 2020, Sweden...
-
Page 82: Other
Coolant pump Example of a minor crack in the drive belt. The drive The drive belt has deep cracks and must be renewed. belt can be refitted. OPM 300 en-GB © Scania CV AB 2020, Sweden... -
Page 83: Checking For Leakage
Check whether the drain hole on the coolant pump is blocked. If there is leakage, renew the seal in the pump or the complete coolant pump assembly. OPM 300 en-GB © Scania CV AB 2020, Sweden... -
Page 84: Checking And Adjusting The Valve Clearance
Carry out a check and adjustment of the valve clearances one more time after the first 500 hours of operation. After this, adjustment according to the regular interval takes place, which is every 2,000 operational hours. OPM 300 en-GB © Scania CV AB 2020, Sweden... - Page 85 1 and 5 2 and 6 DOWN TDC (0°) DOWN TDC (360°) 2 and 4 3 and 7 UP TDC (540°) UP TDC (540°) 3 and 6 1 and 8 DOWN TDC (360°) OPM 300 en-GB © Scania CV AB 2020, Sweden...
- Page 86 Mark the rocker arm with the felt-tip pen and then continue with the next cylinder accord- ing to the table. Adjusting screw Lock nut Rocker arm Valve bridge Feeler gauge OPM 300 en-GB © Scania CV AB 2020, Sweden...
-
Page 87: Renewing The Reductant Filter
If reductant seeps into electrical connections or electrical cables, these must be renewed. Remove the sealing diaphragm. Pump Filter Sealing diaphragm O-ring Antifreeze Filter housing Remove the old reductant filter and fit a new one. OPM 300 en-GB © Scania CV AB 2020, Sweden... - Page 88 Wipe the sealing diaphragm and fit it over the filter. Ensure that the edge of the diaphragm is sit- ting in the groove. Lubricate the sealing diaphragm and threads with the accompanying spray. OPM 300 en-GB © Scania CV AB 2020, Sweden...
- Page 89 Other Renew the O-ring. Place the new O-ring in the filter housing. Refit the filter housing. Use a 46 mm socket. Tighten to 80 Nm (59 lb-ft). OPM 300 en-GB © Scania CV AB 2020, Sweden...
-
Page 90: Cleaning The Reductant Tank Filler Filter
Cleaning the reductant tank ventilation filter Make sure that the ventilation filter (2) is clean. If it is dirty: Clean the ventilation filter with clean water and refit it. OPM 300 en-GB © Scania CV AB 2020, Sweden... -
Page 91: Cleaning The Reductant Tank
Fit two M10 screws in the holes on the re- ductant pick-up unit. Detach the reductant pick-up unit by turning it anti-clockwise with a handle, see illustration. Rinse the reductant tank clean with hot wa- ter. Fit the reductant tank. OPM 300 en-GB © Scania CV AB 2020, Sweden... -
Page 92: Renewing The Particulate Filter
Wash your hands thoroughly after work on the particle filter. IMPORTANT! Be careful when handling the sensor body. It is sensitive and must not be bent or straightened. Renew the sensor if it is bent. OPM 300 en-GB © Scania CV AB 2020, Sweden... - Page 93 Remove the V-clamp at the particulate filter outlet (1) and the V-clamp holding the end plate (2). Remove the end plate (3). Support the particulate filter with a jack or similar. OPM 300 en-GB © Scania CV AB 2020, Sweden...
- Page 94 Calibration > Emission control > Exhaust gas aftertreatment > New ID number upon renewal of the particulate filter or silencer. Detach the differential pressure sensor con- nections and remove the nut from the brack- OPM 300 en-GB © Scania CV AB 2020, Sweden...
- Page 95 Push in the bracket into the slot (1). Tilt in the bracket and the differential pressure sensor against the particulate fil- ter (2). OPM 300 en-GB © Scania CV AB 2020, Sweden...
- Page 96 (1). Fit the new particulate filter. Use a jack or similar to support the particulate filter. Fit the V-clamp (2) and the band clamp (1) loosely around the particulate filter. OPM 300 en-GB © Scania CV AB 2020, Sweden...
- Page 97 Connect the differential pressure sensor con- nector (2). IMPORTANT! Be careful when handling the sensor body. It is sensitive and must not be bent or straightened. Renew the sensor if it is bent. OPM 300 en-GB © Scania CV AB 2020, Sweden...
-
Page 98: Quality Requirements For Fuel
The operator is responsible for using the correct of fuel are described in the Workshop Manual. type of diesel to ensure that local laws are com- This can be ordered from Scania dealers or di- plied with. rectly from Scania. - Page 99 If diesel with too high a sulphur content is used for a prolonged period, there is a risk that the SCR catalytic converter will not operate correct- ly, which will result in a reduction in engine torque. OPM 300 en-GB © Scania CV AB 2020, Sweden...
- Page 100 (bacteria and fun- gus). To avoid this in fuel used in stand-by gen- erator sets, Scania permits the use of fuel oil according to DIN 51603-1 and ÖNORM C 1109.
-
Page 101: Biodiesel (Fame)
Bacterial growth can Scania uses the term biodiesel to refer to a re- occur when biodiesel is stored in a tank in unfa- newable diesel made from greases or oils and vourable conditions. -
Page 102: Hvo
To the user, HVO is reminiscent of diesel in accordance with EN590, apart from HVO having a somewhat lower density. Scania approves the use of up to 100% HVO for all engines in accordance with the European standard EN 15940. -
Page 103: Reductant For Scr
Always store reductant at a tem- perature between -11°C and 30°C (12-86°F). Rec. % by weight of Limit values according urea to ISO 22241 32.5% 31.8-33.2% OPM 300 en-GB © Scania CV AB 2020, Sweden... -
Page 104: Preparing The Engine For Storage
Ethylene glycol can be fatal if ingested and can all reductant must be drained and changed. If old cause skin irritation and eye damage. reductant is used, the SCR system will not work. OPM 300 en-GB © Scania CV AB 2020, Sweden... -
Page 105: Preparations For Storage
Dinitrol 25B and then with Dinitrol 112 or the equivalent. Clearly mark the engine with the storage preparation date, and state that the engine must not be started or cranked. OPM 300 en-GB © Scania CV AB 2020, Sweden... - Page 106 Connect and bleed the fuel system. ature. The engine must be packed in packaging Wash off any preservative oil on the outside made of VCI plastic to protect against dust, dirt using white spirit. and moisture. OPM 300 en-GB © Scania CV AB 2020, Sweden...
-
Page 107: Technical Data
Oil pressure (bar/psi) Normal with the engine at operating temperature, operating speed 3-6/43.5-87 Minimum permitted at idling speed 0.7/10.2 Crankcase pressure with closed crankcase ventilation (mbar/psi) -5.4 to 2.0/-0.08 to 0.03 OPM 300 en-GB © Scania CV AB 2020, Sweden... -
Page 108: Intake System
Water separating prefilter Paper filter from Scania Electrical system Type 1-pin, 24 V, DC Starter motor, standard equipment 1-pin, 24 V, 6 kW Alternator, standard equipment 1-pin, 28 V, 100 A OPM 300 en-GB © Scania CV AB 2020, Sweden... -
Page 109: Scania Assistance
Scania Assistance Scania Assistance Wherever you are, you can always get assistance from the Scania service organisation, Scania As- sistance, all day, every day of the year. Always call the contact for your country. Country Country Austria +43 1 256 44 11... -
Page 110: General Tightening Torques For Screw Joints
Metric thread. Strength class 8.8/8. Tightening torque Thread Lb-ft Flange screws with hexago- nal head and hexagonal flange nuts Metric thread. Strength class 8.8/8. Tightening torque Thread Lb-ft 10.2 OPM 300 en-GB © Scania CV AB 2020, Sweden... -
Page 111: Hose Clamps
A = width Tightening torque (mm) Lb-ft 7.5-9 The maximum tightening torque for a new unfitted hose clamp is 1 Nm (0.7 lb-ft). A = width Tightening torque (mm) Lb-ft OPM 300 en-GB © Scania CV AB 2020, Sweden...
Need help?
Do you have a question about the DC16 and is the answer not in the manual?
Questions and answers