Advertisement
Quick Links
Advertisement

Related Manuals for SCHUNK ORG 85


Summary of Contents for SCHUNK ORG 85
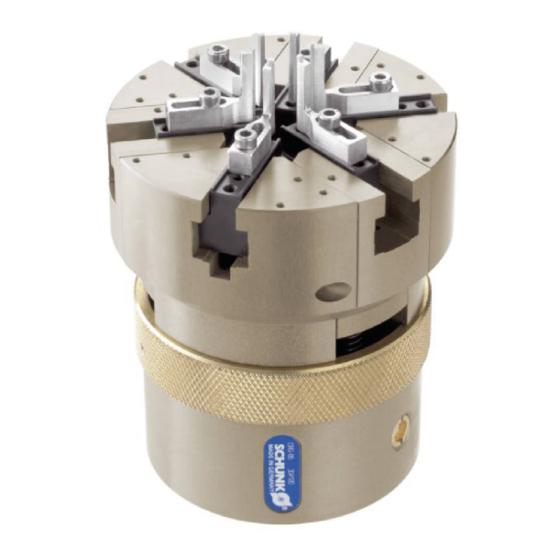
- Page 1 Translation of the original manual Assembly and Operating Manual O-ring gripper...
- Page 2 Imprint Copyright: This manual is protected by copyright. The author is SCHUNK GmbH & Co. KG. All rights reserved. Any reproduction, processing, distribution (making available to third parties), translation or other usage - even excerpts - of the manual is especially prohibited and requires our written approval.
- Page 3 Table of Contents Table of Contents General........................ 6 About this manual .................... 6 1.1.1 Presentation of Warning Labels ............... 6 1.1.2 Applicable documents ................ 7 1.1.3 Sizes ...................... 7 Warranty ...................... 7 Scope of delivery .................... 7 Accessories ...................... 7 1.4.1 Seal kit ...................... 7 1.4.2 Seals to be mounted................. 8 Basic safety notes ....................
- Page 4 Table of Contents 4.4.2 External assembly inner seal diameter between d1>d1max. and d1=150 mm..................... 26 4.4.3 Internal assembly inner seal diameter between d1=10 mm and d1=approx. 120 mm ................ 29 Setting the end positions.................. 32 Mounting the sensor .................. 35 4.6.1 Overview of sensors ................ 35 4.6.2 Assembly drawing mounting kit ............. 36 4.6.3 Mounting inductive proximity switch IN 30 ........... 38 4.6.4 Mounting the sensor cables .............. 46 Function and handling .................... 47...
- Page 5 Table of Contents Troubleshooting ..................... 78 Checking the opening and closing times ............ 78 Maintenance ...................... 79 Notes ........................ 79 Utensils required for maintenance.............. 79 Maintenance and servicing intervals.............. 79 Lubricants/Lubrication points (basic lubrication) .......... 80 Screw tightening torque .................. 80 Gripper design .................... 81 Disassembling the gripper ..................
- Page 6 General 1 General 1.1 About this manual This manual contains important information for a safe and appropriate use of the product. This manual is an integral part of the product and must be kept accessible for the personnel at all times. Before starting work, the personnel must have read and understood this operating manual.
- Page 7 1.1.3 Sizes This operating manual applies to the following sizes: • ORG 85 1.2 Warranty If the product is used as intended, the warranty is valid for 24 months from the ex-works delivery date under the following conditions: •...
- Page 8 General 1.4.2 Seals to be mounted External assembly Inner seal diameter between d1=10 mm and d1=60 mm The necessary top jaws (gripper finger and segment jaws with clamping jaws) must be selected depending on the seals being fitted. NBR 70 Shore A VITON FPM 70 Quant- ID number 1min.
- Page 9 • Structural changes should only be made with the written approval of SCHUNK. 03.00 | ORG | Assembly and Operating Manual | en | 389246...
- Page 10 Use of unauthorized spare parts Using unauthorized spare parts can endanger personnel and damage the product or cause it to malfunction. • Use only original spare parts or spares authorized by SCHUNK. 2.5 Gripper fingers Requirements for the gripper fingers Stored energy within the product creates the risk of serious injuries and significant property damage.
- Page 11 Basic safety notes 2.7 Personnel qualification Inadequate qualifications of the personnel If the personnel working with the product is not sufficiently qualified, the result may be serious injuries and significant property damage. • All work may only be performed by qualified personnel. •...
- Page 12 Basic safety notes 2.9 Notes on safe operation Incorrect handling of the personnel Incorrect handling and assembly may impair the product's safety and cause serious injuries and considerable material damage. • Avoid any manner of working that may interfere with the function and operational safety of the product.
- Page 13 Basic safety notes 2.12 Disposal Handling of disposal The incorrect handling of disposal may impair the product's safety and cause serious injuries as well as considerable material and environmental harm. • Follow local regulations on dispatching product components for recycling or proper disposal. 2.13 Fundamental dangers General •...
- Page 14 Basic safety notes 2.13.1 Protection during handling and assembly Incorrect handling and assembly Incorrect handling and assembly may impair the product's safety and cause serious injuries and considerable material damage. • Have all work carried out by appropriately qualified personnel. •...
- Page 15 Basic safety notes 2.13.3 Protection against dangerous movements Unexpected movements Residual energy in the system may cause serious injuries while working with the product. • Switch off the energy supply, ensure that no residual energy remains and secure against inadvertent reactivation. •...
- Page 16 Basic safety notes 2.14 Notes on particular risks DANGER Risk of fatal injury from suspended loads! Falling loads can cause serious injuries and even death. Stand clear of suspended loads and do not step within their • swiveling range. Never move loads without supervision. •...
- Page 17 Secure the end positions of the product with SCHUNK SDV-P • pressure maintenance valves. 03.00 | ORG | Assembly and Operating Manual | en | 389246...
- Page 18 Technical data 3 Technical data Size ORG 85 Weight [kg] 1.35 Ring diameter external installation [mm] ca. Ø5 ... Ø 160 Ring diameter internal installation [mm] ca. Ø10 ... Ø 120 Number of fingers Max. permissible finger length [mm] 60.0...
- Page 19 Assembly and installation 4 Assembly and installation 4.1 Installing and connecting WARNING Risk of injury due to unexpected movements! If the power supply is switched on or residual energy remains in the system, components can move unexpectedly and cause serious injuries. Before starting any work on the product: Switch off the power •...
- Page 20 Assembly and installation 4.2 Connections 4.2.1 Mechanical connection The values apply to the whole mounting surface to which the Evenness of the product is mounted. mounting surface Requirements for evenness of the mounting surface (Dimensions in mm) Edge length Permissible unevenness <...
- Page 21 Assembly and installation 4.2.2 Pneumatic connection CAUTION Damage to the gripper fingers if the operating pressure is too high. During internal assembly in the range from d =10 mm to =15 mm, or when working with an assembly finger with a width of less than 2 mm, the operating pressure of triple jaw A must reduced to max.
- Page 22 Assembly and installation 4.3 Transfer point seal NOTE To allow the reliable reception of the seal, a transfer point must be defined. The transfer point of the seal is to be designed as follows: The seal must be prepositioned on a plane parallel to the Ø...
- Page 23 Assembly and installation 4.4 Installing gripper fingers Left: Triple jaw A "open" and triple jaw B "closed"; Right: Triple jaw A and B closed (gripper closed) Triple jaw A Triple jaw B 03.00 | ORG | Assembly and Operating Manual | en | 389246...
- Page 24 Assembly and installation 4.4.1 External assembly inner seal diameter between d1=10 mm and d1=60 mm Gripper finger external assembly MFA Six gripper fingers are required for external assembly. ■ Triple jaw A and triple jaw B are closed. ■ Compressed air connection (1) is pressurized, compressed air ■...
- Page 25 Assembly and installation Screw the gripper fingers onto the base jaws using one / two Ø M-3 screw(s) each. In doing so, observe the following: Ø Detail Settings of the gripper fingers and segment jaws When the triple jaw A is open, the gripper fingers must be ✓...
- Page 26 Assembly and installation 4.4.2 External assembly inner seal diameter between d1>d1max. and d1=150 mm Left: Segment jaw for external mounting SBA; Right: Clamping jaw for external assembly HBA Six segment jaws and six clamping jaws are required for external ■ assembly. Triple jaw A and triple jaw B are closed. ■...
- Page 27 Assembly and installation NOTE If inductive monitoring is used, attach intermediate jaws to the base jaws. The cams on the intermediate jaws must point outwards, Mounting the sensor 35]. Connect segment jaws and six clamping jaws with cylindrical pins. Ø Connect both parts with a screw so they can be separated.
- Page 28 Assembly and installation NOTE The dimension t must be at least larger than the tip of the gripper finger (dimension r) plus two safety distances (dimension s). A reliable assembly process is guaranteed if the safety distance (dimension s) is set as small as possible (value range s = 0.1 mm < s < 0.3 mm).
- Page 29 Assembly and installation 4.4.3 Internal assembly inner seal diameter between d1=10 mm and d1=approx. 120 mm Segment jaw internal Holding jaw internal Gripper finger internal installation SBI installation HBI installation MFI Gripper finger, segment jaw and clamping jaw for internal assembly (MFI, SBI, HBI) For internal assembly three gripper fingers for internal ■...
- Page 30 Assembly and installation NOTE If inductive monitoring is used, attach intermediate jaws to the base jaws. The cams on the intermediate jaws must point outwards, Mounting the sensor 35]. Connect segment jaws and six clamping jaws with cylindrical Ø pins. Connect both parts with a screw so they can be separated.
- Page 31 Assembly and installation NOTE The dimension t must be at least larger than the tip of the gripper finger (dimension r) plus two safety distances (dimension s). A reliable assembly process is guaranteed if the safety distance (dimension s) is set as small as possible (value range s = 0.1 mm < s < 0.3 mm).
- Page 32 Assembly and installation 4.5 Setting the end positions WARNING Risk of injury when the machine/system moves unexpectedly. Remove the energy supplies. NOTE The piston rod (2) can be adjusted with max. 0.8 Nm! Setting the end positions Item Designation Notes Set screw Piston rod - Adjustment triple jaw A stroke SW 3...
- Page 33 Assembly and installation Adjustment triple jaw A stroke NOTE To secure the piston rod (2) against rotation, it is necessary to counter it by screwing in the previously removed set screw (1)! The stroke limitation of triple jaw A is performed by adjusting the piston rod (2).
- Page 34 Assembly and installation Adjustment triple jaw B stroke Both counter set screws (3) must be loosened before adjusting the stroke of triple jaw B! They must be unscrewed from the stroke adjustment ring (4) until the ring (4) can be turned! The stroke of triple jaw B can be adjusted after both counter set screws (3) have been loosened.
- Page 35 – The assembly and operating manual and catalog datasheet are included in the scope of delivery for the sensors and are available at schunk.com. • Information on handling sensors is available at schunk.com or from SCHUNK contact persons. 4.6.1 Overview of sensors...
- Page 36 Assembly and installation 4.6.2 Assembly drawing mounting kit Assembly drawing mounting kit 03.00 | ORG | Assembly and Operating Manual | en | 389246...
- Page 37 Holding plate monitoring triple jaws A and B 5516233 5 Bracket 5516234 6 Intermediate jaw 1399682 1 Bracket NHS cable ORG 85 9941642 5 Countersunk screw M2 x 6 9690010 5 Nut M2 9682803 6 Countersunk screw M2.5 x 10...
- Page 38 Assembly and installation 4.6.3 Mounting inductive proximity switch IN 30 CAUTION Damage to the proximity switches possible! The proximity switches can be damaged or destroyed by incorrect settings. Avoid incorrect setting of the proximity switches • Avoid collisions • With the inductive proximity switch IN 30, the Z-stroke and the triple jaws A or B can be monitored Distance between gripper finger and base jaw Initial commissioning...
- Page 39 Assembly and installation 4.6.3.1 Adjusting Z-stroke monitoring Position of the item numbers, Assembly drawing mounting kit 36] NOTE Fastening of the brackets (22) with the proximity switches: The max. tightening torque of the M2 fastening screws (80) is 0.1 Nm! If the screws are tightened too much, there is a danger that the sensor will be damaged and will no longer deliver a signal! Screw the nut (81) onto the screw (83).
- Page 40 Assembly and installation Z-stroke monitoring Detail A The proximity switch is only damped by the screw (83) when the Z- stroke is in the end position (Z-stroke "up", compressed air connection (2) Pneumatic connection 21] not pressurized). 03.00 | ORG | Assembly and Operating Manual | en | 389246...
- Page 41 Assembly and installation 4.6.3.2 Adjusting triple jaws A or B monitoring Position of the item numbers, Assembly drawing mounting kit 36] Insert two nuts (81) into the slot in the holding plate for the Ø triple jaws A and B (21) monitoring. Push the proximity switch into the bracket (22).
- Page 42 Assembly and installation Step 2 (Example Gripper open1 mm "OPEN") Proximity switch S1 is no longer damped by cam 1 (1 mm high). Ø Proximity switch S2 is now damped by cam 2 (0.5 mm high). Ø Proximity switch S1 Proximity switch S2 Step 2 Setting the proximity switches 03.00 | ORG | Assembly and Operating Manual | en | 389246...
- Page 43 Assembly and installation Step 3 (Example Gripper openapprox. 9 mm "OPEN") Proximity switch S1 is not damped. Ø Proximity switch S2 is damped by cam 2 (0.5 mm high). Ø Proximity switch S1 Proximity switch S2 Step 3 Setting proximity switch The position of the proximity switch S2 on the holding plate (21) Ø...
- Page 44 Assembly and installation Step 4 (Example Gripper openapprox. 9 mm "OPEN", bracket rotated 180°) Proximity switch S1 is not damped. Ø Proximity switch S2 is damped by cam 2 (0.5 mm high). Ø Proximity switch S1 Proximity switch S2 Step 4 Setting the proximity switches 03.00 | ORG | Assembly and Operating Manual | en | 389246...
- Page 45 Assembly and installation Step 5 (Example: Gripper open, approx. 17 mm "OPEN", bracket rotated 180°) Proximity switch S1 is not damped. Ø Proximity switch S2 is damped by cam 2 (0.5 mm high). Ø Proximity switchS1 Proximity switch S2 Step 5 Setting the proximity switches The position of the proximity switch S2 on the holding plate (21) Ø...
- Page 46 Assembly and installation Proximity switch S1 Proximity switch S2 Step 6 Setting the proximity switches After setting the proximity switches, attach the top jaws to the Ø intermediate jaws (23). The position of the top jaws on the intermediate jaws (23) can be adjusted by previously measured distances A and B! 4.6.4 Mounting the sensor cables Snap the connector on the sensor cable into the NHS cable...
- Page 47 Function and handling 5 Function and handling 5.1 Pneumatic circuit diagram The O-ring gripper is driven by three drive units: 1. Triple jaw A (double-action) 2. Triple jaw B (single-action) 3. Z-stroke (single-action) Jaw triple A Jaw triple B Z-Hub Pneumatic circuit diagram for ORG with four 3/2-way valves The use of four 3/2-way valves is recommended to operate the gripper.
- Page 48 Function and handling Proximity switch S5 Proximity switch S3 Proximity switch S4 Proximity switch S1 Proximity switch S2 Overview of proximity switches on the gripper The proximity switches S1 and S2 are dampened by the drive unit triple jaw A, whereby proximity switch S1 only scans the "CLOSED" position and proximity switch S2 only scans the "OPEN"...
- Page 49 Function and handling 5.2 Function diagram external assembly The following figure shows the conditions and condition changes of the O-ring gripper for external assembly as a chart. The function diagram uses four 3/2-way valves in the same way as in the pneumatics circuit diagram on page 21.Pneumatic circuit diagram 47]...
- Page 50 Function and handling It must be noted: To ensure the correct control sequences of the O-ring gripper Notes on the external during external assembly, it is necessary, among other things, assembly function that various signals are returned by or for the control. In the diagram: function diagram, they are highlighted in red by "K0 to K5".
- Page 51 Function and handling 5.3 Details of external assembly procedure, Range of inside seal diameter between d1=10 mm and d1=60 mm Position of the item numbers Pneumatic connection 21] 5.3.1 External assembly AM_1.1 External assembly AM_1.1, Range of inside seal diameter between d =10 mm and =60 mm The six assembly fingers must be adjusted so that they are in the...
- Page 52 Function and handling 5.3.2 External assembly AM_1.2 External assembly AM_1.2, Range of inside seal diameter between d =10 mm and d =60 mm The gripper fingers of the gripper can be opened (compressed air connections (3) and (4) pressurised). The seal is widened into the shape of a hexagon.
- Page 53 Function and handling 5.3.3 External assembly AM_1.3 wave External assembly AM_1.3, Range of inside seal diameter between d =10 mm and d =60 mm In the "OPEN" gripper condition, the seal must be widened sufficiently so that a distance larger than zero (dimension y) is created between the widened seal (shape of a hexagon) and the shaft.
- Page 54 Function and handling 5.3.4 External assembly AM_1.4 External assembly AM_1.4, Range of inside seal diameter between d =10 mm and d =60 mm After the seal picked up by the gripper was moved to the position / level of the seal groove of the shaft, the Z-stroke of triple jaw A is pulled back in the the next step, pressurise compressed air connection (2) Pneumatic connection...
- Page 55 Function and handling 5.3.5 External assembly AM_1.5 External assembly AM_1.5, Range of inside seal diameter between d =10 mm and d =60 mm The entire gripper is now moved backward in axial direction, whereby the seal is stripped off the three assembly fingers of the triple jaw B and slides completely into the groove.
- Page 56 Function and handling 5.4 Details of external assembly procedure, Range of inside seal diameter between d1>60 mm and approx. d1=150 mm Position of the item numbers Pneumatic connection 21] 5.4.1 External assembly AM_2.1 External assembly AM_2.1, Range of inside seal diameter between d >60 mm and approx.
- Page 57 Function and handling 5.4.2 External assembly AM_2.2 External assembly AM_2.2, Range of inside seal diameter between d >60 mm and approx. d =150 mm The triple jaws of the gripper can be opened (compressed air connections (3) and (4) pressurised). The seal is widened by means of the segment jaws.
- Page 58 Function and handling 5.4.3 External assembly AM_2.3 wave External assembly AM_2.3, Range of inside seal diameter between d >60 mm and approx. d =150 mm In the "OPEN" gripper condition, the seal must be widened sufficiently so that a distance larger than zero (dimension u) is created between the segment jaws and the shaft.
- Page 59 Function and handling 5.4.4 External assembly AM_2.4 External assembly AM_2.4, Range of inside seal diameter between d >60 mm and approx. d =150 mm After the gripper has been moved to the position / level of the seal groove of the shaft, the Z-stroke of triple jaw A is pulled back axially in the next step (pressurise compressed air connection (2)).
- Page 60 Function and handling 5.4.5 External assembly AM_2.5 External assembly AM_2.5, Range of inside seal diameter between d >60 mm and approx. d =150 mm The entire gripper is now moved backward in axial direction, whereby the seal is stripped off the three assembly fingers of the triple jaw B and slides completely into the groove.
- Page 61 Function and handling 5.4.6 External assembly AM_2.6 For another assembly cycle, move the triple jaws A and B as well as the Z-stroke into the start-ing position.Close triple jaws A and B as well as Z-stroke toward the front. Compressed air connection (1) pressurised, compressed air connections (4) and (2) not pressurised Pneumatic connection 21].
- Page 62 Function and handling 5.5 Function diagram internal assembly The following figure shows the conditions and condition changes of the O-ring gripper for internal assembly as a chart. The function diagram uses four 3/2-way valves in the same way as in the pneumatics circuit diagram Pneumatic circuit diagram 47].
- Page 63 Function and handling It must be noted: To ensure the correct control sequences of the O-ring gripper Notes on the function during internal assembly, it is necessary, among other things, that diagram internal various signals are returned by or for the control. In the function assembly: diagram, they are highlighted in red by "K6 to K11".
- Page 64 Function and handling The O-ring gripper remains at the assembly position to assemble Process step internal the seal. Triple jaw A remains closed. Triple jaw B remains open. assembly IM_1.7 The Z-stroke is pulled axially to the back. Internal assembly IM_1.7 74] By moving back the Z-stroke, proximity switch S5 switch is no longer...
- Page 65 Function and handling 5.6 Details of internal assemblyprocedure Position of the item numbers Pneumatic connection 21] 5.6.1 Internal assembly IM_1.1 Distance between gripper and gasket Gasket Level transition point Internal assembly IM_1.1 Triple jaw A and triple jaw B closed. The Z-stroke is forward. In the first step, the O-ring gripper must be positioned above the seal (the precondition is that the seal is picked up on a level).
- Page 66 Function and handling 5.6.2 Internal assembly IM_1.2 Internal assembly IM_1.2 The triple jaw A opens. Triple jaw B remains closed and the Z-stroke remains forward. 03.00 | ORG | Assembly and Operating Manual | en | 389246...
- Page 67 Function and handling 5.6.3 Internal assembly IM_1.3 Internal assembly IM_1.3 Figure with transfer point Triple jaw A is open. Triple jaw B is closed. The Z-stroke is forward. The O-ring gripper moves axially downward to the transfer point to pick up the O-ring. Internal assembly IM_1.3 Figure B, without transfer point Segment jaw Gripper finger...
- Page 68 Function and handling 5.6.4 Internal assembly IM_1.4 Internal assembly IM_1.4 Triple jaw A can be closed. The gripper fingers move radially toward the inside between the segment jaws and mould the seal locally between the segment jaws. 03.00 | ORG | Assembly and Operating Manual | en | 389246...
- Page 69 Function and handling The following figures show how the seal should not be redirected. Left: Internal assembly: Faulty redirection; Right: Internal assembly: Faulty redirection Internal assembly: Faulty redirection Left figure Right figure The seal does not rest properly against the The gripper fingers have moved too far segment jaws! toward the gripper centre!
- Page 70 Function and handling The following figure shows what the redirection of the seal must look like. Internal assembly: Correct redirection When the triple jaw A is closed, the gripper fingers must have been moved far enough to the inside so that: the seal properly encloses the segment jaws, Ø...
- Page 71 Function and handling 5.6.5 Internal assembly IM_1.5 Internal assembly IM_1.5 The gripper can then be moved or positioned to the position / level of the seal groove of the bore. The centre axis of the gripper and the bore must be aligned concentrically! 03.00 | ORG | Assembly and Operating Manual | en | 389246...
- Page 72 Function and handling 5.6.6 Internal assembly IM_1.6 Internal assembly IM_1.6 After the gripper was moved to the position / level of the seal groove in the workpiece, triple jaw B can be opened. The following pointers must be observed before the triple jaw B can be opened. NOTE The stroke of the triple jaw B must be set as follows: Description given under...
- Page 73 Function and handling Detail B Detail C Detail B Detail C Setting triple jaw B stroke Triple jaw B to which the segment jaws are attached may only open far enough to press the redirected seal into the groove of the bore.
- Page 74 Function and handling 5.6.7 Internal assembly IM_1.7 Internal assembly IM_1.7 The Z-stroke is axially pulled towards the back (pressurise compressed air connection (2)). The gripper finger pulls axially toward the back and the seal relaxes slightly in the direction of the groove in the area of the assembly finger.
- Page 75 Function and handling 5.6.8 Internal assembly IM_1.8 Internal assembly IM_1.8 After the axial pulling of the Z-stroke towards the back, the Z-stroke is directly moved forward again (do not pressurise compressed air connection (2)). As shown in the figure, the three gripper fingers are now on the inside of the seal.
- Page 76 Function and handling 5.6.9 Internal assembly IM_1.9 CAUTION Damage to the gripper fingers if the operating pressure is too high. During internal assembly in the range from d =10 mm to d mm, or when working with an assembly finger with a width of less than 2 mm, the operating pressure of triple jaw A must reduced to max.
- Page 77 Function and handling 5.6.10 Internal assembly IM_1.10 Internal assembly IM_1.10 In the final step, the assembly fingers and the segment jaws are moved toward the inside, i.e. the gripper, triple jaw A and triple jaw B are closed (compressed air connection (1) pressurised, compressed air connection (4) not pressurised).
- Page 78 Troubleshooting 6 Troubleshooting 6.1 Checking the opening and closing times If you cannot reach the opening and closing times mentioned in the latest catalog, please check the following: Flow control valves are opened to the maximum extent possible? Ø (Movement still has to be shock-free!) Inner diameter of air hoses is sufficient for the gripper’s air Ø...
- Page 79 The base jaws and the guidance in the housing are matched. To exchange these parts, send the product with a repair order to SCHUNK or order the housing with the base jaws as a set. 7.2 Utensils required for maintenance...
- Page 80 Maintenance 7.4 Lubricants/Lubrication points (basic lubrication) SCHUNK recommends the lubricants listed. During maintenance, treat all greased areas with lubricant. Thinly apply lubricant with a lint-free cloth. Lubricant point Lubricant Metallic sliding surfaces GP303P All seals Renolit HLT 2 Bore hole at the piston Renolit HLT 2 7.5 Screw tightening torque...
- Page 81 Maintenance 7.6 Gripper design The ORG 85 consists of three assembly groups. Assembly group ORG Assembly group 1 Triple jaw A unit Assembly group 2 Triple jaw B unit Assembly group 3 Drive unit triple jaw B Gripper design 03.00 | ORG | Assembly and Operating Manual | en | 389246...
- Page 82 Maintenance 7.7 Disassembling the gripper Position of the item numbers Pneumatic connection 21]; Assembly drawing 88] Assembly group 1, triple jaw unit A Gripper design 81] must be disassembled first: Remove all compressed air connections ((1), (2) and (3)) from Ø...
- Page 83 Maintenance 7.7.1 Disassembling assembly group 1 (Triple jaw unit A) Position of the item numbers Assembly drawing 88] NOTE Turn off the compressed air supply for all compressed air connections and detach all compressed air lines from the gripper! Mark the assembly position of the base jaws (16) in the base Ø...
- Page 84 Maintenance 7.7.2 Disassembling assembly group 2 (Triple jaw unit B) NOTE Turn off the compressed air supply for all compressed air connections and detach all compressed air lines from the gripper! NOTE To disassemble assembly group 2, the stroke of triple jaw B must be completely opened! Therefore set the end position so that triple jaw B is completely opened Setting the end positions...
- Page 85 Maintenance By pressing the unit together, the transverse bore in the base Ø body triple jaw B (12) is concentric with the elongated hole in the pressure pin (11). You can detach the three cylindrical pins (13) connecting the Ø angle levers of triple jaw B (18) with the pressure pin (11) only now.
- Page 86 Maintenance Mounting mandrel Cylindrical pin Assembly of cylindrical pins (13) All other cylindrical pins (60) connecting the base jaws (16) with Ø the angle levers triple jaw B (18) must also be positioned in the centre! The base jaws triple jaw B (12) must be fastened on the previously Ø...
- Page 87 Maintenance 7.7.3 Disassembly of assembly group 3 (Drive unit triple jaw B) Loosen the set screw (63) from the drive piston triple jaw B (4). Ø Unscrew the screw (41). Ø Unscrew the pressure pin (11) toward the top out of the drive Ø...
- Page 88 Maintenance 7.9 Assembly drawing Exploded view ORG 85 Wearing part, replace during maintenance. Included in the seal kit. Seal kit can only be ordered completely. 03.00 | ORG | Assembly and Operating Manual | en | 389246...
- Page 89 8 Translation of original declaration of incorporation in terms of the Directive 2006/42/EG, Annex II, Part 1.B of the European Parliament and of the Council on machinery. Manufacturer/ SCHUNK GmbH & Co. KG Spann- und Greiftechnik Distributor Bahnhofstr. 106 – 134 D-74348 Lauffen/Neckar...
- Page 90 Translation of original declaration of incorporation 8.1 Annex to Declaration of Incorporation according 2006/42/EG, Annex II, No. 1 B 1.Description of the essential health and safety requirements pursuant to 2006/42/EC, Annex I that are applicable and that have been fulfilled with: Product designation O-ring gripper Type designation ID number...
- Page 91 Translation of original declaration of incorporation Protection against mechanical hazards 1.3.7 Risks related to moving parts 1.3.8 Choice of protection against risks arising from moving parts 1.3.8.1 Moving transmission parts 1.3.8.2 Moving parts involved in the process 1.3.9 Risks of uncontrolled movements Required characteristics of guards and protective devices 1.4.1 General requirements...
- Page 92 Translation of original declaration of incorporation Information 1.7.1 Information and warnings on the machinery 1.7.1.1 Information and information devices 1.7.1.2 Warning devices 1.7.2 Warning of residual risks 1.7.3 Marking of machinery 1.7.4 Instructions 1.7.4.1 General principles for the drafting of instructions 1.7.4.2 Contents of the instructions 1.7.4.3...
Need help?
Do you have a question about the ORG 85 and is the answer not in the manual?
Questions and answers