
Related Manuals for SMART FSE-400


Summary of Contents for SMART FSE-400
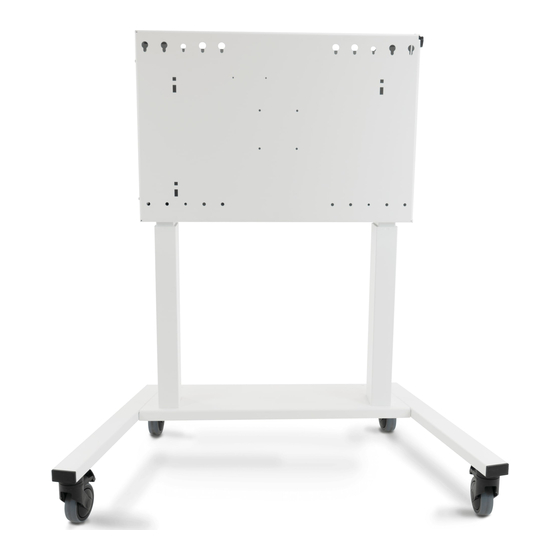
- Page 1 SMART electric height-adjustable mobile stand USER GUIDE FSE-410 (S410-1) Was this document helpful? smarttech.com/docfeedback/171625...
- Page 2 © 2020 SMART Technologies ULC. All rights reserved. No part of this publication may be reproduced, transmitted, transcribed, stored in a retrieval system or translated into any language in any form by any means without the prior written consent of SMART Technologies ULC. Information in this manual is subject to change without notice and does not represent a commitment on the part of SMART.
-
Page 3: Important Information
Closely supervise the operation of the stand when it’s Use only SMART-supplied mounting hardware or used near children or people with disabilities. hardware that is designed to properly support the weight Use the stand only for it’s intended use as described in... - Page 4 Replace a damaged power cord only with a new cord when raising and lowering the stand. and power bar provided by SMART Technologies or a qualified service technician. Do not modify or make changes to the control unit or hand switches.
- Page 5 Important information Product labels Subassemblies Laptop shelf FSE-400-LS 6 outlet power bar Model TPL615B smarttech.com/kb/171625...
- Page 6 Important information Wall mount bracket WM-SBID-200 (Model W200-1) smarttech.com/kb/171625...
-
Page 7: Table Of Contents
Contents Important information Chapter 1: About the stand Features Components Accessories More information Chapter 2: Assembling the stand Environmental requirements Considerations when assembling the stand Chapter 3: Using the stand Moving the stand Raising and lowering the stand Chapter 4: Troubleshooting the stand Resolving general issues Factory resetting the stand smarttech.com/kb/171625... -
Page 8: Chapter 1: About The Stand
Features Components Control switch Accessories More information Features The SMART electric height-adjustable mobile stand has the following features: Feature Description Powered height With its 26" (66 cm) of electric-powered height adjustment, you can easily adjustment adjust the height of a mounted display with the press of a button. -
Page 9: Components
Chapter 1 About the stand Components The stand consists of the following components: Description Mounting holes Control switch Locking casters [Not shown] Storage cabinet (rear surface) [Not shown] Surge-protected power bar (mounted inside the cabinet) Control switch You can raise and lower the stand with the control switch located on the right side of the stand. The control switch has three buttons and an indicator light. -
Page 10: Accessories
Chapter 1 About the stand Button Description Unlocks the height adjustment lock. Sets the upper and lower limits. Unlocks the height adjustment lock. Accessories The following accessories are available for the mobile stand: Accessory Description Laptop shelf The laptop shelf is a convenient place to place a laptop or keyboard when you’re using a stand-mounted display. -
Page 11: More Information
Chapter 1 About the stand More information See the following resources for more information: FSE-410 specifications: smarttech.com/kb/171626 FSE-410 illustrated installation instructions: smarttech.com/kb/171620 These documents are available in the Support section of the SMART website: smarttech.com/support. smarttech.com/kb/171625... -
Page 12: Chapter 2: Assembling The Stand
Assembling the stand Environmental requirements Considerations when assembling the stand The stand requires assembly. Consult the SMART electric height-adjustable mobile stand illustrated installation instructions (smarttech.com/kb/171620) included with the stand for assembly instructions. WARNING Failure to follow the installation instructions included with the stand could result in personal injury or product damage. - Page 13 Do not set up or use the stand in an area with excessive levels of dust, dirt, humidity, or smoke. Review the following recommendations when using the WM-SBID-200 wall mount that is supplied with some SMART display models: Model(s) Recommendation SBID-MX265-V1/2 The wall mount supplied with these models is not compatible with the stand.
- Page 14 Chapter 2 Assembling the stand NOTE Please contact SMART Support (smarttech.com/contactsupport) if you need a WM-SBID-200 wall mount. smarttech.com/kb/171625...
-
Page 15: Chapter 3: Using The Stand
Chapter 3 Using the stand Moving the stand Raising and lowering the stand Resetting the stand Unlocking the height-adjustment safety lock Raising and lowering the stand Setting height limits Moving the stand WARNINGS Do not use the handles to lift the stand. Do not move the stand while external cables are connected or when the power is on. -
Page 16: Raising And Lowering The Stand
Chapter 3 Using the stand 7. Carefully push the center point of the legs to move the stand. Do not push on the upper part of the stand, as this might cause it to tip over. 8. After the stand is moved, flip the caster brakes down to lock them and secure the stand in place. 9. - Page 17 Chapter 3 Using the stand height-adjustment lock before you raise or lower the stand. To unlock the stand’s height adjustment Press the , , and buttons in sequence. Don’t allow more than one second between button presses. Raising and lowering the stand To raise the stand 1.
- Page 18 Chapter 3 Using the stand To set the upper height limit 1. Raise the stand to the height you want to use as the upper limit. 2. While pressing and holding the button, lift the control switch up for eight seconds until the indicator light flashes.
-
Page 19: Chapter 4: Troubleshooting The Stand
Chapter 4 Troubleshooting the stand Resolving general issues Factory resetting the stand This chapter describes how to troubleshoot the mobile stand. Resolving general issues Issue Possible solution The stand does not raise Ensure the power cable is connected to the stand. or lower Check all cables and ensure that they are not damaged. - Page 20 Chapter 4 Troubleshooting the stand Factory resetting the stand If the stand lowers but does not move when you try raising it or if you replace the controller, perform a factory reset by following the steps below. To factory reset the stand 1.
- Page 21 SMART TECHNOLOGIES smarttech.com/support smarttech.com/contactsupport smarttech.com/kb/171625...
Need help?
Do you have a question about the FSE-400 and is the answer not in the manual?
Questions and answers