Table of Contents
Advertisement
Quick Links
Head-End Digital Modulator
Notes on the Assembly Instructions.
As well as this supplementary Assembly
Instructions, the Assembly Instructions for the
STC 160 apply.
GSS
Grundig SAT Systems GmbH
Beuthener Strasse 43
D-90471 Nuremberg
Kopfstation STC 160
Phone:
Fax:
Email:
Internet:
COFDM
HDM 660 T
+49 (0) 911 / 703 8877
+49 (0) 911 / 703 9210
info@gss.de
www.gss.de
Advertisement
Table of Contents

Related Manuals for GSS HDM 660 T


Summary of Contents for GSS HDM 660 T
- Page 1 Kopfstation STC 160 Head-End Digital Modulator COFDM HDM 660 T Notes on the Assembly Instructions. As well as this supplementary Assembly Instructions, the Assembly Instructions for the STC 160 apply. Phone: +49 (0) 911 / 703 8877 Grundig SAT Systems GmbH...
-
Page 2: Table Of Contents
Input frequency ................21 Station filter ................22 Test the status of the individual stations: ........23 COFDM parameters ..............24 Output signal ................27 Bandwidth of the output signal ..........27 Carrier modulation ..............27 Inverting the user signal ............27 - 2 - HDM 660 T... - Page 3 Renaming a PID................33 Factory reset ................33 Saving data ................34 CA module .................35 PID monitoring ...............35 Configuring the CA module .............36 Selecting stations ..............37 6 Final procedures ..................39 7 Channel and frequency tables ..............40 - 3 - HDM 660 T...
-
Page 4: Safety Regulations
C o p e o f d e l i v e ry 1 Head-end Digital Modulator COFDM "HDM 660 T" 1 HF connection cable... -
Page 5: Meaning Of The Symbols Used
Output impedance: ................. 75 Ω Connections: SAT inputs: ................2 F sockets HF output: ................1 F socket Connection strip (20-pin): .......for supply voltages and control circuits Common Interface: ......1 (several channels can be descrambled) - 5 - HDM 660 T... -
Page 6: Description
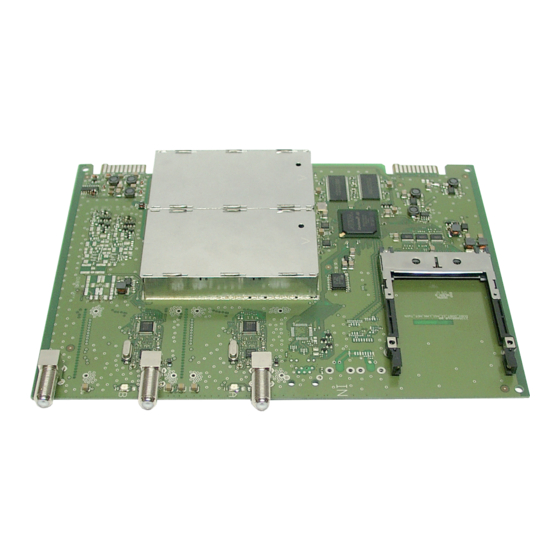
C r i p t i o n The Head-end Digital Modulator COFDM "HDM 660 T", in the following called COFDM module converts two DVB-S (QPSK) modulated data streams into two DVB-T (COFDM) modulated data streams. The COFDM module has two SAT-IF inputs and one HF output. -
Page 7: Tps Module Functions
– Before installing or changing a module, switch off the head-end station or unplug the power cable from the mains power socket. Take measures to protect against ESD! • Open the housing of the head-end station in accordance with the assembly instructions for the STC 160. - 7 - HDM 660 T... -
Page 8: Retrofitting A Ca Module
(top) of the CA module (fig. 1). • Push the CA module without canting into the guide rails of the com- mon interface according to the following picture and contact it to the common interface. Fig. 1 - 8 - HDM 660 T... -
Page 9: Installing The Cofdm Module
(fig. 3). • After installing the COFDM module close the locking device in the direc- tion of the arrow (fig. 3). Fig. 3 - 9 - HDM 660 T... -
Page 10: Connecting The Cofdm Module
HF cables made on-site (length approx. 80 cm) or if applicable con- nect each to one of the outputs of a retrofitted SAT-IF input distributor. • After programming, connect the modulator output to one of the input sockets of the output collector. - 10 - HDM 660 T... -
Page 11: The Control Panel At A Glance
C t i o n s o f t h e C o n t r o l pa n e l b u t to n s To move the cursor, call up functions To adjust values and functions To save the programmed data To switch to the next menu - 11 - HDM 660 T... -
Page 12: Programming
• Test the software versions of the head-end station and the COFDM module and update them if necessary. The current software versions can be found on the website "www.gss.de". • Connect the test receiver to the modulator output on the COFDM module to the HF output on the output collector if it is already connected (page 10). -
Page 13: Programming Procedure
Programme hinzufügen / entfernen Activating / removing stations Filter Das Erste nächster Service (Programm) next service (station) on / off - 13 - HDM 660 T nur Kanalzug “A” mit CA-Modul Bx 1A only Channel strip “A“ with CA module... - Page 14 C7/8 G1/32 2 … 8k G1/4 … G1/32 1A/B COFDM TPS 0x0000 … 0xFFFF CELL 0x0000 on / off 1A/B STUFFING 31667 (20351) 1A/B FAILURE Single Carrier Null Packets … Single Carrier - 14 - HDM 660 T 1A/B TS/ONID...
- Page 15 / off page 13 Werkeinstellung 1A/B FACTORY 1A/B FACTORY aufrufen invoke factory defaults Defaults => STORE => M page 13 1A/B MEMORY Einstellung speichern store factory defaults STORE S => STORE page 13 CANCEL - 15 - HDM 660 T...
-
Page 16: Programming The Cofdm Module
—> The display shows, e.g., the "Bx 1A COFDM-TPS" menu. "Bx" indicates the slot "1" indicates slot no. 1 "A" indicates channel strip "A" "COFDM-TPS" Type of module "850 MHz" frequency set "V 19" software version of the module - 16 - HDM 660 T... -
Page 17: Channel / Frequency Setting
306 MHz going back in steps of 8 MHz (see frequency table on page 40). Please note thereby that many receivers cannot receive the channel ranges S21 … S41 (306 … 466 MHz). - 17 - HDM 660 T... -
Page 18: Output Frequency, Output Channel, Modulator
—> When it is switched off, the status LED for the channel strip goes out (see page 12). Bx 1A OUTPUT – – – • If the modulator is switched "off" use the to switch it "on". • Press the button. —> The "Output levels of the channel strips" – "LEVEL" menu is activated. - 18 - HDM 660 T... -
Page 19: Output Levels Of The Channel Strips
In this menu you can select which tuner (input A or B) is to use (only for channel strip B). So the transport streams of the receiving stage "A" can be split into two output transport streams. Bx 1B INPUT Tuner B • Press the buttons to select the tuner wished. - 19 - HDM 660 T... -
Page 20: Lnb Oscillator Frequency
DVB-S 27500 • Use the buttons to position the cursor under the digit of the symbol rate displayed to be set. • Press to enter the respective digit of the desired symbol rate. • Repeat the procedure by the quantity of the digits to be set. - 20 - HDM 660 T... -
Page 21: Input Frequency
—> In addition to the indicator in the display, the quality of the transport stream received is indicated by a status LED: Status LED – Channel strip ”A” Status LED – Channel strip ”B” - 21 - HDM 660 T... -
Page 22: Station Filter
Meaning of the indicators in the example: "Bx 1A" Slot 1, channel strip "A" "TV" TV channel type " + " The currently selected station is activated. "01/07" The 1st of 7 stations is being displayed. "Das Erste" Station name - 22 - HDM 660 T... -
Page 23: Test The Status Of The Individual Stations
In this mode you can use the buttons to scroll through the station list, and to deactivate activated stations or activate further stations. • In the "PROGRAM Filter on" menu the station filter can be switched "off" using the buttons - 23 - HDM 660 T... -
Page 24: Cofdm Parameters
14929 16588 17563 18095 16588 18431 19514 20105 17417 19352 20490 21111 14929 16588 17563 18095 19905 22117 23417 24127 22394 24882 26344 27143 64 QAM 24882 27647 29272 30159 26126 29029 30736 31667 - 24 - HDM 660 T... - Page 25 13171 13571 16 QAM 12441 13823 14635 15078 13063 14514 15367 15832 11197 12441 13171 13571 14929 16588 17563 18095 64 QAM 16795 18661 19758 20357 18661 20735 21953 22619 19594 21772 23051 23750 - 25 - HDM 660 T...
- Page 26 Used bandwidth [MHz] 5.71 5.71 5.71 Total symbol duration 373 336 317 308 767 672 634 616 1493 1344 1269 1232 [µs] Guard interval T [µs] 74.7 37.3 18.7 9.3 37.4 18.6 298.7 149.3 74.6 37.3 - 26 - HDM 660 T...
-
Page 27: Output Signal
"NEG" (negative). The default setting is "POS" (positive). • Use the buttons to place the cursor under "POS". • Use the buttons to set the spectral position to "NEG". • Press the button. —> The "Transmission parameters" – "COFDM-MODE" menu is activated. - 27 - HDM 660 T... -
Page 28: Transmission Parameters
A high guard interval, e.g. "G1/4" causes a low output data rate. For cable networks the setting "G1/32" is adequate. • Use the buttons to place the cursor under "G…". • Set the guard interval required using the buttons ("G1/4", "G1/8", "G1/16", "G1/32"). - 28 - HDM 660 T... -
Page 29: Transmitter Identification (Cell Id)
This menu shows the output data rate defined using the COFDM settings and the current measured output data rate. Bx 1A STUFFING 31667 (20351) Zahl 1 Zahl 2 Number 1 Number 2 31667 (= "Number 1"): Defined net output data rate - 29 - HDM 660 T... -
Page 30: Substitute Signal In The Case Of An Incorrect Input Signal
Self-made tables are transmitted further- more. Bx 1A FAILURE Single Carrier • Use the buttons to set the output signal required. • Press the button. —> The "Transport stream / ORGNET-ID" – "TS/ONID" menu is activated. - 30 - HDM 660 T... -
Page 31: Transport Stream / Orgnet Id
=> Make • To switch the NIT on or off ("on"/"off") press the buttons. • Press the button to activate the NIT ("Make"). —> All active cassettes which are able to output a NIT ("NIT cassettes") must be set and ready for reception. - 31 - HDM 660 T... -
Page 32: Deleting A Pid
PID to be deleted ("0x0000") and set the hexa- decimal number using • Use the button to set the cursor under "off" and delete the PID using the buttons ("on"). • Press the button. —> The "Renaming a PID" – "REMAP" menu is activated. - 32 - HDM 660 T... -
Page 33: Renaming A Pid
FACTORY Bx 4A FACTORY aufrufen invoke factory defaults Defaults => STORE => M • Press the button. —> By pressing the button, the "Saving data" – "MEMORY" menu is activated without invoking the factory defaults. - 33 - HDM 660 T... -
Page 34: Saving Data
"Selecting the module / channel strip" (page 16). —> By pressing the button, you will be returned to the menu item "Selecting the module / channel strip" without saving the pro- grammed data. - 34 - HDM 660 T... -
Page 35: Ca Module
Bx 1A PID Check • Use the buttons to switch "off" or "on" the PID monitoring. • Press the button. —> The "Configuring the CA module" – "CA" menu is activated. - 35 - HDM 660 T... -
Page 36: Configuring The Ca Module
• Use the buttons to select the function desired. • To set the CA module use the buttons. • All settings are saved by pressing the button. —> You will be returned to the "Configuring the CA module" – "CA" menu item. - 36 - HDM 660 T... -
Page 37: Selecting Stations
The currently selected station remains unchanged. • Use the buttons to call up the stations in sequential order which are to be descrambled, then use to descramble (" X ") or not to descramble them (" 0 "). - 37 - HDM 660 T... - Page 38 —> The filter is activated. The display shows the "Configuring the CA module" – "CA" menu. Bx 1A Menu <= => Edit • Press the button. —> The "Output signal" – "COFDM-MODE" menu is activated (page 27). - 38 - HDM 660 T...
-
Page 39: Final Procedures
(page 10, fig. 4). • Test the output level of the output collector according to the STC 160 assem- bly instructions and set the output level required for the cable system. • Mount the base plate and the front cover (see STC 160 assembly instruc- tions). - 39 - HDM 660 T... -
Page 40: Channel And Frequency Tables
C 48 690.00 C 58 770.00 C 68 850.00 C 29 538.00 C 39 618.00 C 49 698.00 C 59 778.00 C 69 858.00 C 30 546.00 C 40 626.00 C 50 706.00 C 60 786.00 - 40 - HDM 660 T... - Page 41 CE - Declaration of Conformity - 41 - HDM 660 T...
- Page 42 Kundendienst: Telefon: +49 (0) 911 / 703 2221 Fax: +49 (0) 911 / 703 2326 Email: service@gss.de Alterations reserved. Technical data E. & O.E. © by GSS GmbH V19/20062011...
Need help?
Do you have a question about the HDM 660 T and is the answer not in the manual?
Questions and answers