Table of Contents
Advertisement
Quick Links
Advertisement
Table of Contents

Related Manuals for GSS HDM 2380 P CI


Summary of Contents for GSS HDM 2380 P CI
- Page 1 Head-End Digital Modulator QPSK - PAL HDM 2380 P CI HDM 2380 OIRT CI CLASS Phone: +49 (0) 911 / 703 8877 Fax: +49 (0) 911 / 703 9210 Grundig SAT Systems GmbH E-mail: info@gss.de Beuthener Strasse 43 Internet: http://www.gss.de...
-
Page 2: Table Of Contents
Setting the input frequency ..............23 Reception quality ................23 Channel selection ................24 Selecting the TV station sound .............. 25 Setting the volume level ............... 25 Setting the audio mode ................ 26 - 2 - HDM 2380 P CI / HDM 2380 OIRT CI... - Page 3 Selecting the TV station sound / Setting the volume level (timer) ....33 Saving settings ................... 34 6 Final procedures ....................34 7 Channel and frequency tables ................35 - 3 - HDM 2380 P CI / HDM 2380 OIRT CI...
-
Page 4: Safety Regulations And Notes
At the end of its service life, please take your device to one of these public collection facilities for proper disposal. - 4 - HDM 2380 P CI / HDM 2380 OIRT CI... -
Page 5: General Information
General information Packing contents 1 cassette HDM 2380 P CI or HDM 2380 OIRT CI 2 HF cables 1 CD (assembly instructions) 1 Brief assembly instructions Meaning of the symbols used Important note —> General note • Performing works Technical data... -
Page 6: Description
DVB-S and QPSK standard into two PAL-modu- lated cable signals (HDM 2380 P CI in CCIR standard/ HDM 2380 OIRT CI in OIRT standard). The cassette has two digital SAT IF inputs and one HF output. -
Page 7: Software Query
• Remove the fastening screws of an unoccupied slot from the bracket of the head-end station. • Insert the cassette in this slot and push it into the housing. • Align the cassette and apply slight pressure to connect it to the connections of the board and the HF bus bar. • Fasten the cassette with the screws - 7 - HDM 2380 P CI / HDM 2380 OIRT CI... -
Page 8: Emc Regulations
Tighten the nut on the cable terminal until the teeth on the lock washer have pen- etrated the exterior coating and a good connection is made between the housing and cable terminal. - 8 - HDM 2380 P CI / HDM 2380 OIRT CI... -
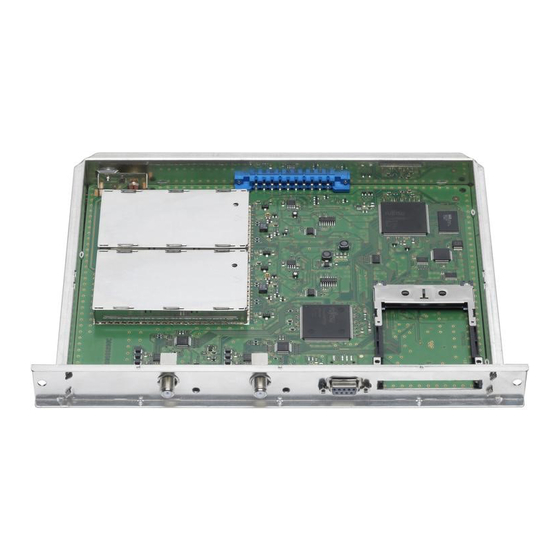
Page 9: Overview Of The Cassette
PC according to the wiring scheme below. 9-pin 9-pin D-SUB plug D-SUB socket —> If necessary use a standard RS-232/USB adapter. • Start the “BE-Flash” software and update the software of the cassette. - 9 - HDM 2380 P CI / HDM 2380 OIRT CI... -
Page 10: Retrofitting A Ca Module
(top) of the CA module. • Insert the CA module into the guide rails of the CA slot with the top side of the CA module facing the top side of the cassette. • Push the CA module without canting into the guide rails of the CA slot and contact it to the common interface. - 10 - HDM 2380 P CI / HDM 2380 OIRT CI... -
Page 11: The Control Panel At A Glance
- 11 - HDM 2380 P CI / HDM 2380 OIRT CI... -
Page 12: Programming
Programming Preparation • Test the software versions of the head-end station and the cassette and up- date them if necessary. The current software versions can be found on the website “www.gss.de”. • Connect the test receiver to the HF output or the test output of the head-end station. • Set the output channel / output frequency of the cassette (page 20) and adjust the TV test receiver to this channel / this frequency. - Page 13 CA module used. 4A/B FREQ ◀ ▶ 11953 -1.8 CN 12 Bx 4A 01/09 + 4A/B AUDIO ◀ ▶ 01/02 - 6 dB + 6 … - 26 dB - 13 - HDM 2380 P CI / HDM 2380 OIRT CI...
- Page 14 - 12 … + 12 14:20:11 ? + 01 S / – 4A/B TIMER 4A/B TIMER ◀ ▶ 05:00 – 10:00 on / off - 14 - HDM 2380 P CI / HDM 2380 OIRT CI 4A/B TIMER ◀ ▶...
- Page 15 TIMER FREQ ◀ ▶ 11836 -1.8 CN 12 TIMER 01/07+ Das Erste TIMER AUDIO ◀ ▶ 01/02 - 6 dB + 6 … - 26 dB Page 12 - 15 - HDM 2380 P CI / HDM 2380 OIRT CI...
-
Page 16: Programming The Cassette
—> The display shows e.g. the menu “Box 4 QPSK-PAL“: “Box 4” stands for slot 4 ”QPSK-PAL” type of cassette ”V 3” software version of the cassette - 16 - HDM 2380 P CI / HDM 2380 OIRT CI... -
Page 17: Selecting The Channel Strip
• Press the button. —> The “Switching the modulator off or on”, ”Adjusting the output levels of the channel strips” – ”MODULATOR” menu is activated. - 17 - HDM 2380 P CI / HDM 2380 OIRT CI... -
Page 18: Switching The Modulator Off Or On
“0” to “–7”dB. • Activate channel strip “A”. • Press the button. —> The “Setting the TV standard of the output signal” – “NORM” menu is activated. - 18 - HDM 2380 P CI / HDM 2380 OIRT CI... -
Page 19: Setting The Tv Standard Of The Output Signal
TV standard of the output signal (”CCIR 5.5 FM … • Press OIRT 6.5/6.3 FM“). —> Select “CCIR 5.5 FM” for cassette HDM 2380 P CI —> Select “OIRT 6.5/6.7 FM” or “OIRT 6.5/6.3 FM” for cassette HDM 2380 OIRT CI. -
Page 20: Setting The Output Channel
• Use the buttons to place the cursor under the digit to be set for the frequency display then use to set the output frequency wished. • Press the button. - 20 - HDM 2380 P CI / HDM 2380 OIRT CI... -
Page 21: Selecting The Tuner (Only Channel Strip B)
If used, in this menu the settings of a CA module can be done (dependent on the CA module). ▶ 4A/B Bx 4A CA-MENU Bx 4A MENU 10600 MHZ > ▶ Information *) nur mit CA-Modul / only with CA module - 21 - HDM 2380 P CI / HDM 2380 OIRT CI... - Page 22 “Setting the LNB oscillator fre- quency” – “LNB” menu. • Press the button. —> The “Setting the input symbol rate” – “SYMBOL” menu is activated. - 22 - HDM 2380 P CI / HDM 2380 OIRT CI...
-
Page 23: Setting The Input Symbol Rate
Additionally the signal to noise ratio (C/N) of the signal received is displayed (e.g. ”CN 12” dB). 4A/B FREQ 11953 -1.8 CN 12 - 23 - HDM 2380 P CI / HDM 2380 OIRT CI... -
Page 24: Channel Selection
As soon as the automatic station search has found all of the TV or radio channels, the corresponding data appear in the display of the head-end station. Bx 4A 01/09 + - 24 - HDM 2380 P CI / HDM 2380 OIRT CI... -
Page 25: Selecting The Tv Station Sound
TV station, you can select the desired audio stream from the trans- port stream in this menu. Additionally in this menu, you can balance unequal volume levels of TV and radio stations in the various channel strips. - 25 - HDM 2380 P CI / HDM 2380 OIRT CI... -
Page 26: Setting The Audio Mode
(“Dual normal” / “Dual swap”). • Press • Press the button. —> The “Adjusting the picture format”, ”Switching teletext mode off/on” – “VIDEO” menu is activated. - 26 - HDM 2380 P CI / HDM 2380 OIRT CI... -
Page 27: Adjusting The Picture Format
For specific applications test lines can be inserted in the teletext in this menu. 4A/B TESTLINES • Using the buttons switch the test lines “on” or “off”. • Press the button. —> The “Locking the regional window” – PIDS:” menu is activated. - 27 - HDM 2380 P CI / HDM 2380 OIRT CI... -
Page 28: Locking The Regional Window
The vertical dimension and the position of the strip can be set. 4A/B SUBTITLE 4A/B SUBTITLE west 4A/B SUBTITLE 01 / 02 "deu" 4A/B SUBTITLE black 40 / 10 - 28 - HDM 2380 P CI / HDM 2380 OIRT CI... - Page 29 (e.g. ”10”) using the buttons and set the dimension wished. • Press the button. —> The “Setting the time zone and summer time” – “TIME” menu is activated. - 29 - HDM 2380 P CI / HDM 2380 OIRT CI...
-
Page 30: Setting The Time Zone And Summer Time
• Using the buttons switch summer time support on (“S”) or off (“–”). • Press the button. —> The “Setting time-controlled, alternative channels” – “TIMER” menu is ac- tivated. - 30 - HDM 2380 P CI / HDM 2380 OIRT CI... -
Page 31: Setting Time-Controlled, Alternative Channels
—> The “Setting the days of the week” –“TIMER Days” menu is activated. Setting the days of the week In this menu you set the days on which the timer has to be active. 4A/B TIMER 05:00 – 10:00 - 31 - HDM 2380 P CI / HDM 2380 OIRT CI... -
Page 32: Setting The Lnb Oscillator Frequency (Timer)
—> The “Setting the input symbol rate (timer)” – “TIMER SYMBOL” menu is activated. Setting the input symbol rate (timer) TIMER SYMBOL 27500 —> For setting see page 23. - 32 - HDM 2380 P CI / HDM 2380 OIRT CI... -
Page 33: Setting The Input Frequency (Timer)
“TIMER AUDIO” menu is activated. Selecting the TV station sound / Setting the volume level (timer) TIMER AUDIO 01/02 - 6 dB —> For setting see page 25. - 33 - HDM 2380 P CI / HDM 2380 OIRT CI... -
Page 34: Saving Settings
—> In order to prevent interference within the head-end station and the cable system, the output levels of the analogue cassettes must be set higher by 8 dB compared to digital cassettes. • Mount the front cover (see assembly instructions of the head-end station). - 34 - HDM 2380 P CI / HDM 2380 OIRT CI... -
Page 35: Channel And Frequency Tables
847.25 C 29 535.25 C 39 615.25 C 49 695.25 C 59 775.25 C 69 855.25 C 30 543.25 C 40 623.25 C 50 703.25 C 60 783.25 - 35 - HDM 2380 P CI / HDM 2380 OIRT CI... - Page 36 831.25 215.25 423.25 631.25 839.25 223.25 431.25 639.25 847.25 231.25 439.25 647.25 855.25 239.25 447.25 655.25 247.25 455.25 663.25 255.25 463.25 671.25 263.25 471.25 679.25 271.25 479.25 687.25 - 36 - HDM 2380 P CI / HDM 2380 OIRT CI...
- Page 37 Service: Phone: +49 (0) 911 / 703 2221 Fax: +49 (0) 911 / 703 2326 Email: service@gss.de Alterations reserved. Technical data E. & O.E. © by GSS GmbH V3/22022010...
Need help?
Do you have a question about the HDM 2380 P CI and is the answer not in the manual?
Questions and answers